Airtable
Due to changes Airtable made, this is now no longer possible. This feature is deprecated, and these details are no longer relevant or applicable.
Airtable can be connected to Budibase through some simple configuration. This allows you to enhance both tools, and let them work together easily.
Airtable API pageMost, if not all, IDs, examples and data structures, for connecting to your Airtable Base(s) can be found in the amazing API reference page from Airtable. They offer a complete API overview entirely tailored to your base. To make the integration with Budibase as smooth as possible, keep the tab open.
Head over to the Airtable API page
Connect Airtable to Budibase
To connect Airtable to Budibase, you need to add a new Data Source. Head over to the data section in the Budibase UI, and click the Add source button in the left navigation.
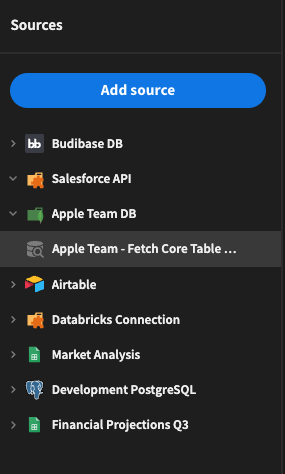
A dialog will open, allowing you to choose which data source you want to add. Choose Airtable, and click continue.
You will be prompted to enter your API key and the base. You can get your API key from your Account page inside Airtable. To retrieve the base from Airtable, head over to the REST API page. This page should list all your bases for you. Click on the base you want to connect, and the base ID should be given to you.
Enter the data into the configuration, and click Save to store the details of your integration. This is all you need to do to connect Airtable. The next step, is to query your data.
Query Airtable data
To query data from your Airtable base, click the Add query button below the Airtable configuration

First, enter a name for your query, this is purely cosmetical and has no impact on the inner workings. It will be displayed to you when you pick a data source in a Data Provider in the Budibase Design section.
Choose the function you want to perform. There are detailed instructions on how to complete each function below.
Then there are the specific fields.

The Table field accepts both the table name and the table ID. It is highly recommended to enter the ID as shown above. You can retrieve the ID for your table from the Airtable REST API page.
The View field accepts the name of the view you've created in your base. The default is Grid view (yes, including a space).
The NumRecords field is an optional field, by default all data will be returned, but if you want to limit the results you could enter a number here.
After filling in all these details, you should be able to Run Query and then preview the results below the query. If you're happy with the results, you can click the Save button.
Function: read
When you select the read function, you will be querying data from Airtable, so you can display it in your application. You don't need any further instructions based on the configuration you've already done above.
Function: create
When you choose the Create function, you will be able to insert records directly into your Airtable view. A Query field will be displayed, in which you can enter a JSON object for a single records, like so
{
  "Name": "The Budibase Card",
  "Start date": "2022-03-29",
  "Deadline": "2022-03-31",
  "Status": "To do",
  "Priority": "High"
}
The structure of course depends on what kind of data you're storing inside your Airtable. Luckily you can find this structure easily in the API page of Airtable, but you could also use the Read function to fetch the data you already have stored in your Airtable.
Once you're happy with your data, click the Run Query button, and you should see your newly created data appear in Airtable directly.
Function: update
The Update function works almost the same as the Create function, the only difference is: you need a record ID in addition to the table name. You can find the record ID by doing a Read function first, store the record ID, and then send an Update function. This is where Bindings come in.
Function: delete
The Delete function also requires a query, but this time much simpler than Create and Update. All you have to provide is the ID and the deleted boolean, like so:
{
  "id": "rechNCPnvIRob8Ytz",
  "deleted": true
}
You can retrieve the ID of the data you want to Delete using a Read function. If you want to integrate this into your UI, you will have to look into Bindings.
Bindings
Bindings in Queries allow you to insert data when using the query. You can use HandleBar Bindings inside the query. A simple, but common, example of a binding would be a record ID. This allows you to, for example, update a single record based on a binding you've specified, even from the UI of your application.
Let's take a look at an example where we pass the ID from a binding into the query. Our binding looks like this.

Then, adjusting our query, we add the id using handlebars directly into the string

Now, wherever you use the created query as a data source in a Data Provider, you can configure the bindings directly from there, using the gearwheel behind the provider selection

This will then open up the configuration modal, where you can bind the value, for example using a Form input.

Retrieving relational data
You can have relationships between Airtables, however there is no joining functionality. Instead you must make two REST calls.
This means two Data providers with a filter will be involved in order to display the related data within your app.
You can also use Action chaining to aggregate the data of multiple tables from one button click.
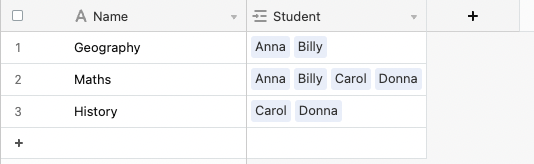
In this example there are many classes with many students.
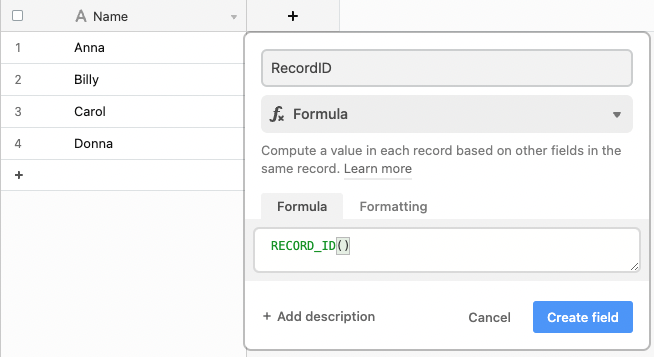
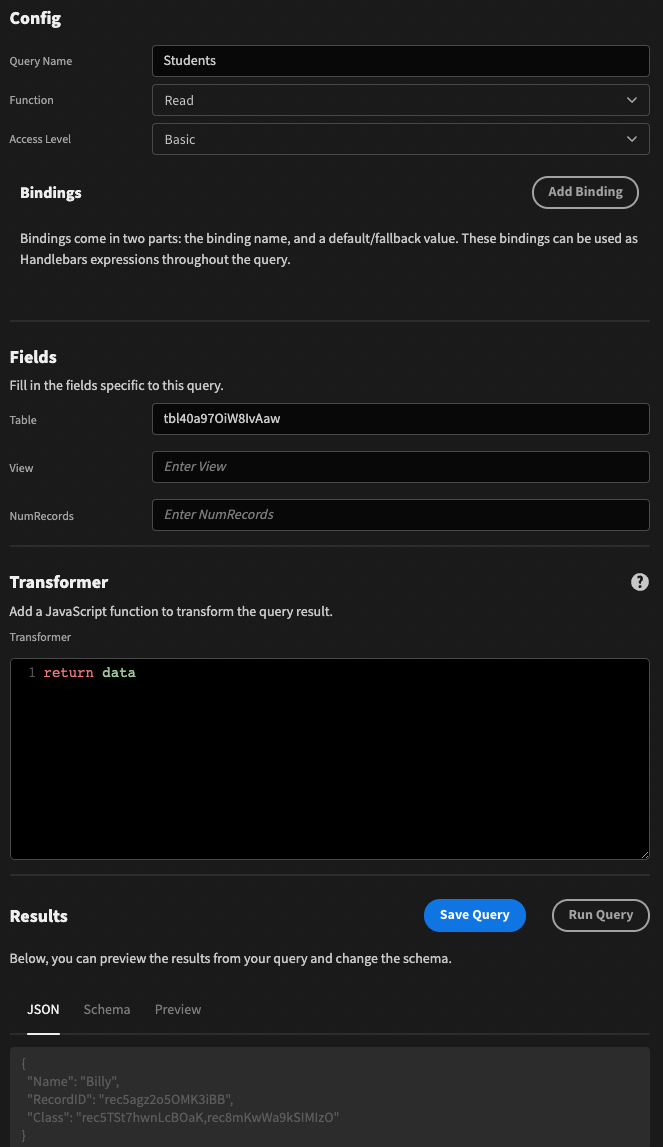
- Within Airtable, add a RecordID column to your Students table. This will allow us to filter for the students that attend a particular class.
- Also within Airtable, link your Classes table to your Students table.
- Add a read query for the class table.
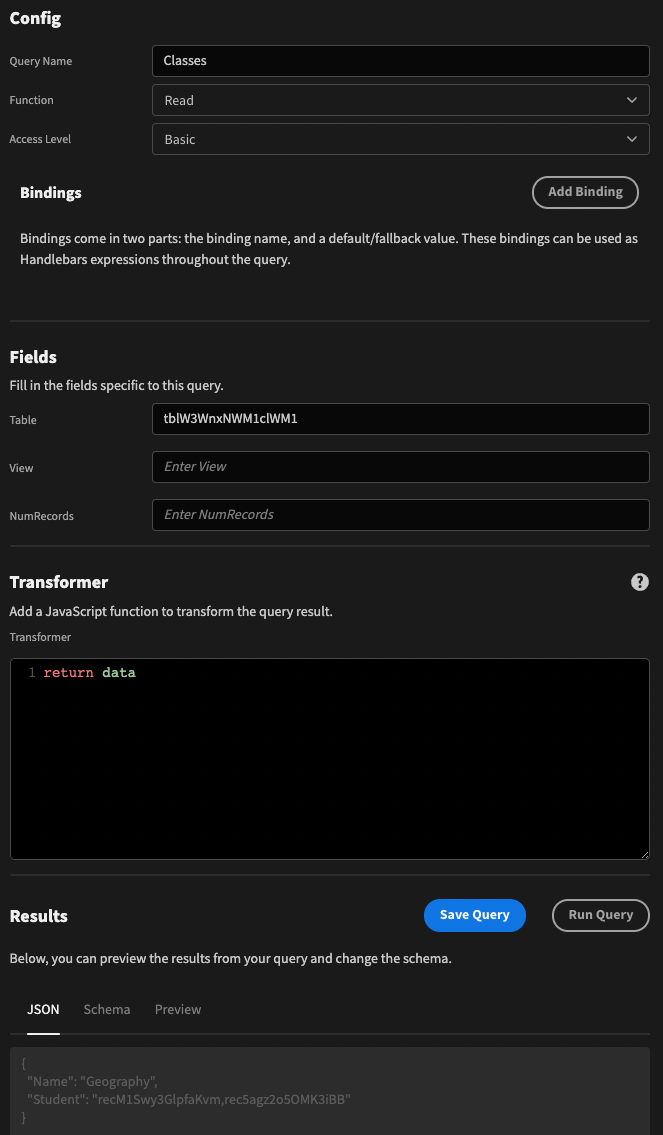
- Add a read query for the students table.
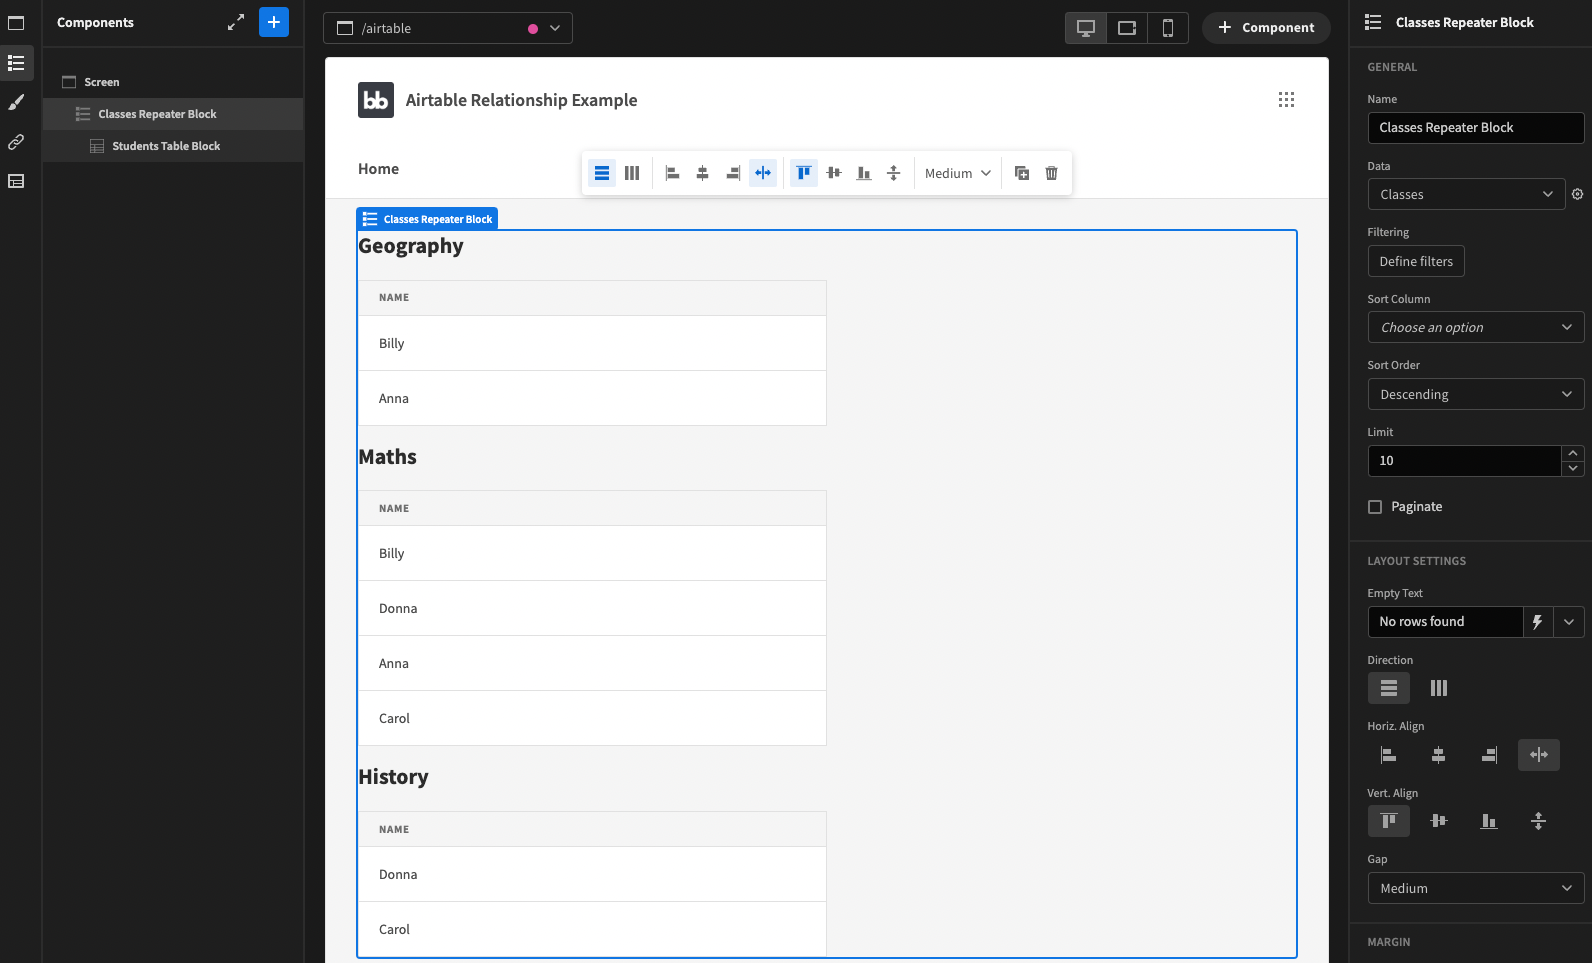
- In the Design section, add a Repeater Block for the Classes query, and a Table Block nested underneath for the Students query.
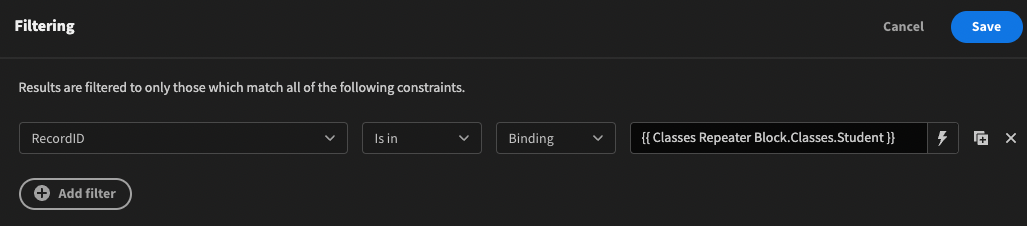
You can add the class title for each of the student tables, and configure the columns to avoid adding the id strings. - Add a filter to the students table block as follows:
- The final result should appear as follows: