Oracle
Connecting Budibase to an existing Oracle database
SQL DatabasesBudibase is designed to integrate with any core SQL database.
Read more about SQL Datasources.
Tutorial: Building a Departments Portal
In this tutorial we will be building an app to allow executive staff to view and manage department and employee details.
To get started, follow the instructions from the Database Star sample database repo, running the setup scripts against your Oracle instance.
You may also find this video tutorial helpful for getting started: How to Set Up the Oracle HR Schema.
Adding the datasource
With your Oracle instance running, and the sample database installed, we can begin pulling that data into Budibase.
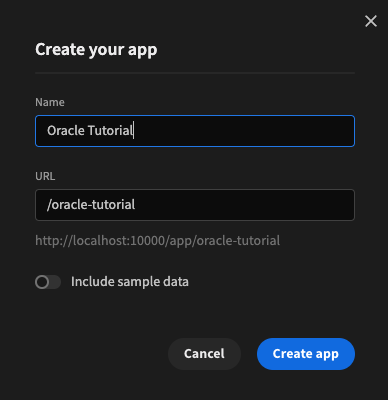
First create an app - no sample data needed.
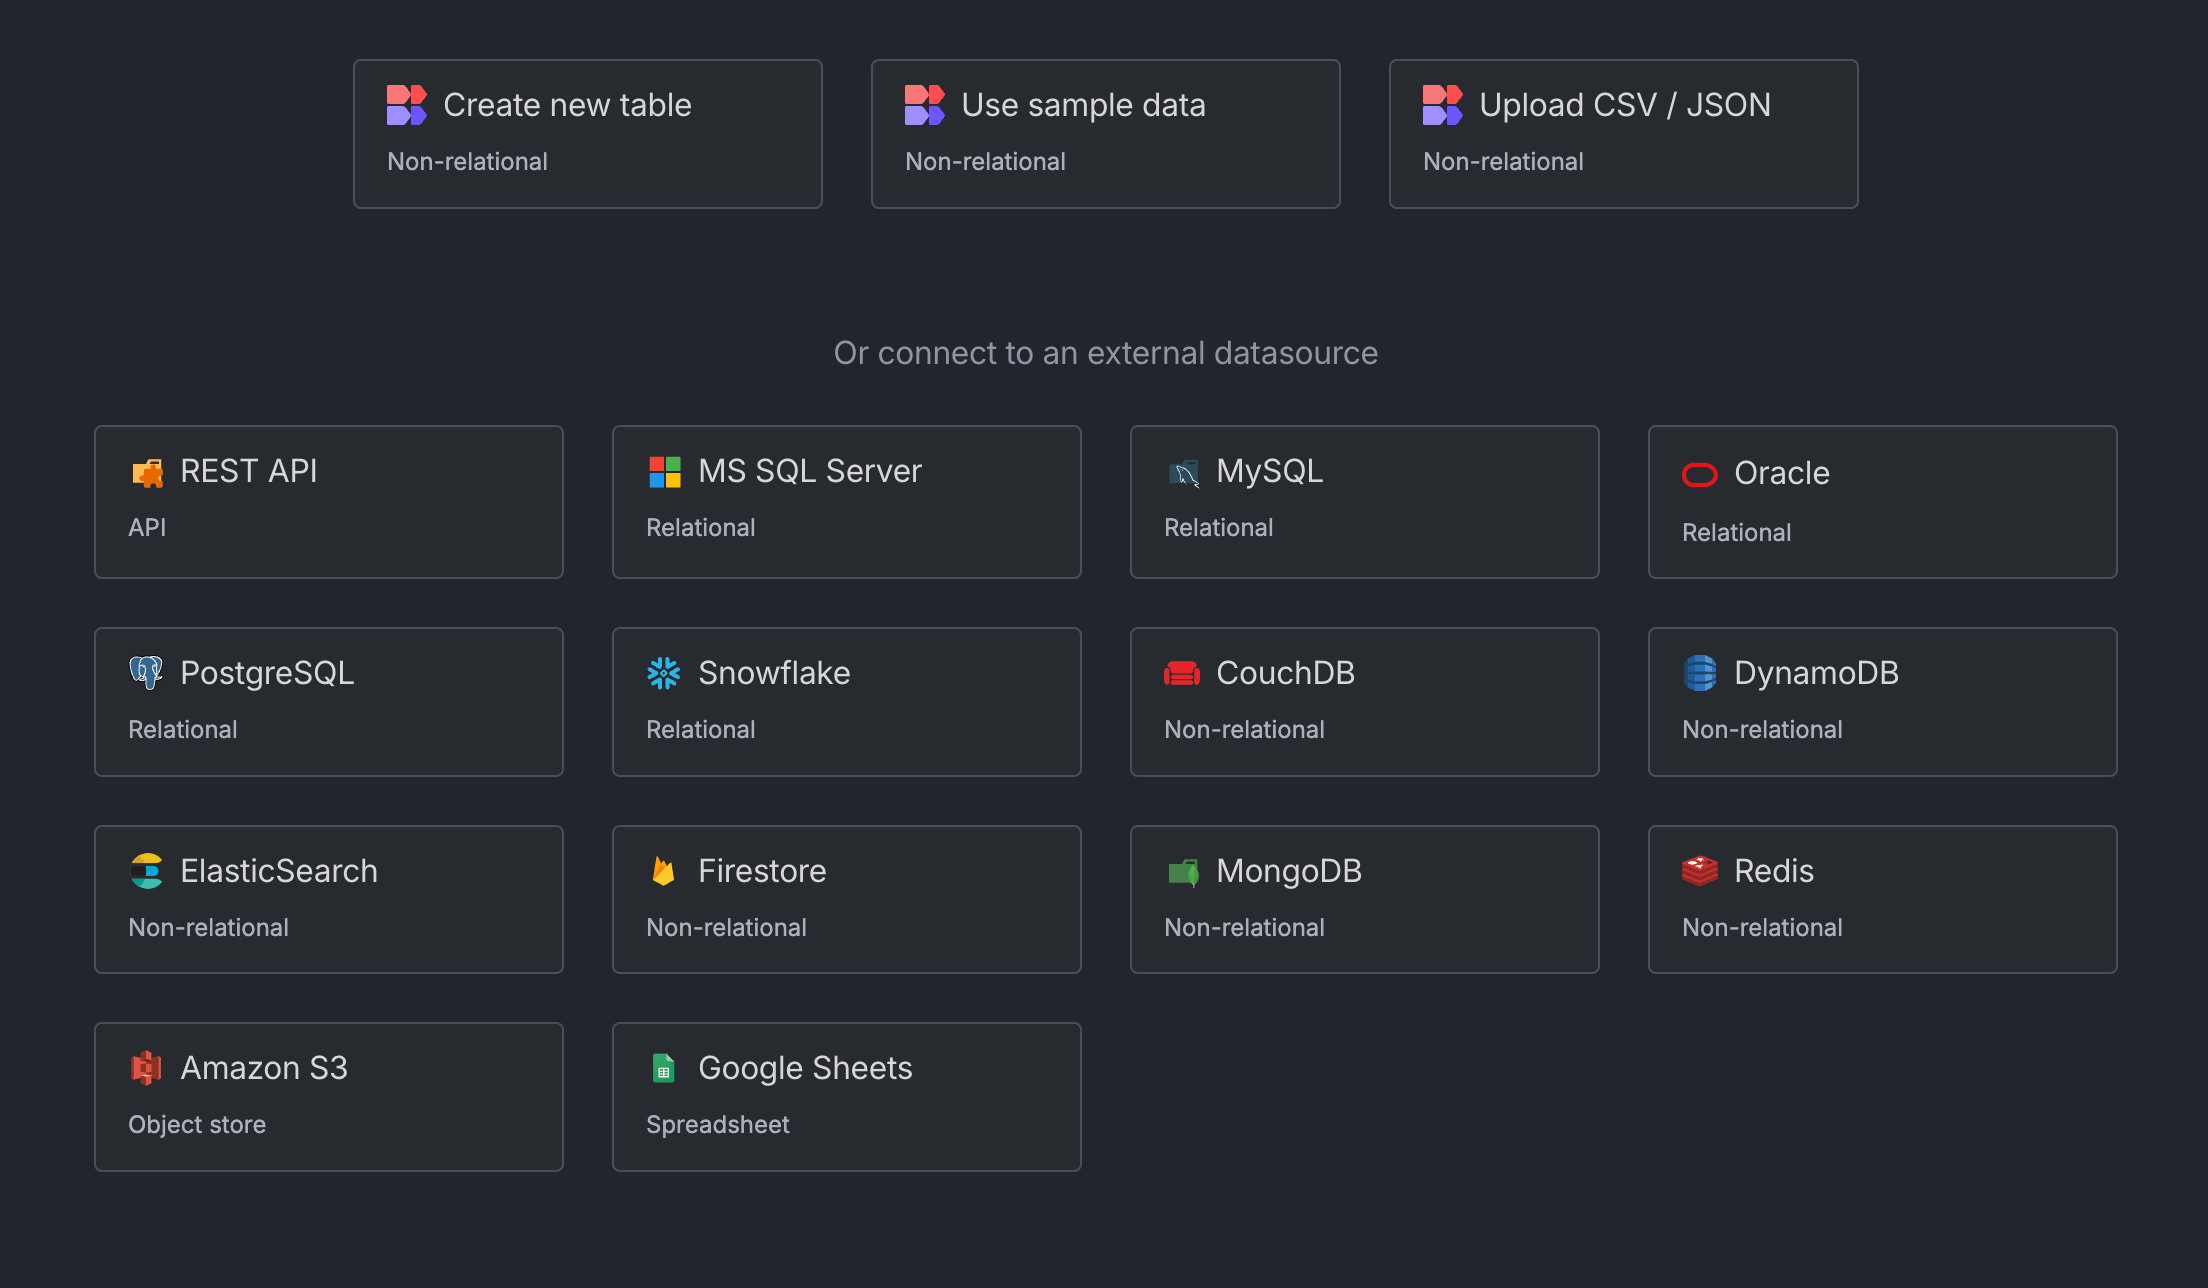
Once the new app has been created, click Add source and select Oracle.
Click Continue and then fill out the connection config with the host, service name and user of your Oracle instance.
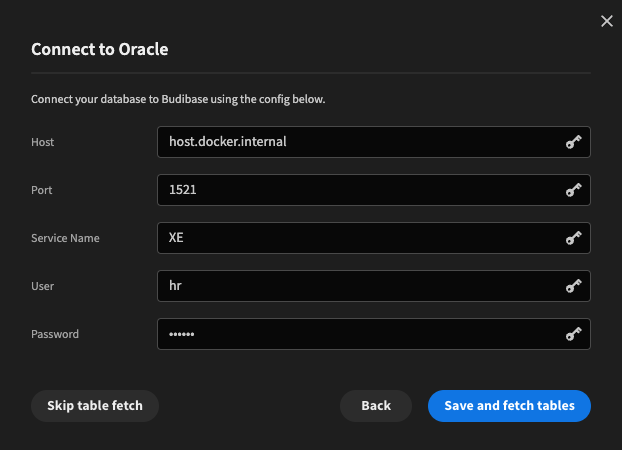
Click Save and fetch tables to finish.
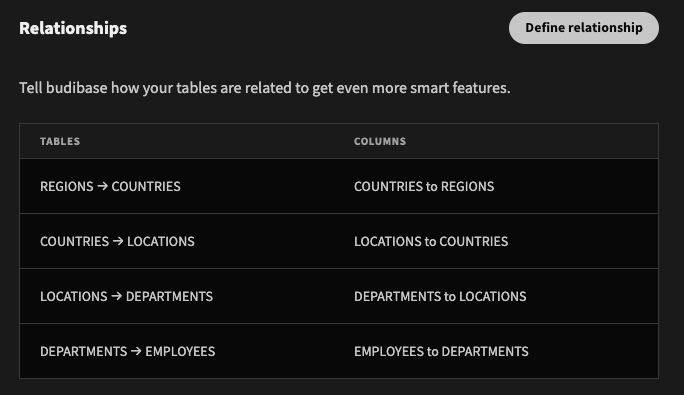
Defining relationships
With our tables fetched, we can now define relationships within Budibase.
Click the Define relationship button below the Table section to get started, and setup the following relationships:
- One REGION -> Many COUNTRIES
- One COUNTRY -> Many LOCATIONS
- One LOCATION -> Many DEPARTMENTS
- One DEPARTMENT -> Many EMPLOYEES
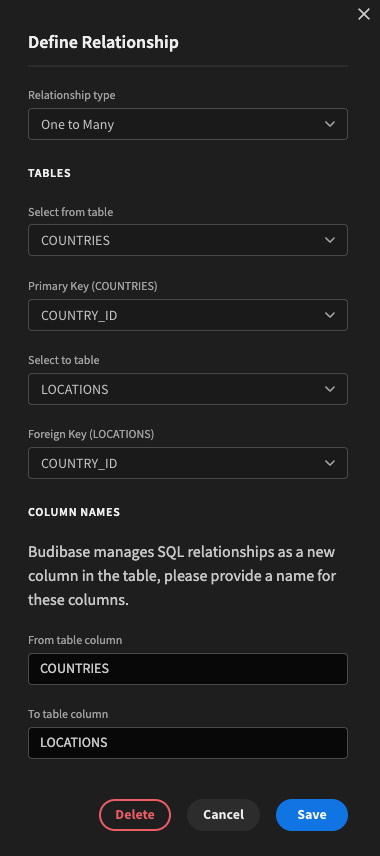
Example relationship: One Country -> Many Locations
Once finished you should see a list of your defined relationships:
It is also worth changing the display column on some of the tables so that the links are more human readable. For example edit the REGION_NAME column of the REGIONS table and toggle on Use as table display column.
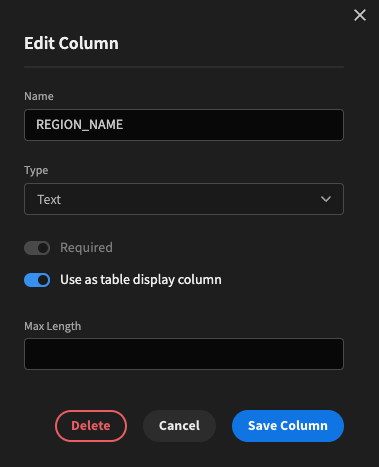
Setting the region name as the display column

Linked region in the countries table is now human readable
Region map screen
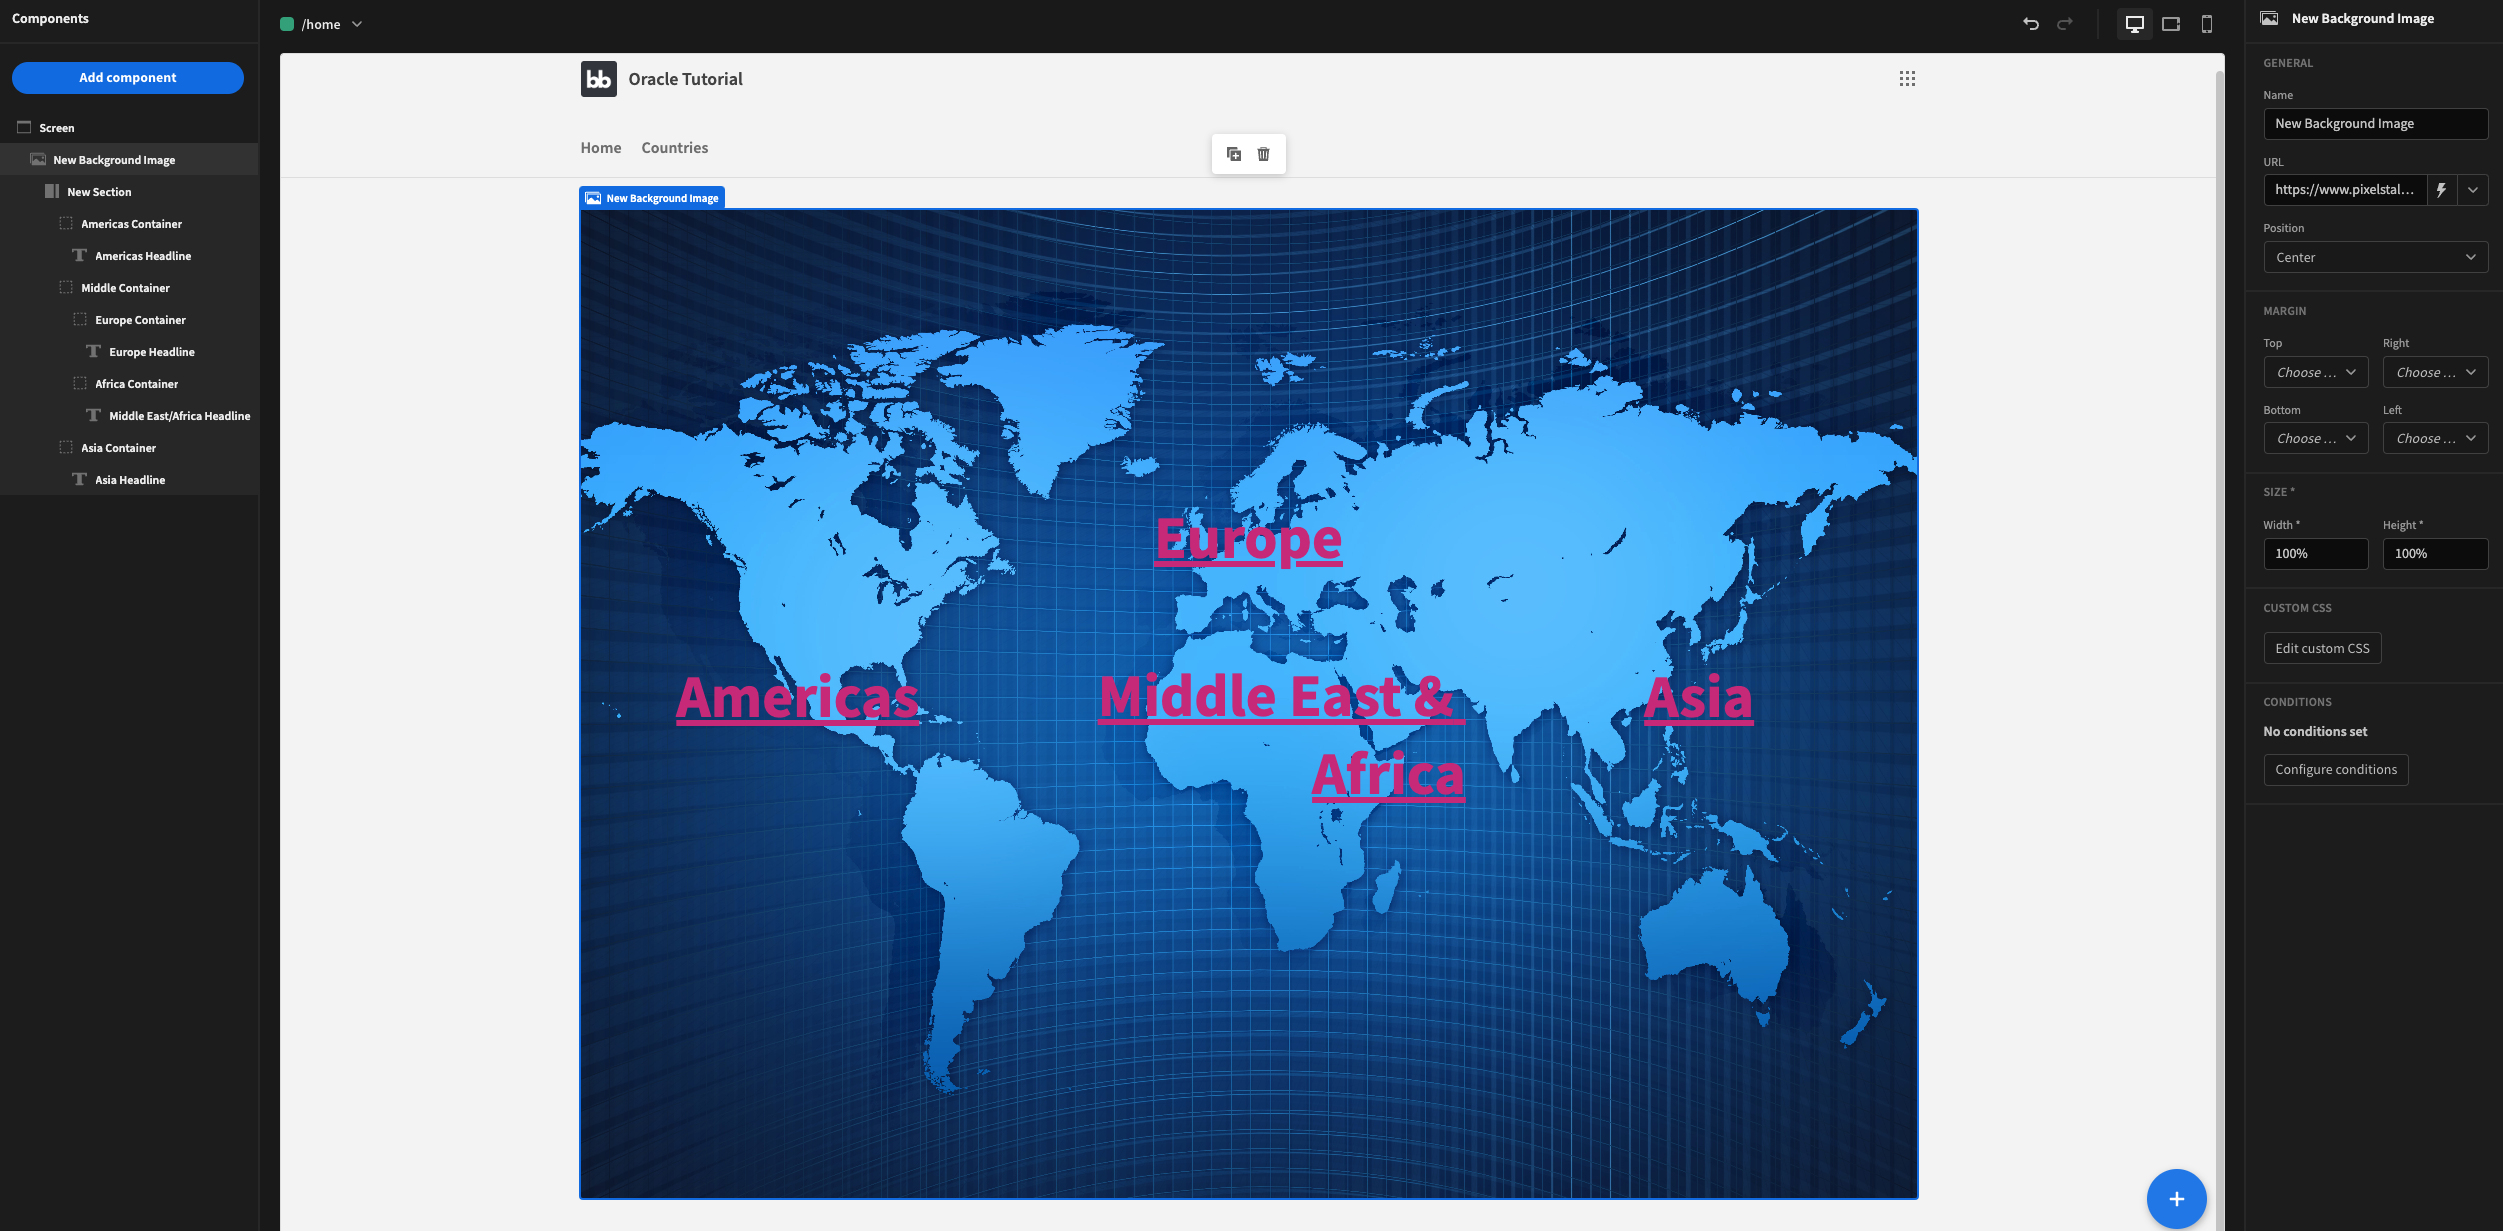
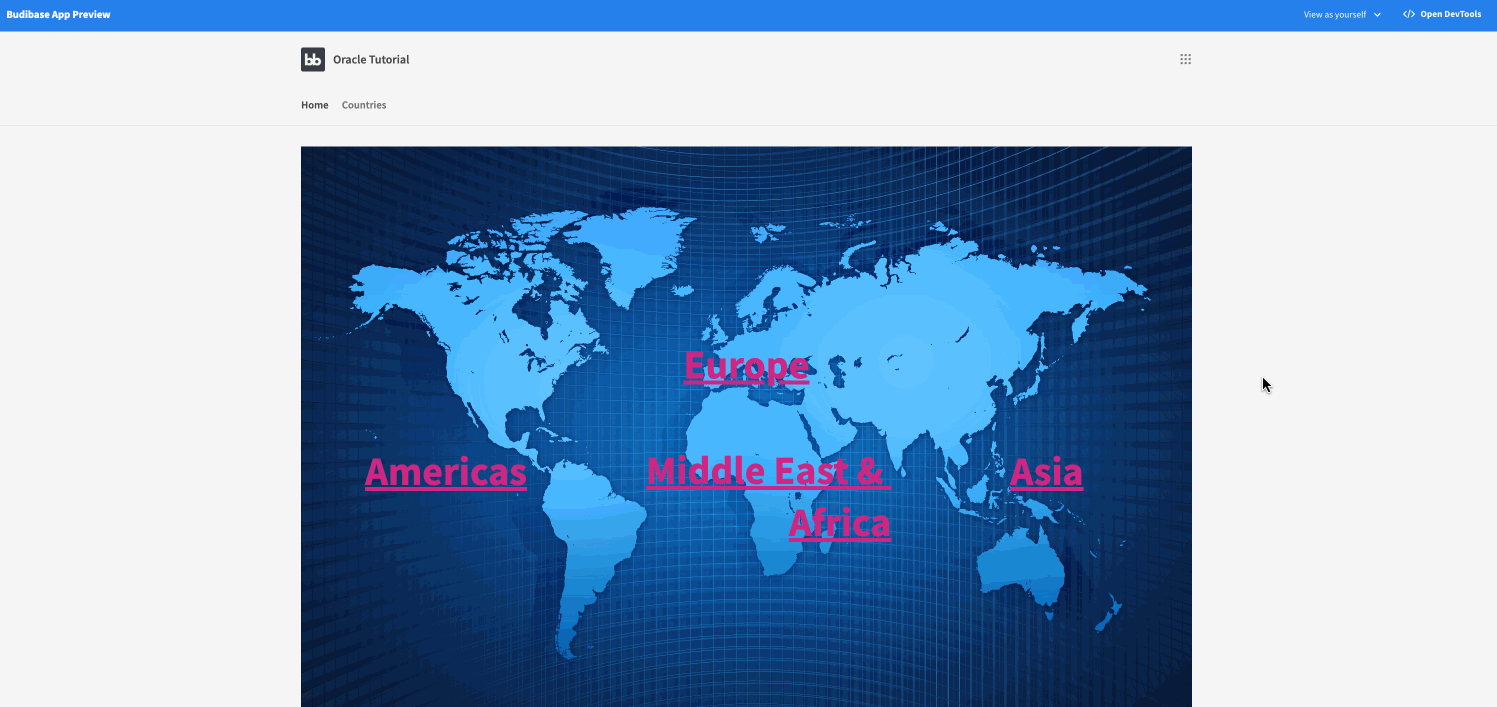
Our REGION table includes four regions. To start of with, let's present the user with a world map from which they can select a region and further drill down into country > location > department > employees.
Click on the Design tab along the top. Next add the Background image component, with a URL to a World Map image. Set the Height and Width to 100%.
Next add a Section and set the type to Three columns and Custom CSS to set the height:
height: 100%;Next add three Containers. Within each container add a Headline for each of the Regions: Americas, Europe, Middle East and Africa, and Asia. Add margin and adjust the container layouts as desired.
Country screen
With our region map setup, we can add a country screen that will list the countries of the selected region.
Click Add screen and select List view.
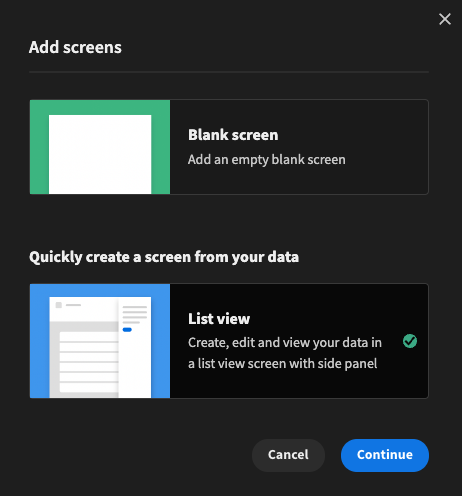
Adding an auto-generated screen
Click Continue, select the COUNTRIES table, and then Confirm.

You will now see your new screen with a pre-populated countries Table block. Click Configure columns in the Settings Panel, Add all columns, and then click the X to remove the ID columns and the REGIONS.
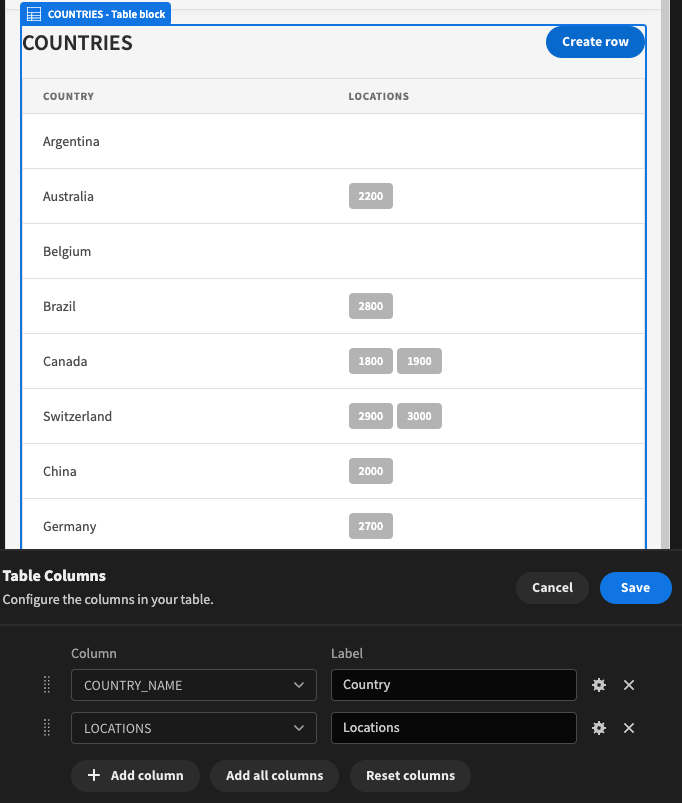
Configuring table columns
You can see the locations are showing an ID field value, which isn't ideal. We can improve this by changing the display column. Navigate to the LOCATIONS in the Data section and set the City column to the display column.
We can further improve the user experience by adding country flag images to each row, and allow users to search the columns.
Untick the setting Show button above table. All the countries have already been added, and we don't want the user to be able to enter new records.
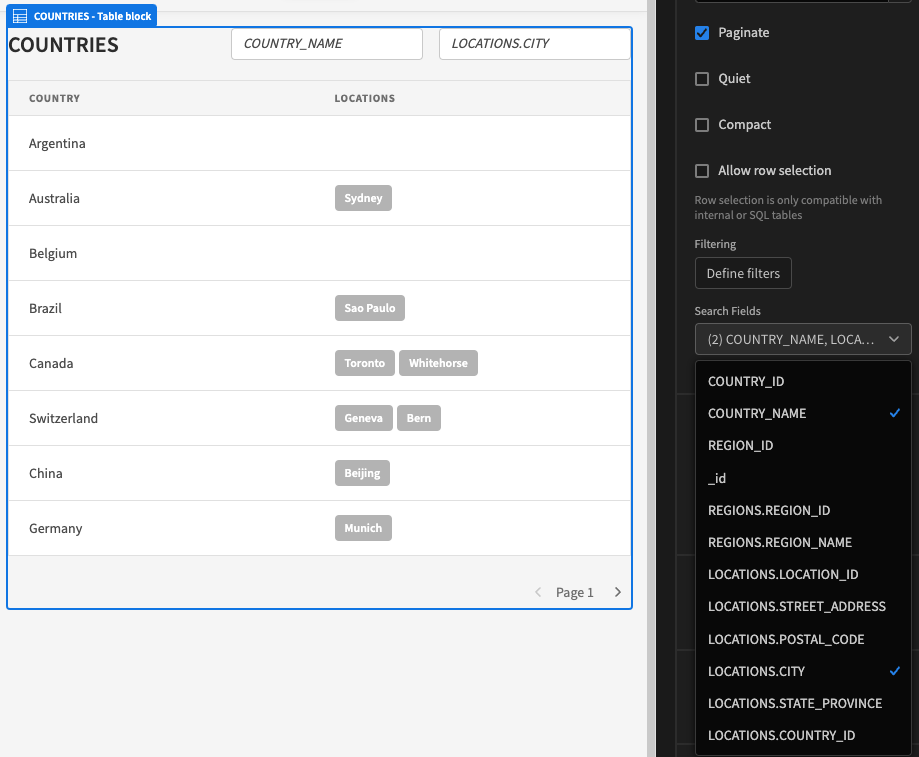
Search fields
Adding searchable fields is straightforward. Within the settings panel, select the COUNTRY_NAME and LOCATIONS.CITY options under the Search Fields property.
Selecting search fields
The search fields will allow users to performa a "Starts with" search to find countries by name or city.
Row flag icons
As a nice visual cue, we can also add Image components to each row of our table. To do this we must first Eject the table block. Next select the Table component, and click the Add component button.
Select the image component, and set the Width and Height to 64px and 36px.
Finally, for the URL property, click the lightning icon to provide the following JavaScript Binding:
const country = $("Table.COUNTRIES.COUNTRY_NAME")?.toLowerCase()?.replaceAll(" ", "-");

if (country === "united-states-of-america") {
	return "https://www.rankflags.com/wp-content/uploads/2015/04/National-Flag-Of-United-States.jpg"
}

if (country === "israel") {
	return "https://upload.wikimedia.org/wikipedia/commons/d/d4/Flag_of_Israel.svg"
}

return `https://images.mapsofworld.com/${country}/${country}-flag.gif`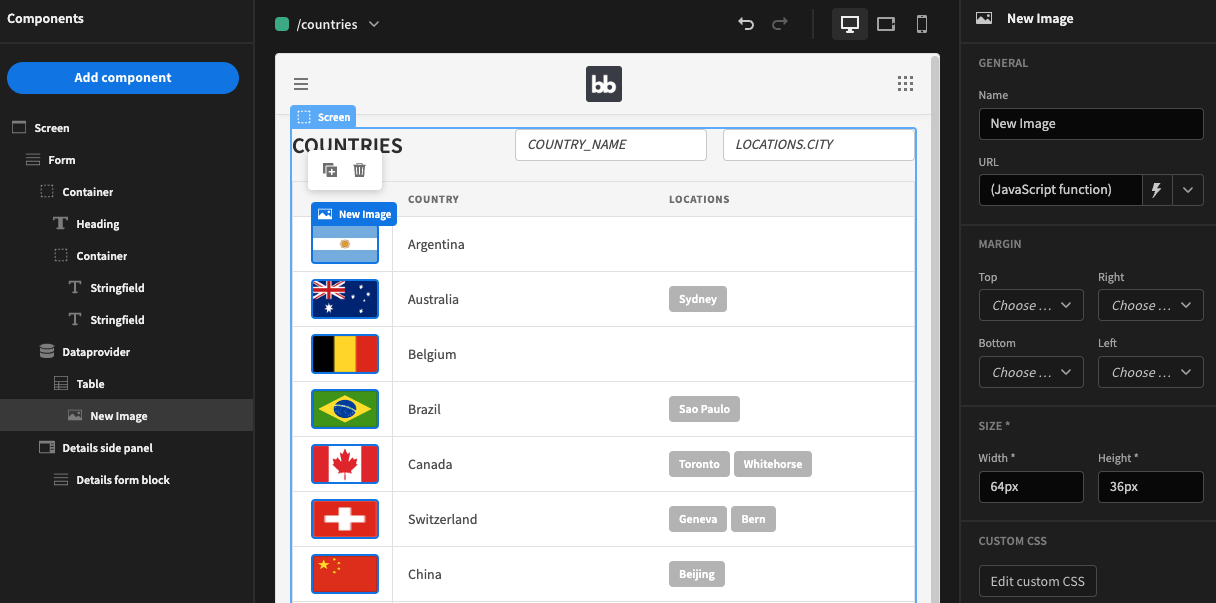
Filter out countries with no locations
We don't want to display countries if they have no departments. Click on the Data provider and Define filters. Add another filter to check if the locations relationship if empty.
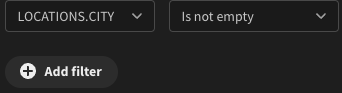
Don't retrieve locations with no city
Linking the region to the country screen
While the countries screen is setup, we still need to filter the countries by region and link the screen to the chosen region.
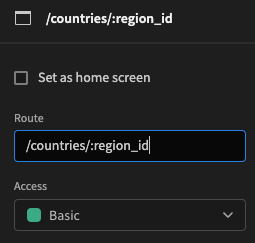
First click on the Screens icon button on the left hand panel. In the Settings Panel on the right, edit the route to include a URL variable for the region_name.
Adding a region name to the countries screen
Next in the components view, click on the Data provider and Define filters. Click Add filter, selecting REGION_ID equals binding: {{ URL.region_name }}.
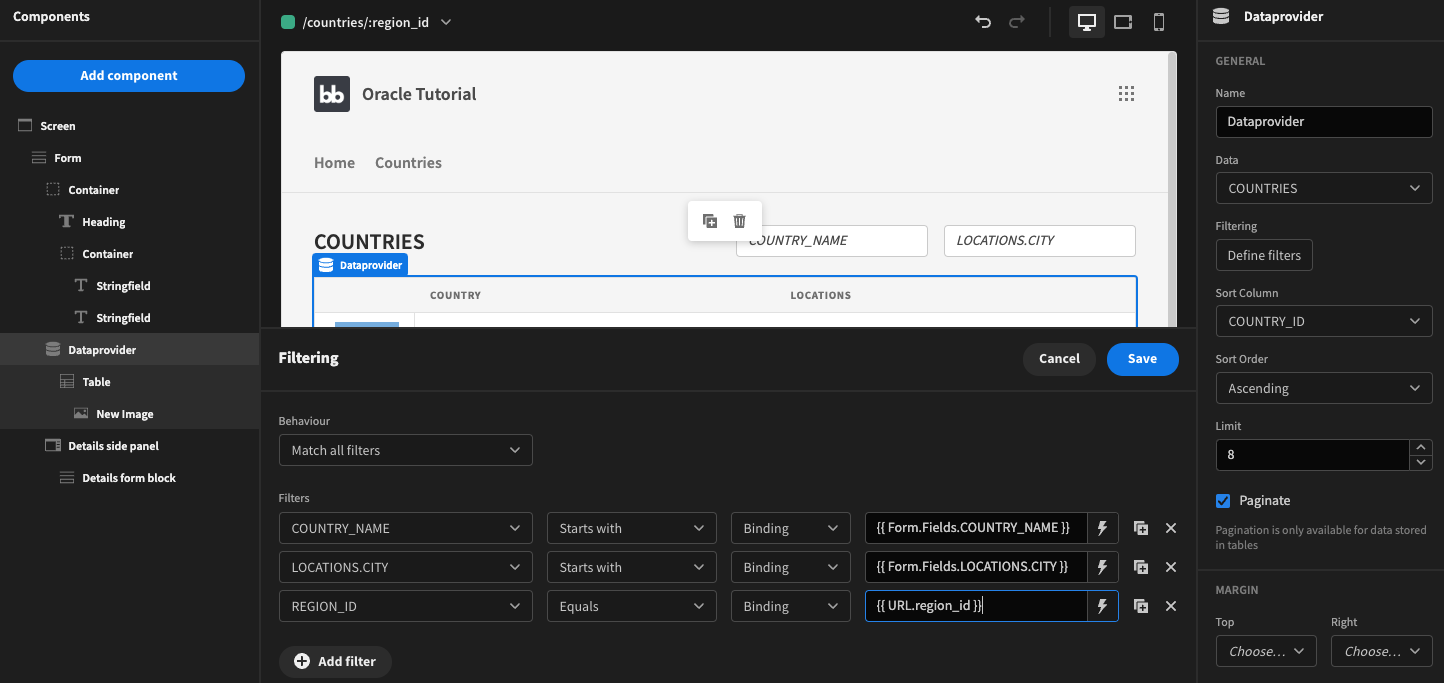
Adding a filter on the Region ID
Next navigate to the /home screen. For each of the headline containers, click Define actions for the On Click property.
Add the Navigate To action, and select the countries screen. Then replace :region_id with the particular ID (1-4) for the selected region.

Navigate to the country screen for Region 2 (Americas)
Adding the region name to the country screen
Above the 'COUNTRIES' heading, add a Repeater block component, and nest the headline under it. Select the REGIONS table as the data source, and Define filters. Match the region ID against the ID passed in the URL. We can use the default handlebars helper to provide a title while in the builder.
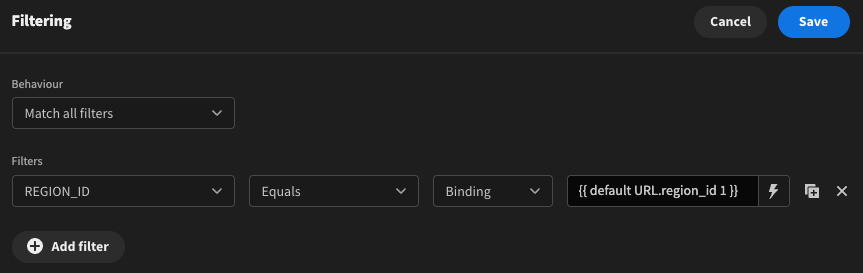
Filter on the Region ID from the URL, or default to 1
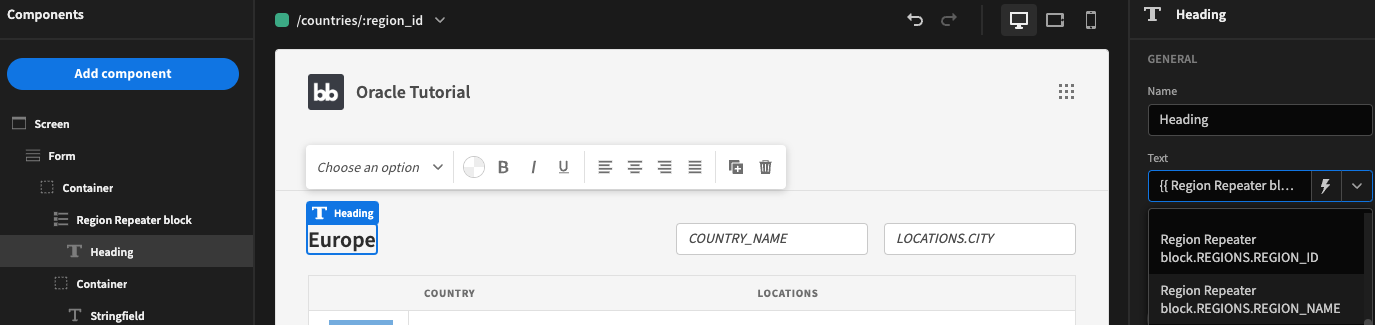
For the heading value, select the REGION_NAME binding from the dropdown:
Displaying a list of departments
The next level of data to drill into is the list of departments for the selected country.
In the /countries/:region_id screen, delete the Details form block. The countries should be static and not editable by the user - we only want to display the list of departments here.
Now in the empty Details side panel, add a Repeater block, and nest a Headline component. The Repeater block should have COUNTRIES set as the data source, with a filter on the _id column against the State ID. This state binding represents the ID of the clicked row.
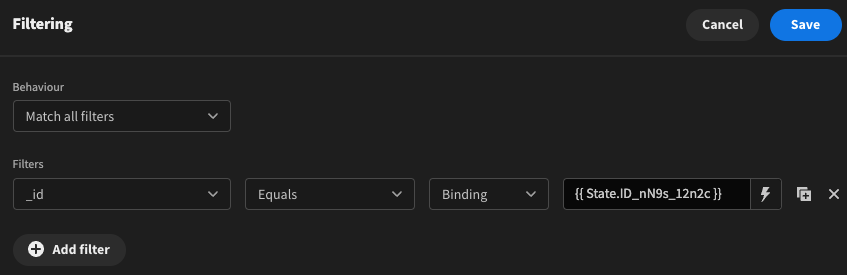
Filtering on '_id'The _id field represents a URL-safe encoded id string.
As relationship links in Budibase are stored in this format, this field must be used when filtering on side panel state IDs.
The headline value should bind to the COUNTRY_NAME of the repeater block:
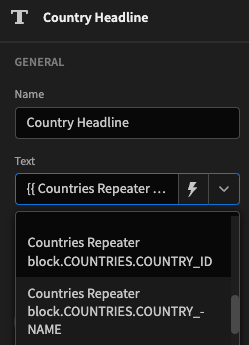
Selecting the country name from the repeater block
Below the country name headline, add a Divider as well as another Repeater block. This will be for the LOCATIONS pulled from the relationship of the COUNTRIES datasource.
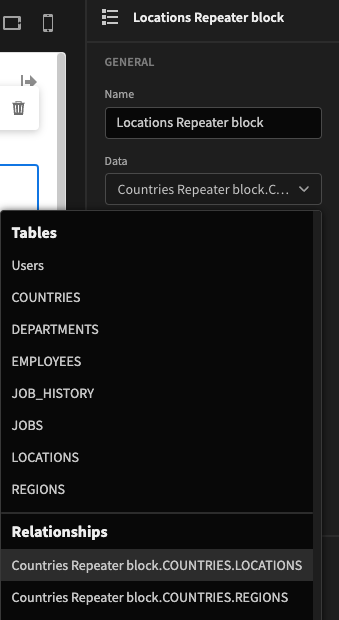
Selecting locations from the countries relationship
Now within the Locations Repeater block, nest a Cards block for the DEPARTMENTS relationship:
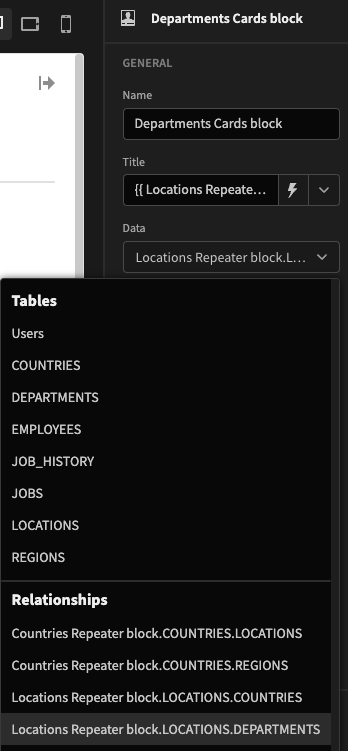
Selecting departments from the locations relationship
The Title of the Cards block should bind to the _City_of the location, which can be selected from the drop-down.
Scroll further down the right hand settings panel to get to the Cards section. Remove the Subtitle and Description, but add the following binding for the individual card Title: {{ Departments Cards block.DEPARTMENTS.DEPARTMENT_NAME }}. This can be selected from the dropdown.
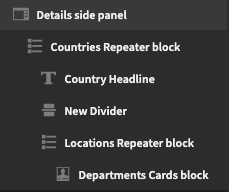
Final Details side panel component tree
Hiding locations that have no departments
Currently if a location has no departments, we will see the No rows found message.
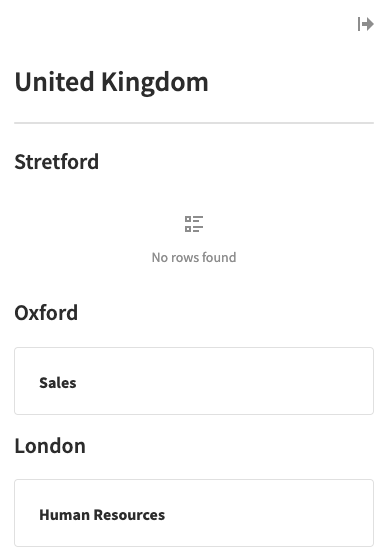
No rows found because Stretford has no departments
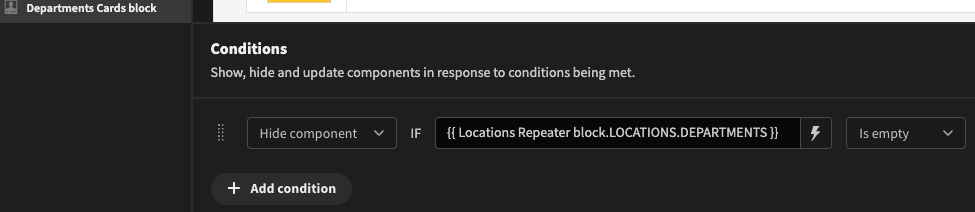
Ideally we should not display Stretford at all in this case. Click on the Departments Cards block and click on Configure conditions. Add a Condition to hide the component if LOCATIONS.DEPARTMENTS is empty.
Result
Employees screen
The last screen we want is for displaying all the employees of a selected department. Click Add screen and add a List view screen for the EMPLOYEES table.
Change the Route to /employees/:department_id. Then in the components view, click on the Table block and Define filters. Add a filter to match {{ URL.department_id }} against DEPARTMENT.DEPARTMENT_ID.
You can also eject the table block so that you can deselect some of the employee form fields, such as the ID and the department fields.
Back to the /countries screen, click on the Departments Cards block. Find the setting called Link card title and tick the checkbox. Under Link screen select the /employees/:department_id screen. There is no need to replace the :department_id in this instance, as Budibase knows to replace this with the _id of the repeater.
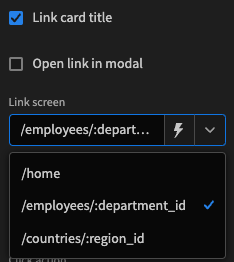
Linking the card title to the employees screen
Removing navigation links
As both the employees screen and the countries screen require an ID in the URL, we do not want to show the nav link for these screens.
Click the Configure links button and click the X to remove the link for employees and countries, and click Save.

Only display the home screen link
Managing departments
Currently the departments listed for a location are read-only. It may be the case that you want Admin users to be able to add new or update existing departments.
Create a new auto-generated List view screen for the DEPARTMENTS table, but in this case select Admin access level.
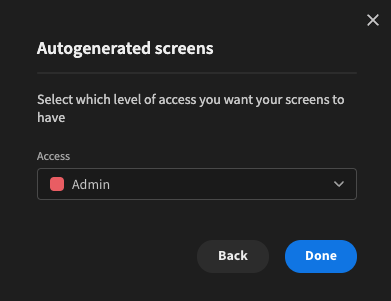
Only Admin users can view this autogenerated screen
You will also want to make sure that the navigation link for the department screens only displays for admin users.
Click on the Navigation icon on the left hand pane, and Configure links. Beside the /departments link, click the dropdown and select Admin, then click Save.
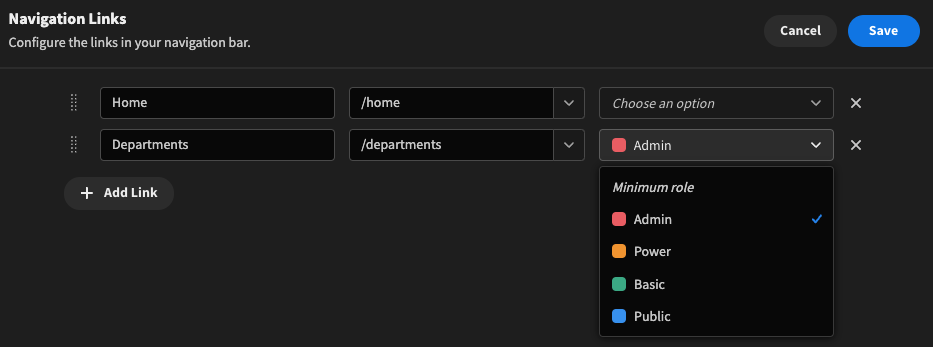
The departments link will be visible to admin users only - default is basic
To verify the permissions, click Preview in the upper right hand corner of the Design view. You can toggle the user permissions in the blue bar along the top to test.
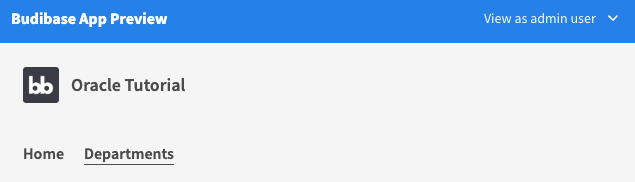
Verifying that admin users can see the Departments link
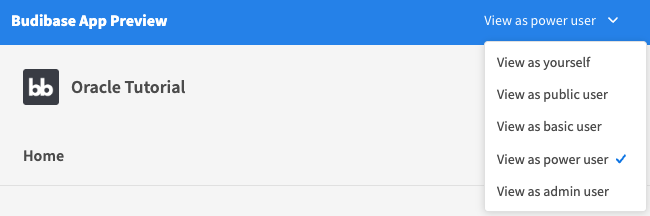
Verifying that power users (and below) cannot view Departments
Updated 10 months ago