SQL
Connecting to and integrating SQL databases into Budibase
When you already have a database running, you can add external database connections through the Budibase interface with a few clicks.
Our core SQL datasource connections include:
Adding the remote datasource
To add a new remote datasource choose the Data tab in Budibase , then click the + button in the left-hand panel.

Add datasource
You'll be prompted to choose the type of datasource you want. Next you will fill out the settings for your chosen SQL database. See each SQL datasource page for specific settings.
In each case, you will have the option to Fetch tables, Create new table or select another datasource.

Firewall considerationsYour database server will need to be whitelisted in any firewalls protecting your database. If you are using the Budibase Cloud you should Whitelist the Budibase IP addresses in your firewall. If you are self-hosting you should whitelist the IP address of your Budibase server on your database server.
If you use Docker to host your own Budibase installation and are connecting to a database on the same machine as your Budibase installation you should set the host to
host.docker.internal, or172.17.0.1(if running on Linux).
Fetching tables
By default when you add a new datasource, you will be presented a menu allowing you to choose which tables you want to fetch after the connection has been confirmed. However, in the dialog where you configure a new datasource, you can skip fetching tables.
Fetching tables can also be triggered at any stage after the source has been added. This is especially useful when you've added, removed, or updated a new table after you've added the connection to Budibase.
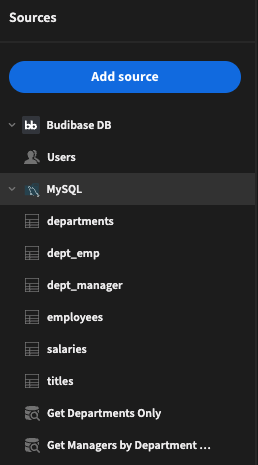
To fetch tables, head over to the added datasource in the sidebar, and find it under the Tables tab.
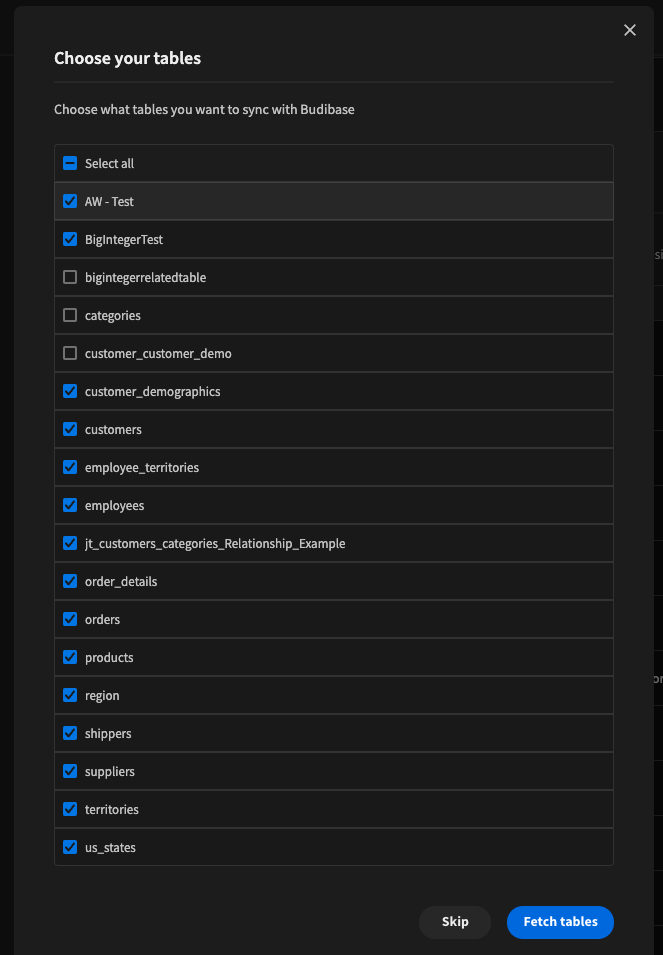
Fetching specific tables
It can be useful to fetch only the tables you need. Perhaps the database has a large number of tables and you don't want to pull them all in for your Budibase app.
To fetch a subset of your database tables, click Fetch tables and then toggle the tables you want to fetch.
Defining relationships
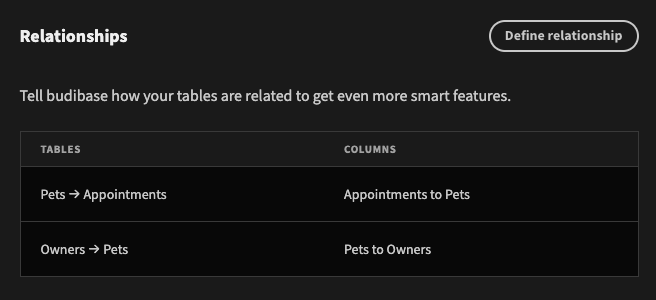
To help Budibase understand your database you will need to create relationships between the different tables. This can be done from the configuration screen of your datasource. To get there, click your datasource in the sidebar and scroll down until you find the Relationships section.

When you click the Define relationship button, you get a form in which you can define the relationship.
One-to-many
When you define a one-to-many relationship you will have to choose the from table and its primary key column. After that, you need to choose the to table and the foreign key column. For example, if you have a pets table, and an owner table, you first will have to select the owner primary index, and then select the pets "owner" foreign key column.
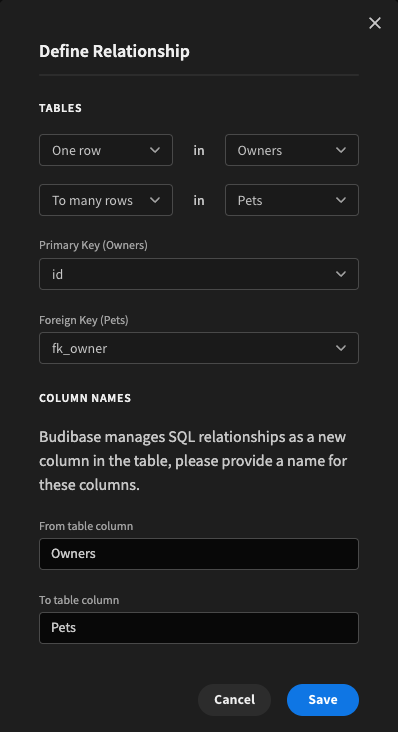
After setting this up, an owner_id column will be added to the pets table, as well as a pets column to be added to the owner table. These columns will only be added internally, meaning this column will not be added to the remote datasource. This is to allow Budibase to keep track of the relationships without interfering with the remote source. Visually, when you navigate to both tables, you'll see the relations displayed as blocks referring to the related row in the other table.

Pets

Owners
If you want to change the field being used in the relationship tags, you can do this by selecting the display column in each table.
Many-to-many
With a many-to-many relationship, a joining table will be needed. The steps will be similar to the above, however a "through" table needs to be selected.
This "through" table will be the joining table.
Configuring the joining tableTo ensure many-to-many relationships function correctly in Budibase, it is important that your joining table is configured correctly. It must meet the following criteria:
- Have a primary key that will not be used as a foreign key
- Have a nullable foreign key for each table

When saving rows, you will not need to save entries to the joining table - Budibase will automatically do this for you.
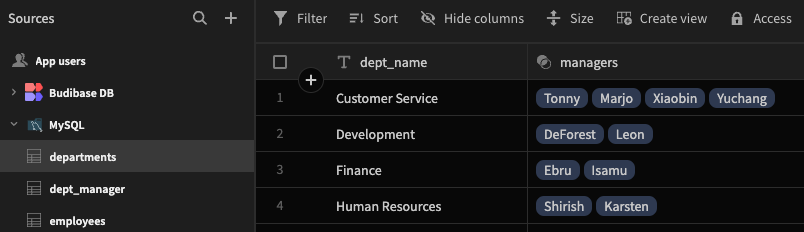
Many-to-many relationships could be useful if you had many managers across many departments, for example.
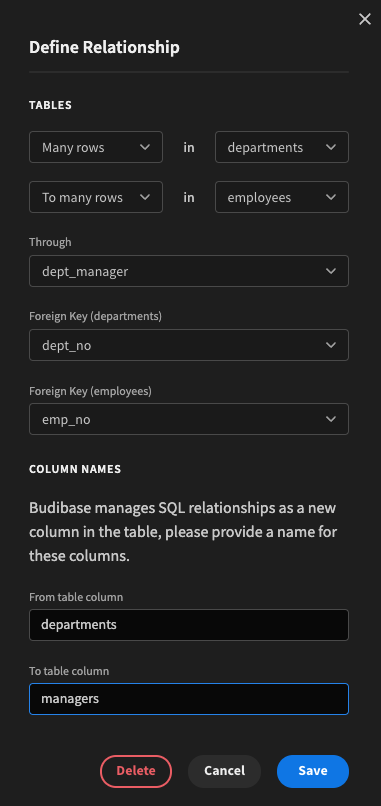
Defining a Many-to-Many relationship between Departments and Managers
Joining table
Departments table

Managers table
Editing relationships
After you have defined relationships, you will see them listed in the Relationships section of the datasource.
To edit a relationship, simply click on an entry. You will then be able to change the keys and tables involved, or Delete the relationship. This will automatically remove any previous columns that were created for handling the relationships in both tables.
Add query
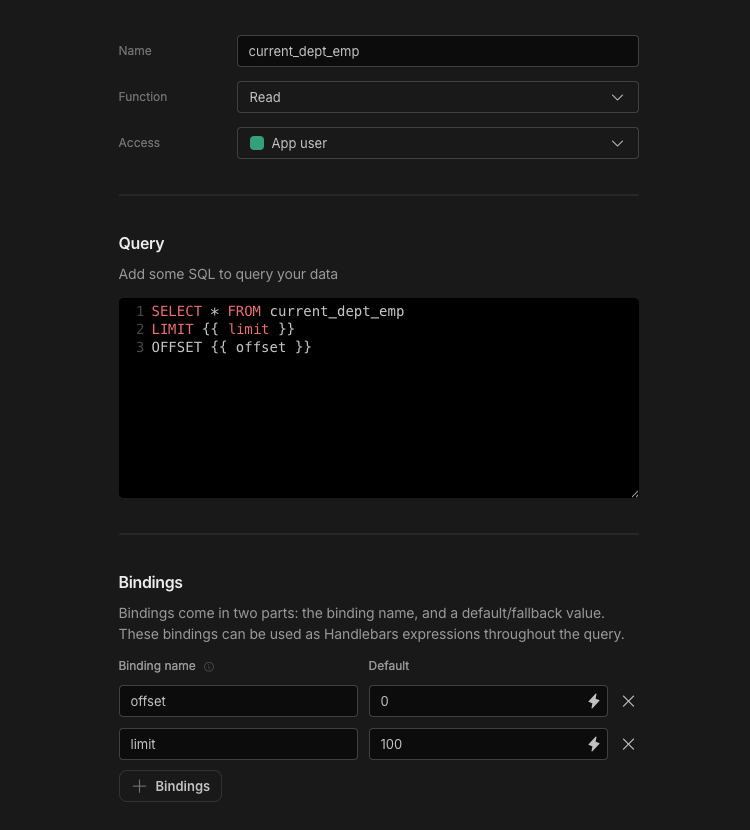
As a complement to the Budibase integration of SQL tables into your app tables, you can also add Custom queries. These allow you to perform complex queries such as multiple joins, and group by.
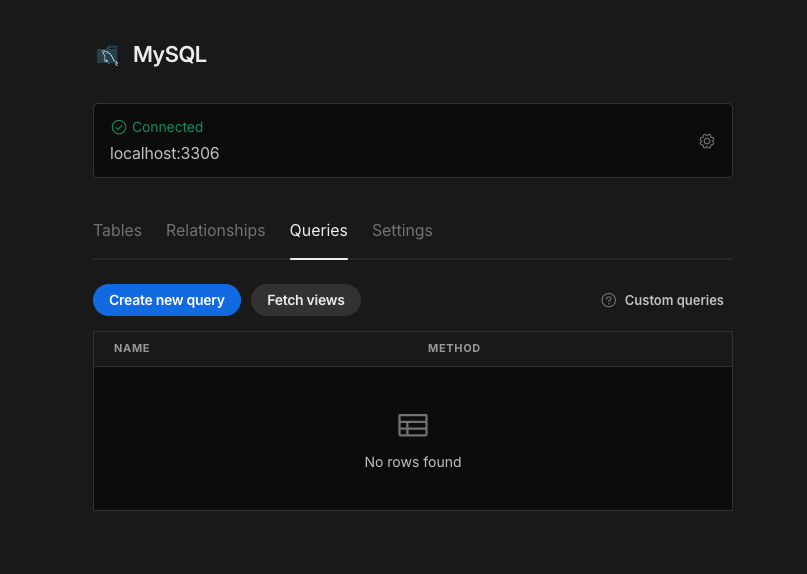
To add queries for a given SQL Datasource or view existing queries, click on the datasource in the sources panel, and scroll to the bottom of the page.
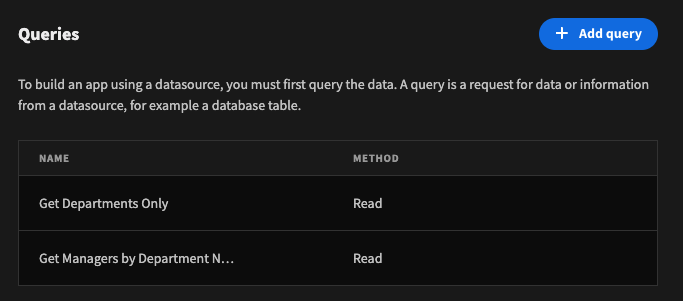
Existing queries are also indicated by the Search icon instead of the usual table icon.
A MySQL datasource with two queries
LimitationsWhilst custom queries offer a lot of flexibility in terms of the SQL query itself, you will lose some of the automatic functionality such as pagination and sorting.
These can however still be added manually through the use of bindings. An example can be found in this discussions answer.
Fetching views
Budibase allows you to import database views as custom queries directly from your SQL datasource. To fetch views, open the Queries tab for your datasource and click Fetch views. This will display a list of available database views that can be selected and imported into your application
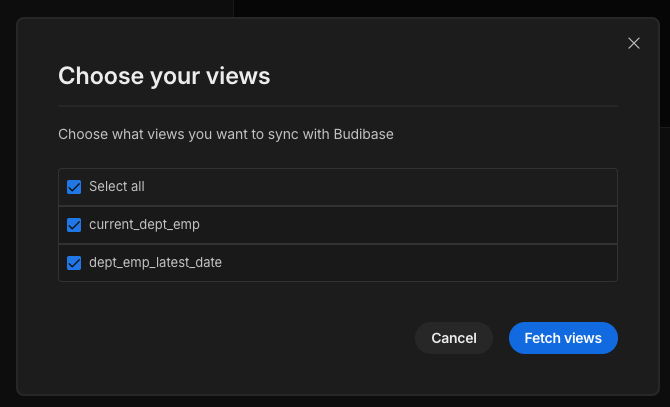
Once imported, views appear in the Queries list and can be edited, executed, and managed like other custom queries.
Supported datasourcesCurrently, this feature is supported for PostgreSQL and MySQL datasources
Troubleshooting
If you are having issues with your SQL database in Budibase it is a good idea to raise this issue with the Budibase team. You can find out information about how to do this and provide the information that the team will need to fully debug your issue on the SQL troubleshooting page.