Custom datasource
Write a custom datasource integration
Purpose
Datasource plugins are simple in their nature, allowing you to write an extension to Budibase that defines external CRUD operations that are useful to your business. Datasource plugins are data centric, focused on getting the data you need into Budibase so that you can build apps quickly and easily.
Getting started
Make sure you have the latest Budibase CLI installed. Even if you have previously installed the CLI, you may want to install it again to be sure you have the latest version.
Also make sure that you have node v16+ installed. You can run node --version to see if you need to upgrade.
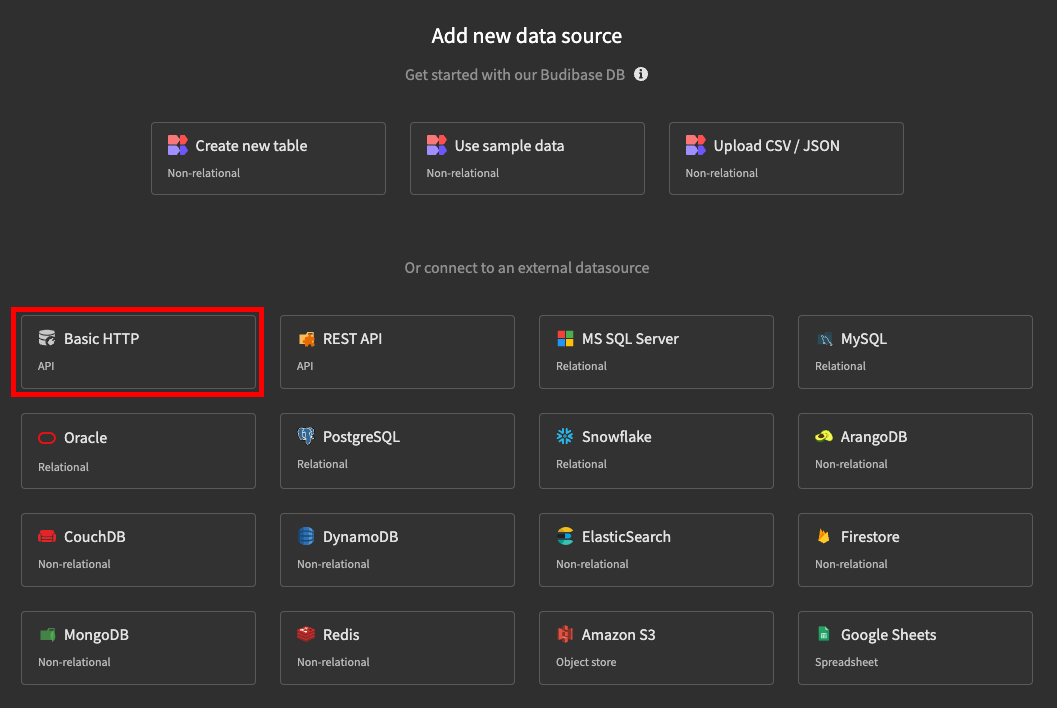
Please note that datasource plugins can only be used in self host installations - they cannot be imported to the Budibase Cloud.
Once that's done, we need to initialise a template for our datasource.
Navigate to the folder location you want to create your plugin, and execute the following command:
budi plugins --init datasourceNext you will receive a series of prompts to enter details about your datasource. You can press enter without providing a value if you are happy to use the placeholder.

Within the newly created custom datasource project you should see a tree structure as follows:
src:
  datasource.ts: The code for your custom datasource. Do not rename.

test:
  index.spec.ts: A Jest test file that includes template unit tests for each CRUD method.

package.json: The version, license and dependencies for your datasource.

schema.json: The meta data and available builder settings for your datasource.
Building your datasource
After you have created your new datasource directory, execute the following:
cd my-datasource
yarn build
Assuming you have updated the server env variable you should now be able to see your datasource template in Budibase:
datasource.ts
This is where your code will live for your datasource. It is recommended that it is developed in TypeScript. The default implementation is a basic HTTP connector, but you can make use of a wide range of npm packages to build the desired integration.
To make sure your saved changes are passed through to your Budibase server, you must execute a yarn watch within your custom datasource project. This will allow your local Budibase app builder to see those changes in real-time, which is very handy for getting your datasource to behave just right.
As the file is TypeScript, it is recommended that you use the import keyword over require. E.g
import Surreal from "surrealdb.js"
const Surreal = require("surrealdb.js");
Methods
The datasource.ts file contains four CRUD methods which must be implemented.
The signature of each method should match the definition provided by the Schema.
You will also notice a request method in the created template. This is not mandatory, however it can be useful to have a method that executes shared code between your CRUD methods.
Test
The index.spec.ts test file includes template unit test methods for each CRUD method in your datasource. You can implement these to meet your own specification, however failing tests wont prevent the datasource from being built and used within the Budibase builder.
Schema
On the next page we will discuss the intricacies of the datasource schema.json file - which defines the inputs and outputs of your datasource and its queries.
You can jump to the datasource schema page here.
Adding an icon
By default your custom datasource will present with the following icon:
It is nice to add an icon to your custom datasource so that it is distinguishable from other custom datasources. Simply add an svg file to the root of your project. It should be called icon.svg.
Example: n8n workflow connector
This tutorial will show you how to build an n8n connector that can perform CRUD operations on workflows.
This example will assume you have configured the server plugins directory env var
Step 1 - Initialise
Initialise your custom datasource as follows:

Next make sure the Budibase dev environment is running.
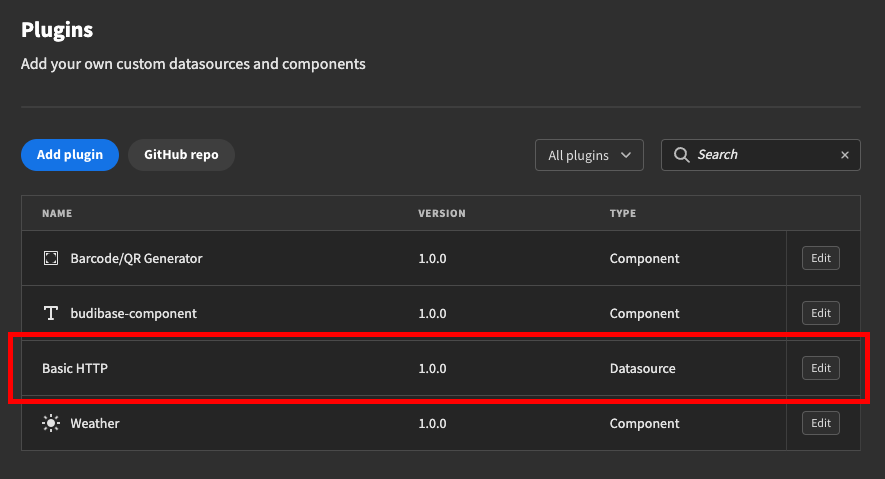
Open the newly created custom datasource directory in your IDE, for example VSCode, and run yarn watch. Verify your plugin is available in the plugins list in the Budibase portal.
Step 2 - Schema updates
Update the schema.json to include the host and apiKey settings.
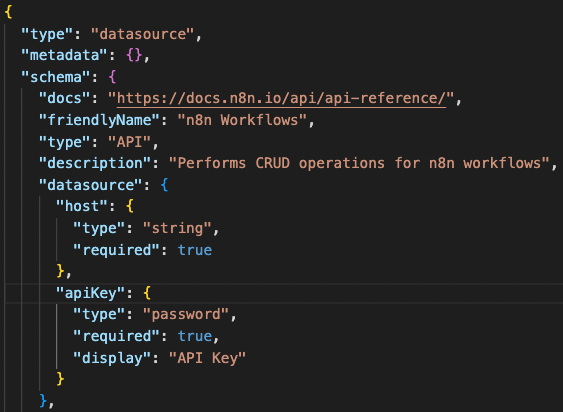
You can also update the docs link and friendlyName.
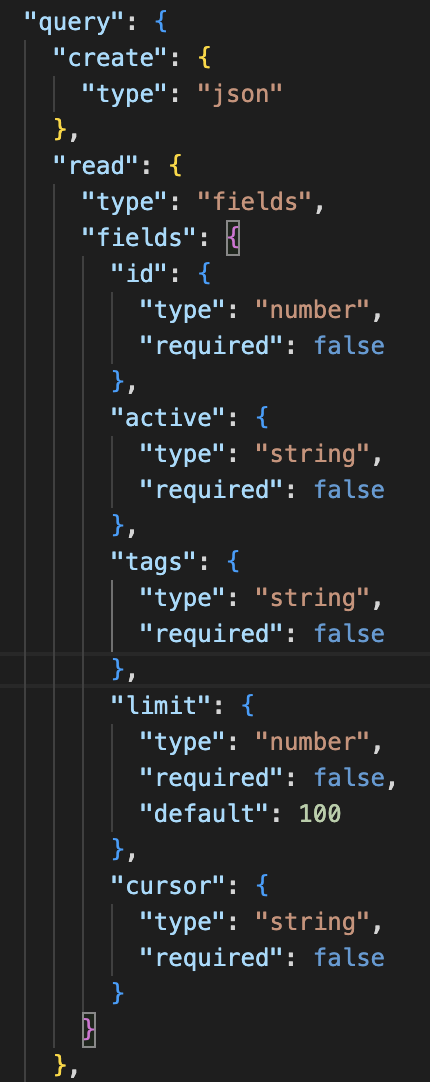
Next update the read property of the schema. This will determine the available fields available for reading our n8n workflows. It should look as follows:
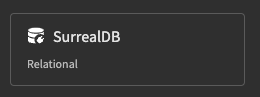
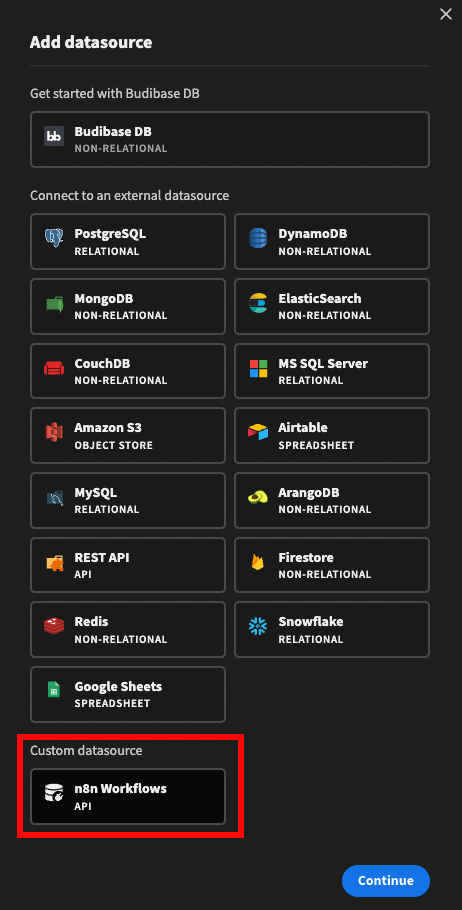
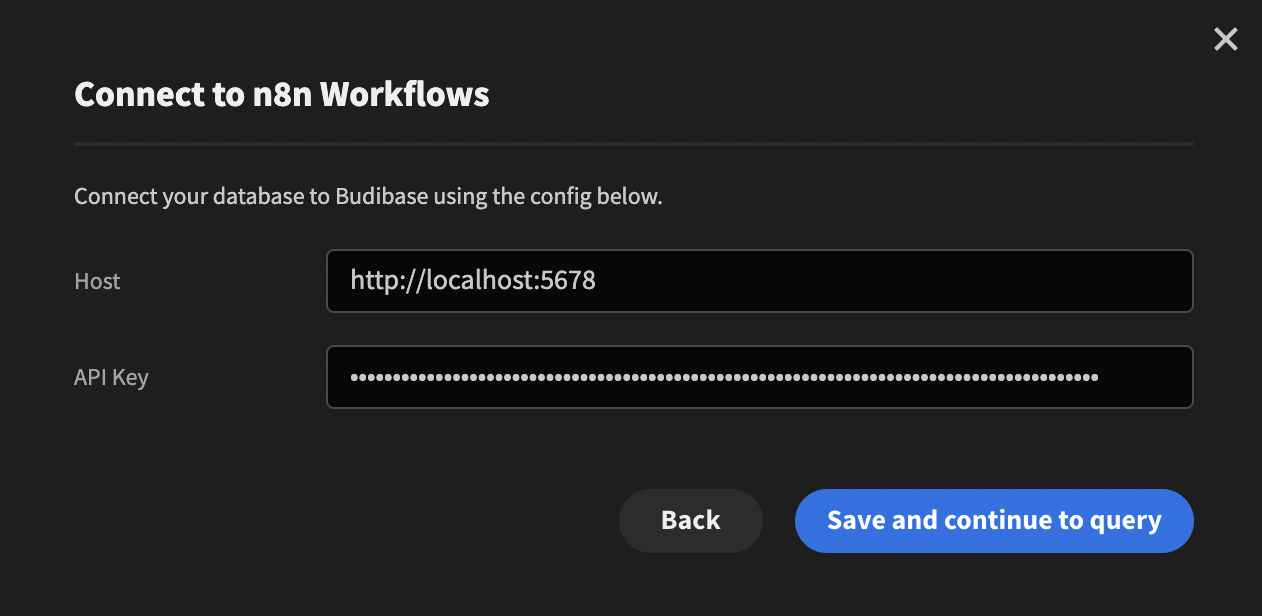
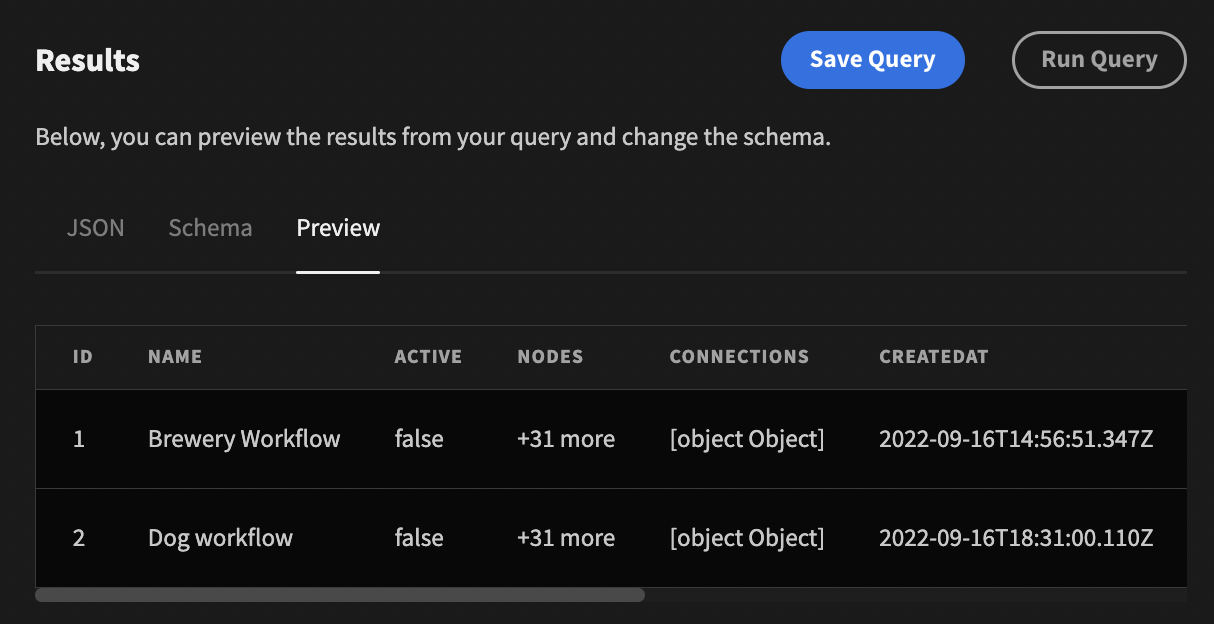
You will need to refresh your Budibase builder webpage to pull in schema changes. To test things so far, if you add a new datasource it should look as follows:
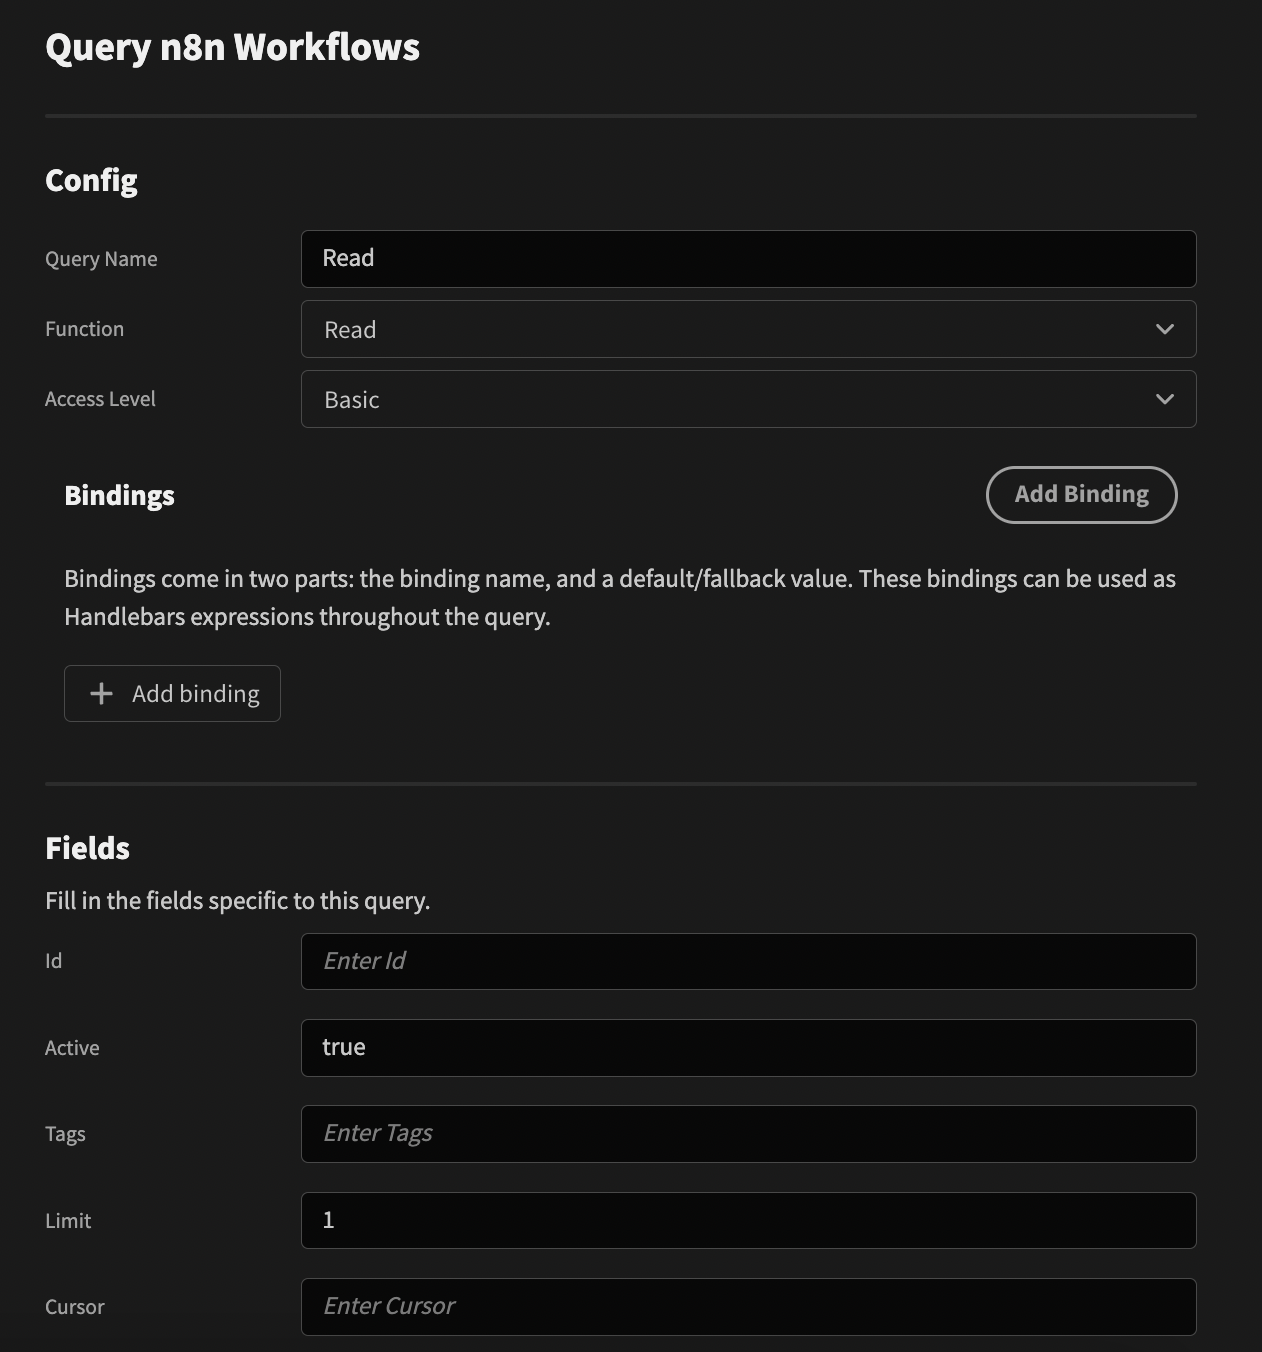
And the Read query:
Step 3- Read method implementation
Whilst we have provided the interface to let Budibase know which fields to expect for the custom datasource read method, we still have to write the implementation.
First lets replace the existing config properties with the new ones: host and apiKey. Replace all references to the old properties with the new ones throughout the file.

Next update the read method as follows:
async read(query: { id: number, active: string, tags: string, limit: number, cursor: string }) {
    const opts = {
      method: "GET",
    }
    if (query.id > -1) {
      return this.request(`${this.host}/api/v1/workflows/${query.id}`, opts)
    }
    let queryParams = ""
    if (query.active) {
      queryParams += `&active=${query.active}`
    }
    if (query.tags) {
      queryParams += `&tags=${query.tags}`
    }
    if (query.limit) {
      queryParams += `&limit=${query.limit}`
    }
    if (query.cursor) {
      queryParams += `&cursor=${query.cursor}`
    }
    return this.request(`${this.host}/api/v1/workflows?${queryParams}`, opts)
  }
If an ID is provided then get the data for that particular workflow, otherwise grab all workflows using the optional query params.
Finally, the n8n API expects the apiKey in the header, so we can add that in the request method as all calls will need authenticated.

The official n8n API workflow docs can be found here.
Get all workflows
A similar process can be followed to implement the Create, Update and Delete methods. Remember to update the schema as needed.
Step 4 - Adding an additional method
So far we have demonstrated how to implement CRUD methods for a custom datasource, but what if we want to add additional methods? For example, the n8n workflows API includes CRUD operations, but it also has endpoints for activating/deactivating workflows.
First add the additional method properties to the schema like so:
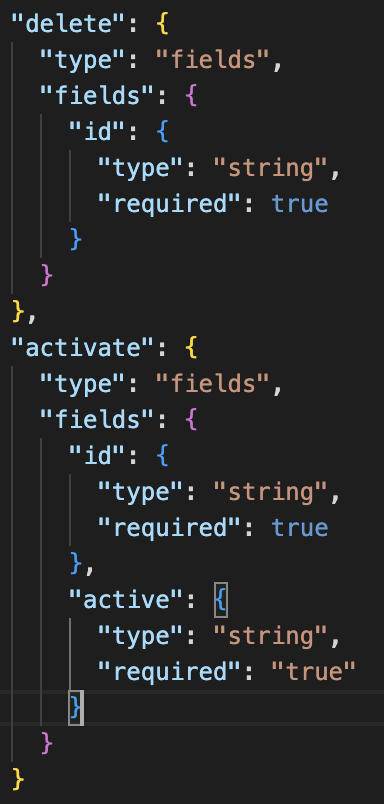
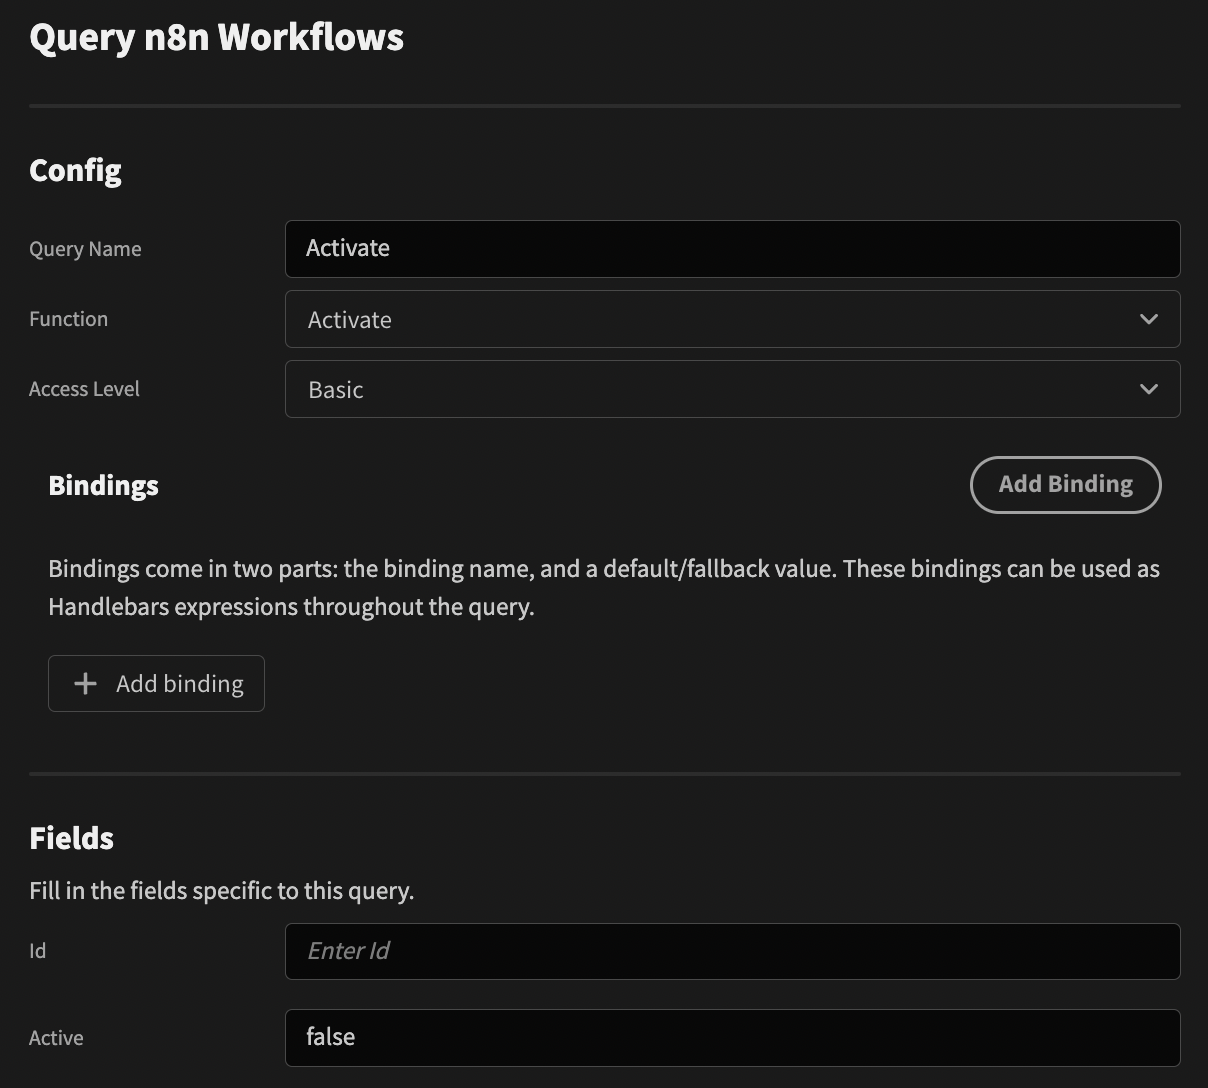
Upon refreshing your local Budibase builder webpage (you may also need to navigate out of your app and back in), then you should see the changes:
Next add another method to your CustomIntegration class as follows:
async activate(query: { id: string, active: string }) {
    const opts = {
      method: "POST",
    }
    if (query.active === "true") {
      return this.request(`${this.host}/api/v1/workflows/${query.id}/activate`, opts)
    }
    if (query.active === "false") {
      return this.request(`${this.host}/api/v1/workflows/${query.id}/deactivate`, opts)
    }
    throw new Error("Active must be 'true' or 'false'")
  }
Depending on the state of the active flag, the activate or deactivate endpoint is called. An error is thrown if a boolean is not provided.
You can view the finished datasource plugin, and also use the GitHub URL to import the plugin: https://github.com/melohagan/budibase-datasource-n8n-workflow
Example: SQL query
The previous example shows you how to include functions with field type. You may want your custom datasource to support SQL queries with basic syntax highlighting.
This example is taken from the SurrealDB custom datasource integration
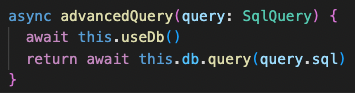
- First update your schema to include a function that takes a sql type function.
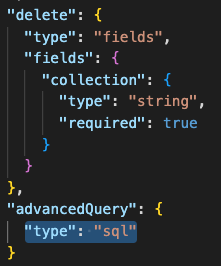
- Next include the
SqlQuerytype from Budibase types.

- Finally update your method signature to include the query parameter. You can access the SQL string via
query.sql
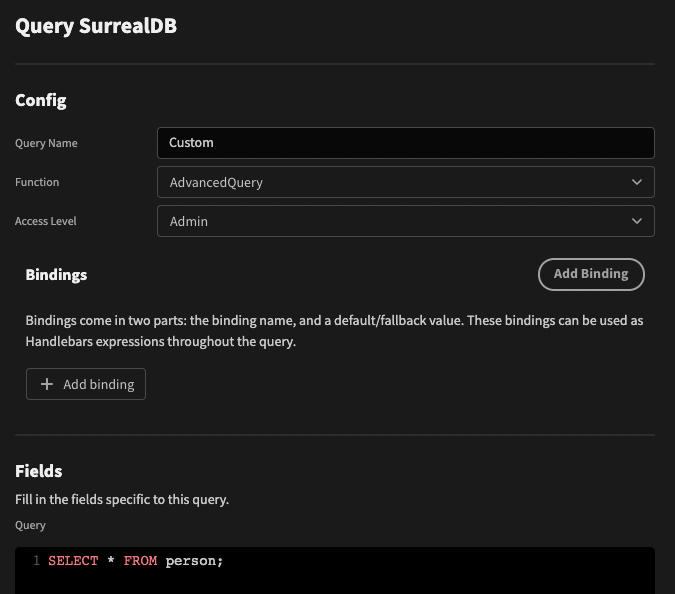
Result
Example: Extra fields for handling modes
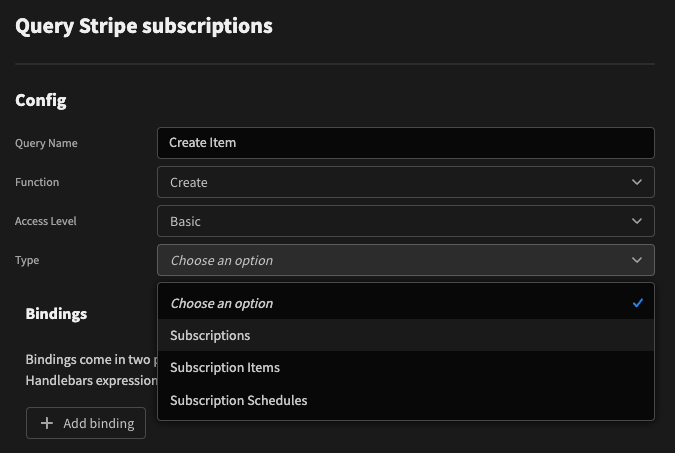
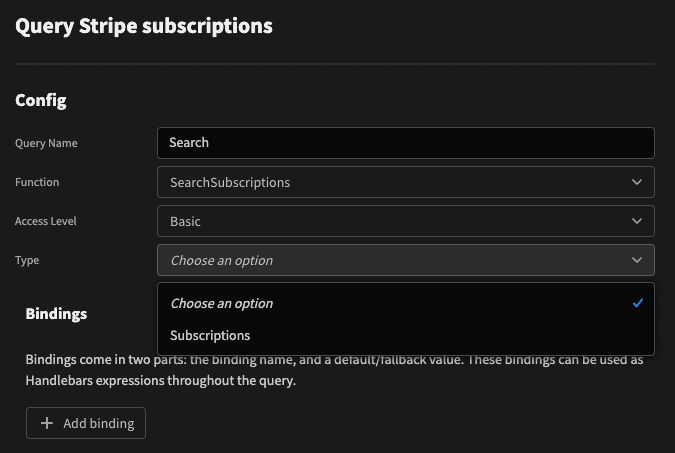
So far we have looked at examples where we perform CRUD operations within a single domain/mode. In this example we will look at handling different modes for when you want to mostly share CRUD functionality, but make slightly different calls depending on the selected mode.
Specifically, we will be looking at handling CRUD operations for Subscriptions, Subscription Items and Subscription Schedules, all in one datasource plugin
Update the schema to include the extra property. In this case it was placed after the query property:
"extra": {
      "type": {
        "displayName": "Type",
        "type": "list",
        "required": true,
        "data": {
          "create": [
            "Subscriptions",
            "Subscription Items",
            "Subscription Schedules"
          ],
          "read": [
            "Subscriptions",
            "Subscription Items",
            "Subscription Schedules"
          ],
          "update": [
            "Subscriptions",
            "Subscription Items",
            "Subscription Schedules"
          ],
          "delete": [
            "Subscriptions",
            "Subscription Items",
            "Subscription Schedules"
          ],
          "list": [
            "Subscriptions",
            "Subscription Items",
            "Subscription Schedules"
          ],
          "searchSubscriptions": [
            "Subscriptions"
          ],
          "releaseSchedule": [
            "Subscription Schedules"
          ]
        }
      }
    }
The lists indicate which options are available depending on which function has been selected. For example:
Next we can use the extra information to make a decision about which endpoint to hit. For example, the create method can be changed to the following:
async create(query: { json: object; extra: { [key: string]: string } }) {
    if (query.extra.type === "Subscriptions") {
      return await this.stripe.subscriptions.create(query.json as Stripe.SubscriptionCreateParams)
    }
    if (query.extra.type === "Subscription Items") {
      return await this.stripe.subscriptionItems.create(query.json as Stripe.SubscriptionItemCreateParams)
    }
    if (query.extra.type === "Subscription Schedules") {
      return await this.stripe.subscriptionSchedules.create(query.json as Stripe.SubscriptionScheduleCreateParams)
    }
    throw new Error("You must provide a type!")
  }