CSV Import
Importing a CSV or JSON into Budibase as a table
When you already have existing data, you can import this using a CSV file, which will create a new table in the internal Budibase DB. This will automatically identify columns and create them for you, after which you can specify data types per column.
- Click
Add sourceand selectUpload CSV / JSON.

- Click
Continue. You will now see a modal in which you can enter a table name.

- Click
Uploadand select the CSV or JSON file you want to import.
Column namesWhen importing a CSV, the first row will be used to determine the column names.
In the example below, I imported a CSV with 4 columns representing a table of countries. After the file was uploaded, the screen below was shown.

As you can see, it automatically identified the 4 columns and allowed me to pick the data types for each column.
- Click
Createto build a new table from your imported CSV/JSON file.
Importing rows into an existing table
You may find that you want to update an existing table with new CSV/JSON data. To do so, click on the Budibase table you want to import into. Next click the Import button.

Once you have selected a file, Budibase will match the column names from the CSV against the destination table. Column names that do not match will be ignored, and the modal will highlight the offending fields:

Click Import to pull in the new rows.
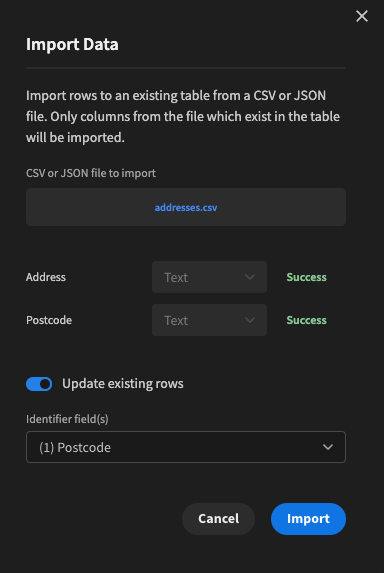
Updating rows with CSV
This is done in a similar fashion to importing a CSV for creating rows. The only difference being, is a toggle at the bottom which needs checked Update existing rows. Additionally, an identifier field needs selected. The purpose of this field is to check for records that are already existing. If one is found in the database that matches the CSV. Then this record will be updated with the CSV's data instead of a new record being created.
Duplicate recordsAs an _id field is only assigned upon import, Budibase does not determine if a row has previously been imported. It will always import any rows provided in the CSV/JSON file.
Reading CSV data from an S3 bucketIf you have a CSV file in an S3 bucket, you can use the S3 connector to read the CSV data.