Row actions
A key addition in Budibase v3 is Row Actions, these are used for creating and progressing workflows.
A Row Action is configured against the table but can be enabled or disabled per view. This allows you to control which users can trigger specific workflow stages.
Using row actions allows you to securely ensure that only specific users with the correct permissions can progress row data through a pipeline
Setup
Below are the steps on how you can setup your first row action.
-
Go to the data and select the table/view you wish to create a row action on
-
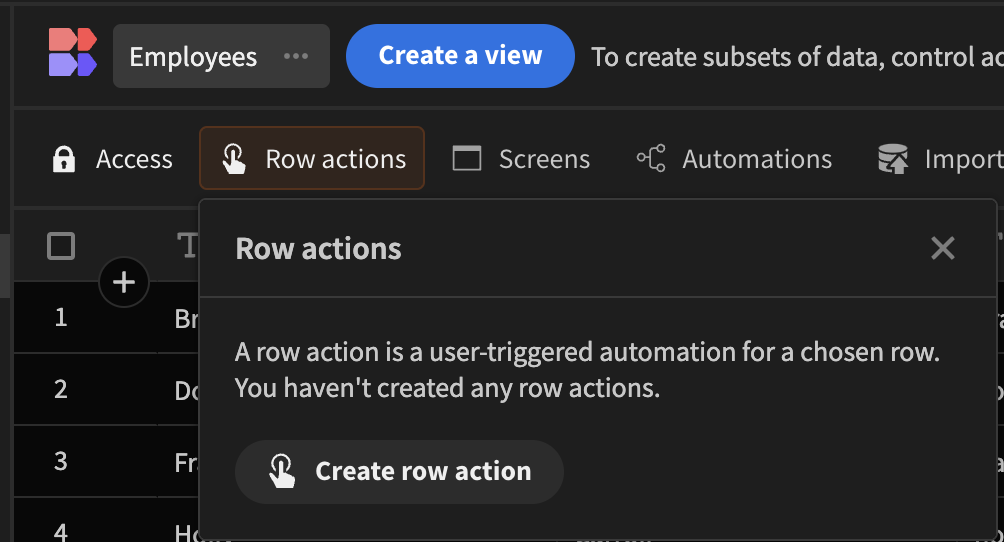
Click the Row actions button beside Access above your table
-
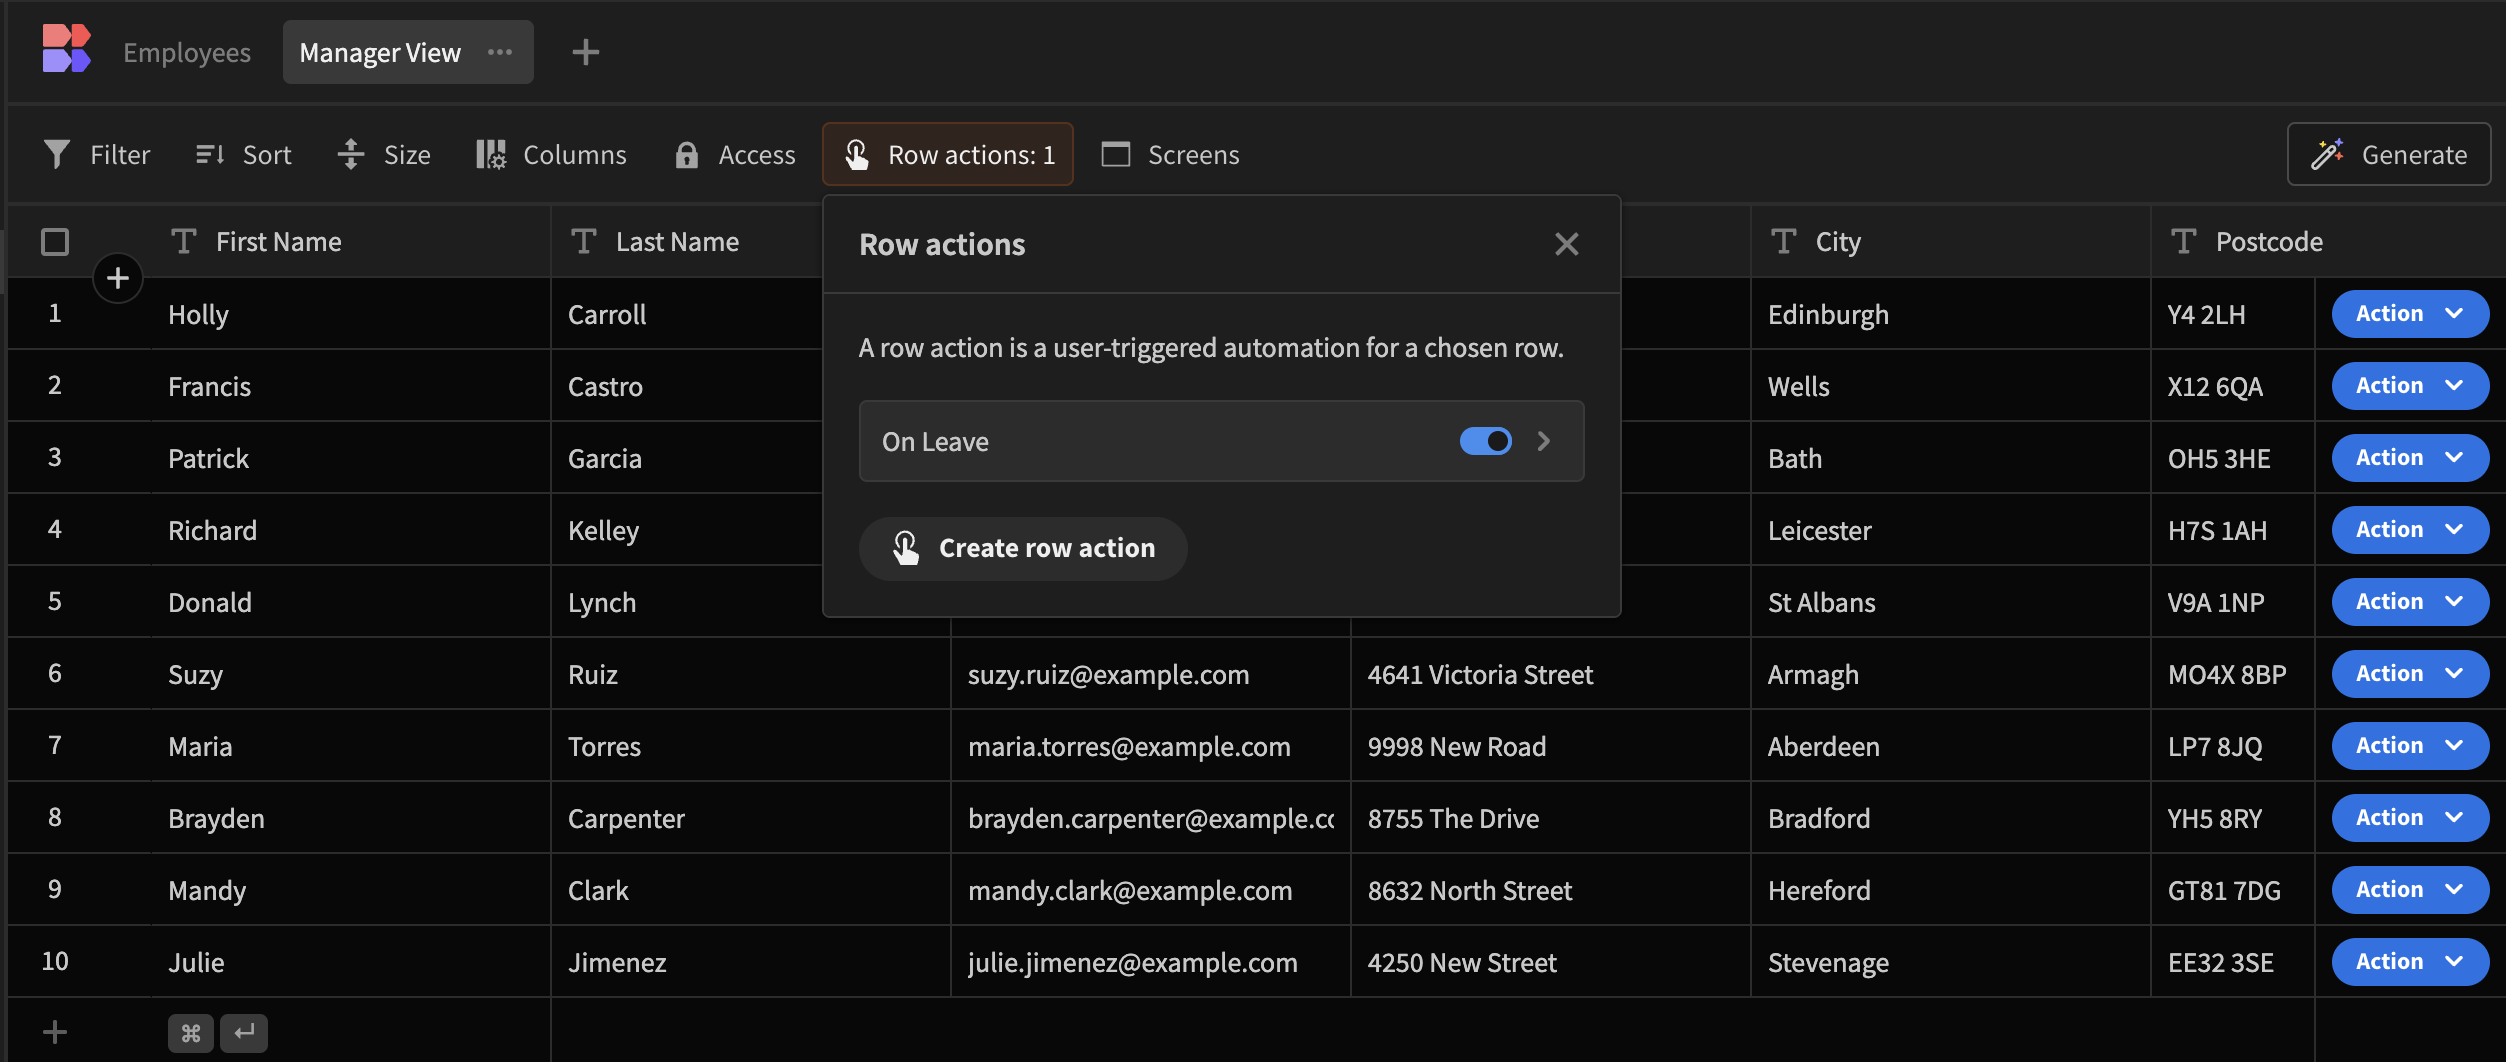
A context menu will appear, providing you with some information about row actions
-
Click the Create row action button
-
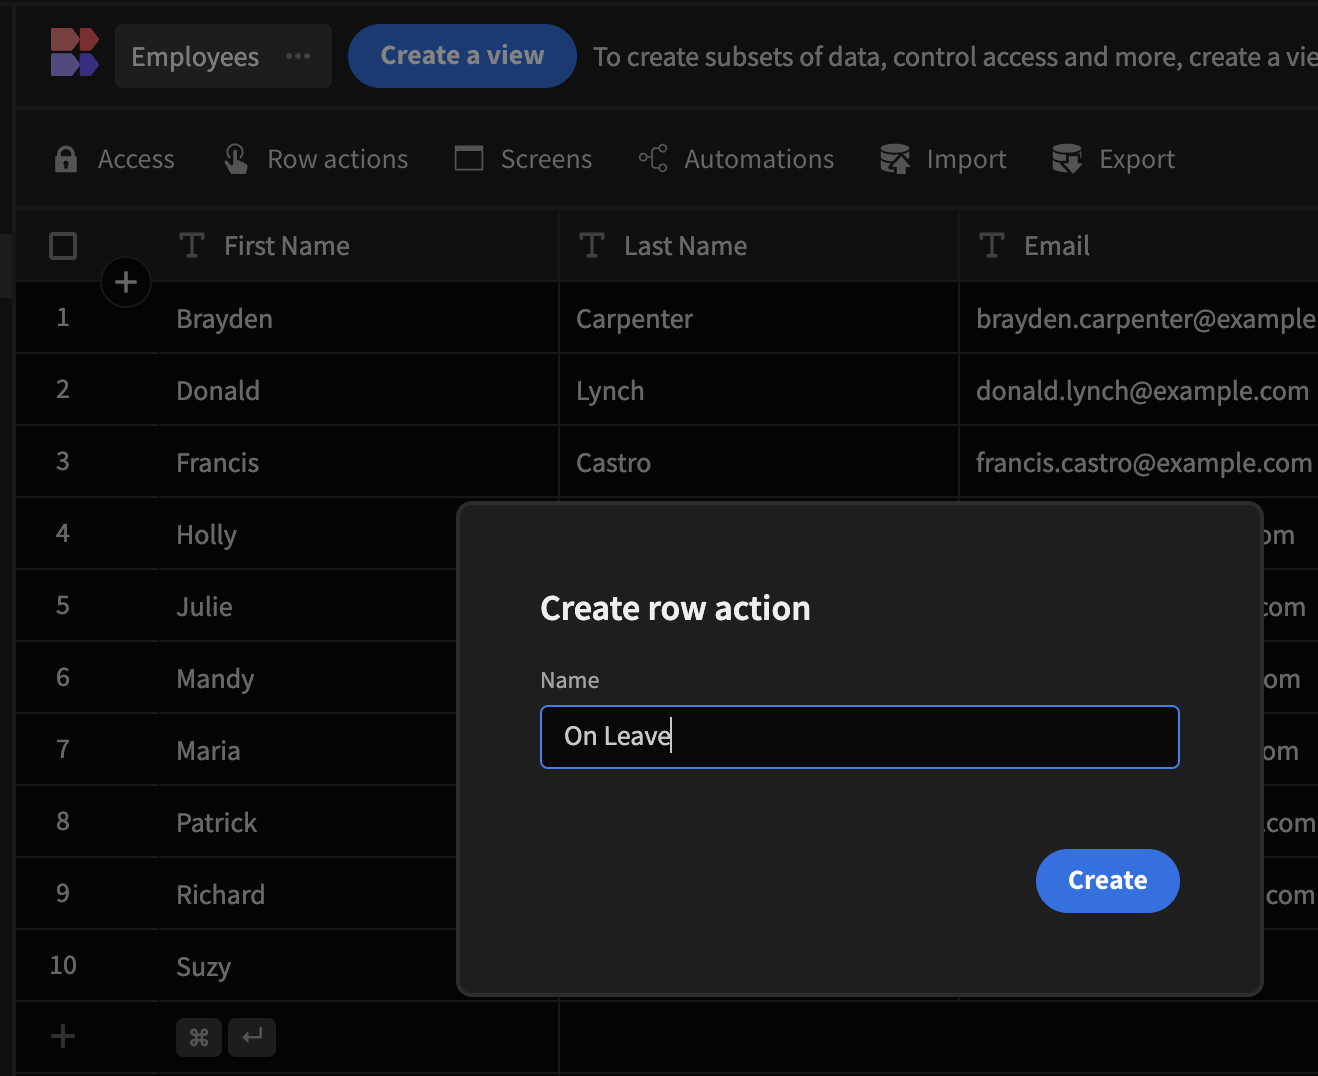
You will be prompted with a modal. Type a relevant name for the row action e.g. accept, deny, assign etc
-
Click the Create button
-
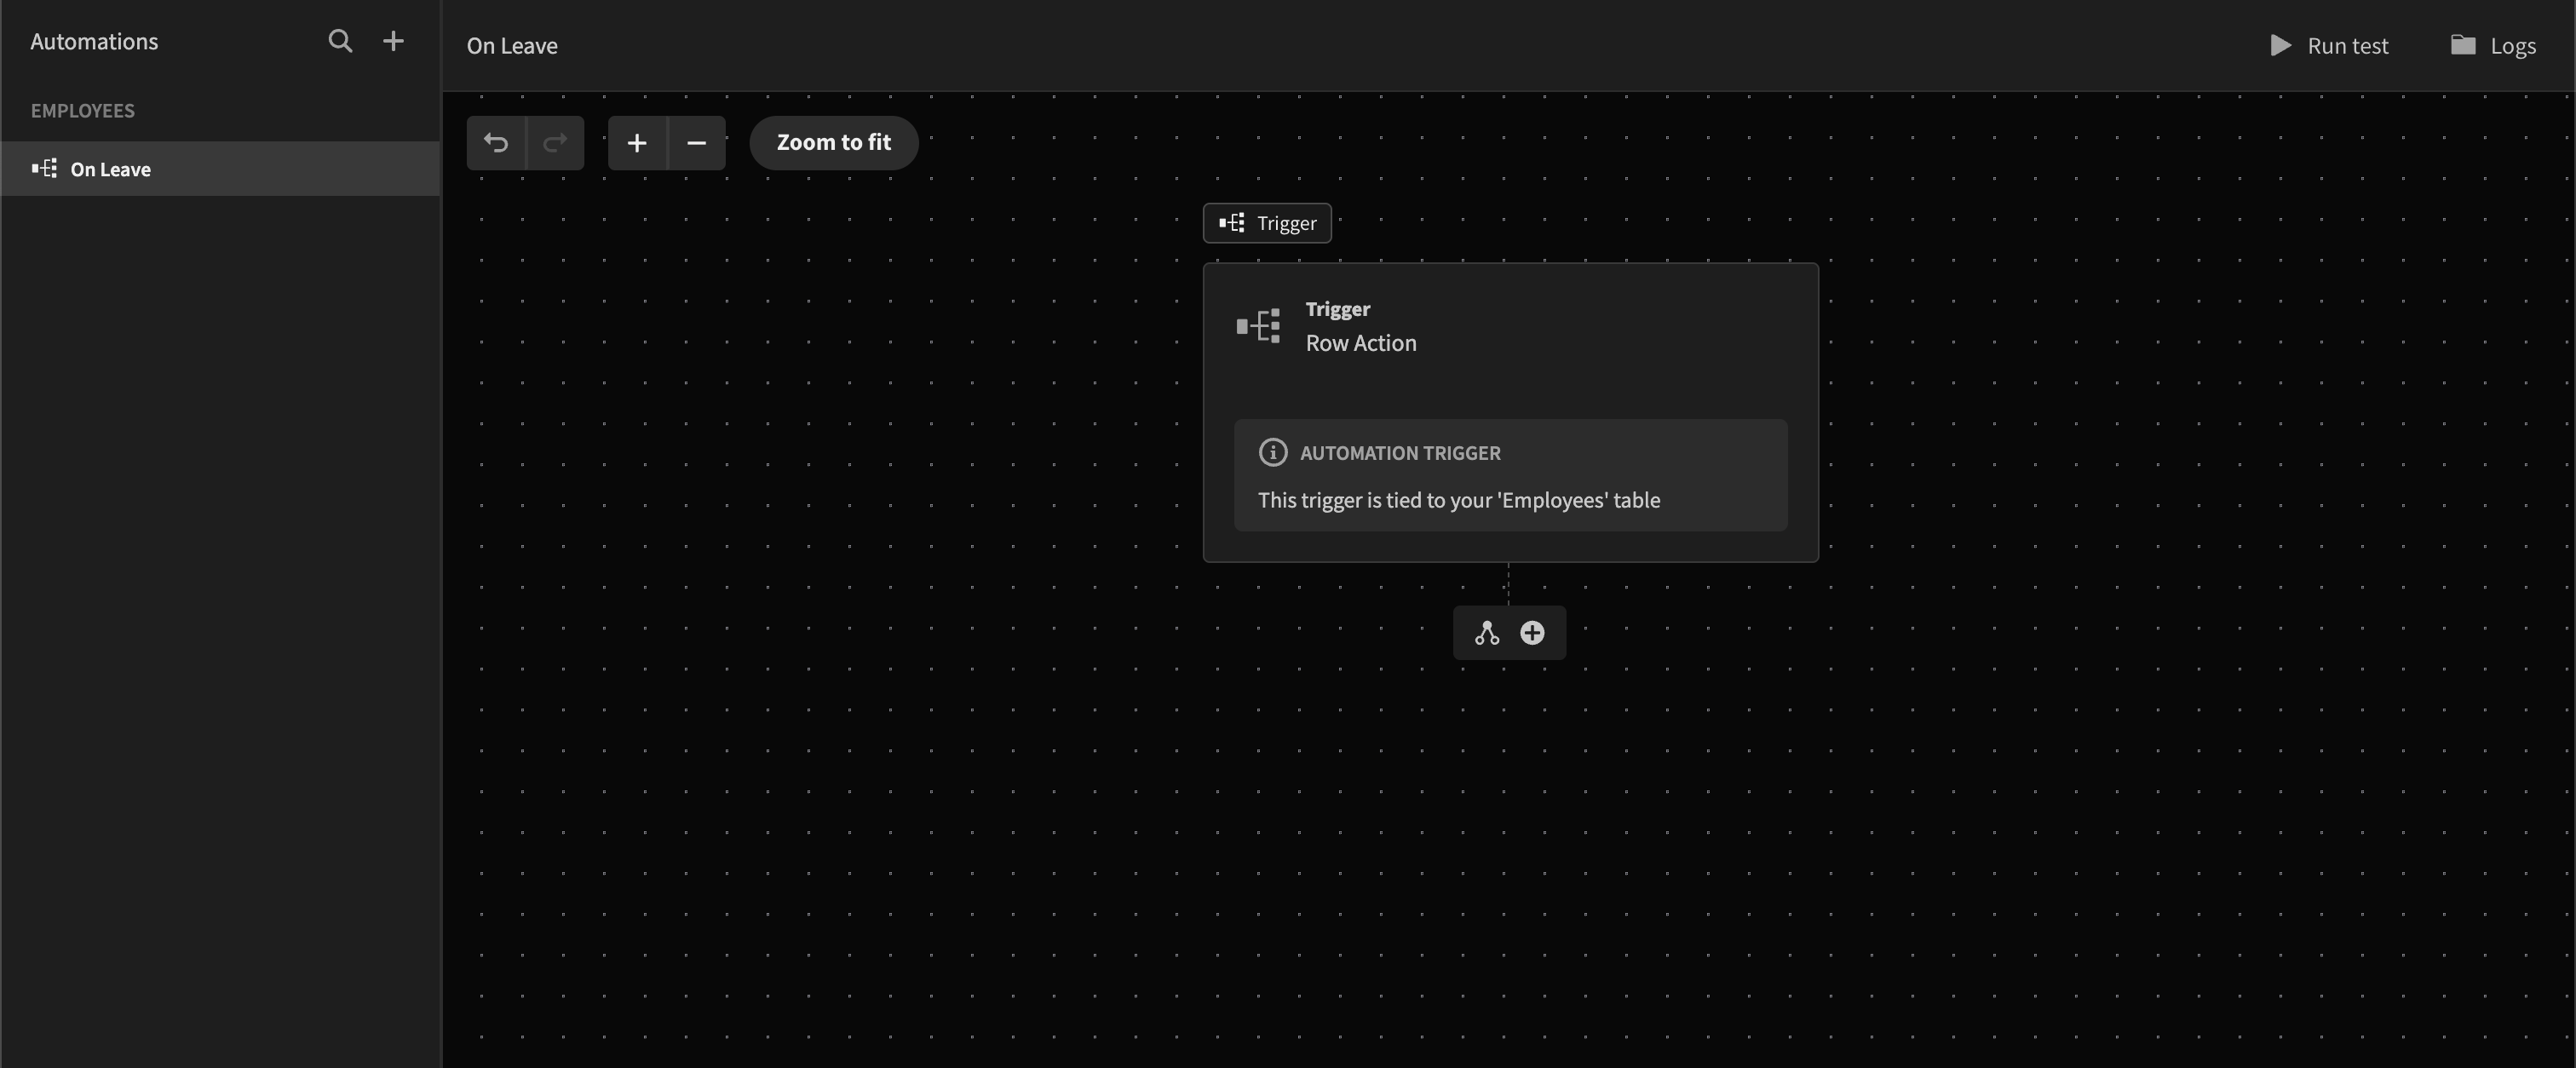
You will now be redirected to the row action automation. You can begin building out your workflow for this row action here
-
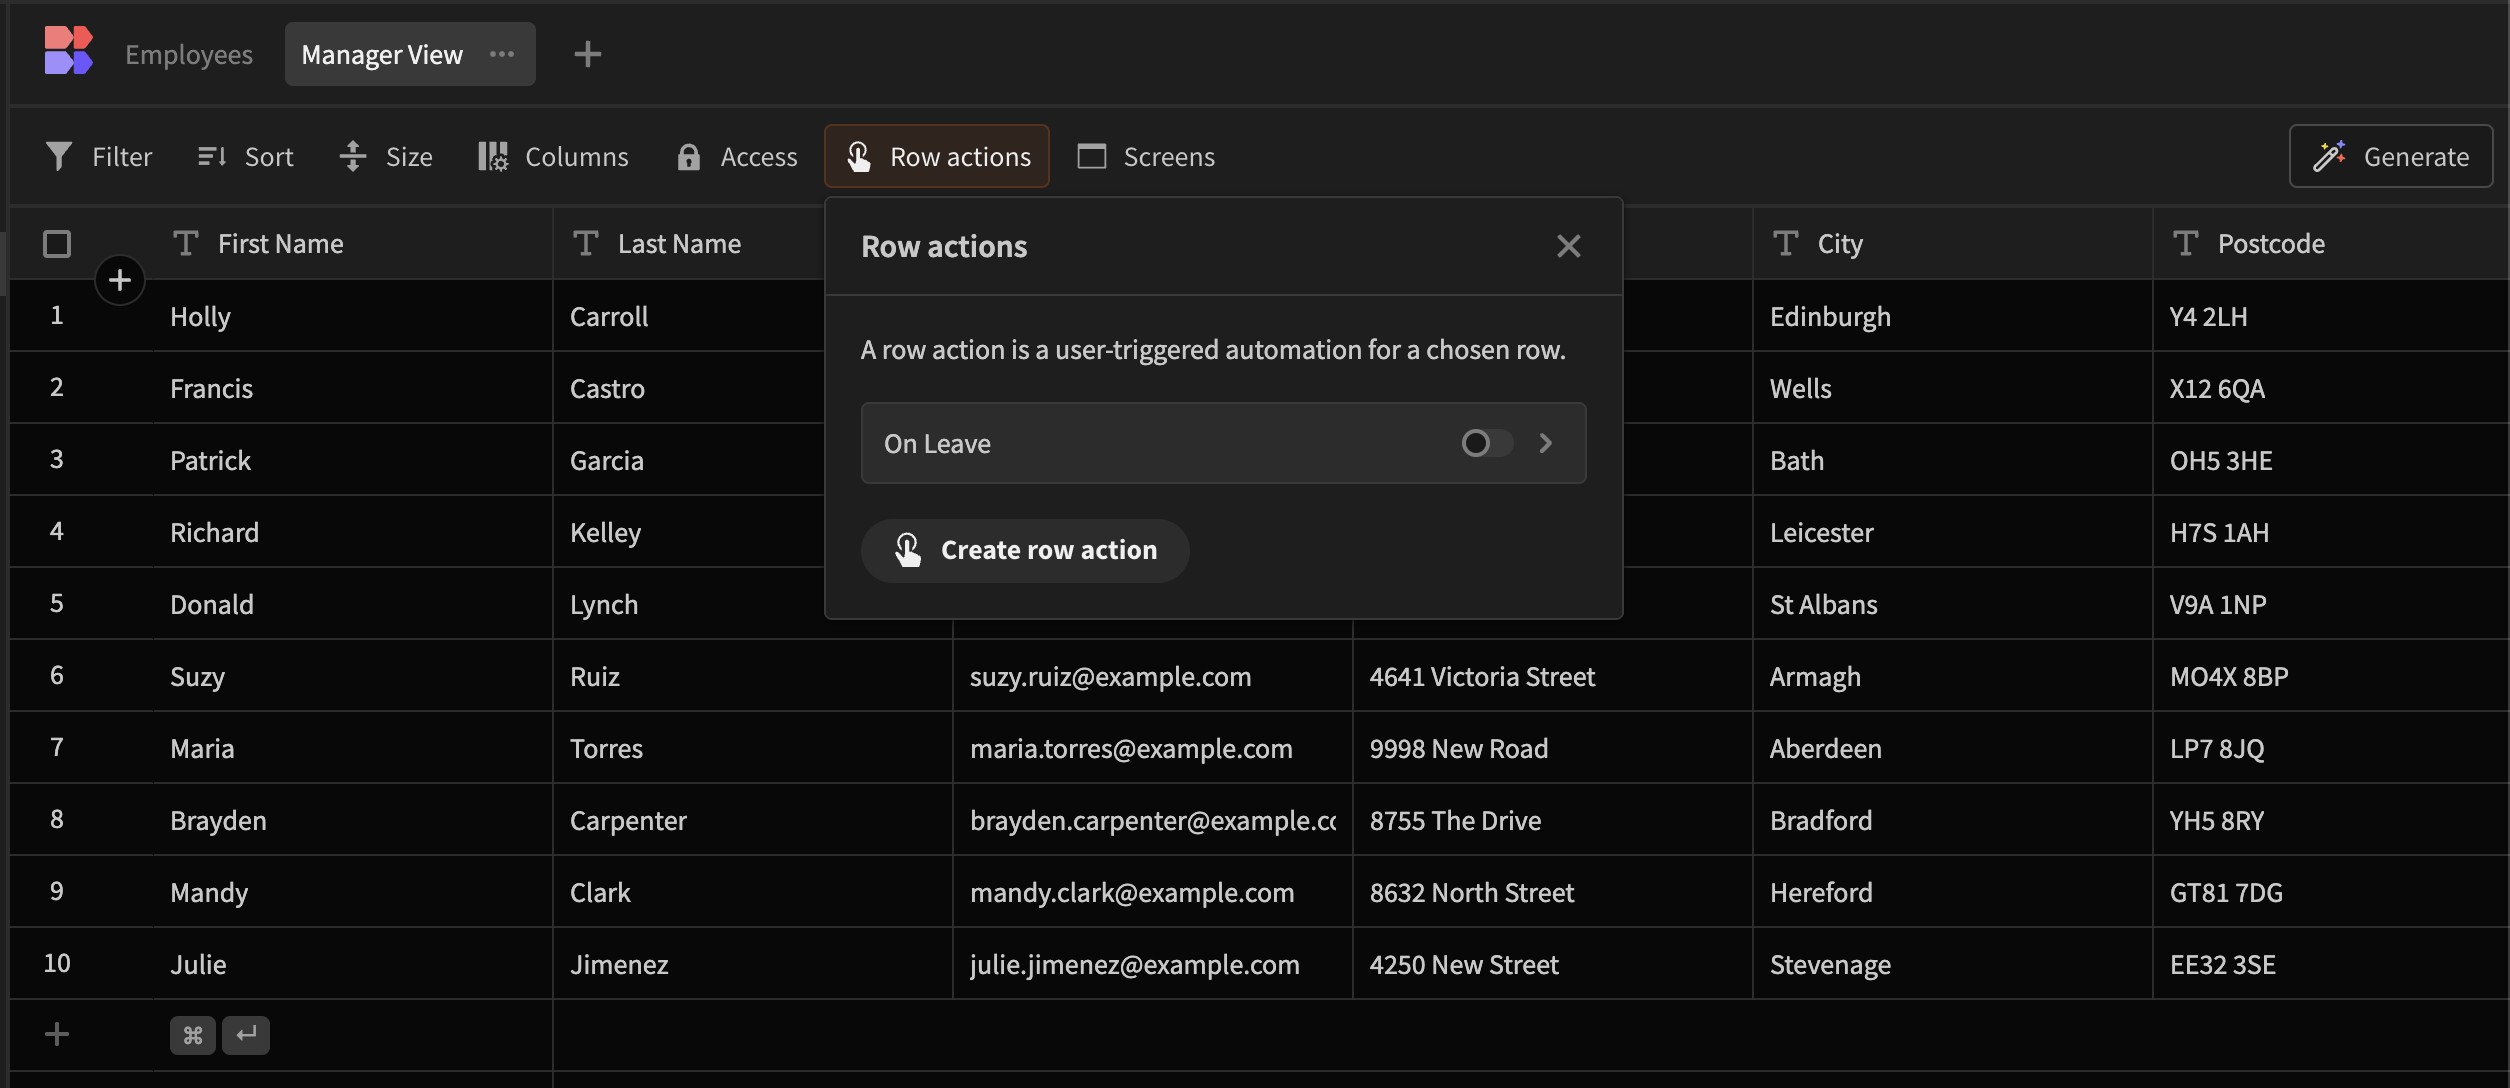
Returning to your table, you can see how many row actions have been created for a table. You can also create views with relevant access roles. This will carry over to your row actions. If a certain user doesn't have the correct permissions, they won't have access to the row action. These can be managed on a view-per-view basis by toggling them on and off.
-
After toggling these on, you should see a new dropdown button on the table's right-hand side.
-
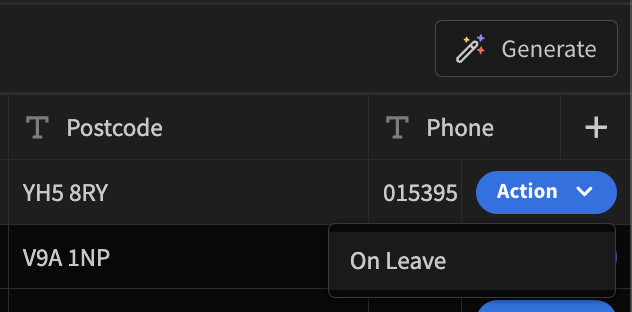
Clicking on the dropdown button on the far right will display all available row actions. You can then click one of the row actions to trigger the corresponding workflow.
Design
A new action with the same name has been added to trigger these row actions. You can learn more about configuring this action here.
From the design perspective, there are two ways to quickly add row actions to your components.
The first is with a table component. Start by adding a table component to your design area. Select the table component, scroll to the bottom of its settings, and click Add button. This will let you choose either a custom button or a row action. The button title will match the name of your row action.
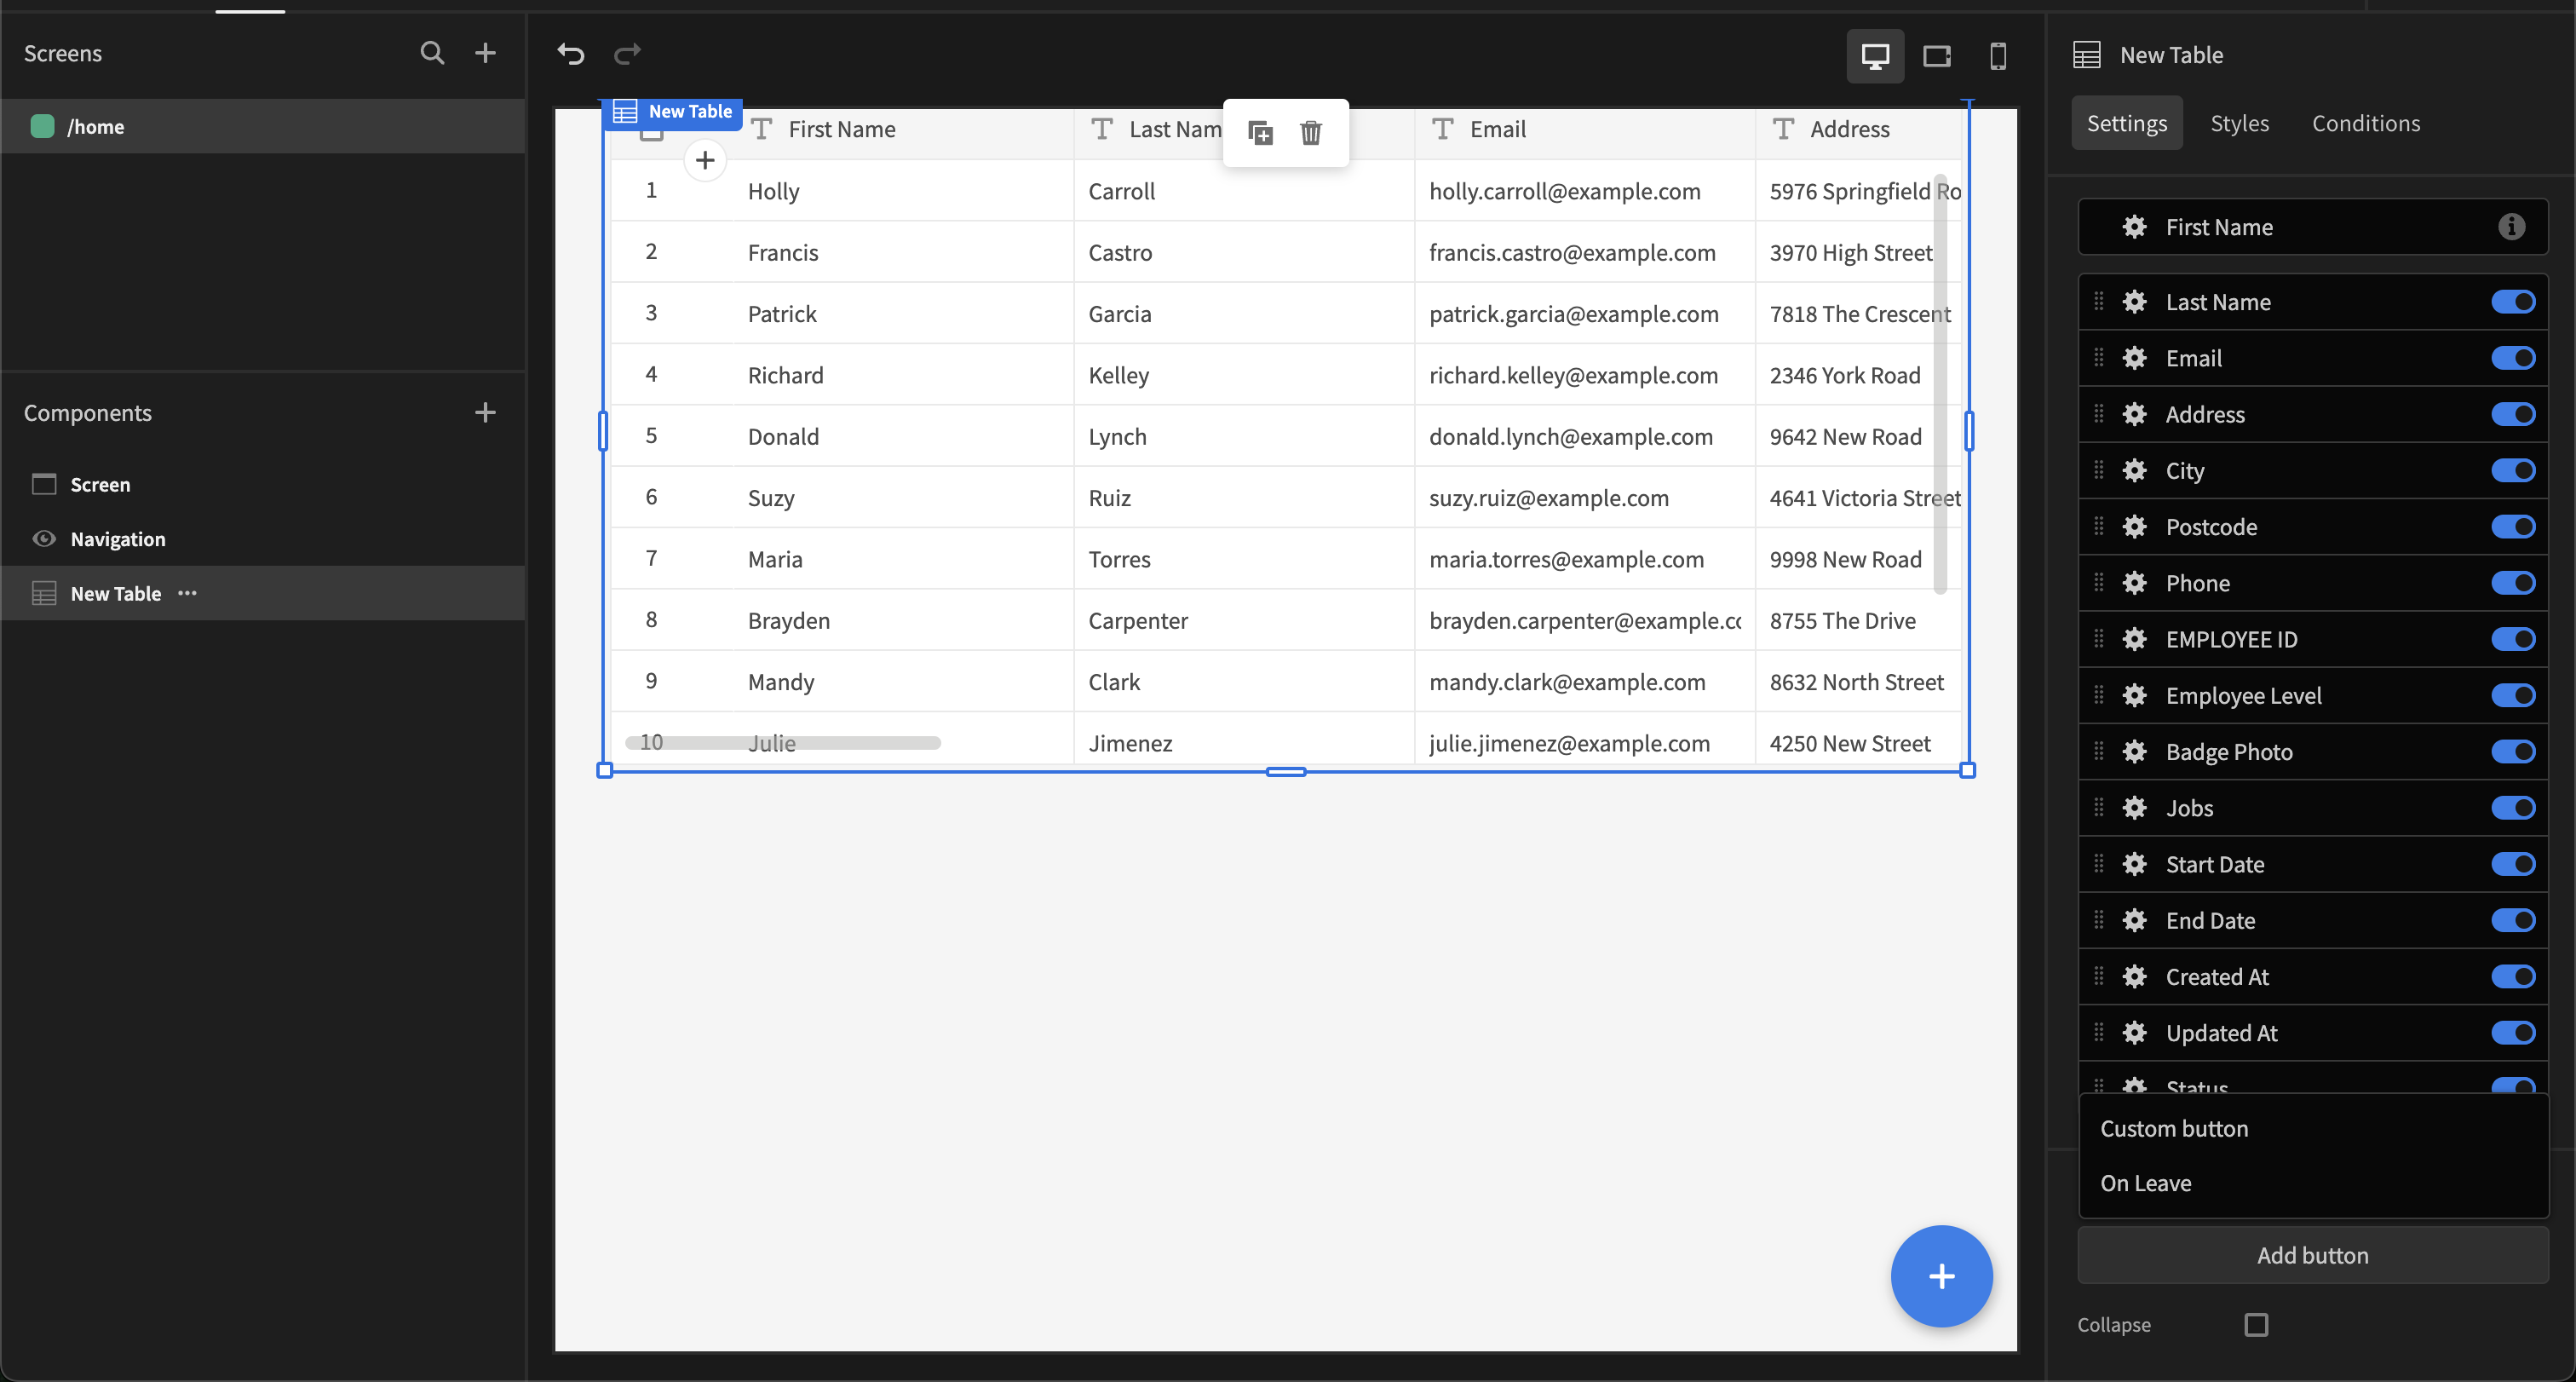
When selected, a new button will appear in the table. You can review the button's settings to see how it’s configured. There is also an option to make the button collapsible, which is helpful when you have numerous buttons attached to the table, as they will be grouped into a dropdown menu.
Once everything is set up, users can use these buttons to trigger your row action automation, allowing users to process your workflows.
Form block
A form block can also generate buttons with row actions. The setup here is even easier than the table, as it will auto-generate the button based on your selected schema. Ensure you use an update form type, as row actions are meant to progress existing data through a workflow.
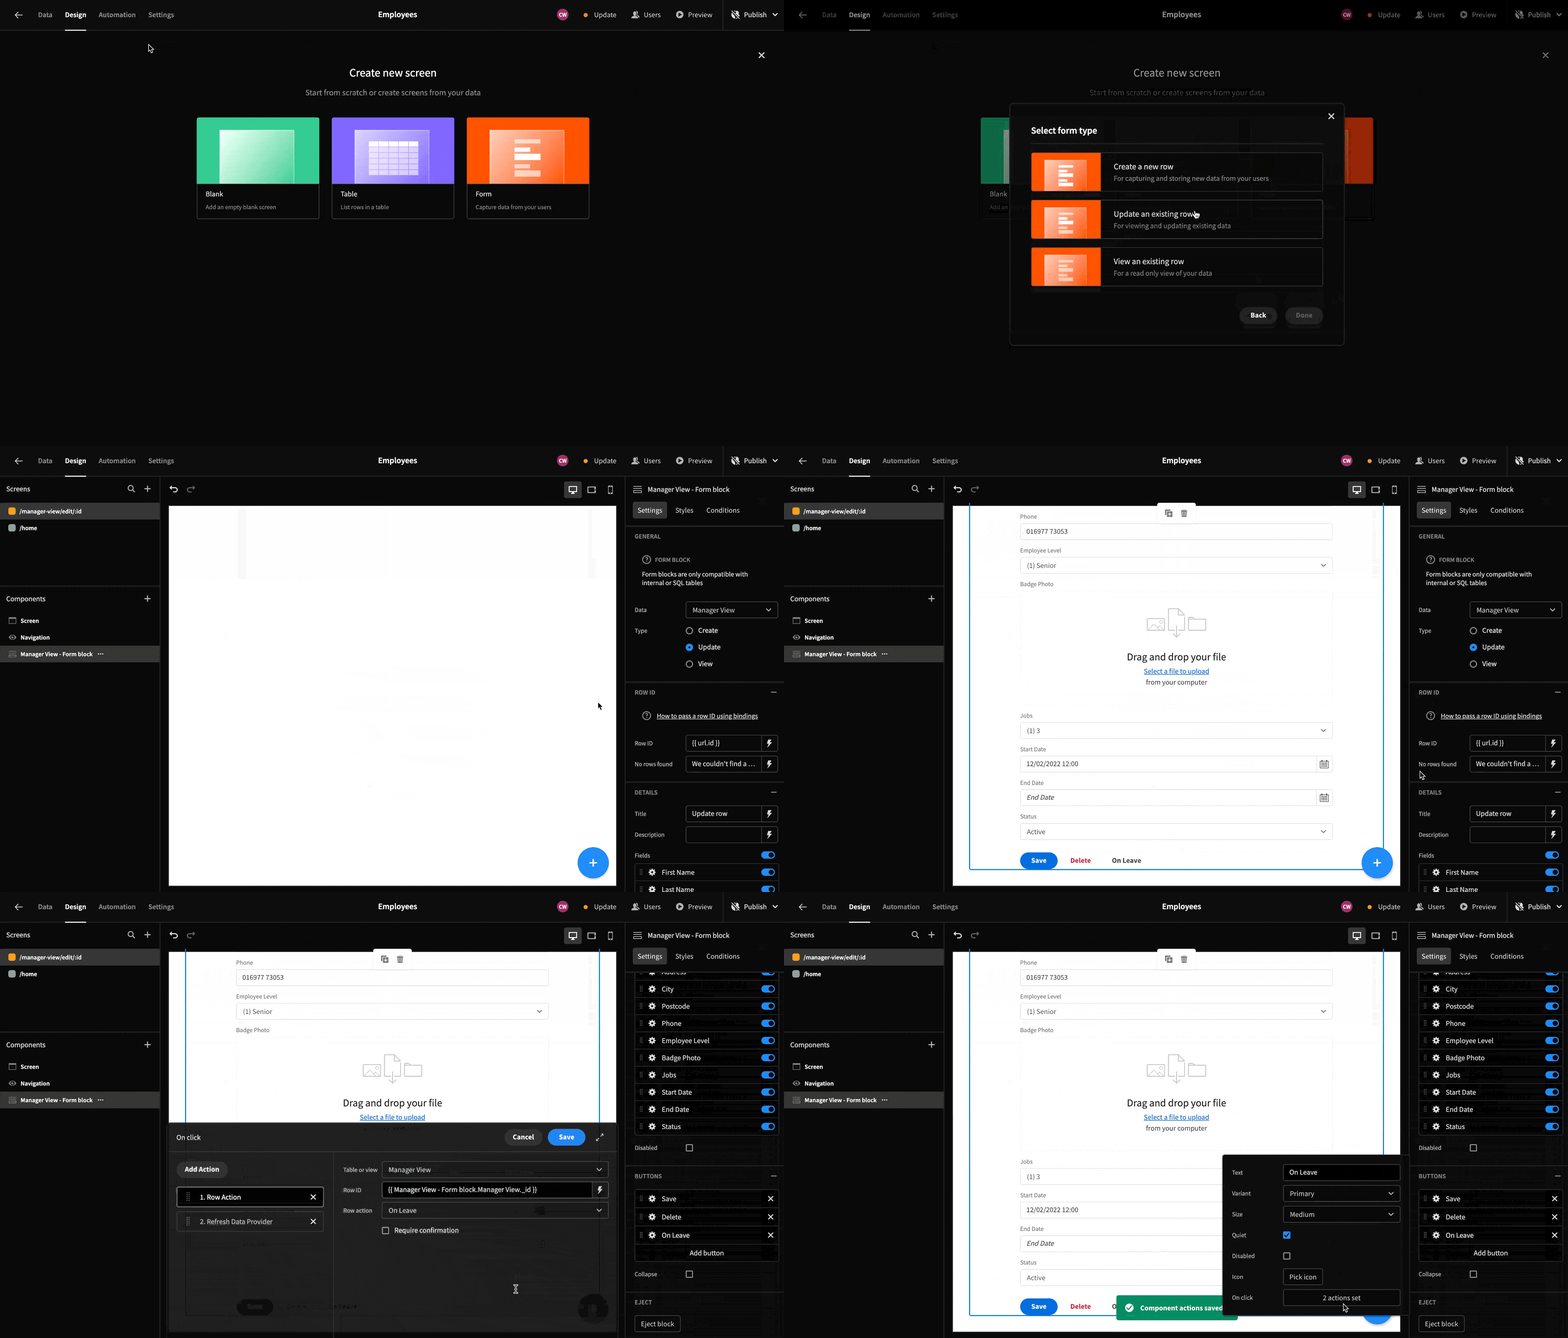
You can also add a Row action to any component that allows actions to be applied.
Updated 5 months ago