Attachments
Learn more about how Budibase manages static files.
Almost every web application needs to manage static files in some way.
These could be images, text files, audio files and more. With budibase, you can upload your static files to your budibase applications with ease. We are going to cover how to upload and display your files both inside the budibase builder and in your web applications themselves.
New Field Types for Attachments
We've recently introduced new field types for attachments, replacing the previous unified attachment field. Now, attachments are categorised into two distinct types: Attachment and Attachment List. Let's explore the differences:
Field Types
In Budibase, static files are managed through the Attachment field type. Both attachment and attachment list fields support various static file formats, including images, CSV files, and more.
Attachment
This field type allows the upload of a single attachment at a time. You cannot add additional attachments to this field. When looking more into the JSON data related to this field you will see that this is stored as an object were previously it was an array.
Attachment List
Here, you can include multiple attachments of different types, such as CSV files, images, Word documents, and more.
To create an attachment or attachment list field type, simply add a new column to a new or existing table and select either the Attachment, or Attachment list type. While an attachment field can accommodate as many attachments as needed, please note that the maximum file upload size per file is 20MB.
Uploading attachments
When you create a new row in your table you will be presented with a Dropzone component for your attachment field that you can use to upload files.
A Dropzone component is a commonly used file upload component in web applications. It allows you to drop files from your computer into the dropzone area, or to navigate your file system to find the file that you want.
Your attachments will be displayed like any regular field - inside grids and tables, forms and more Budibase components.
To see attachments in action, take a look at the following example section. We will build a small app for storing country data using Budibase attachments.
Attachments are stored in MinIO.
Example
In this example, we will be creating a simple web application that will be used to store information about different countries around the world.
Creating the Countries table and columns
Let's begin by creating a table to store data for our countries.
Next, we need to create columns in our Countries table. Let's look at the information we need to include about each country and decide which data types are the best to use for our columns.
- Country Name: Country names are just letters, so a Text type is a good fit here.
- Country Population: We should use a Number type for this.
- Country Flag: This will require an image file - here is where Attachment types come in.
- Travel Guide: We can store PDF travel guides for each country here. Let's use another Attachment type.
Watch the video below to find out how to set up your table as detailed above.
Creating rows and uploading data
Now that we have set up our columns, we can start to add some rows to our Countries table. You will now notice that on row creation, you will be presented with dropzone components inside the row creation popover for both of our attachment types - Flag and Travel Guides.
Let's create a row for Spain. Follow along with the video below to find out how.
Here are the files used in the video below if you don't have your own:
Muy bien! 🇪🇸
Front-end
Navigate over to the Design tab in the builder. Add a screen and select List view. This will create an Autogenerated screen. Now we can preview our application and interact with our attachments!
Click the preview button on the top right of the builder. You will be navigated to your app in your default browser. Log in with the credentials that you set up when you initially created your app and you will see the homepage of your new app. Navigate to the automatically created "Countries" link in your navbar - you should see your countries listed in a table:

Manage access
By default, the table write access will be Basic. This means if you have a public form, you may see an error message: Session not authenticated when trying to upload files.
To fix this, click on the Manage access button.
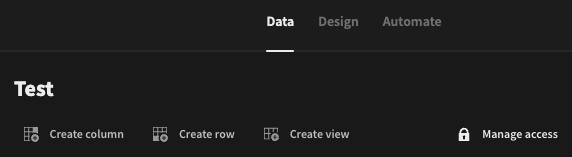
Set the write access to public
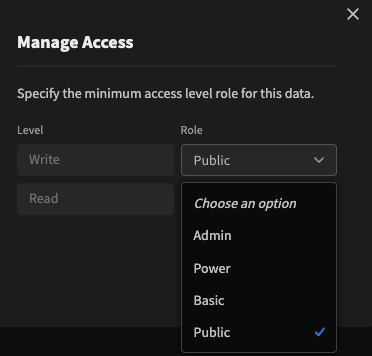
Note this will allow anyone to upload a file to your app instance, so use with caution!
You must also ensure that the table with your target attachment field is selected as the form schema. Budibase needs to know the target field of the attachment upload.