Webhook
Trigger your Budibase automations when something happens in an external application
A webhook is an HTTP-based callback function that allows lightweight, event-driven communication between two APIs.
Contextually, webhooks allow Budibase to listen for an external application event, and trigger an automation. A payload will be included in the trigger that gives Budibase information about the event.
Setup
Create a new automation and select Webhook as the trigger.
This will present you with a box. To view the details for this step, click on it this should open a side panel with additional information.
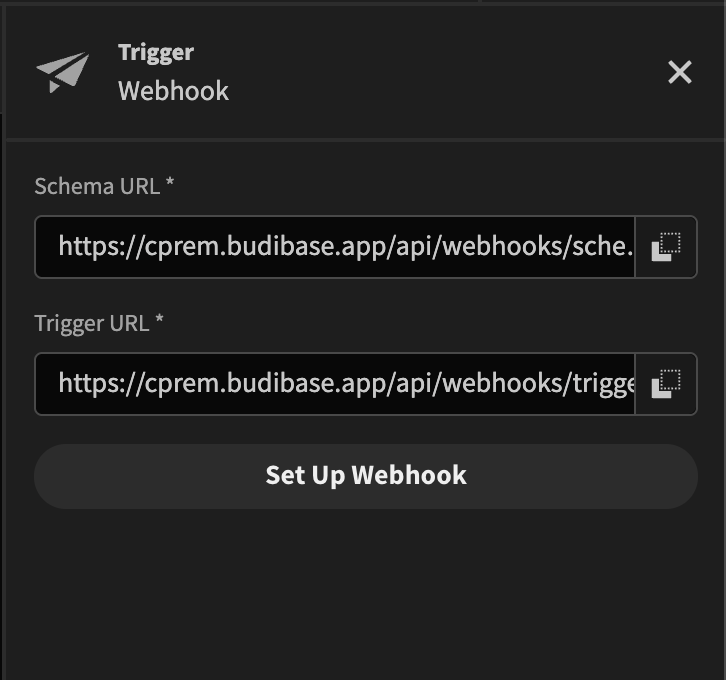
The Schema URL is required to tell Budibase what payload to expect from the external application.
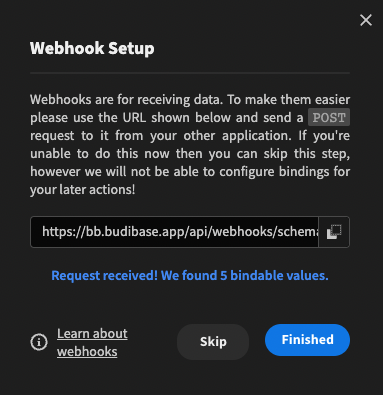
Click the Set Up Webhook button. This will bring up a dialog with the schema URL. Copy the schema URL.
Let's assume for this example we want to save a row to a Budibase table any time a new issue is created in our GitHub repo.
Conveniently we can grab an example payload from the GitHub webhook docs.
Next open Postman, or any other REST query tool, and POST the example payload to the schema URL.
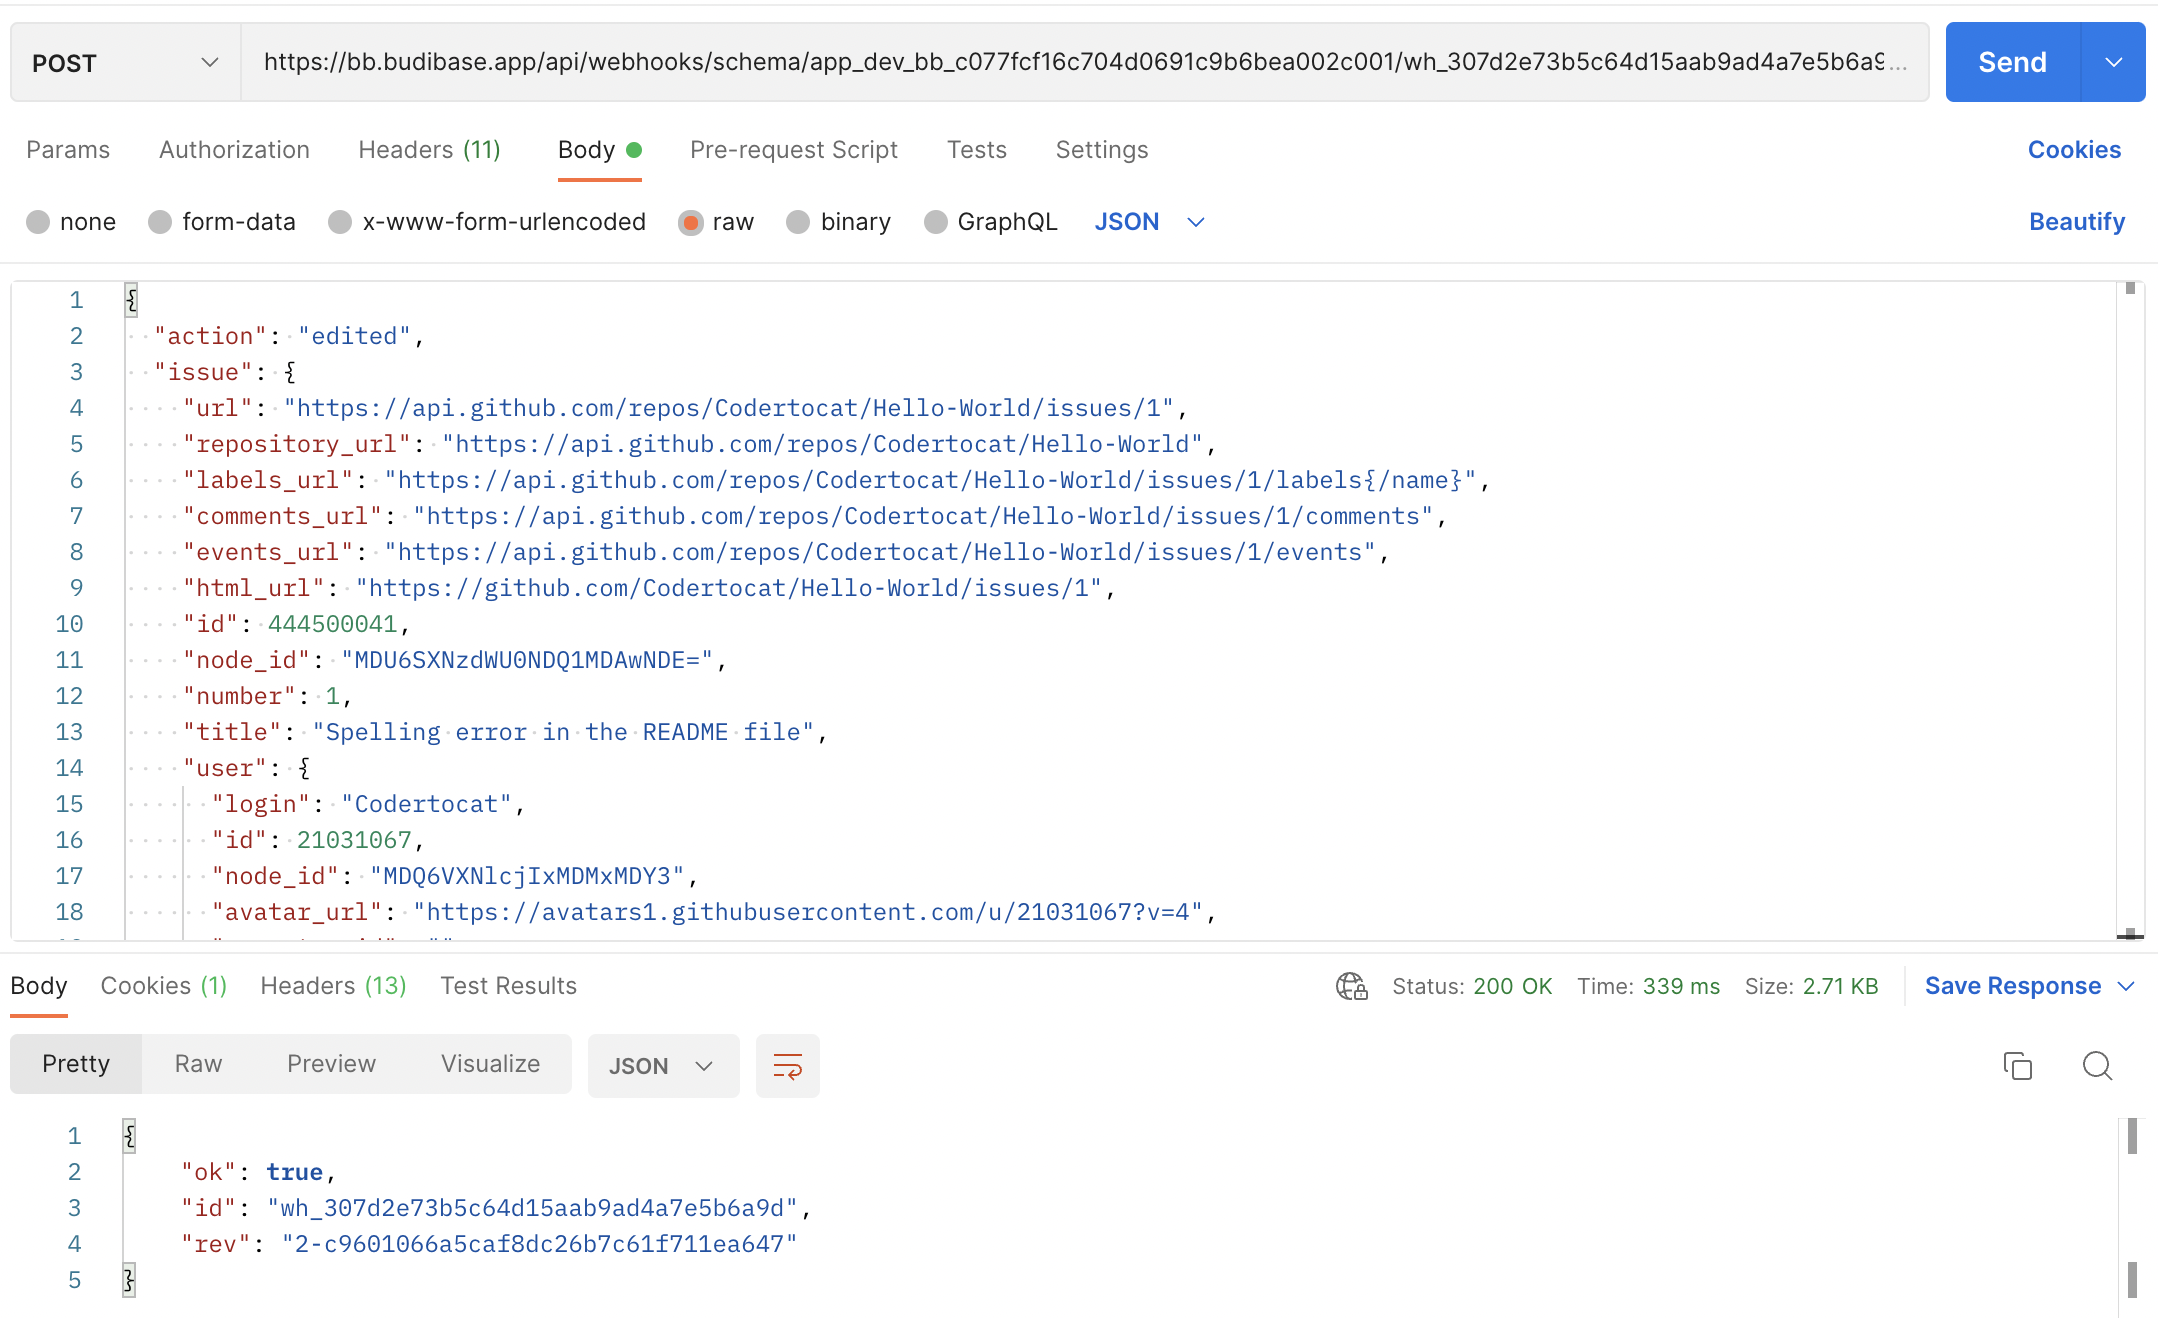
After you receive the 200 OK response, you should now see that Budibase has successfully picked up on the schema. Click Finished.
Finally click the Publish button in the top right of the screen to make the automation live.
Link the trigger application
Copy the Trigger URL from your Budibase automation and paste it into the Payload URL of your GitHub webhook.
Make sure Content type is application/json
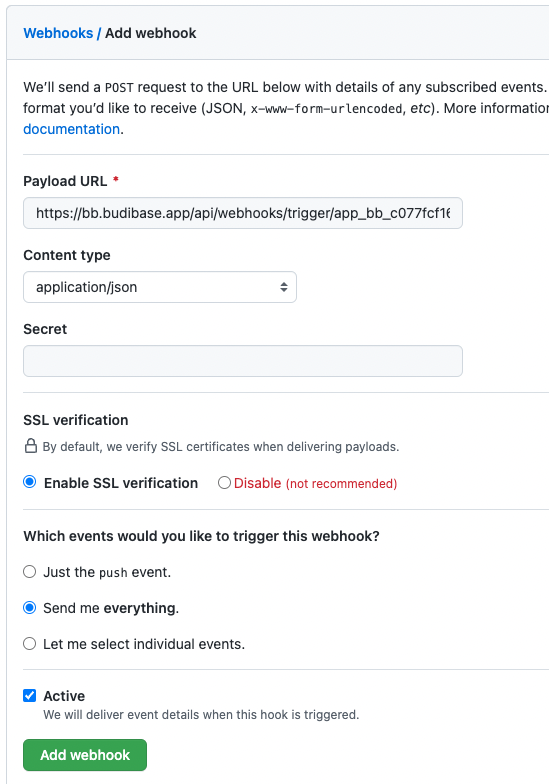
Click Add webhook.
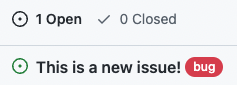
To test, add an new issue in your GitHub repo. Within a minute, you will be able to see that the automation was triggered via the Automtion history.
Trigger body
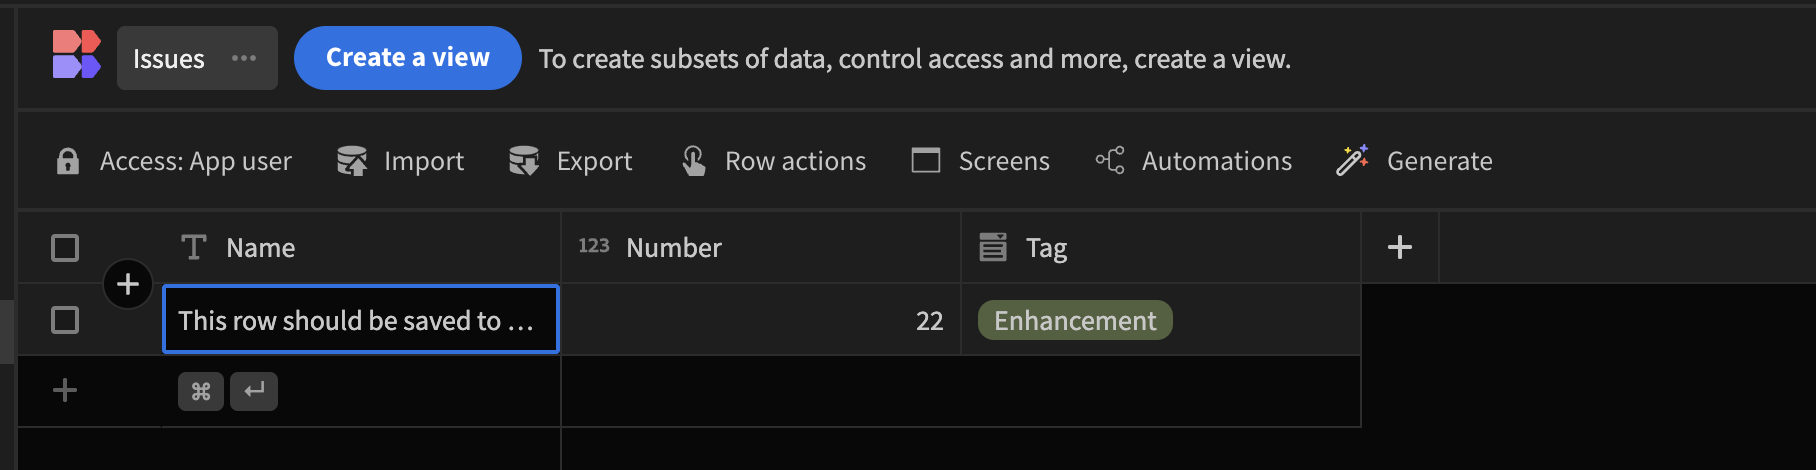
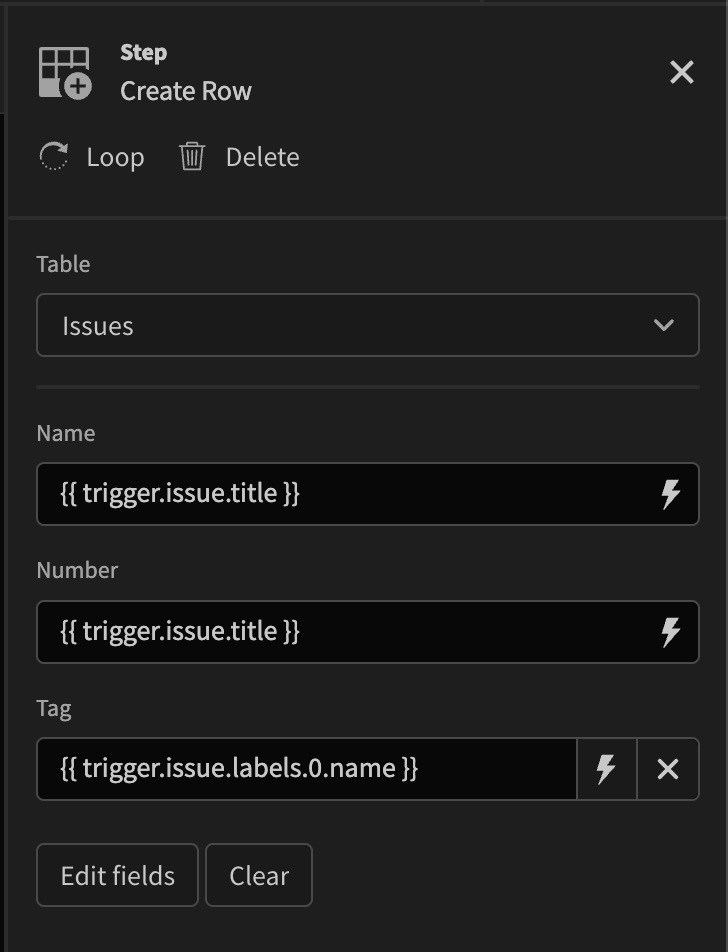
Now that we know that GitHub events are being picked up by our Budibase application, lets do something with the event data. For example, we may want to create a new row in our own 'Issues' table.
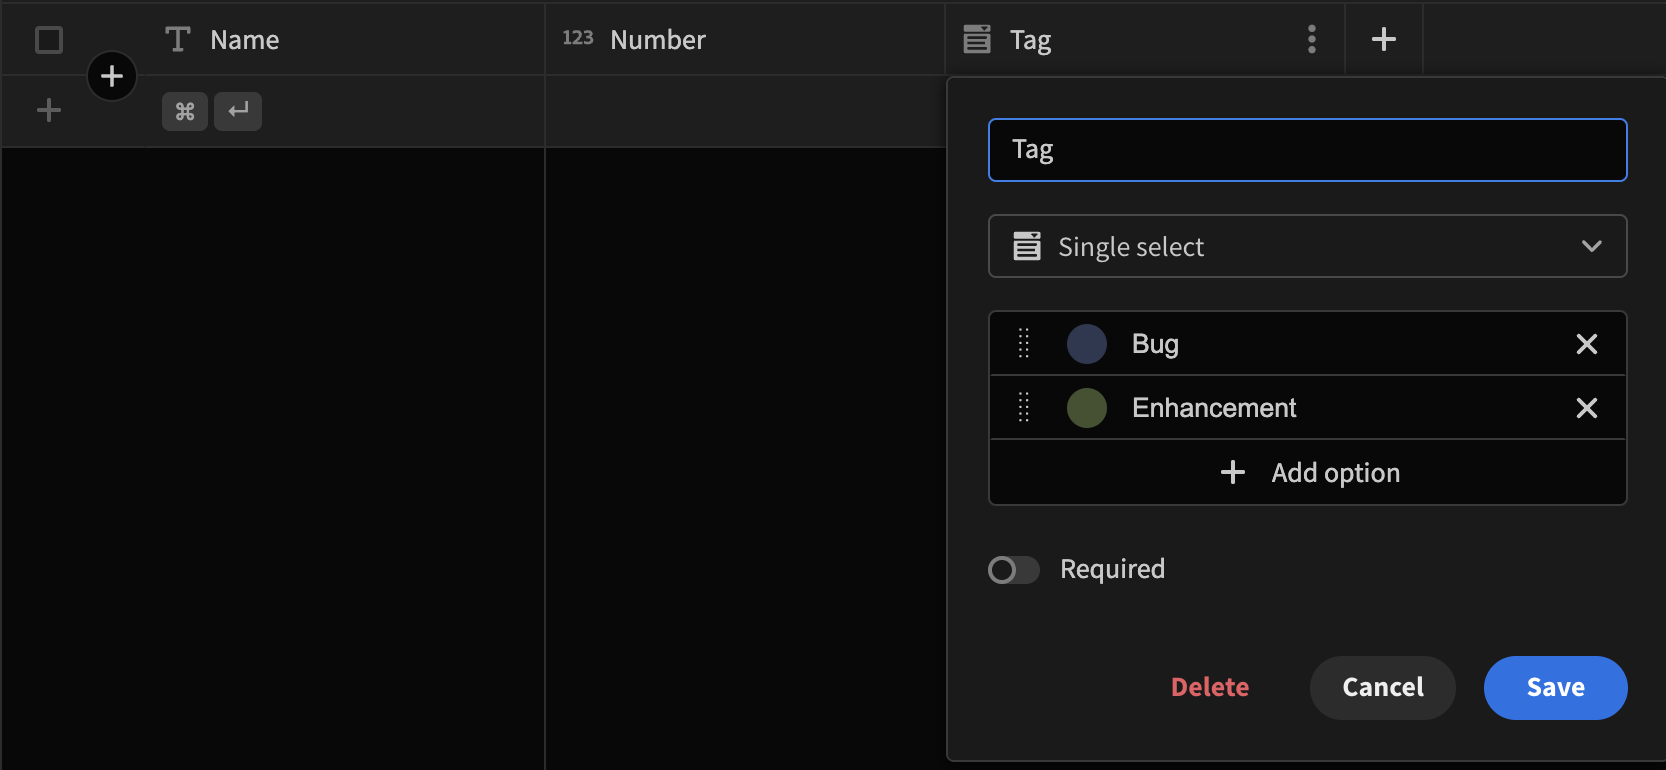
Create a new 'Issues' table with a text Name column, a number Number column, and an options type Tag column.

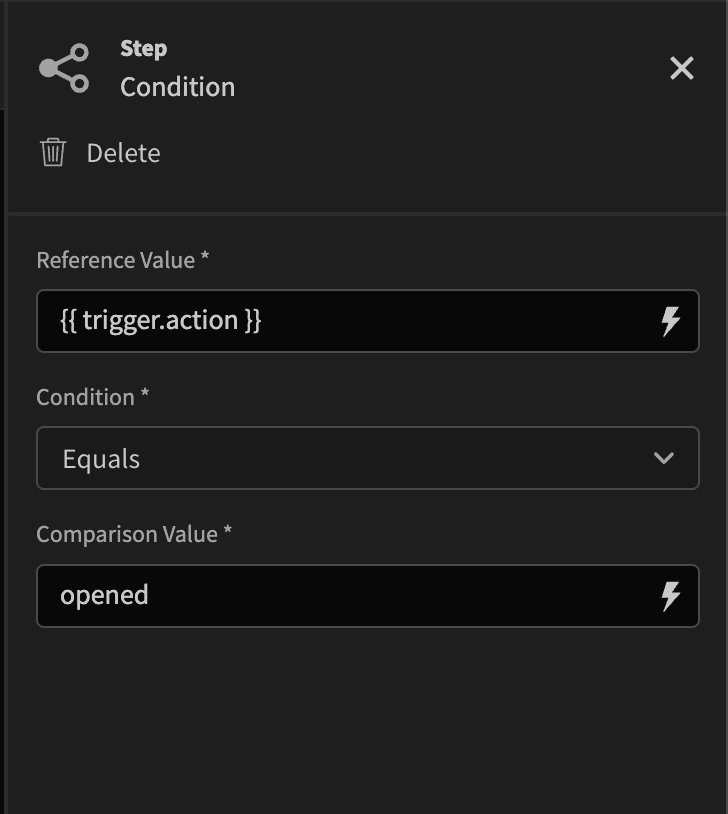
Next within the Automation tab, add an additional Condition step. This is because we only want to create a row if the GitHub action type is opened.
Add the {{ trigger.action }} binding to the Reference Value field.

Select condition Equals comparison value 'opened'.
Add another automation step for Create Row. Select Use bindings as well as the 'Issues' table. Fill in the bindings.
You can click Finish and test automation to verify your automation. Don't forget to press Publish when you're done.
Now when a new issue is created in your GitHub repo, you should see a new row in your Budibase table.