Passing bindings in URL parameters
Using URL parameters to bring information into a screen
Try it out!
In this scenario, I will be using the sample data provided in the internal Budibase DB to make a list of staff, each element in the list can be clicked to navigate to a page that displays more detailed information about that particular staff member. Follow along by building your own version, or download the app-export at the end of the page to take a closer look.
Firstly, I'll add a Data Provider, and nest a Repeater component, and then add Container component inside the Repeater.
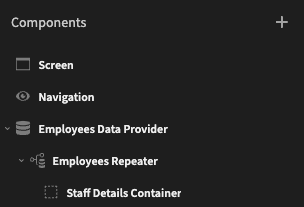
In the Data Provider settings, I'll select the Employees table as the Data source. Now, any components I add inside the Repeater will have access to the bindings that reflect the Employees table.
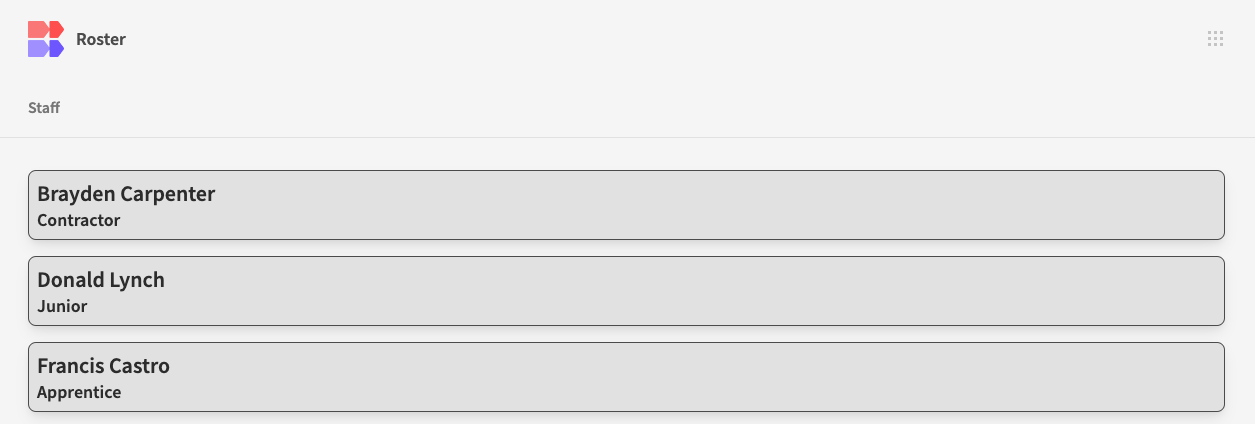
I can set this by going to Bindings >> New Repeater and see the column names offered as bindings. I've used a Headline component to show First Name and Last name, and another Headline component to show Employee Level. With a little bit of styling we can start to see this screen coming together.
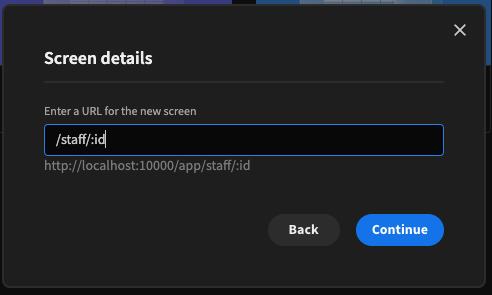
Next, I'll create a new screen that will become the detailed view of each employee. I'll set the URL of the screen to be /staff/:id. Pay close attention to the colon : - this is how we will denote a variable in a URL.
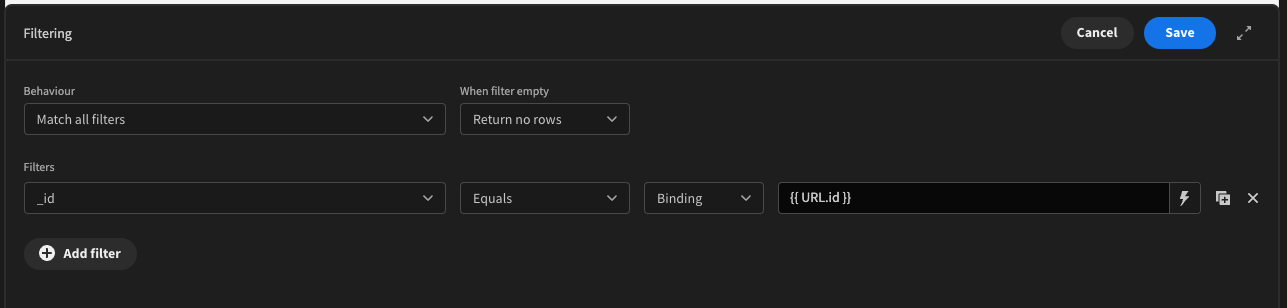
On my new screen, I'll add a Data Provider to get information from the Employees table, and set a filter for the _id from the Employees table to match the binding passed in the URL.
If a user accidentally managed to navigate to the /staff/:id screen without a valid _id being set, the default setting of "When filter empty: return all rows" would get every row in the table, and display the bindings of the first row it found. It's much better to catch that by returning no rows. I'll also disable pagination on the Data Provider.
Now inside my Data Provider I can add components that have access to my Data Provider in the bindings. It's important here to note that the Data Provider fetches rows from a table, which are returned as an array of objects, where each object is one row from the table. We will only ever get one row using these filters, but it will still be returned as an array. All that is to say that when digging into the bindings we should index the result of the Data Provider rows. Using {{ New Data Provider.Rows.0 }} will return the entire row as an object, and we can prop-drill one level further by adding a column name.

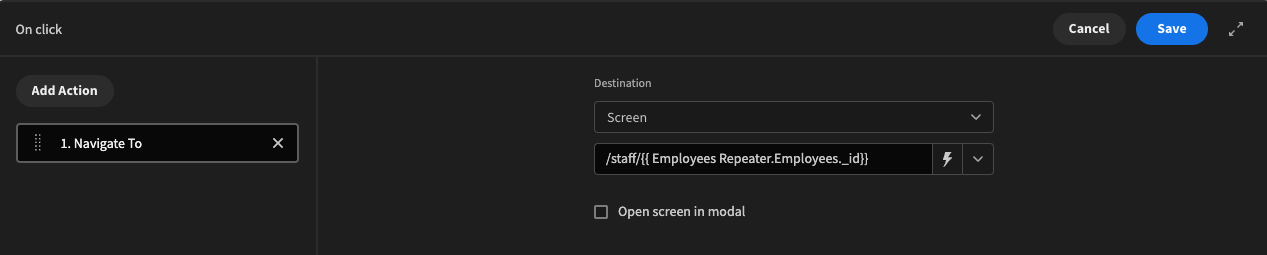
I've applied some details to the page, referencing the individual row, and it's now starting to take shape. The last part of this task is the most important. Head back to the /staff screen, and on the Container component in the Repeater component, add an On Click action. Set a Navigate To action, and open the bindings drawer. In this example the destination will be /staff/{{ New Repeater.Employees._id }} , which puts the clicked container's _id into the URL, and passes it through to the /staff/:id screen.
Click the lightning bolt to open the Bindings Drawer...
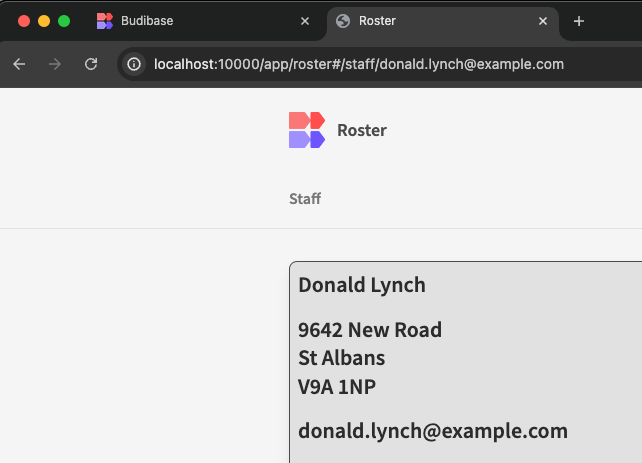
Now, navigating from /staff will actually substitute :id for a row id, which the Data Provider uses to filter the table and present the information.
A few things to consider...
Think carefully about what you pass into the URL. In this example we passed _id. We could have used something more human-readable like email, but that would mean people could manipulate the URL to include an email that they shouldn't have access to, or a sequential number like EMPLOYEE ID. Imagine the URL had been /staff/:email, and On Click we navigate to /staff/{{ New Data Provider.Employees.Email }} but we only listed staff who were not managers, it would be easy to circumnavigate that by just editing the URL in the browser to an email address of a manager.
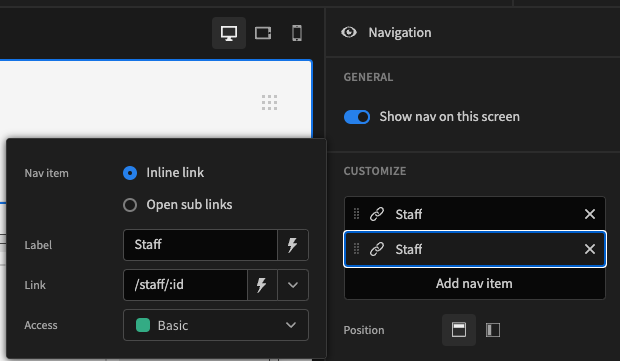
You might want to remove the path to /staff/:id from the navigation bar, otherwise people will be able to visit the page without setting an _id
When working in the builder on the /staff/:id screen, no _id will have been set or passed, so it can be tricky to know that your variables have been set properly. In this instance, in your Data Provider, temporarily set "When filter empty" to "return all table rows", so that you get some values to work with. Make sure to return it to "return no rows" when you're finished.
Try it for yourself, and click below to download the app used to create this guide.