Discord
This tutorial will help you add a Discord automation to your Budibase app.
The Discord notification is a webhook that allows you to send notifications from your Budibase app to a Discord channel.
Settings
The Discord Action has four settings:
Setting | Description |
|---|---|
Incoming Webhook URL | Add your Discord Webhook URL. To find your Discord Webhook URL:
Further information and directions on how to find your Discord webhook URL: https://support.discord.com/hc/en-us/articles/228383668-Intro-to-Webhooks |
Bot Name | Copy the name of your bot from Discord |
Bot Avatar | To give your bot an avatar, add your image link to the Bot Avatar field. For example: https://res.cloudinary.com/daog6scxm/image/upload/v1632818347/logo/budibase-icon-500_svrfwf.png On Discord, the avatar size is 128 x 128 pixels. However, you'll actually want to upload a larger square image. Discord will automatically scale your image down to the appropriate dimensions, but you'll retain high-quality resolution in the process. |
Message | The content you would like to send to your Discord channel when your automation is triggered. |
Tutorial - When a new record is added, send a Discord notification
The following tutorial will demonstrate how to send a Discord notification when a new record is created. We will assume you have your data setup and design screens built. If you don't, check out the Quickstart: Budibase DB.
Our Discord notification automation will consist of two automation blocks:
- Trigger - Row created
- Action - Discord notification
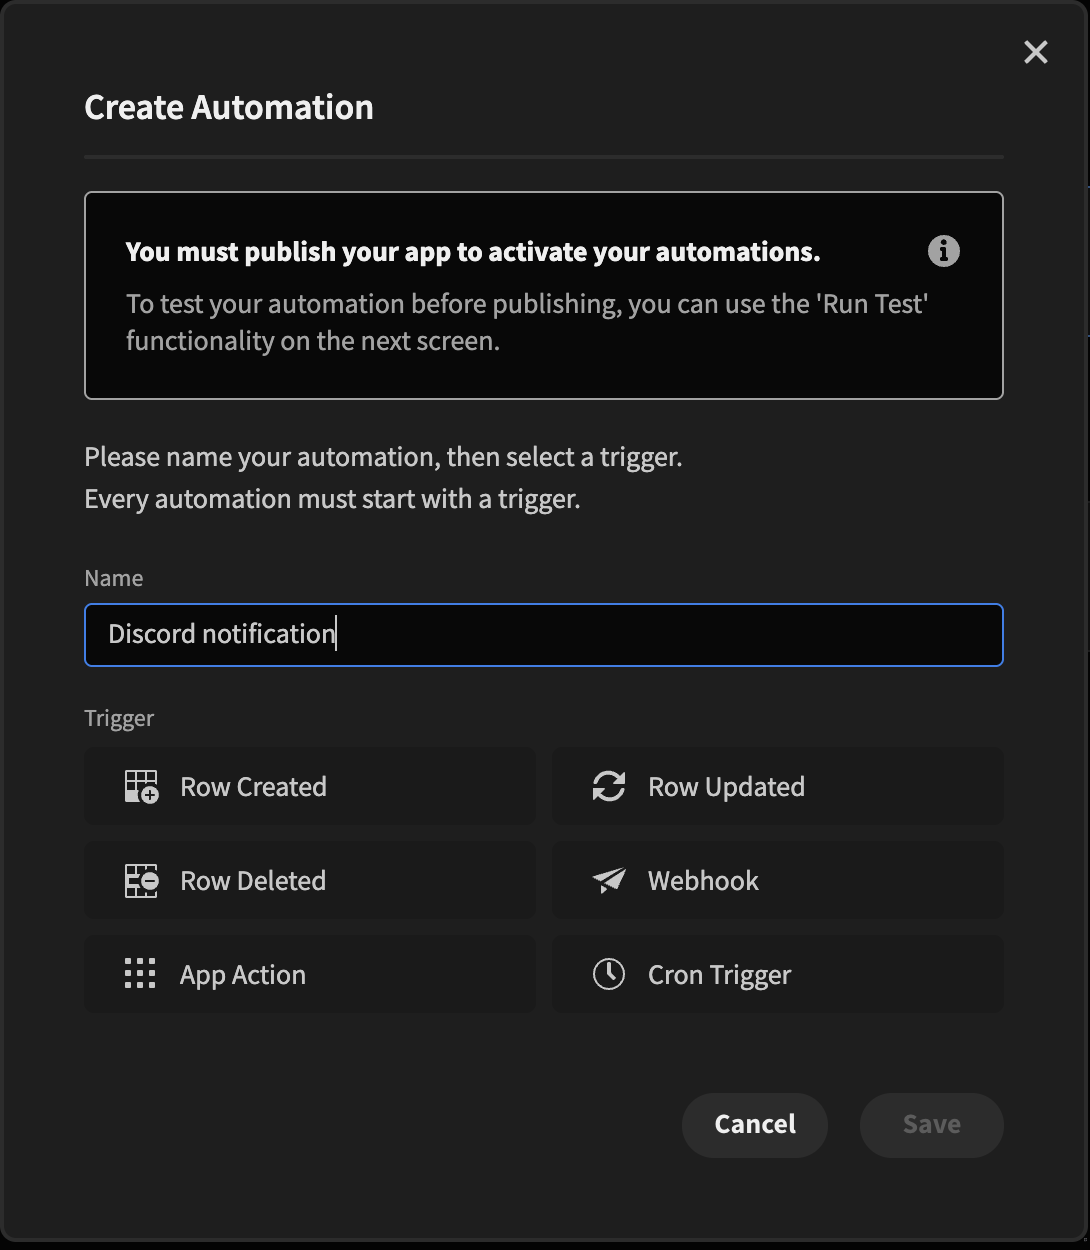
Click the add automation icon.

Add Trigger - Row created
Give your new automation a name - we will name ours Discord notification. Select the 'Row Created' trigger. Then click 'Save'.
Now click the Row created automation a side panel on the right will appear, and select your table - in our case Sales.

trigger setup
Add Action - Discord
Now click the small plus icon button under the Trigger automation step, select Discord, then click Save.

Add discord action to budibase
Now it's time to set up our Discord action. If you don't have a Discord channel, please set one up.
Get your incoming Webhook
Open your Server Settings and head into the Integrations tab. Click on View Webhooks, select your Webhook, and click 'Copy Webhook Url'.

Create a new Discord Webhook
If you don't have a Webhook to connect to, click the "Create Webhook" button to create a new webhook.
You'll have a few options here. You can:
- Edit the avatar: By clicking the avatar next to the Name in the top left
- Choose what channel the Webhook posts to: By selecting the desired text channel in the dropdown menu
- Name your Webhook: Good for distinguishing multiple webhooks for multiple different services.
Discord will generate you a webhook. Click the 'Copy Webhook URL' button.

Paste your Discord Webhook URL into the Discord Webhook Url input within your Action automation step.
In the Bot name field, add the name of your Bot. We've not got an avatar, so we'll leave the Bot avatar field blank.
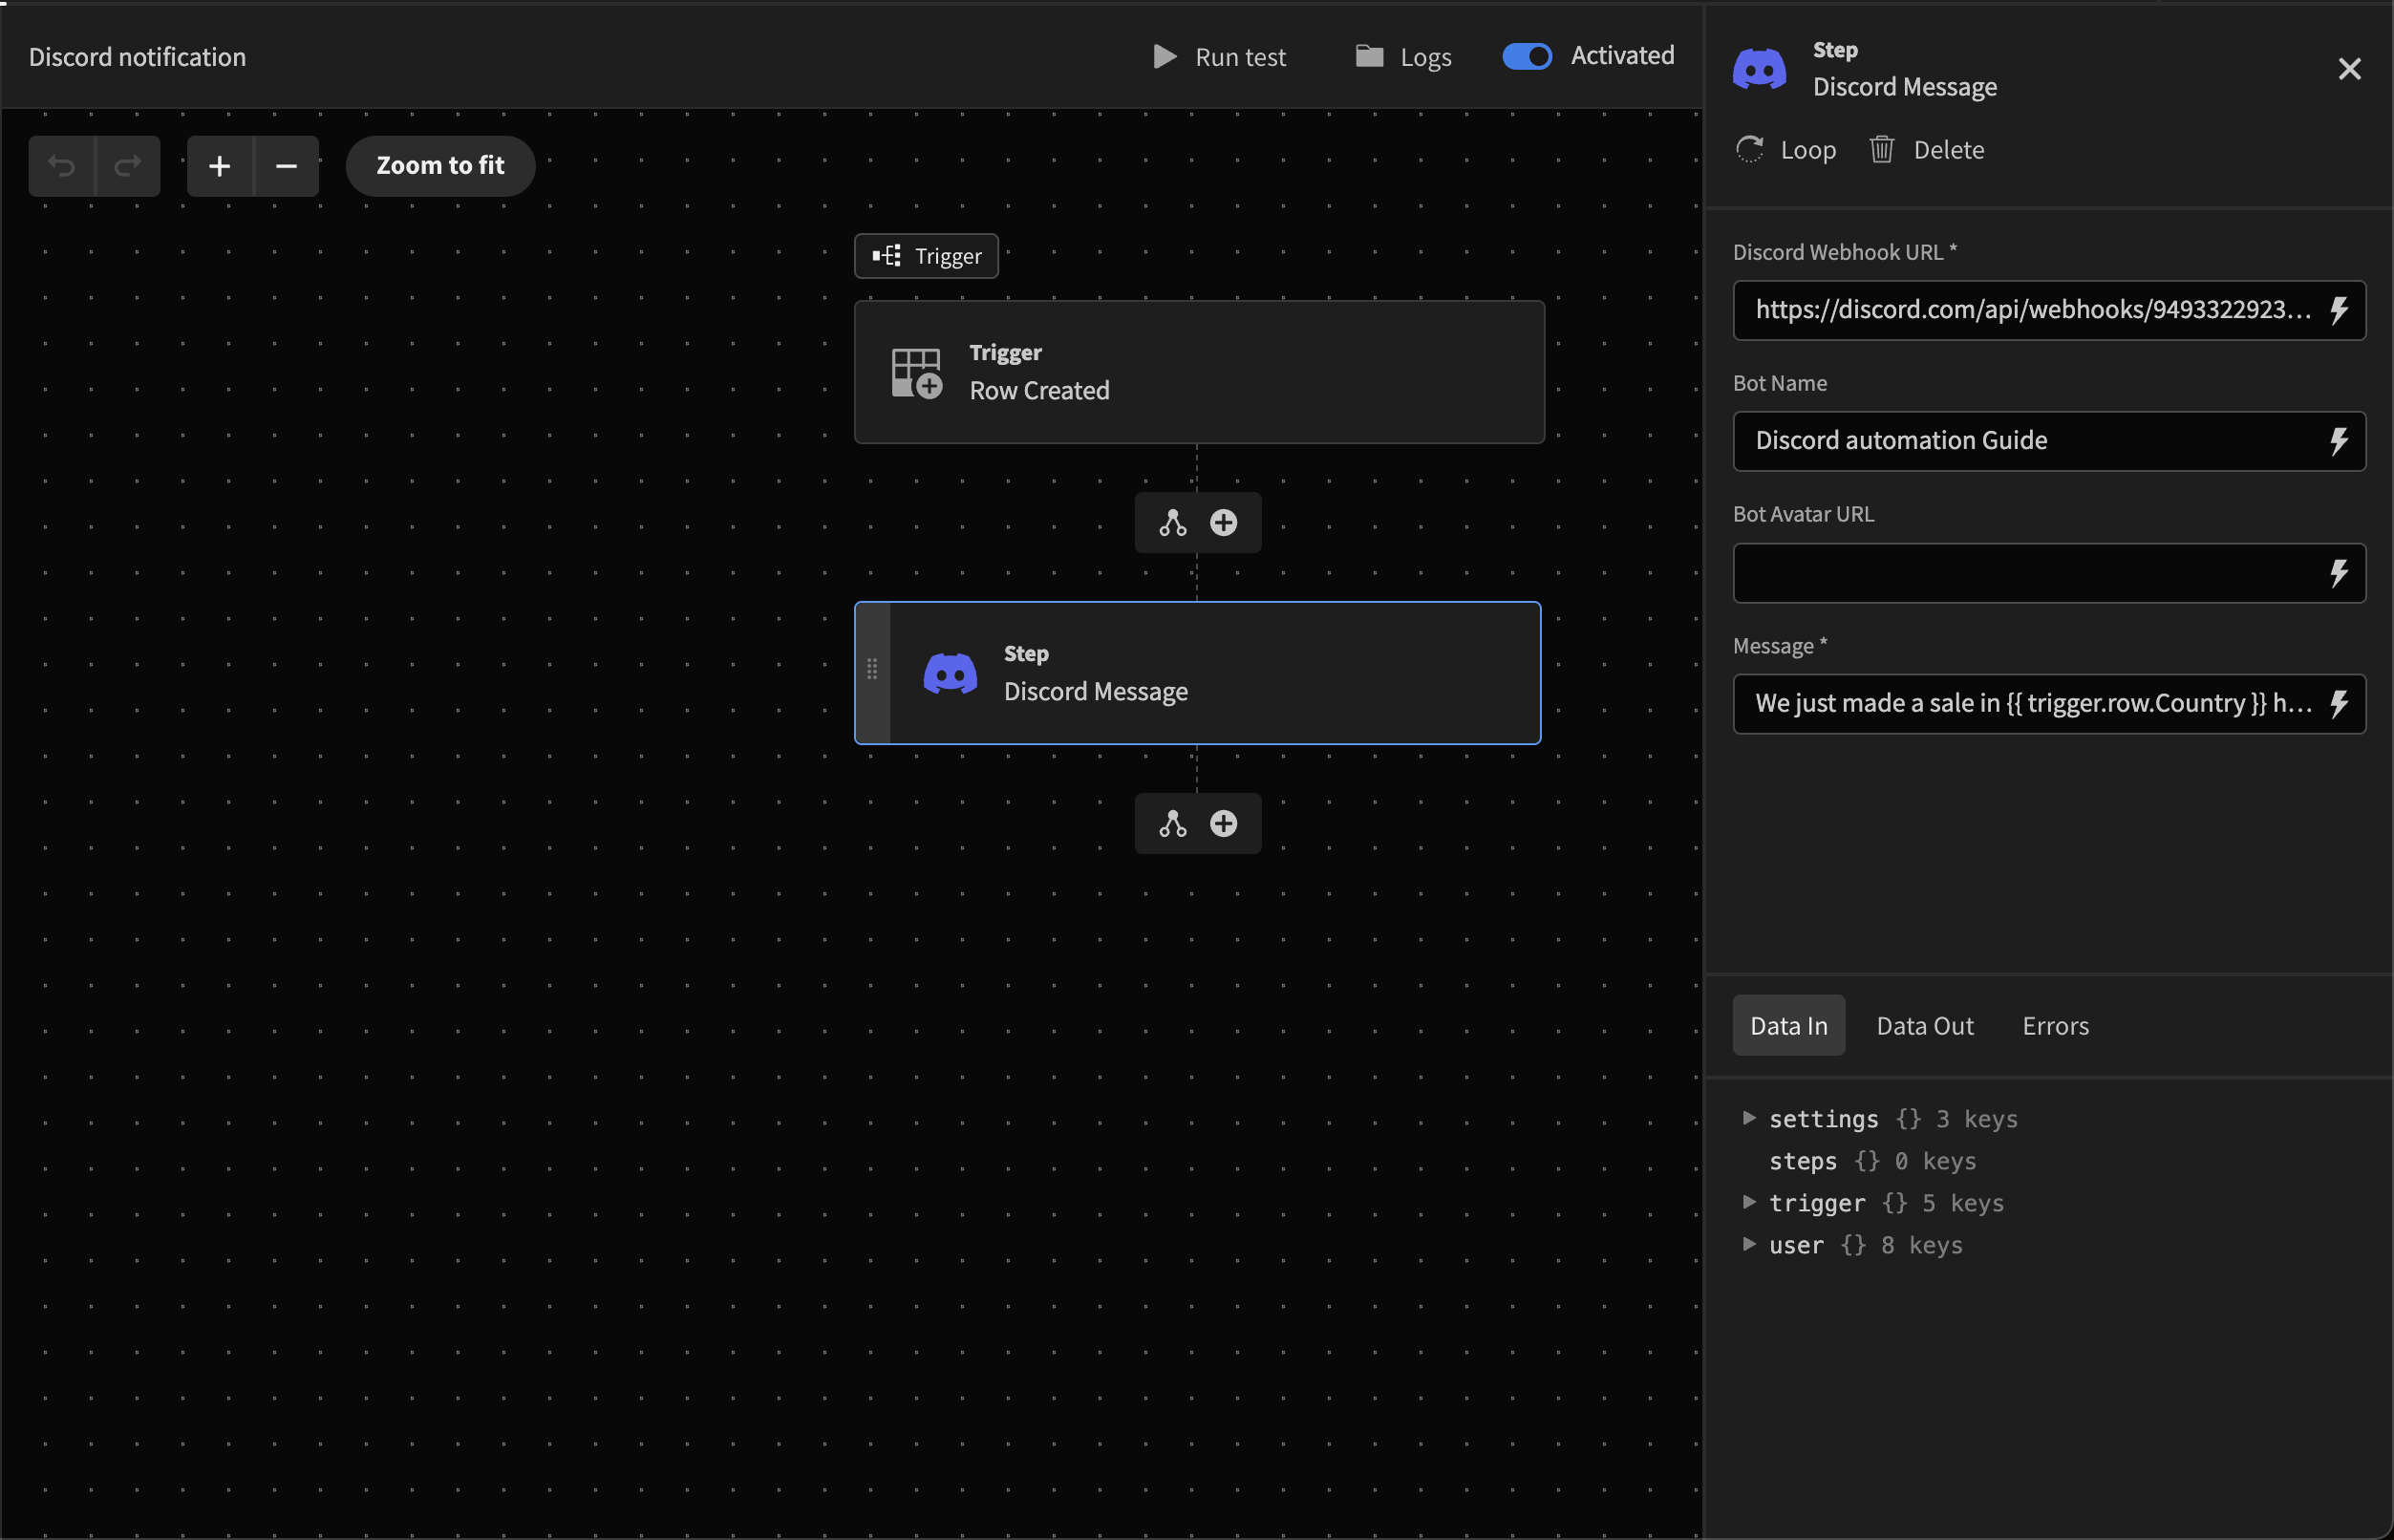
In the Message input, add the message you would like Budibase to post to your Budibase channel when a new row is created. You can bind values from the newly created record to your message. For our use case, I want to send the following notification to our channel:
We just made a new sale in {{ trigger.row.Country }}

Check out the sale using the link below:
https://joe.budibase.app/app/tutorials#/sales/{{ trigger.id }}
From the above, you can see I have used automation bindings to pull data into our message. Check out the following documentation to learn more about how to use Data in automations.

Trigger output bindings - Trigger.Row
To pull data from your Trigger record, you can use Trigger Output helpers (see Gif above). Using the helper trigger.row I now have access to that data from our newly created record. I add the field/column title to the binding to pull a specific field back: trigger.row.Country.
To allow users to access the specific record page, we must add a link to our message.
To create a link, we must first Publish our application. Save the automation, click the Publish app button. Now, go back to the app portal page (Click the Budibase icon). Locate your app, click the more icon, and click View published app. Copy your base URL - We will improve this experience soon.
Trigger output bindings - Trigger.ID
Now, click into your app and go back to the automation we were just creating and into the message section (where we were above). Paste your URL, and append it with the Trigger ID output. Click Save.
Test automation
Click Finish and test automation. Then select your table from the dropdown.

In the Column/Field you referenced in your trigger.row binding above (we used Country), add a value - we'll add Budiland to the 'Country field'. Click 'Test'. You should now see a message on your Discord channel.
If you are happy, click 'Publish app'. Add a new record within your app, and like magic, watch as a new Discord notification appears within your channel.
