MongoDB
MongoDB is a modern NoSQL database, that can be connected to Budibase with a few clicks.
Before we get started, make sure you've got the following:
ConnectionStringfor connecting to the database remotely including username and password- The Database name
In addition, ensure you have added the Budibase IP to the Mongo Atlas IP Access List.
Check Whitelisting for the Budibase IP if you're using the cloud-hosted solution.
Now that you have everything you need to hook up your MongoDB installation to Budibase, let's get started.
ConnectionStringDon't know how to get the ConnectionString? Check this useful guide by MongoDB.
Don't have a MongoDB instance?The easiest way to get started is by signing up for the (from) free offering from Mongo directly: MongoDB Atlas. We've also used MongoDB Atlas for writing this guide, and testing our integrations!
Connect your MongoDB
To connect your MongoDB Data Source, head over to the data section in the Budibase builder UI. Then, click the Add source button in the left-hand settings panel to add a new data source.
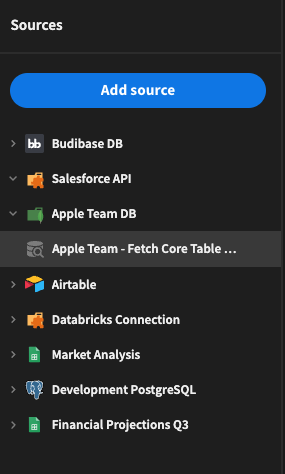
Press the + icon to add a data source
You will be presented a dialog, in which you choose MongoDB. Then you will be presented with the connection configuration.

A standard connectionstring when connecting to MongoDB Atlas
Paste your ConnectionString, and enter the database name which you want to connect with, and click Save and continue to query.
Pressing this button will save the ConnectionString into your Budibase installation.
Connect to MongoDB AtlasConnecting to a hosted instance of MongoDB Atlas should be straightforward, but do check the useful guide on connecting to a database
Adding a query
Now that you have added the connection to your database, you can start querying your data to use it straight away in your application.
The first step is to click the 'Add query' button, which is located on the data source page you just added. If you're not on this page, click on the MongoDB connection in the list of data sources on the left.

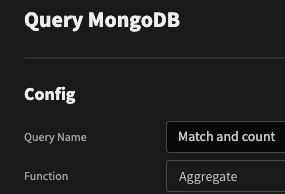
Query configuration

Configuring your query is essential in making sure it runs correctly. In the table below you'll find what each field means.
| Field | Description |
|---|---|
| Query Name | The name you want to give the query, this is a visual name. The name is used when selecting a Data Sources inside the design section |
| Function | The action you want to perform. This is a MongoDB specified function. Choosing a function influences the options you get offered to you for actionTypes |
| Access Level | Which level do you want to be able to access this query? |
| Collection | The MongoDB collection you want to query |
| Action Types | The action-type defined by MongoDB, based on the Function you've selected. |
What do the action types mean?The action types are defined by MongoDB. You can read more about those in the MongoDB Documentation
Create query
You have the option to insert one or many documents into a collection.
When inserting a single document, provide a payload within the query box.

In this case, an ObjectId is automatically generated for the new document.
If you want to specify an ObjectId, you can do that as follows:

Document IDIn MongoDB you can use most data types as a document ID, however the default and recommended type is ObjectId
When inserting many, you must provide an array of objects.

Read query
The most basic query you can do is a find with no query body.
This will return all data available within the specified collection.

A filter object can be added to the query box. For example, get all documents in the collection where age is greater than 40:

A full list of query operators can be found here: https://www.mongodb.com/docs/manual/reference/operator/query/
Update query
When performing an update you must provide two objects:
- uired] F** Filter - find the documents to change.
- uired] U** Update - instructions for the modifications to make.
- ional] O** Options - additional update parameters (more here)
For example, set the retired property to true for all documents that have an age over 65:

If updateOne was used instead, then only the first filter match would have been updated.
A full list of update operators can be found here: https://www.mongodb.com/docs/manual/reference/operator/update/
Delete query
To delete ALL records from a collection, run a query with no filter and the deleteMany action type set.
Careful!
Otherwise, you can add a filter to delete all matching records:

If deleteOne was used instead, then only the first filter match would have been deleted.
In addition, a number of non-mandatory options are available: https://www.mongodb.com/docs/v4.4/reference/method/db.collection.deleteOne/
Stringify the queriesIf you take a look at the MongoDB documentation, and you find queries there, they're most likely not stringified. As the
Fieldsbox only supports JSON objects, you should convert it to strings.
Bindings
Bindings in Queries allow you to insert data when using the query. You can use Handlebar Bindings inside the query. A simple, but common, example of a binding would be an ObjectID. This allows you to query a single ID based on a binding you've specified, even from the UI of your application.
Let's take a look at an example where we pass the ID from a binding into the query. Our binding looks like this.

Then, adjusting our query, we add the id using handlebars directly into the string

Now, wherever you use the created query as a data source in a Data Provider, you can configure the bindings directly from there, using the gearwheel behind the provider selection

This will then open up the configuration modal, where you can bind the value, for example using a Form input.

Transformer
The transformer is intended for you to have a layer between the data received from your MongoDB database, and how it ends up in your interface. By default you return the data directly received, but manipulating, or restructuring, data in the transformer can be very useful to be able to limit what is returned, or to make it more eye-friendly.
The transformer box accepts JavaScript, and is ran within a function. This means you have to return the data you want to get back from the query.
TransformerTo understand how Transformers work, read about them on the Transformers page
Saving the query
Now that you have configured the entire query correctly, it's time to save the query. You can't save the query without running it first so we know it actually is working.
So the first thing you want to do now, is click the Run Query button

As soon as you click the button, the query will be executed. When the query is successful, the result will be displayed below. There you can inspect the result, configure the schema and preview it in a table.

Configuring schema
Configuring the schema is important for Budibase, as it allows the interface to understand what kind of data it is dealing with. In order for you to configure the data, click the Schema Tab, which is next to the JSON tab in the results section. You should then be presented with a page like this:

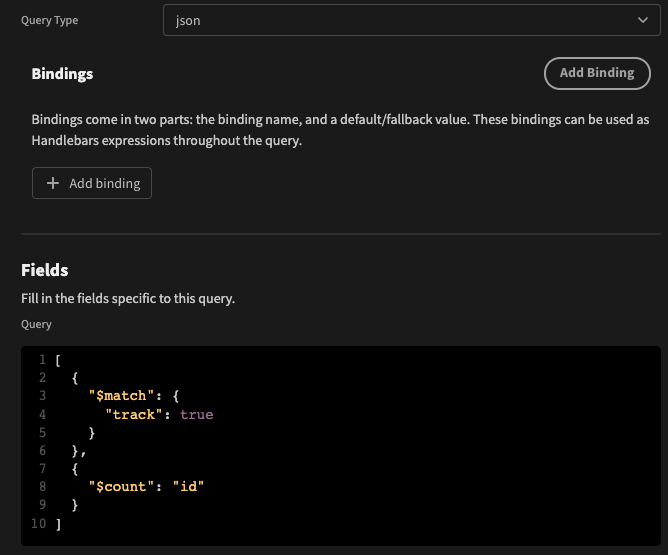
Aggregations
MongoDB aggregations allow multiple documents to be grouped and processed.
This is done through pipelines which contain a number of stages. More from the official docs here: MongoDB aggregations.
To use aggregations within Budibase, select the Aggregate function.
There are two modes in which you can interact with aggregations: JSON and Pipeline.
Json
This is the default mode. Simply enter an array of stages to be processed.
Pipeline
Whilst the JSON mode can do everything you need, you may find the GUI mode makes your pipeline easier to manage.
Add as many stages as you like with the + button, delete stages with the trashcan icon, and use the arrows to swap stages.
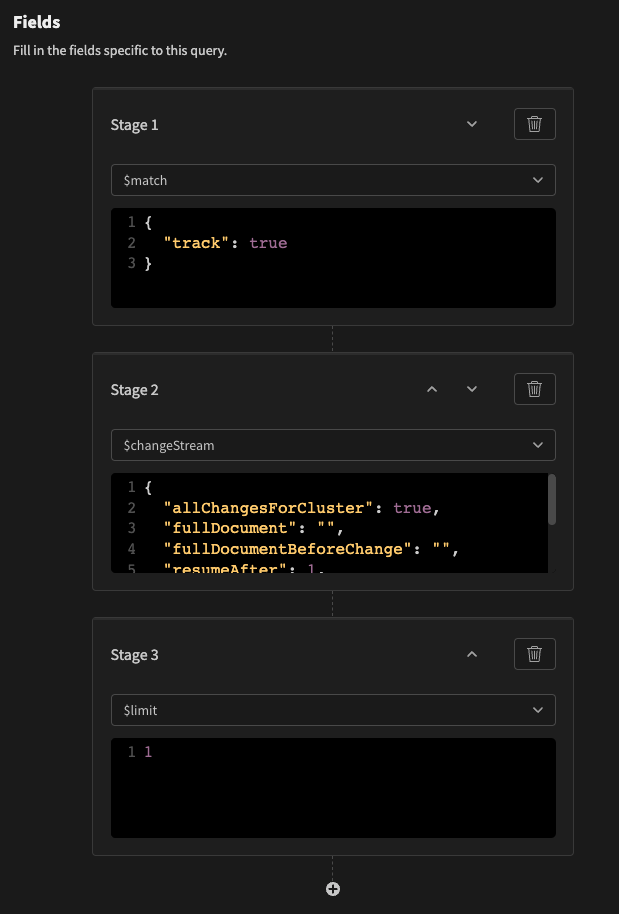
A benefit of using the Pipeline mode is that it provides the available aggregation stages in a dropdown, and selecting a stage will fill out a template of relevant properties, which can be easily altered.
Video tutorial
Displaying related nested data
In MongoDB it is common to use nested documents instead of relationships. For example, this transactions collection returns an array of transaction meta data, with nested transaction data:
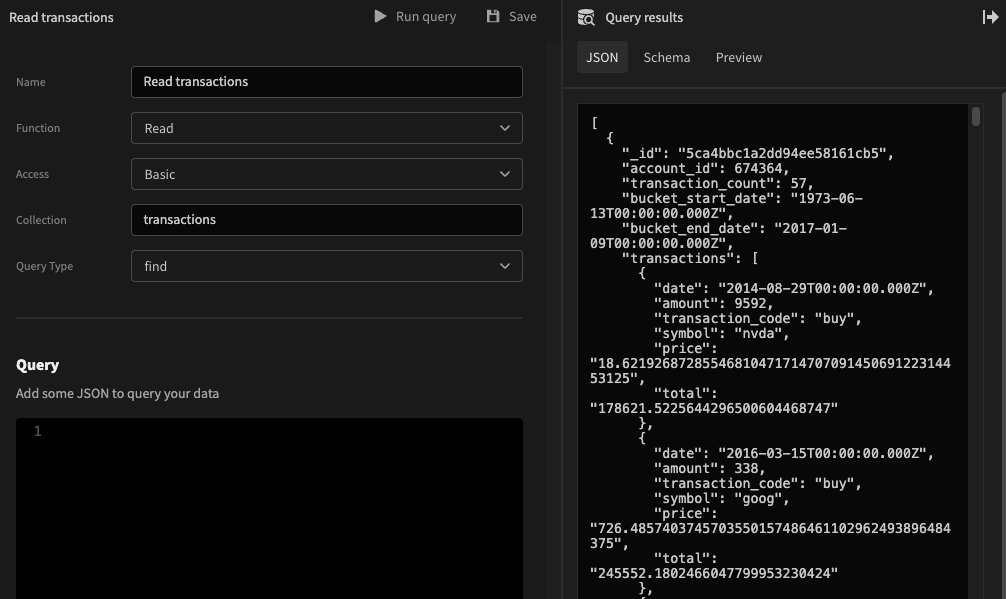
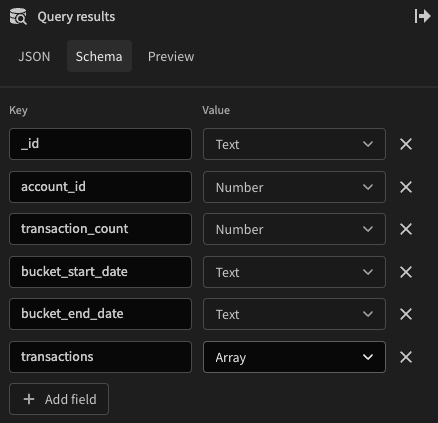
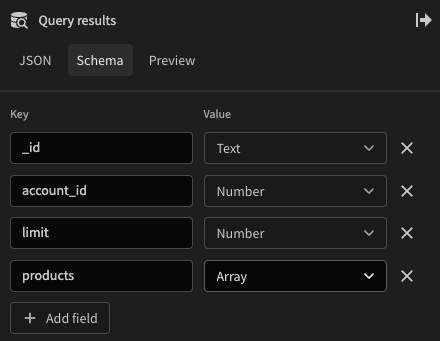
Looking at the Schema tab, we can see a property called transactions of type Array:
Array of transactions
When displaying nested array query data, Budibase will automatically generate the schema for the nested objects.
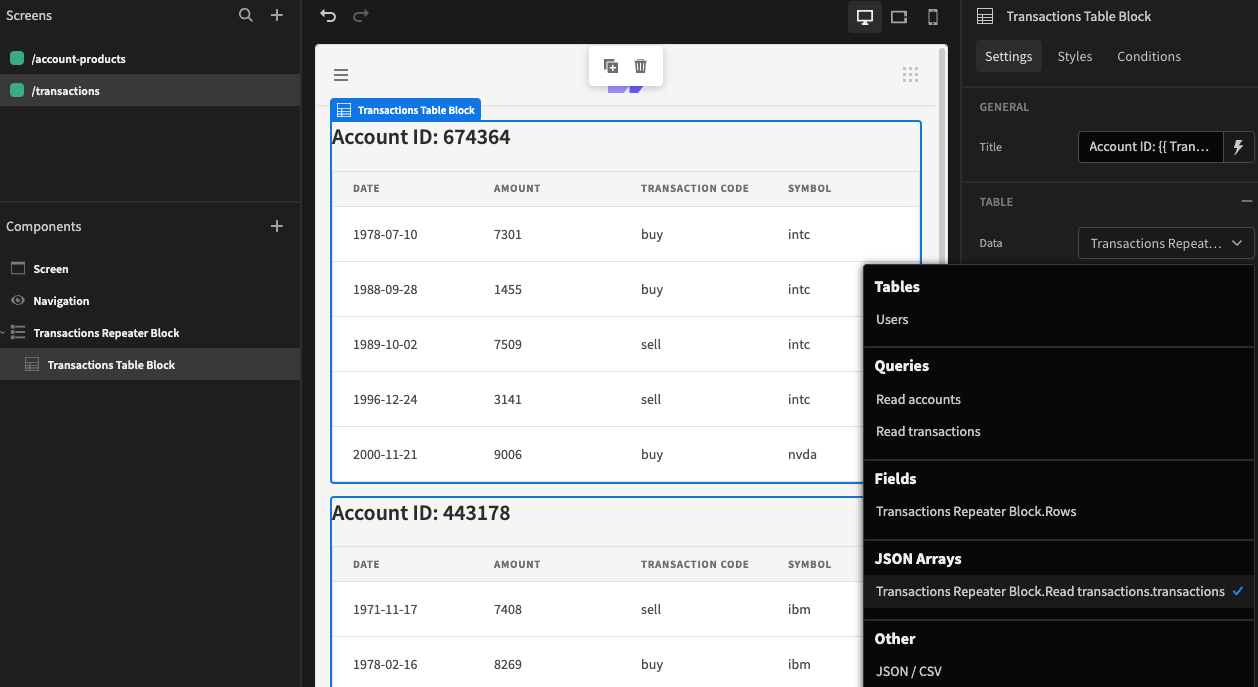
To make use of the nested data, first add a Repeater Block to your screen for the query.
Selecting the query
Next nest a Table block under the repeater block. The nested data source can be selected under the JSON Arrays section:
Alternatively you can nest another Repeater block, which would give you access to the nested data row bindings:
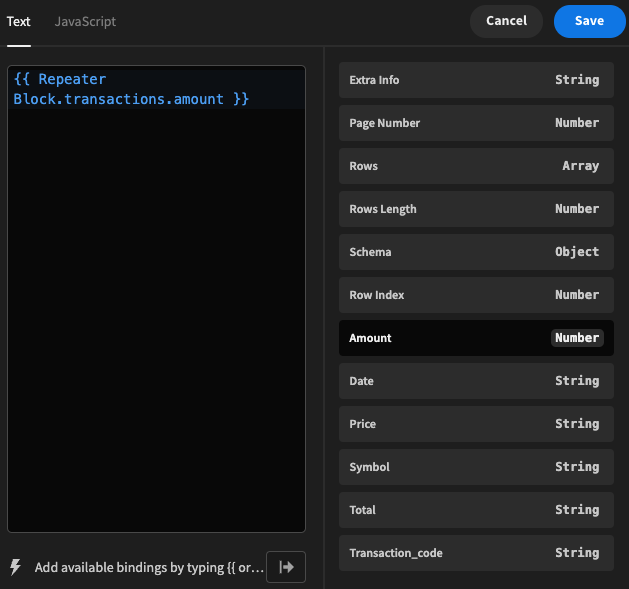
The data types are determined automatically based on the primitive types provided by the Mongo query:
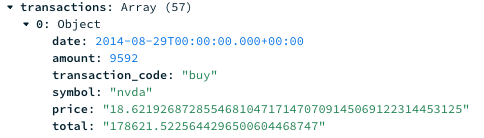
Example nested transaction data in Mongo Atlas
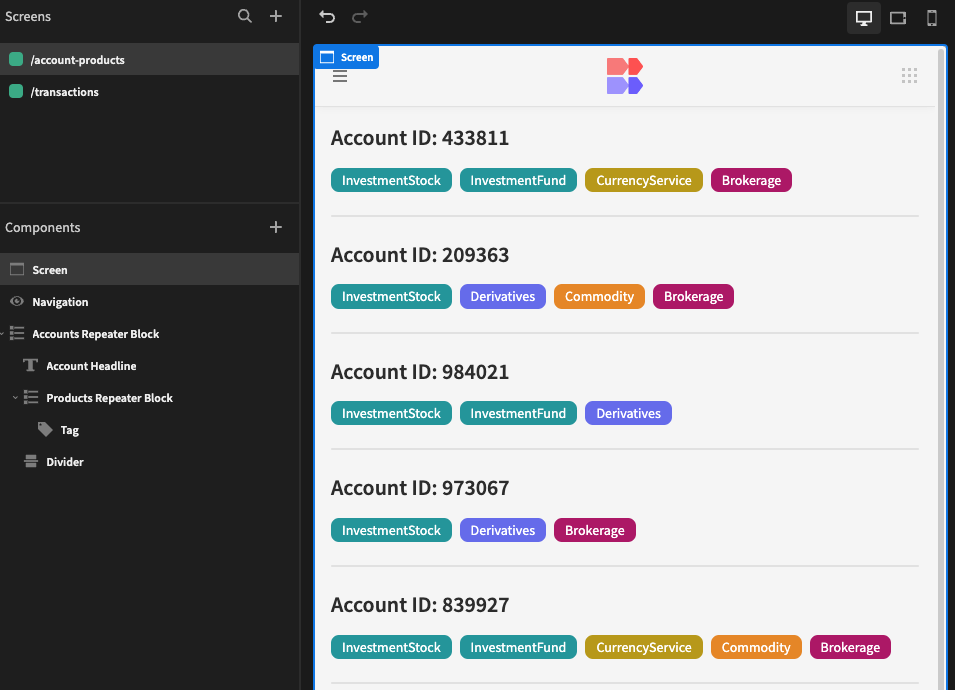
Tutorial: Displaying array items as tags
In the previous example we had a nested array of objects. Sometimes you will have a simple array of strings instead, which can be used nicely with the Tag component.
In this tutorial you will see how to display a list of product tags underneath each account. Here is the result of the Mongo query:

Account schema with products array
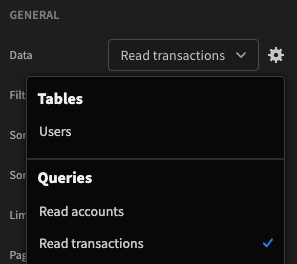
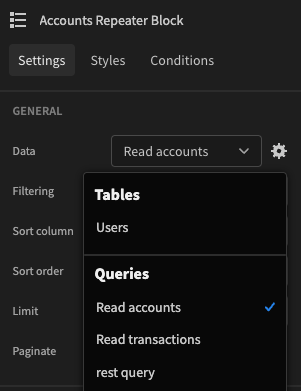
To begin create your screen and add a Repeater block. Select the Read accounts query.
Next add a Headline and display the account_id with the following Binding: Account ID: {{ Accounts Repeater Block.Read accounts.account_id }}
Now we'll nest a second Repeater block, this time for the associated account products. Under the Fields section of the Data setting, select the products field:
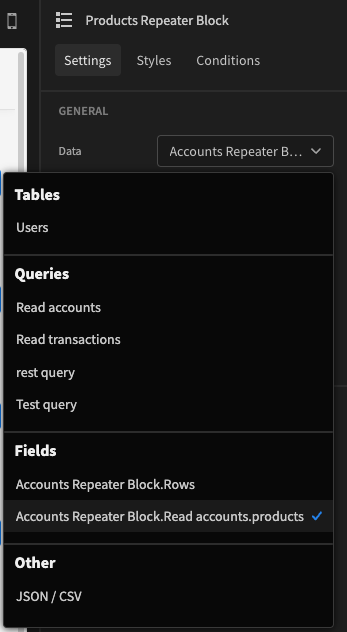
Selecting the related account products
Under the second repeater block, nest a Tag component. Your final Component Tree should look roughly like so:
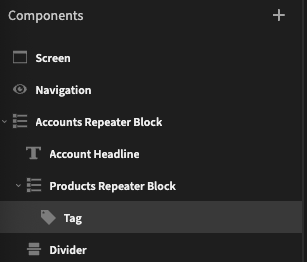
Final component tree
In the Settings Panel, set the Text property of the tag to the products value: {{ Products Repeater Block.products.value }}
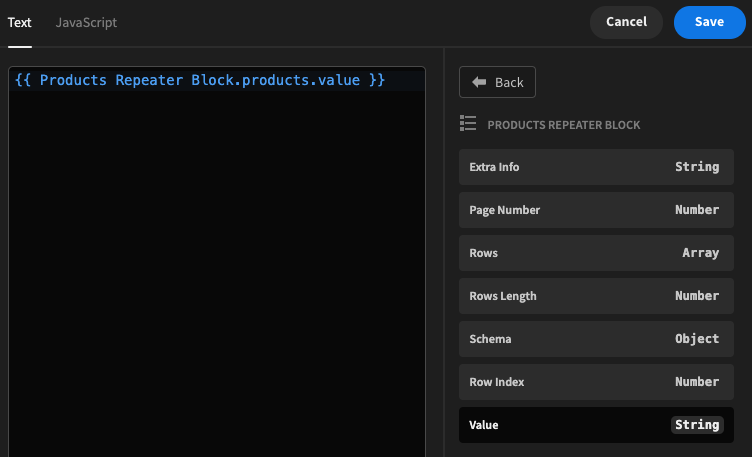
Select the 'Value' binding from the products repeater
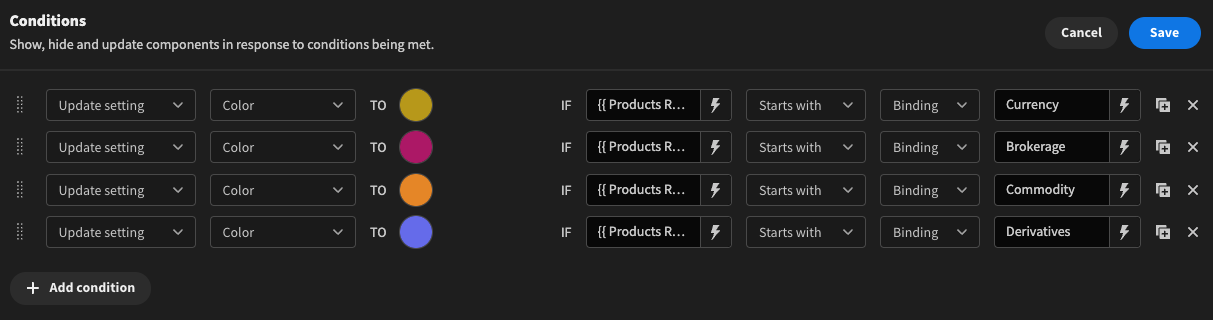
Use Conditional UI to give the tags a custom colour based on the product:
Result