User action
Trigger your Budibase automation when an action takes place in your Budibase app.
The User Action trigger is intended to be called from the UI of your Budibase application.
Fire and forgetAutomations run asynchronously on a background thread; therefore, once an automation is triggered from the client, there will be no returned response by default.
To receive a response, you can make use of Synchronous automations 🔒.
Creating the Automation
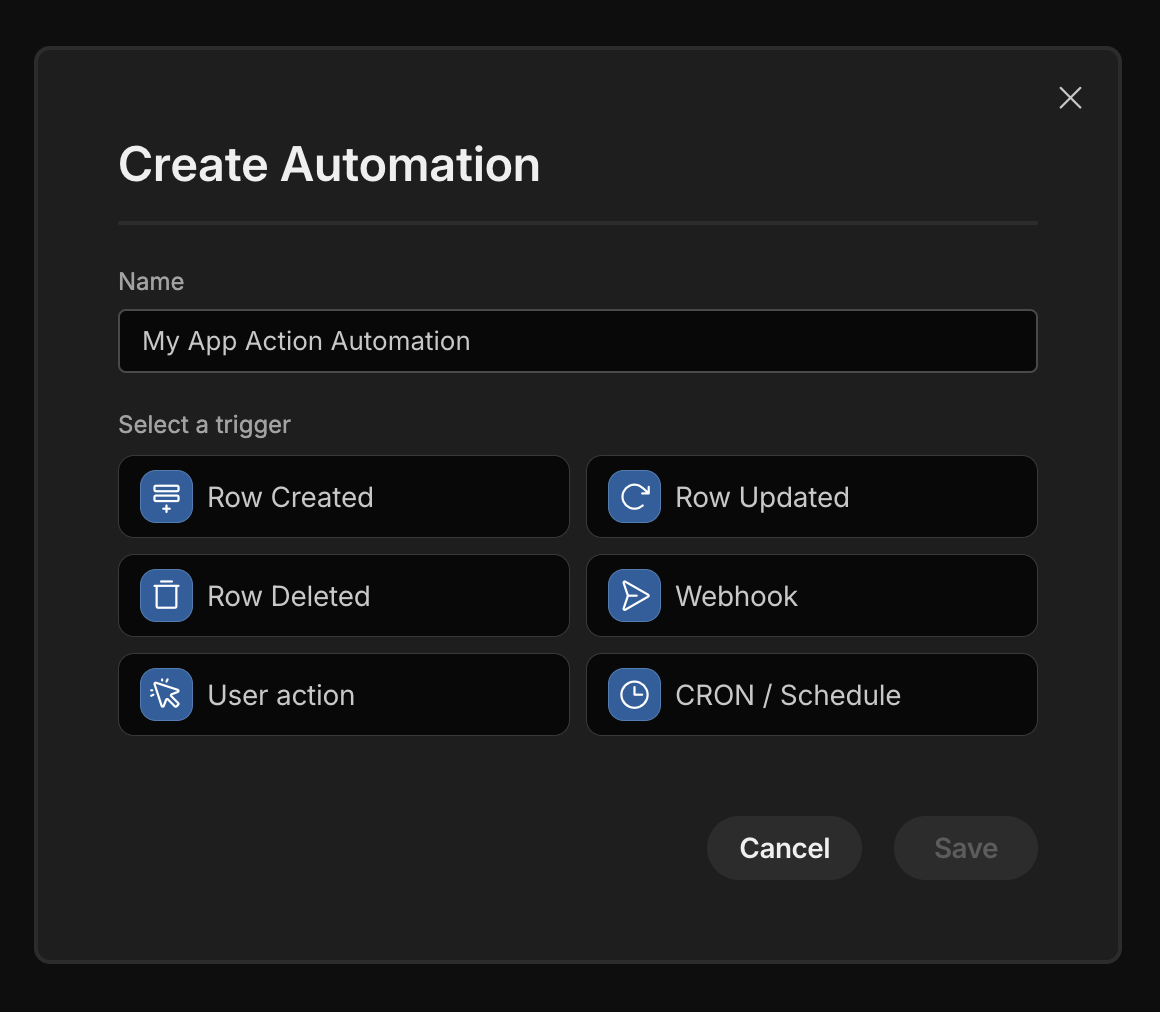
To use the User Action trigger, you will need to create an automation with it defined as the trigger. Head over to the Automation section, create a new automation, and select User Action as the trigger you want to start your automation with.

Once you've entered the name and picked User Action, you can click Save, and your automation will be created.
Defining Fields
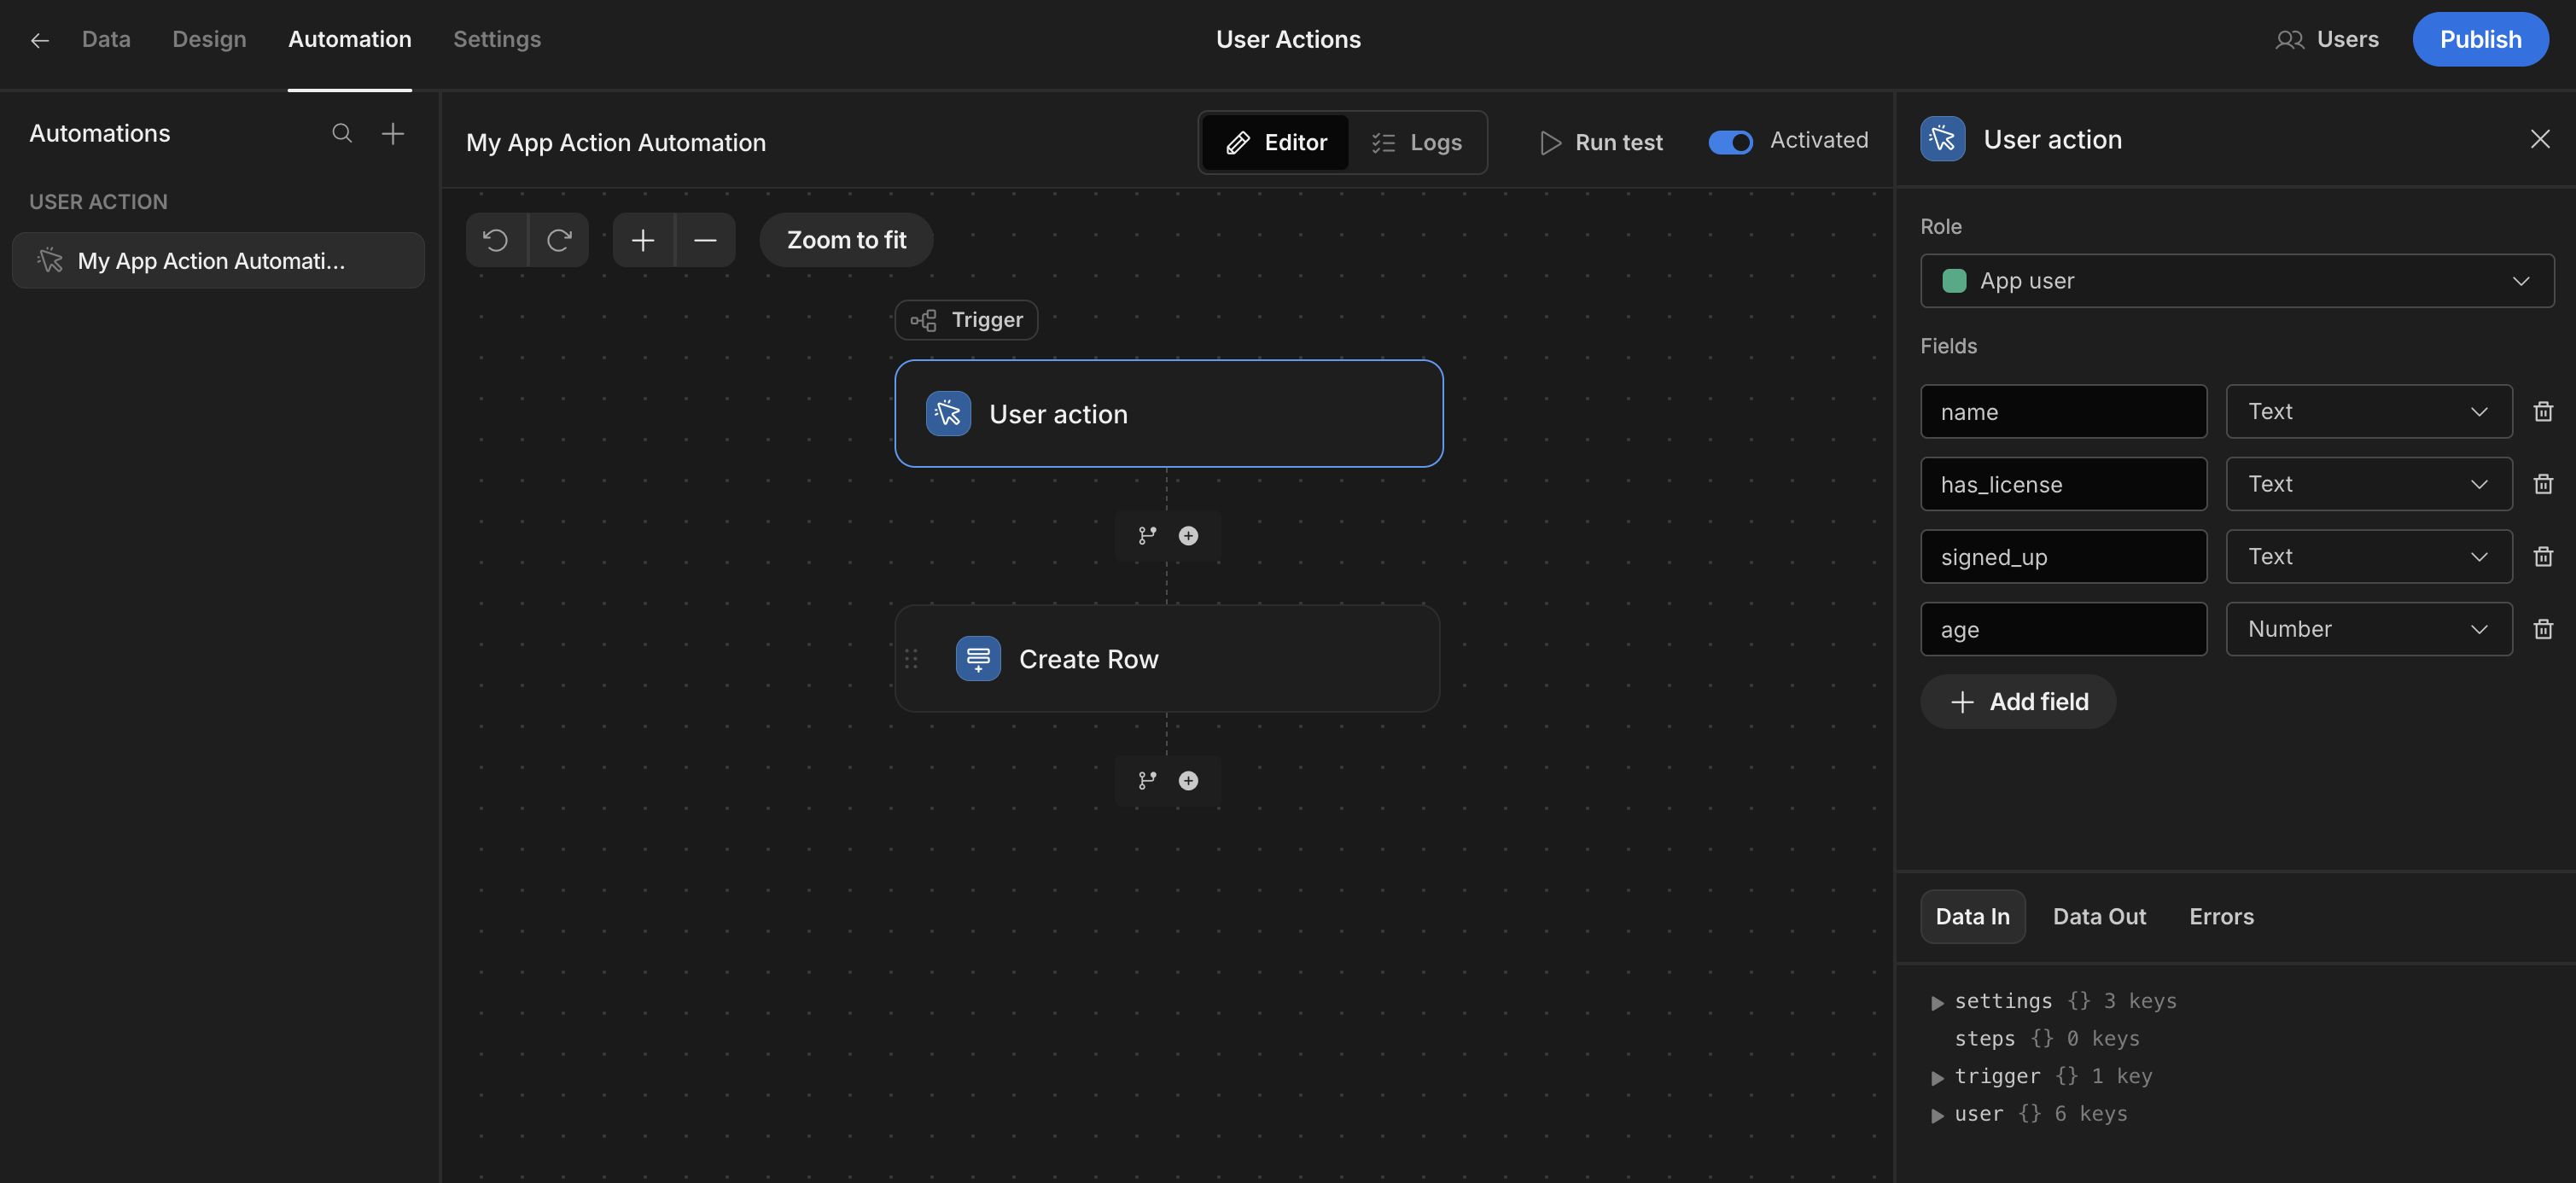
You can now define fields by clicking on the automation step. This should open a side panel on the right of your screen. These fields will be the ones you want to have applied to the automation. This will enter data into your automation, which you can use in future steps.
Right now, 5 different types of fields are supported: Text, Number, DateTime, Boolean, and Array. Add as many as you wish to have inside your automation.

You can use these fields in the next steps, check the Working with data in automations guide to learn how.
Populating Fields from the UI
Now that you have defined fields to be used in your automation, you can call this automation from the UI and populate the fields you just selected.
First, add a button to your application in the Design Section of Budibase. Then, head over to the No actions set setting of the button in the Settings Panel.

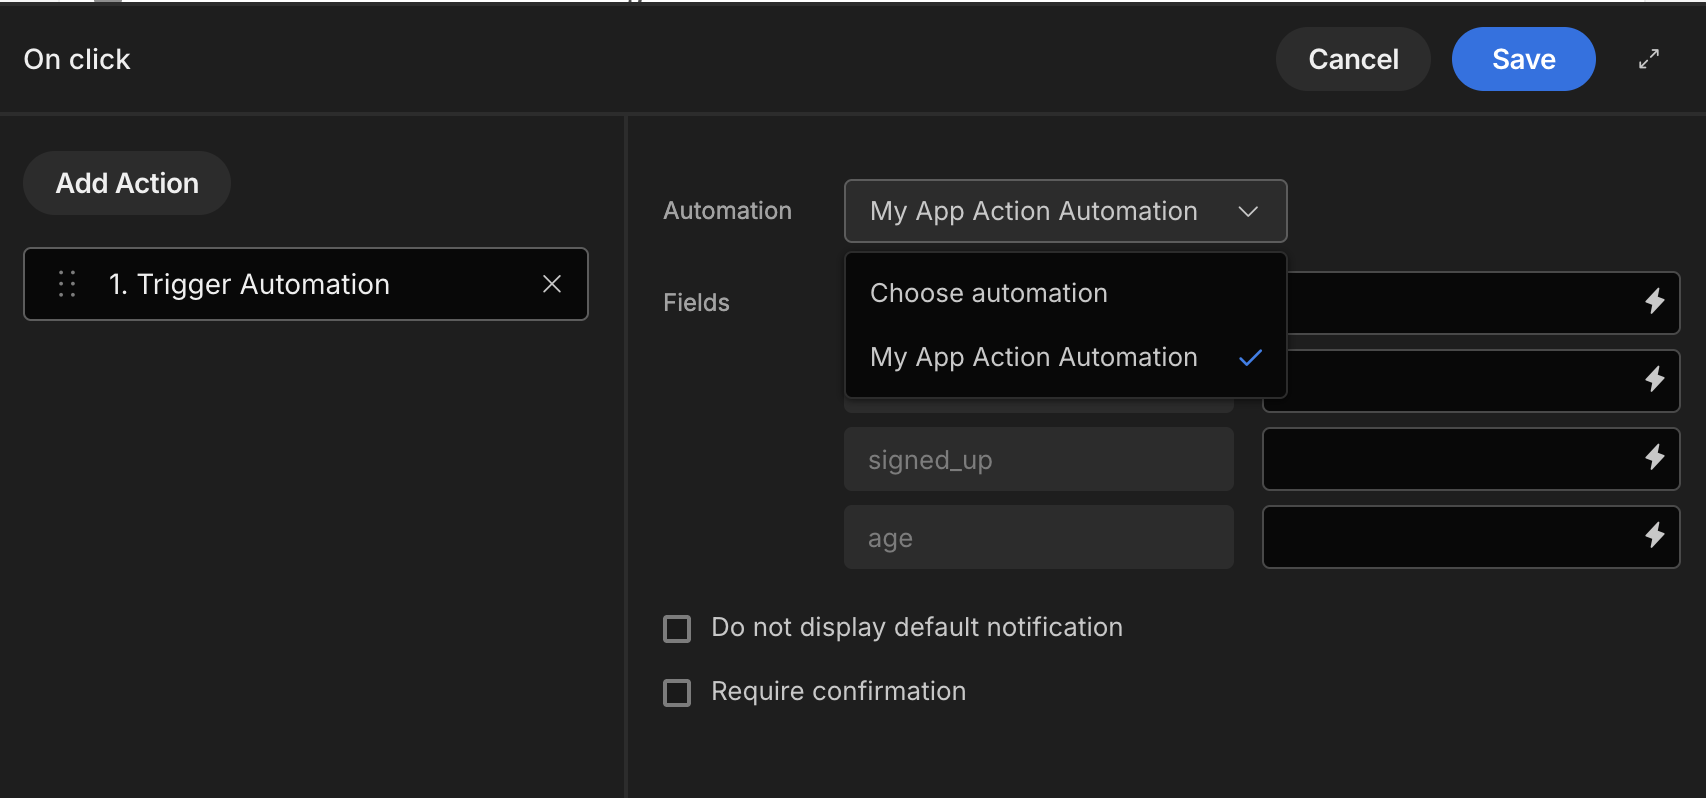
A modal will open where you can define Actions. Create a new action by choosing Trigger Automation from the options and clicking the Add Action button.
Then select your app action type automation from the dropdown list. Only app action automations will appear in this list.

After selecting your app action and any fields you created, they will be pulled through below the select automation. You can freely type the values you wish to pass. Or you can use any available bindings and pass those to the automation instead.
After selecting the field you want to populate, you can enter the value. This can be static text, or through Bindings. You could even use JavaScript Bindings for it.
Whatever you choose for bindings, you will receive the result back in your automation, which you can then use in the next steps.
Using Trigger Fields
This subject touches upon working with data in automations, but I wanted to highlight the specific data that comes in with this trigger.
One popular thing to do with a User Action trigger is creating one or multiple database rows. You could use this action to populate various tables, or even Data Sources at once.
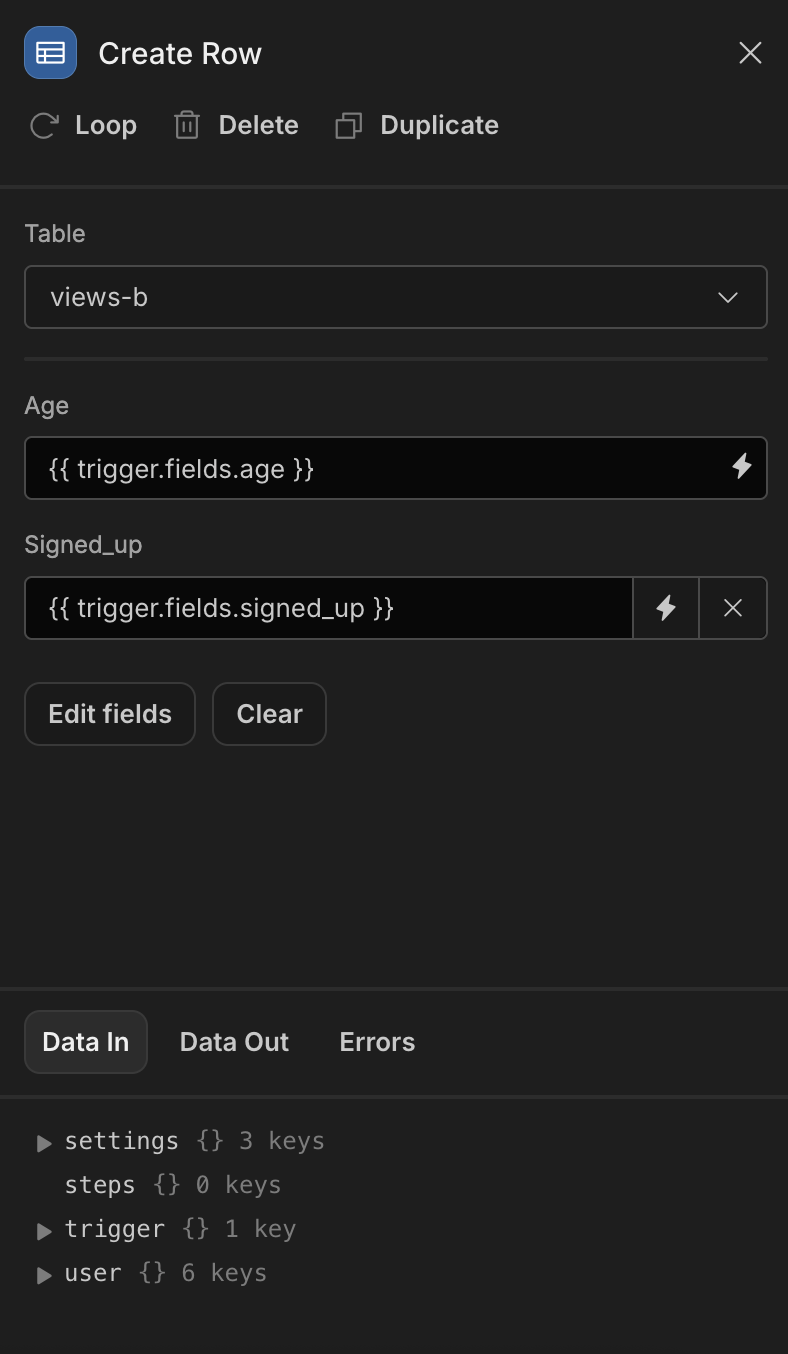
Let's take a look at the Create Row action. Click the Create Row step to open its settings. Select the table you want to create a row in, and then use Bindings to use the trigger.fields. object to populate the data you want.

As you can see, we're using the same names for the fields we defined in the first step.
And if you want, at this stage, you could create another Create Row, or another action to create a row in another table, or somewhere else entirely. This could also be a good moment to duplicate data to MongoDB.
Updated 5 months ago