Custom automation step
Write a custom automation action
Purpose
Automation action plugins can be used to extend the functionality of automations. Automations can be used in conjunction with the various triggers Budibase provides, like webhooks or row created/updated/deleted events to create custom backend functionality, API endpoints or background processes. With plugins we can extend this further, for example we could build an automation plugin that integrates with a local IoT system, allowing you to trigger real world actions through Budibase. Currently, automation plugins can only be used in self host.
Datasource plugins can also be used to provide similar functionality through the "External Data Connector" action in automations - however the integration with automations is more complex, the plugin is more complex (requiring CRUD operations to be fully defined) and is more data centric in functionality; automations in contrast are more action focused.
Getting started
Make sure you have the latest Budibase CLI installed. Even if you have previously installed the CLI, you may want to install it again to be sure you have the latest version.
Also make sure that you have node v20+ installed. You can run node --version to see if you need to upgrade.
Please note that automation action plugins can only be used in self host installations - they cannot be imported to the Budibase Cloud.
Once that's done, we need to initialise a template for our automation action.
Automation actions - not triggersIt is important to note that you can only build automation actions, triggers are built into Budibase and can only be extended through the core project. If you need a new automation trigger type please create an issue describing what you need.
Navigate to the folder location you want to create your plugin, and execute the following command:
budi plugins --init automationNext you will receive a series of prompts to enter details about your automation. You can press enter without providing a value if you are happy to use the placeholder.

This will create an automation skeleton project, with the following structure:
src:
  index.ts: The main entry file - this should not change under normal circumstances.
  automation.ts: The code for your custom automation action. Do not rename.

test:
  index.spec.ts: A Jest test file that includes a template test for the action runner.

package.json: The version, license and dependencies for your automation action.

schema.json: The metadata which describes your automation action - like settings displayed in builder.
There will be a lot of generated files/directories, such as node_modules and build/test configuration files - you will not usually need to edit these, if you do need to change these it may be worth raising an issue.
Building your automation
After you have created your new automation action directory, execute the following:
cd budibase-automation
yarn build
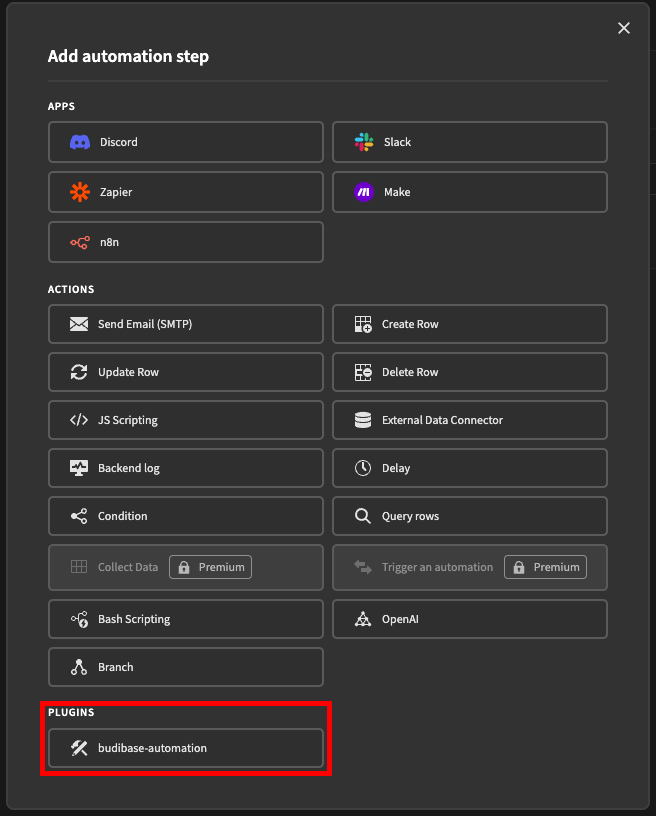
Assuming you have updated the server env variable you should now be able to see your automation plugin in Budibase:

Automation.ts
This is where the code will live for your automation action. It is recommended that it is developed in TypeScript, this allows use of the @budibase/types package if you desire access to any of the Budibase types.
To make sure your saved changes are passed through to your Budibase server, you must execute a yarn watch within your custom automation project. This will allow your local Budibase app builder to see those changes in real-time, which is very handy for getting your automation to behave just right. Please note that if you change the stepId in your schema.json then any automations currently using the plugin will break, the stepId should not change.
Methods
The automation.ts file contains a single exported function - run. This takes the inputs from the prior automation steps, as configured by the user and performs the steps required for this action. This can be quite daunting, as you can do anything with this function, for some inspiration as to how this can be used you can look through the built-in actions.
Types involved with the automation runner can be found here. Importantly the AutomationStepInput which is provided to the automation runner, contains the following:
| Property | Type | Description |
|---|---|---|
inputs | object | A map of the specific inputs the user has specified for this automation, these may have been extracted from context |
context | object | The full automation context, containing the outputs of all prior steps |
emitter | object | An event emitter, used to trigger other events in Budibase (can trigger other automations) |
appId | string | The app ID which this automation is being ran within; can be used with the Budibase API, or functions in @budibase/backend-core |
Test
The index.spec.ts test file includes a template unit test for the runner function. testing can be quite simple, just pass in the require inputs and check that the function returns the expected outputs/performs the expected actions; the design of your test will depend on the function of your automation action.
Testing is not required for developing an automation plugin, but can be useful when developing, rather than having to run an automation within Budibase, you can check your automation action performs its expected result through a test.
Schema
The schema defines various properties such as the name, icon and the inputs/outputs of your automation action.
You can jump to the automation schema page here.
Adding an icon
Adding an icon to your automation action is quite simple, first pick the icon you would like to use on the Spectrum Icon site. For example if we you want to use the "Ad Display" icon shown below:

Then all you need to do is update your schema.json - find the top level icon field and set it to AdDisplay - this is case sensitive and should not contain spaces.
Updated 5 months ago