Chaining actions
Using Budibase, you can create a sequence of actions. Actions run synchronously; if one fails, the actions after won't run.
Action referencing
Accessing data from a previous action in a new action can be useful.
The following actions expose data after execution:
Action Name | Data Binding | Returns |
|---|---|---|
Save Row | {{ Action X.Saved Row }} | Field value pairs (including auto-columns)
|
Duplicate Row | {{ Action X.Duplicated Row }} | Field value pairs (including auto-columns)
|
Execute Query | {{ Action X.Query Result }} First row example |
|
Trigger Automation | {{ Action X.Automation Result }} | The response of a Synchronous automation 🔒 |
Note X is the action number
Query result properties
In addition to the payload data of an execute query action result, you can also access the following additional information:
- Status code - Number
- Response time - String including the time unit
- Payload size - String including the size unit
This can be useful in combination with Conditional UI for navigating to different screens upon an error, or to change text color based on the status code.
Example
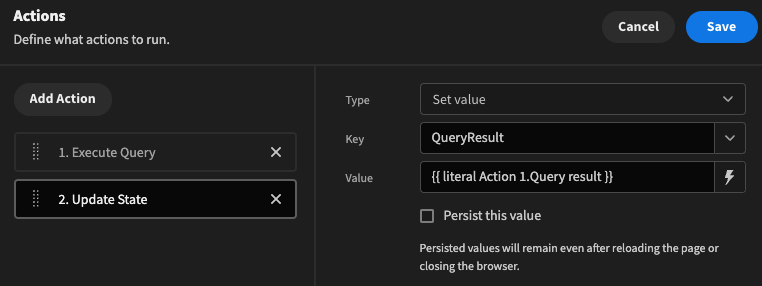
- Save the query result to App state. Use the literal keyword to ensure an object is saved, and not text.
- Reference the metadata properties with the following Bindings:
### Status code: {{ State.QueryResult.code }}

### Response time: {{ State.QueryResult.time }}

### Payload size: {{ State.QueryResult.size }}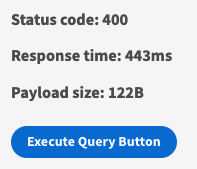
Response info returned after executing the query
Tutorial: Creating and Linking two table entries in one form
Schema
- Bookings
- Leaders
- One Booking -> One Leader
Use Case
Create a new booking and a new associated leader in one form
Steps
-
In the Data tab, using the internal BudibaseDB, create a new table, "guides", containing the following columns - name (text), phone_number(text), email(text). Populate these with a few rows of dummy-data.
-
Create another table, "tours", containing the following columns - destination(text) date(date, set to "Date only").
-
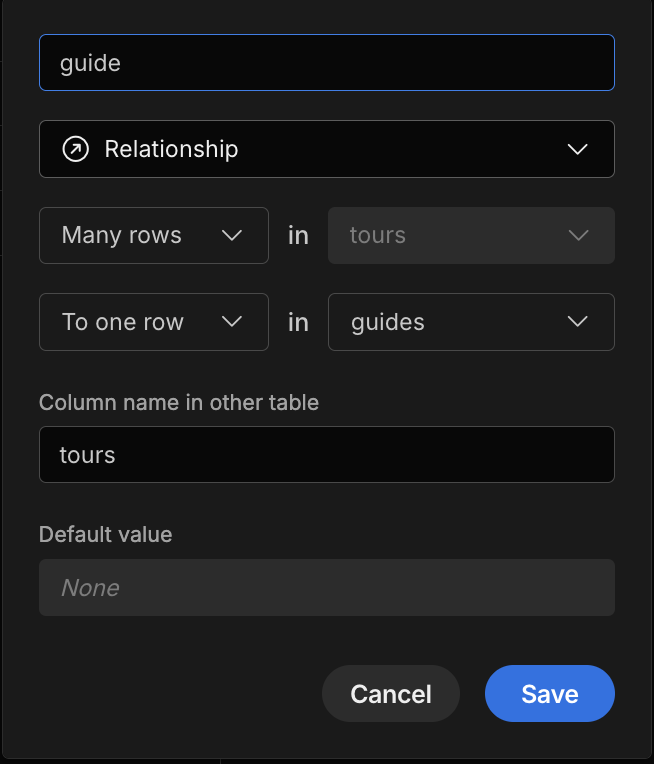
In the tours table, add a column called "guide", with a relationship of many rows in tours to one row in guides. Set the column name in the other table to be "tours".
-
Switch back to your guides table to see that the relationship column has been created. The circle with an arrow denote that this column is a relationship to another table.

-
Create a new app called "Creating and Linking two table entries in one form"
-
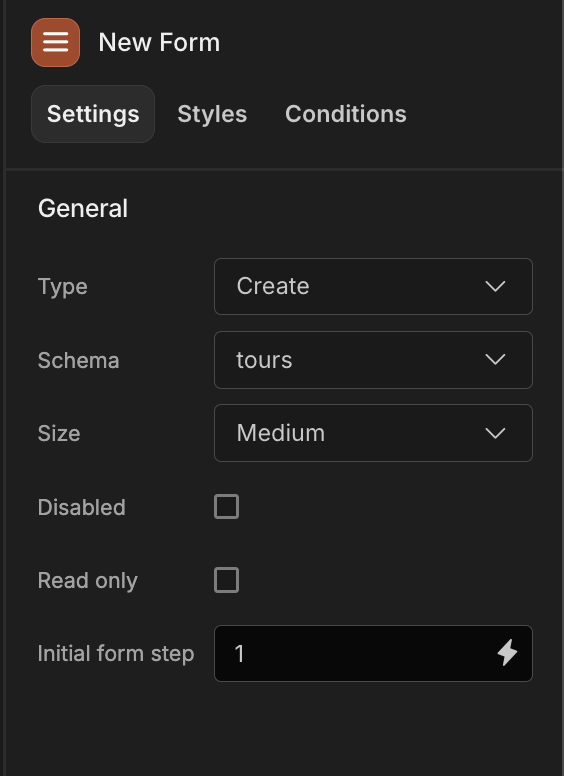
Add a new screen, add a form component (not to be confused with a Form Block). Set the form component to create a row in the tours table.
-
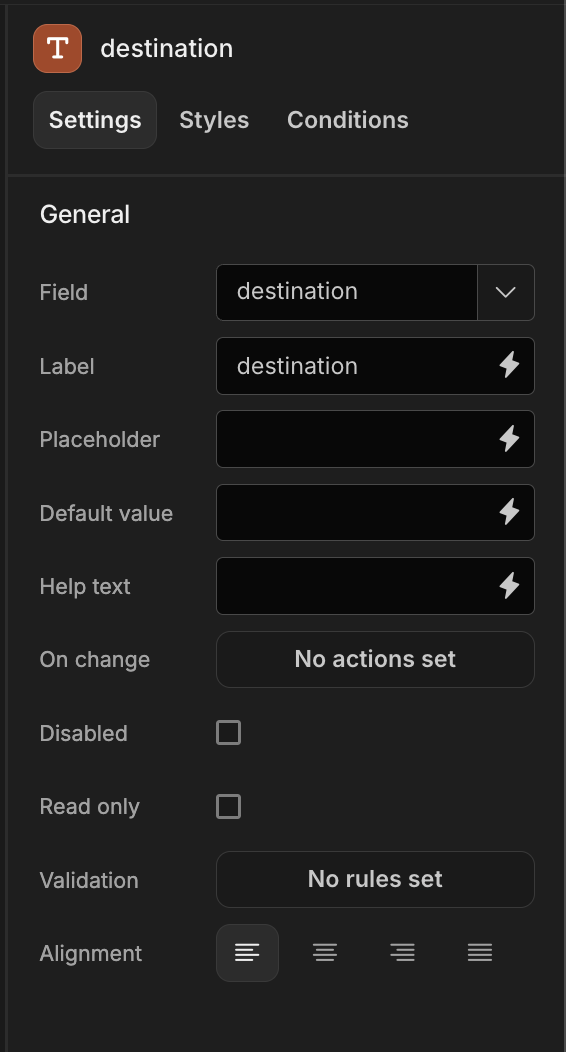
Add a Text Field component to your form, and set the name as "destination" and the label as "Tour Destination"
-
Repeat the previous step until your form has all of the following
| Field | Name | Label |
|---|---|---|
| Text Field | destination | Tour Destination |
| Date Field | date | Tour Date |
| Text Field | TGname | Tour Guide's Name |
| Text Field | TGphone | Tour Guide's Phone Number |
| Text Field | TGemail | Tour Guide's Email Address |
-
Next, add a button as a child of your Form Component - Set the text to "Save" and (optional) add an Icon
-
Add an On click action to the button: Validate Form will catch any "required" fields, as well as any custom validation set on a per-field basis (though not applicable in this guide).
-
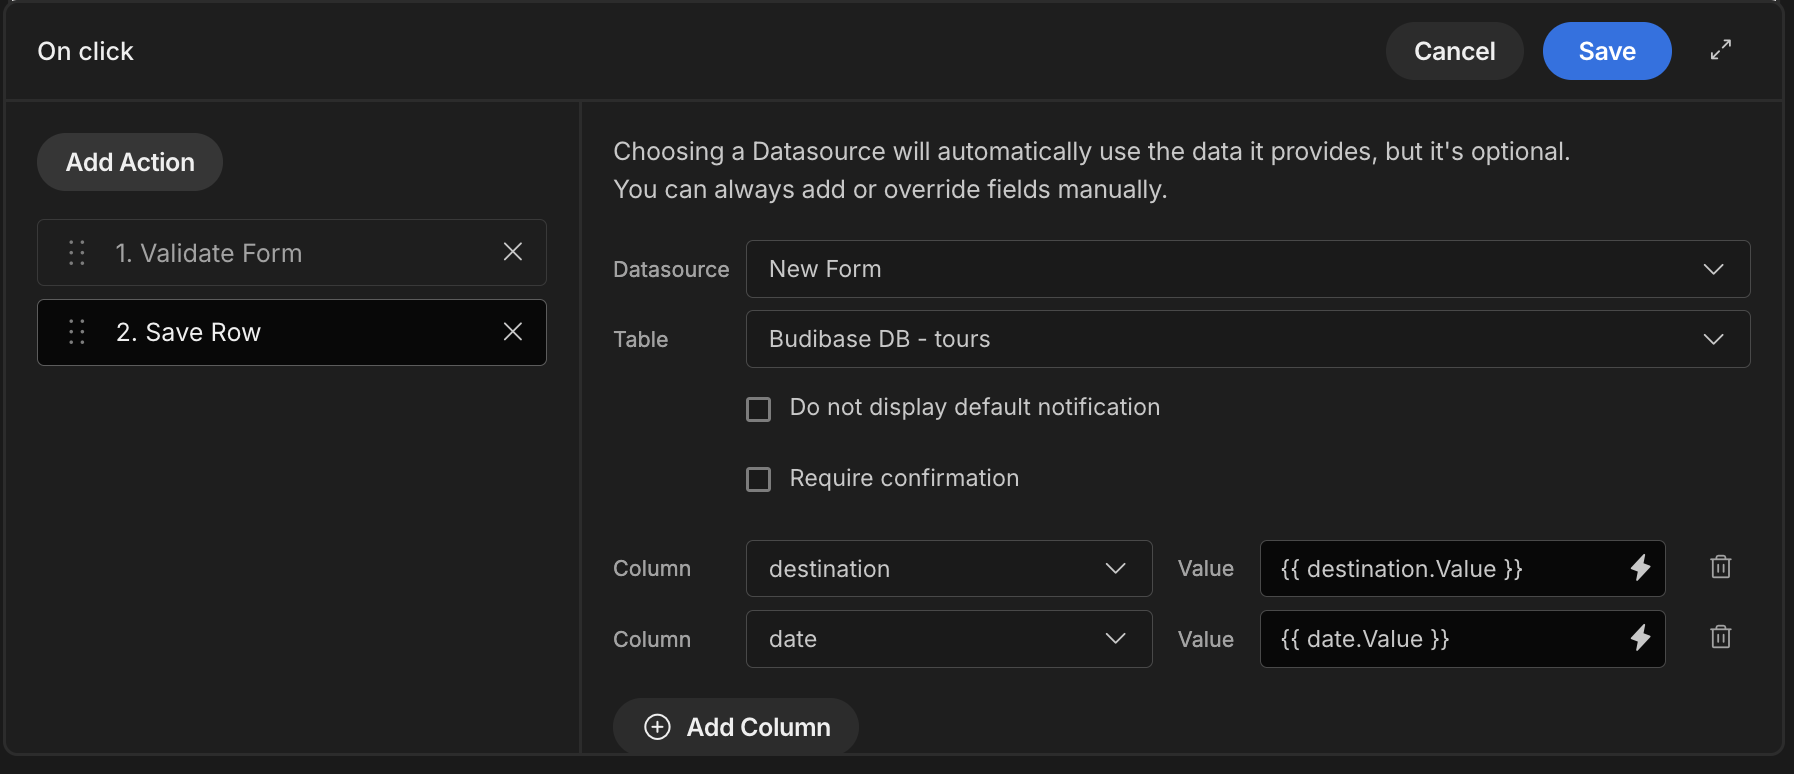
Add another action - Save Row. Select your form as the datasource, and set the table as tours. Add two columns from the tours table, destination and date, and assign the values from the destination and date fields accordingly.
-
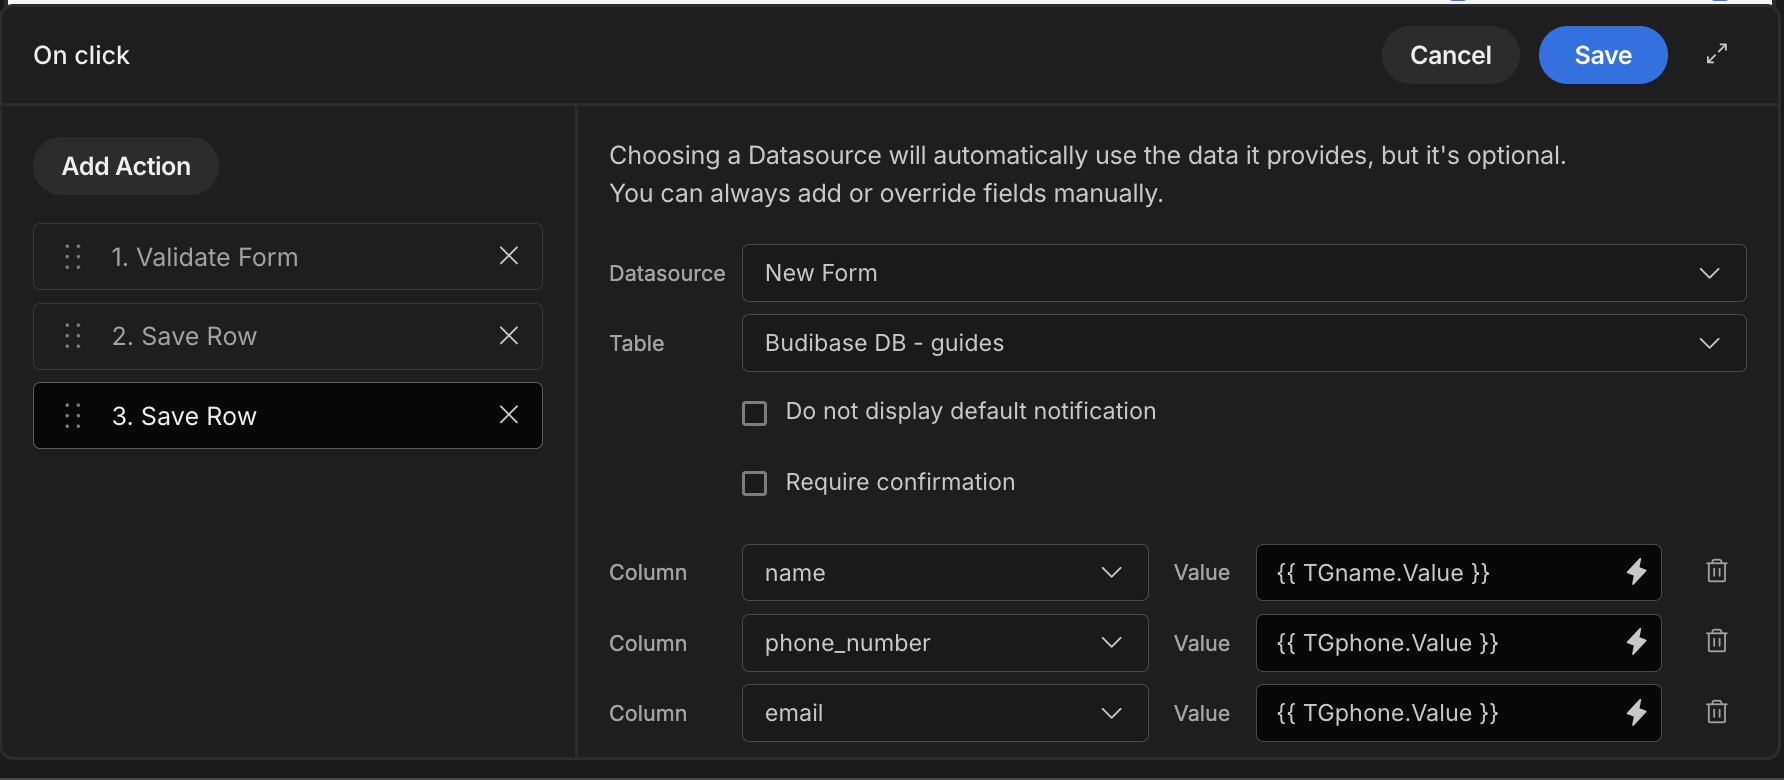
Add another Save Row action, but this time we will save the Tour Guide's information to the guides table. Look closely at the fourth column - tours - this is saving row_id from the previous action, which is linking the two rows together. This action will save a new tour and a new guide, and show the relationship between them.
-
(optional) Check the "Do not display default notification" on one of the Save Row actions.
-
Add a "Clear Form" action to reset the form back to it's default values
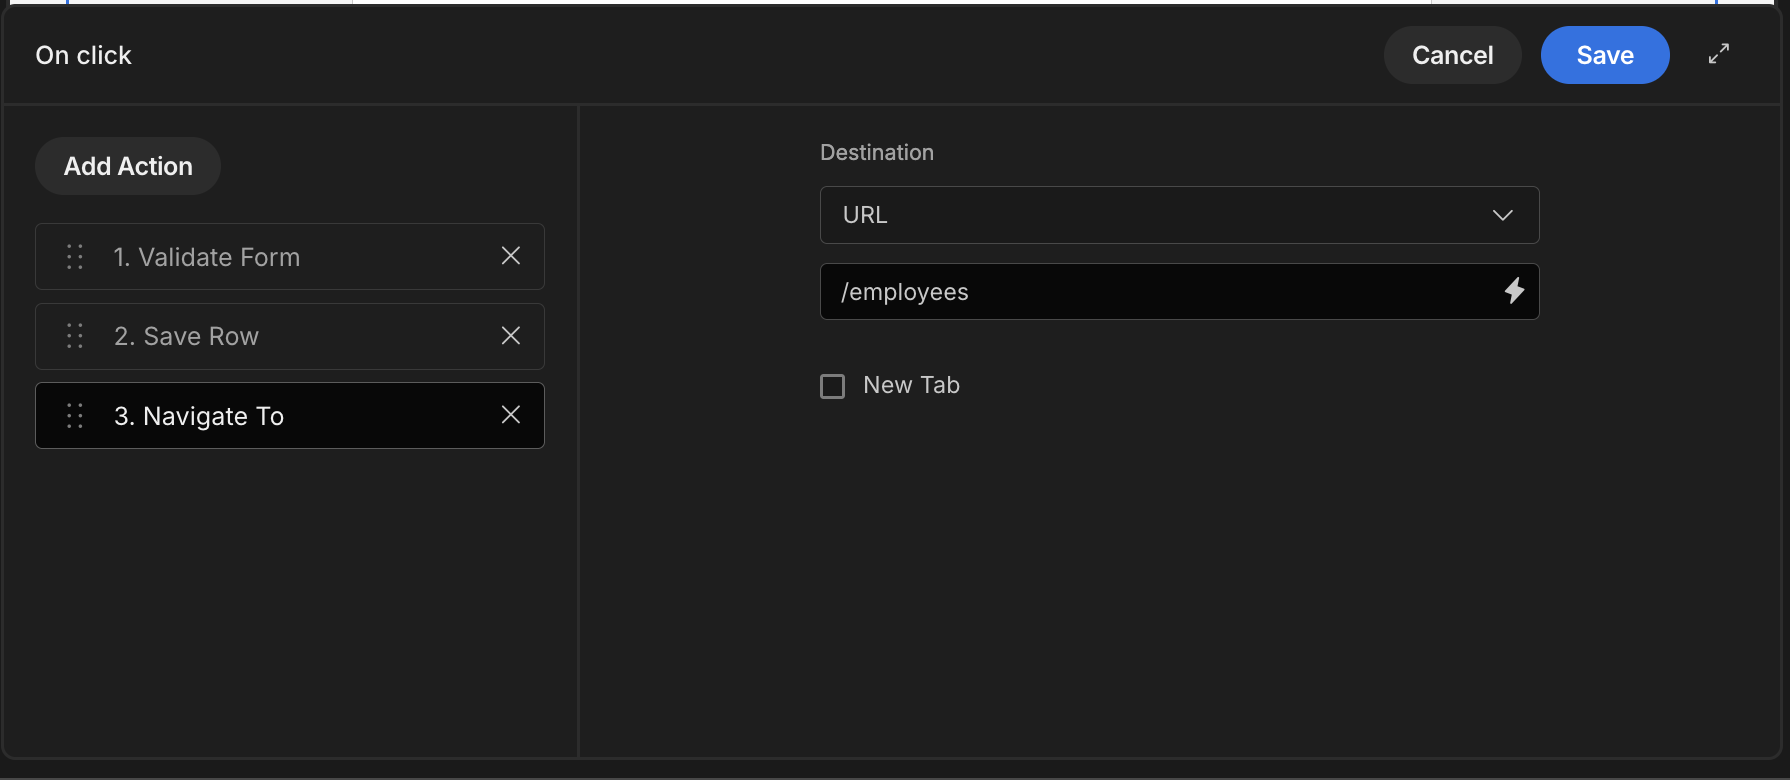
You could also use a "Navigate To" action to take the user to a screen showing the information in a table, or back to the homepage.
Updated 5 months ago