REST OAuth2
Budibase uses the Client Credentials Grant, which is a grant type in OAuth2 used for machine-to-machine authentication. This is typically is used when an application needs to access resources without user interaction. Unlike other OAuth2 flows, this one does not involve a user login. Instead, it uses a Client ID and Client Secret to obtain an access token directly from the authorisation server. More information on this grant type can be found here.
Setup
Managing OAuth2 configuration
In Budibase, OAuth2 is managed on a per-app basis. To set your OAuth2 authentication:
- Go to the Budibase Dashboard.
- Select the app you want to configure.
- In the app, navigate to the Settings tab using the top navigation bar.
- Click on the OAuth2 option in the sub-navigation menu.

You will now be on the OAuth2 configuration page, where you can add and manage different OAuth2 credentials. On this page, you will be able to view any previous OAuth2 credentials. You can update all the fields or even delete any configurations.
Creating a new OAuth2 configuration
To create your first OAuth2 configuration:
- Click the "Add OAuth2" button located above and to the right of the table.
- A modal will appear, allowing you to enter the necessary configuration details.
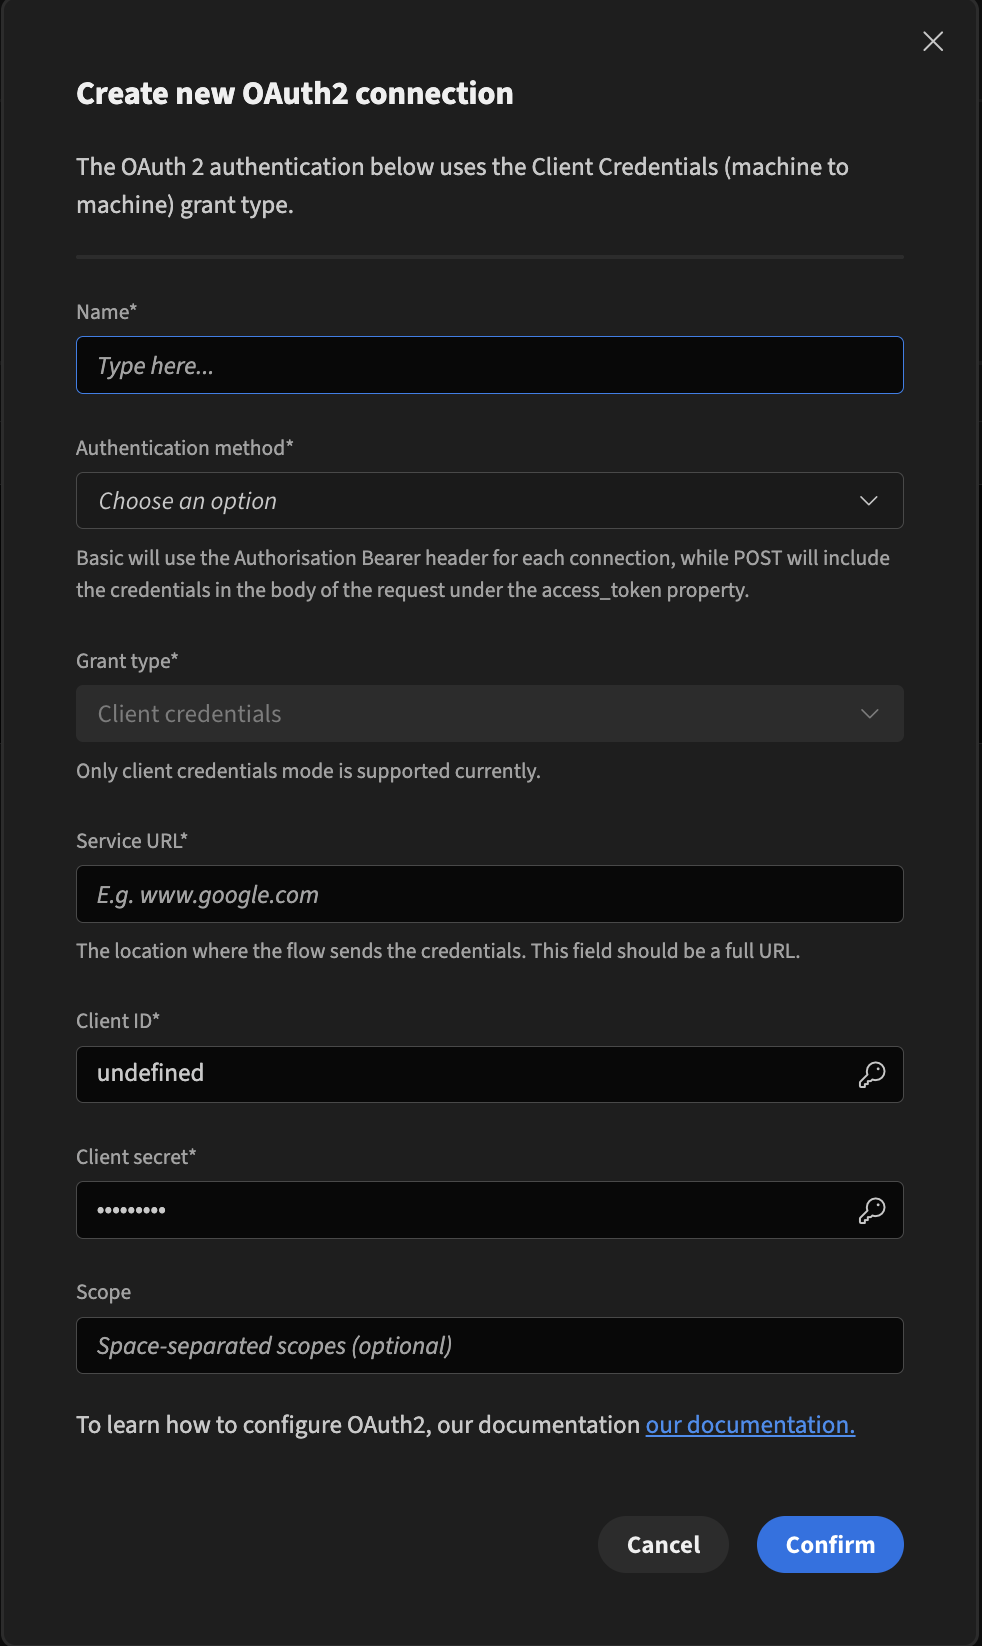
Fields Configuration
Nearly all fields in this form are required to set up OAuth2 authentication. Here’s what each field does:
- The Name field is the unique identifier for the OAuth2 configuration. Use descriptive names (e.g., Spotify Client Auth, Internal API Auth) for easy reference.
- The Authentication method field Specifies how credentials are sent during authentication. The two options are;
- Basic: Uses the Authorisation: Bearer <token> header for each connection.
- POST: Includes the credentials in the body of the request under the access_token property.
- The Grant type field defines the OAuth2 authorisation method. (Currently, Budibase only supports the Client Credentials grant type.)
- The Service URL field is the URL where the OAuth2 flow sends the credentials. This must be a full URL (including https://) pointing to the token endpoint.
- The Client ID field is the unique identifier for the service you are connecting to.
- The Client Secret field is used to validate the client’s authenticity.
- The Scope defines the specific permissions or access levels the client requests. This new field refines access control by allowing a more granular definition of what resources and actions are permitted.
Example setup
Let’s walk through an example using Spotify’s OAuth2 Client Credentials flow.
Create Spotify OAuth2 credentials
- Go to the Spotify Developer Dashboard.
- Log in and create a new app.
- Copy the Client ID and Client Secret in the app settings.
Configure OAuth2 in Budibase
- Navigate to the OAuth2 configuration page.
- Click "Add OAuth2".

- Fill in the fields as follows:
- Name: Spotify Client Auth
- Authentication Method: Basic
- Grant Type: Client Credentials
- Service URL: https://accounts.spotify.com/api/token
- Client ID: <your-client-id>
- Client Secret: <your-client-secret>
- Click Confirm.
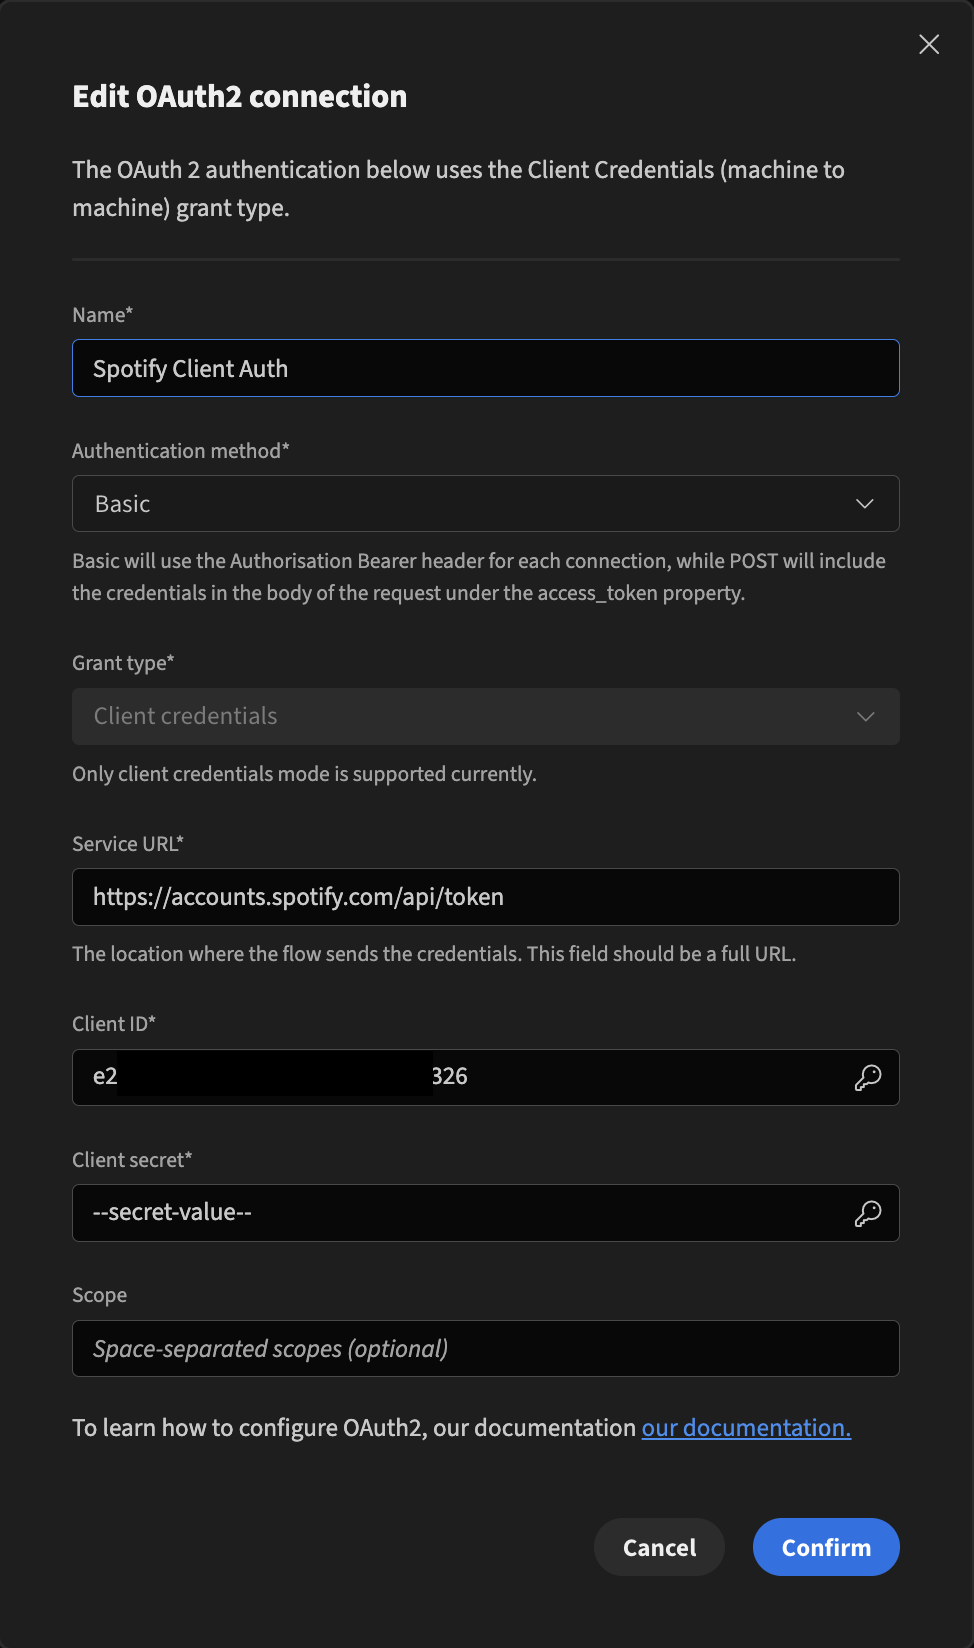
Now that you have successfully set up your OAuth2 configuration with Spotify. We can start using the Spotify API and our OAuth2 configuration to validate any requests made to it. We can do this using our REST datasource.
Testing your OAuth2 configuration
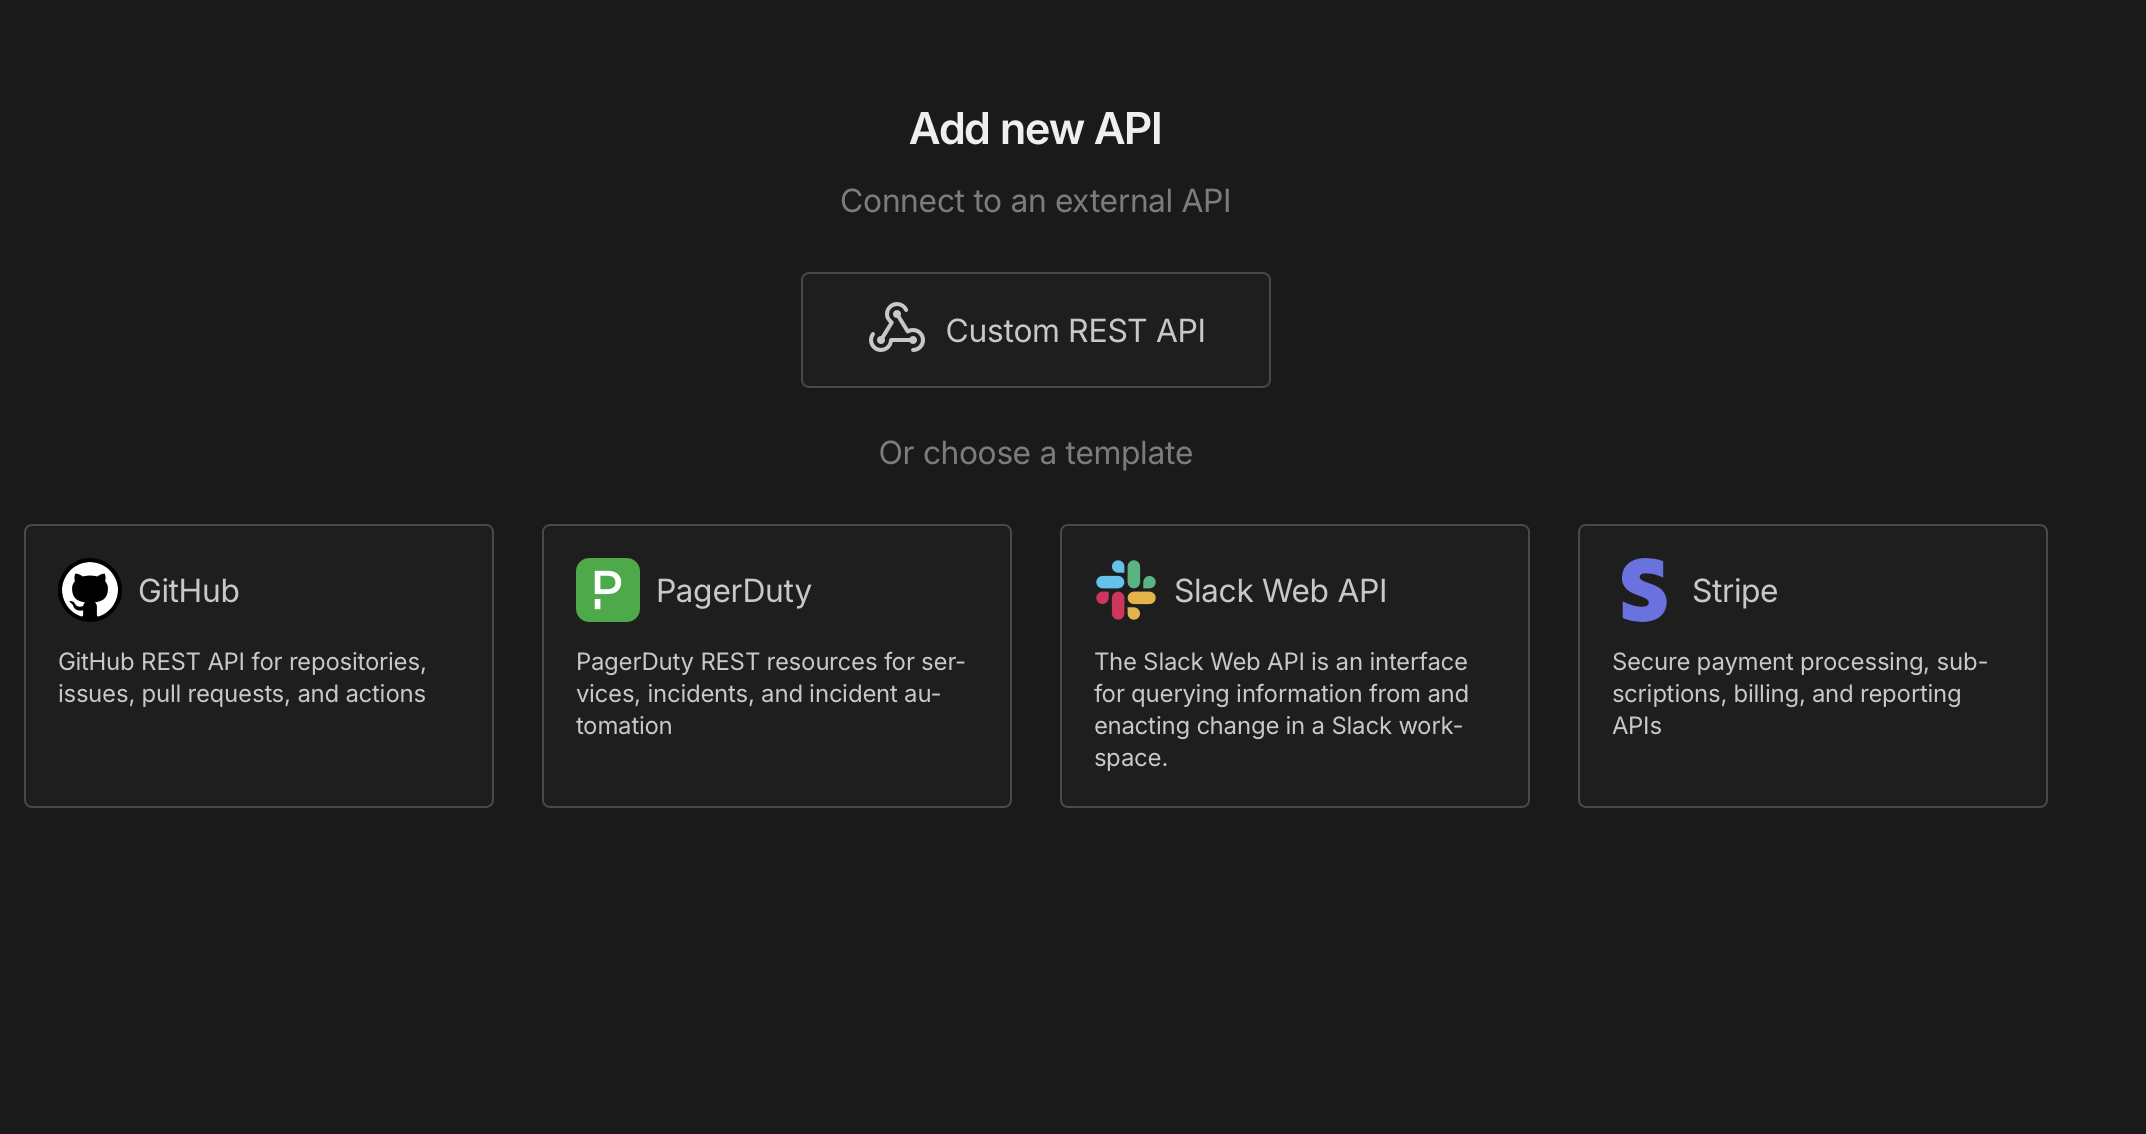
- On the same app you set your OAuth2 configuration, add a new REST API
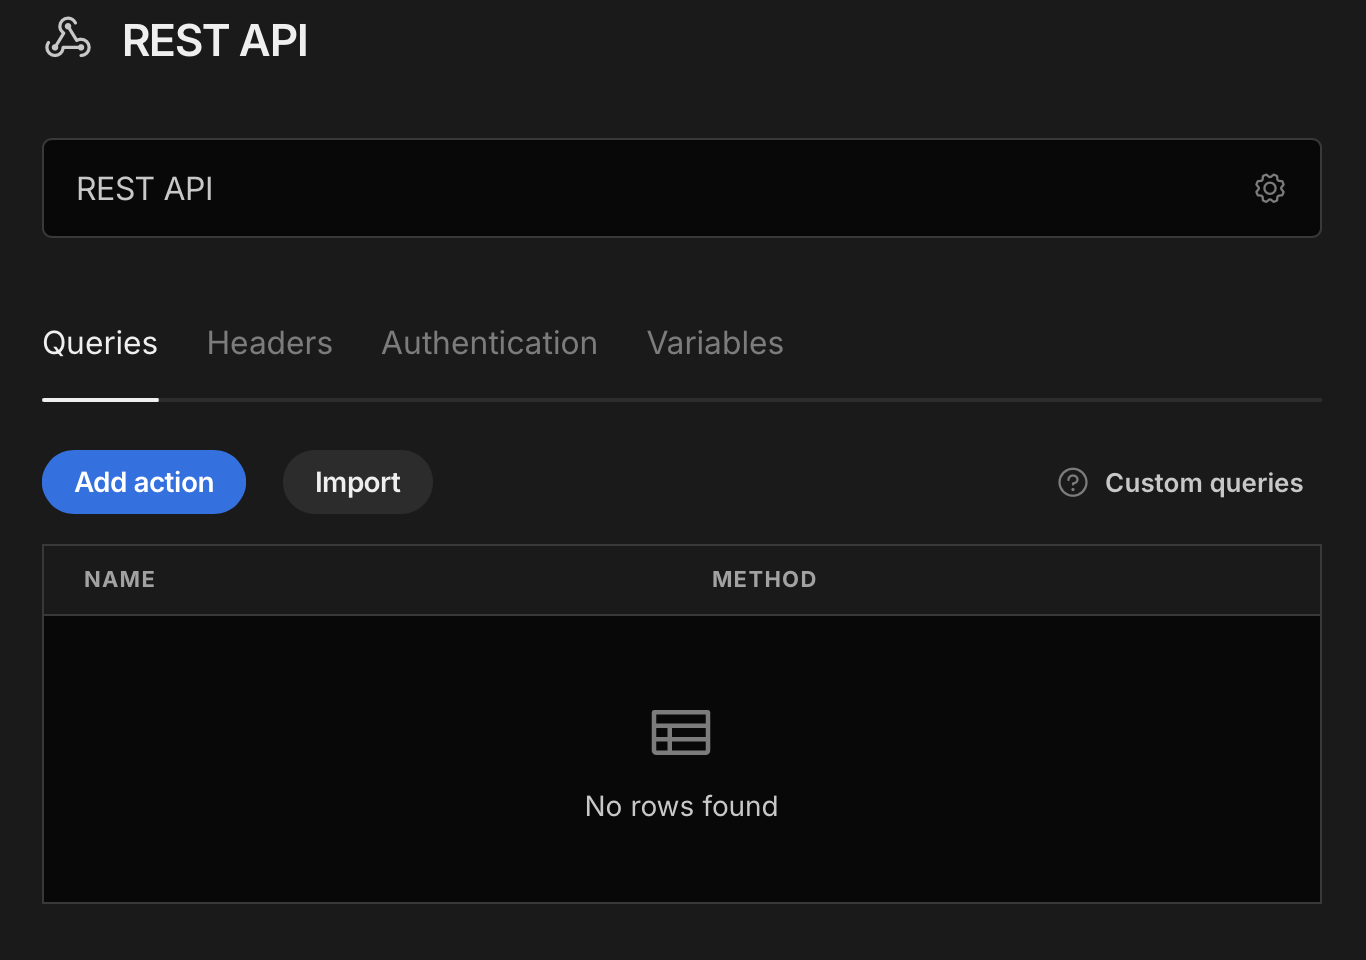
- Add a new query. In our case, we will be using a get-query
- Add the URL you wish to hit when sending the request to the API (I'm using: https://api.spotify.com/v1/artists/
{{id}}) - Select your OAuth2 authentication
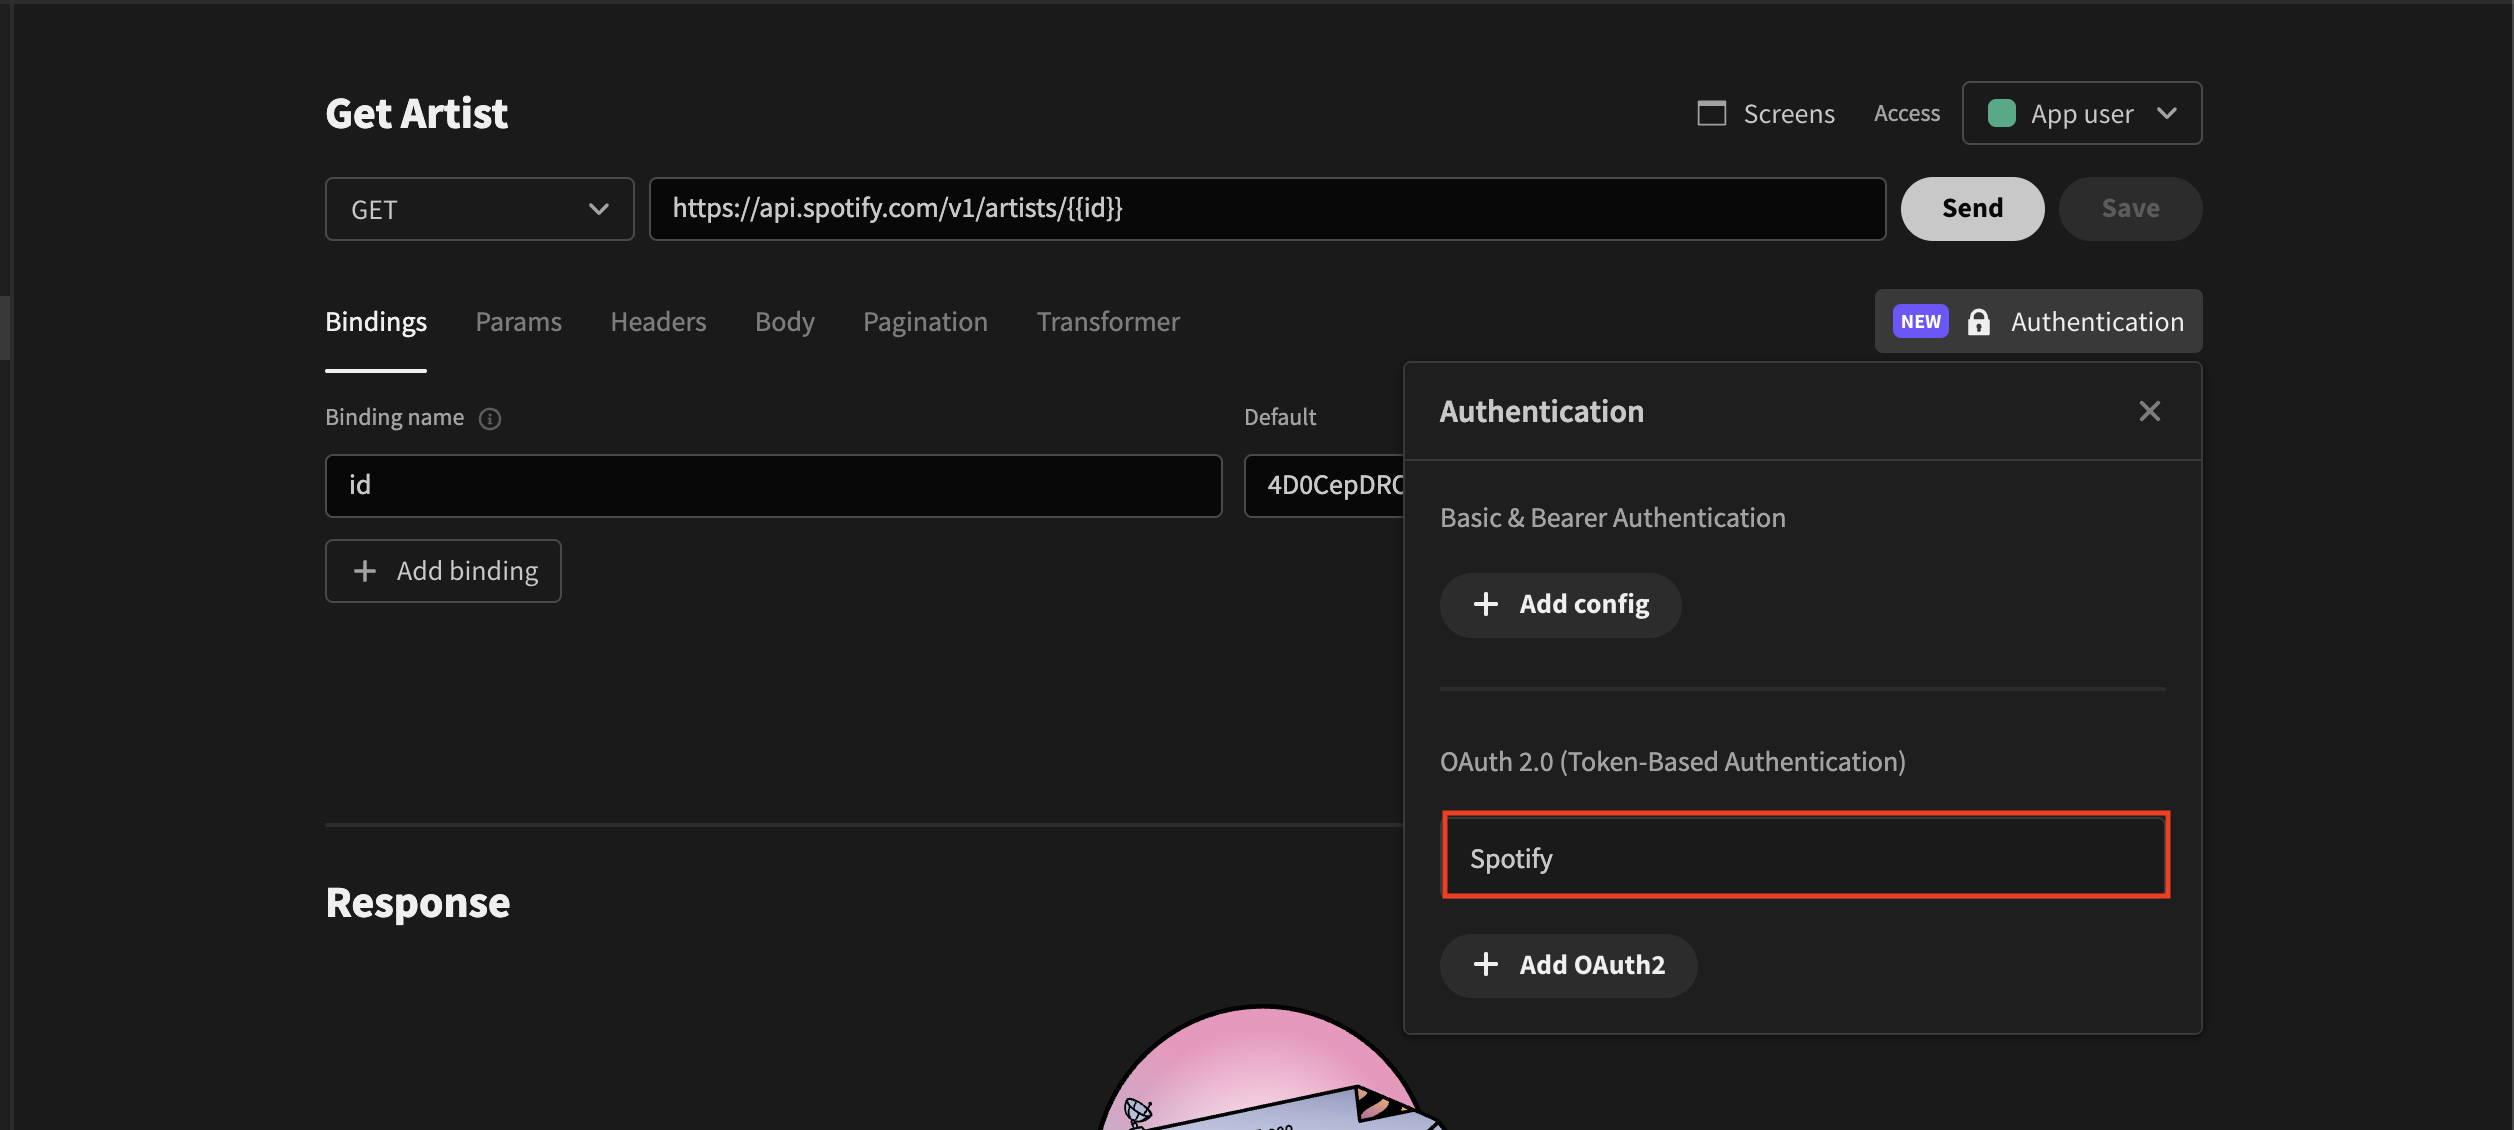
- Click save
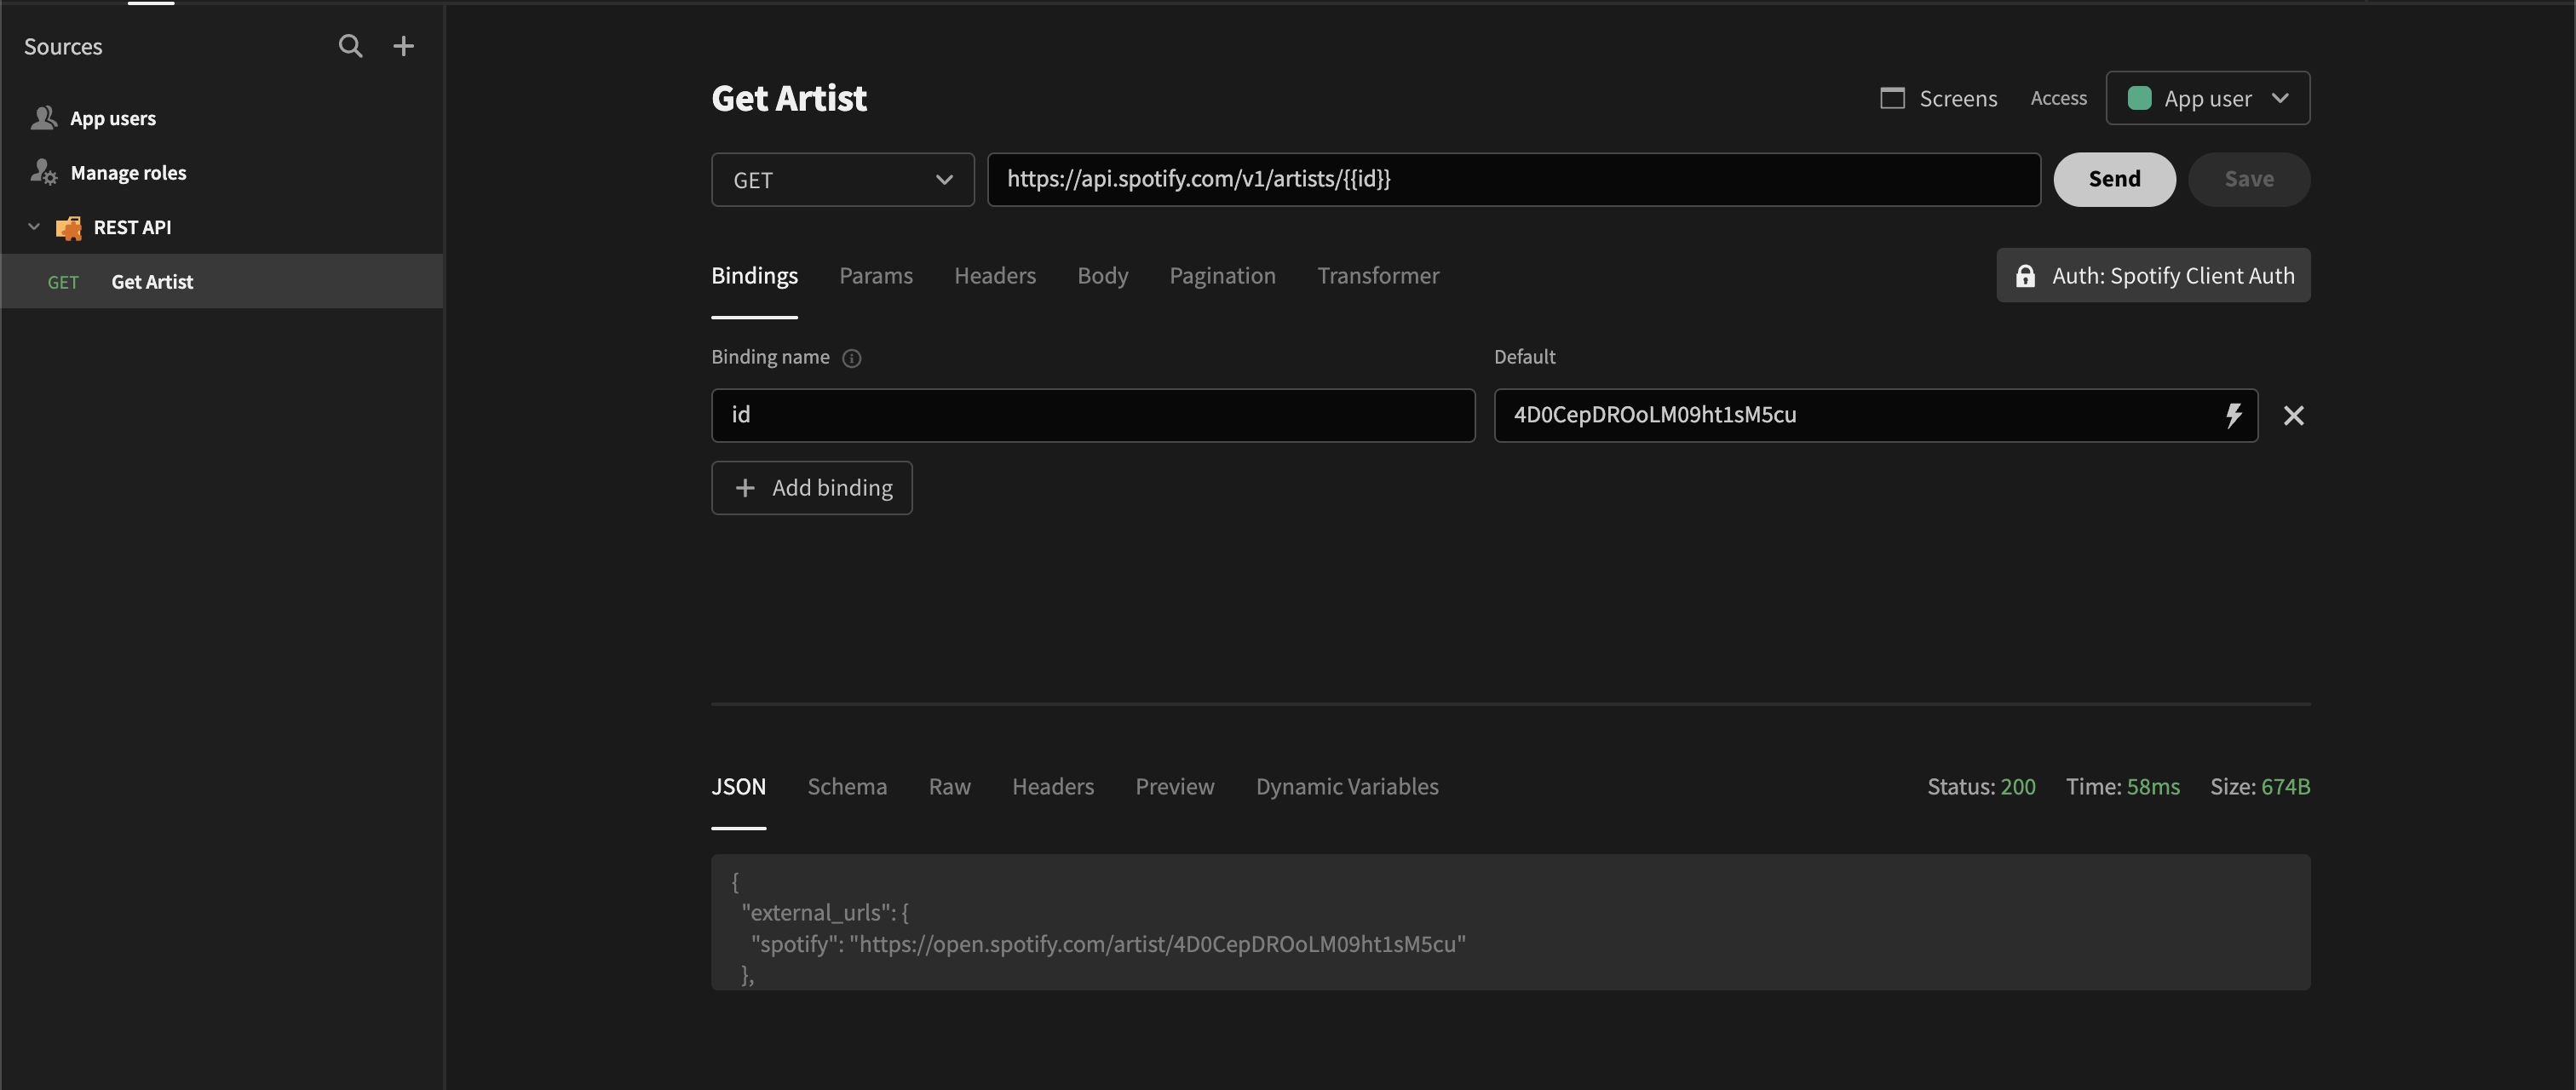
- Send your request, and you should be able to see a successful response from the API.
Updated 3 months ago