Risk Management
Our risk management template provides a ready-to-use solution for recording, assessing, and working with data around risks, incidents, and improvement initiatives.
It’s fully customizable, offering the perfect basis for creating your own custom solution utilizing your own data, logic, and processes.
In this guide, we cover everything you need to know about working with our template, including what it does, how it’s built, and the key ways that you can modify it to suit your needs.
To use this template, click here.
What does this template do?
At its core, our application is based around submission and approval workflows for risks, incidents, and improvements.
This includes:
- Enabling App Users to submit new risks, incidents, or improvements. They also can view and cancel their own previous submissions.
- Routing submissions to Power Users for review and approval.
- Providing records of all ongoing and previous submissions.
- Notifying stakeholders of changes to the status of submissions or when there are new submissions that need their attention.
Our template utilizes simple approval flows for each type of submission, with two distinct user roles in addition to our App Admin role.
It’s built on top of five tables within Budibase’s internal database. We’ll examine what each of these is and what it stores a little later.
Let’s check out the core functionality first.
CRUD operations
Our application enables different kinds of users to perform specific CRUD actions across the various underlying tables, with user permissions varying according to their roles.
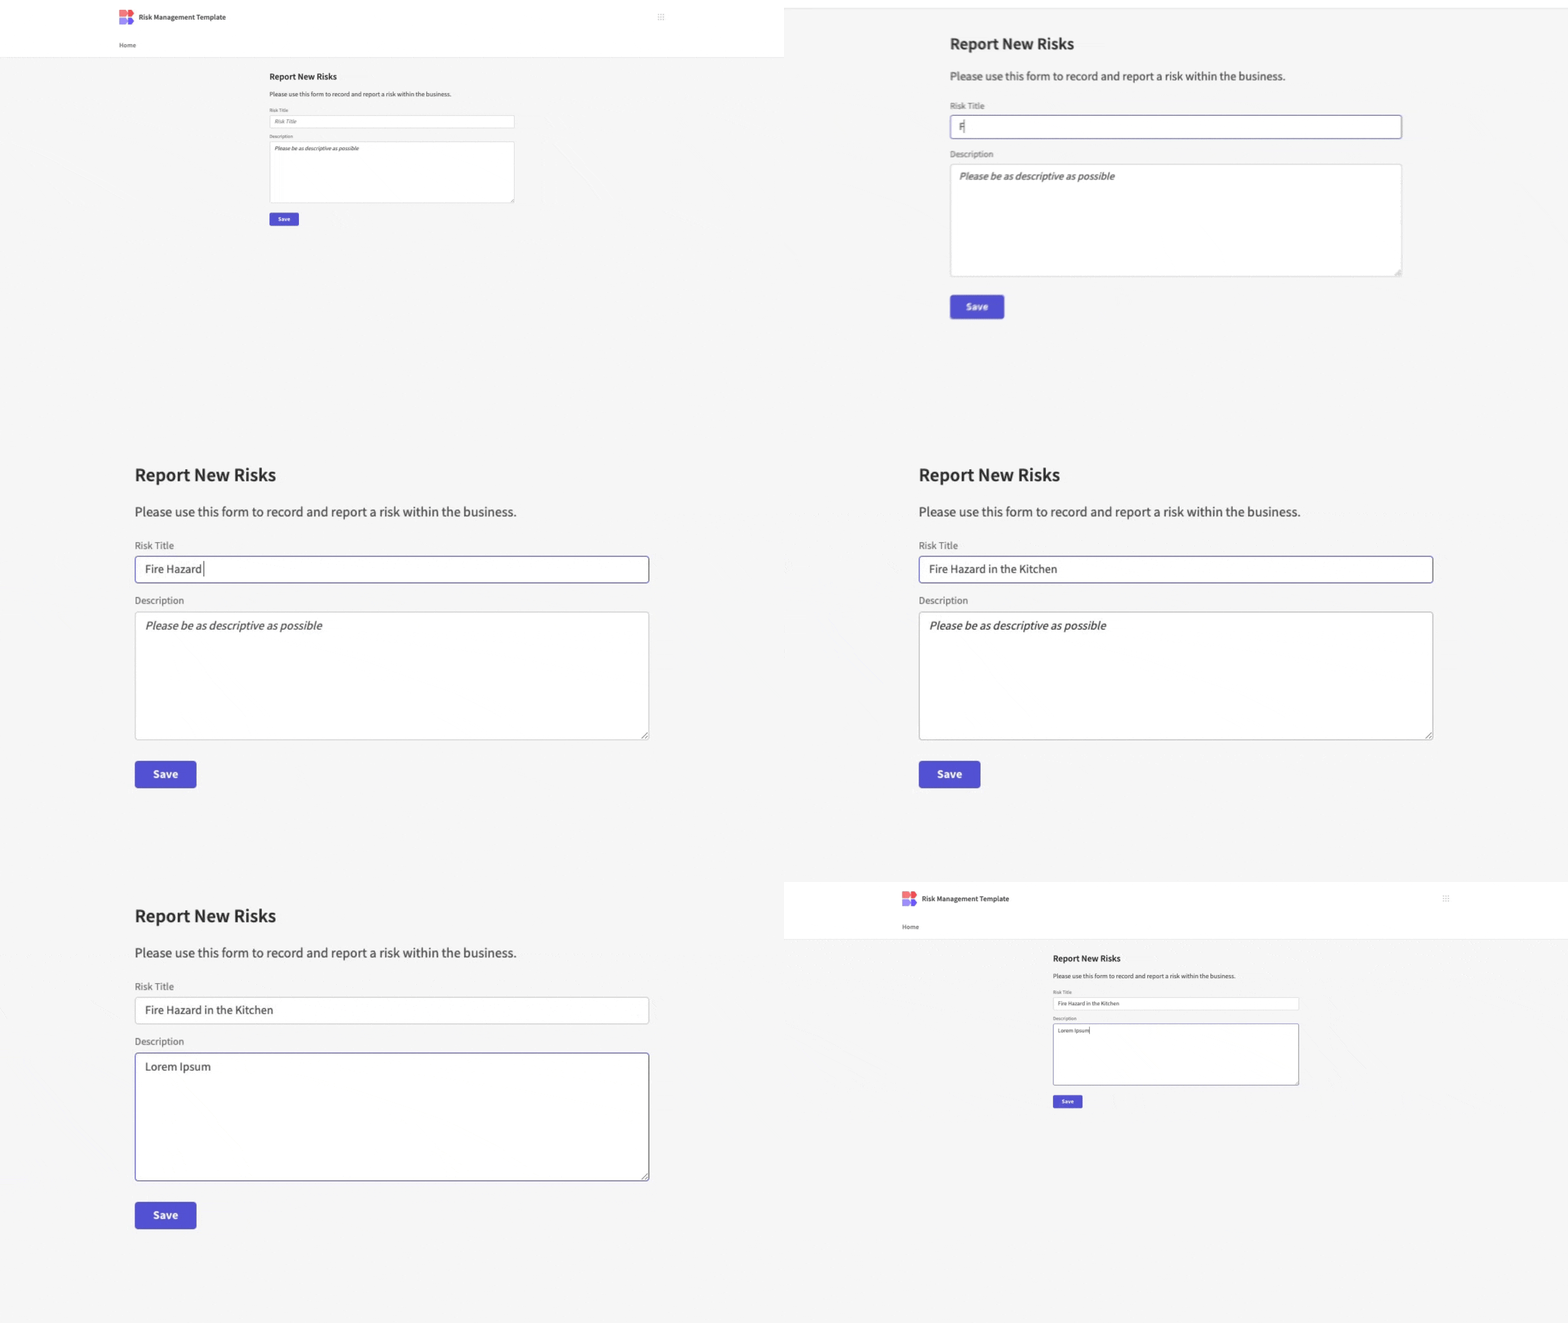
App Users can create new records on our Improvements, Risks, or Incidents tables using dedicated data submission forms, populating only a subset of each table’s columns.
However, they have limited permissions to Read or Update entries across the tables. Specifically, they’re only able to access their own previous submissions. Within these, they can update the Status attribute to Canceled via a Row Action.
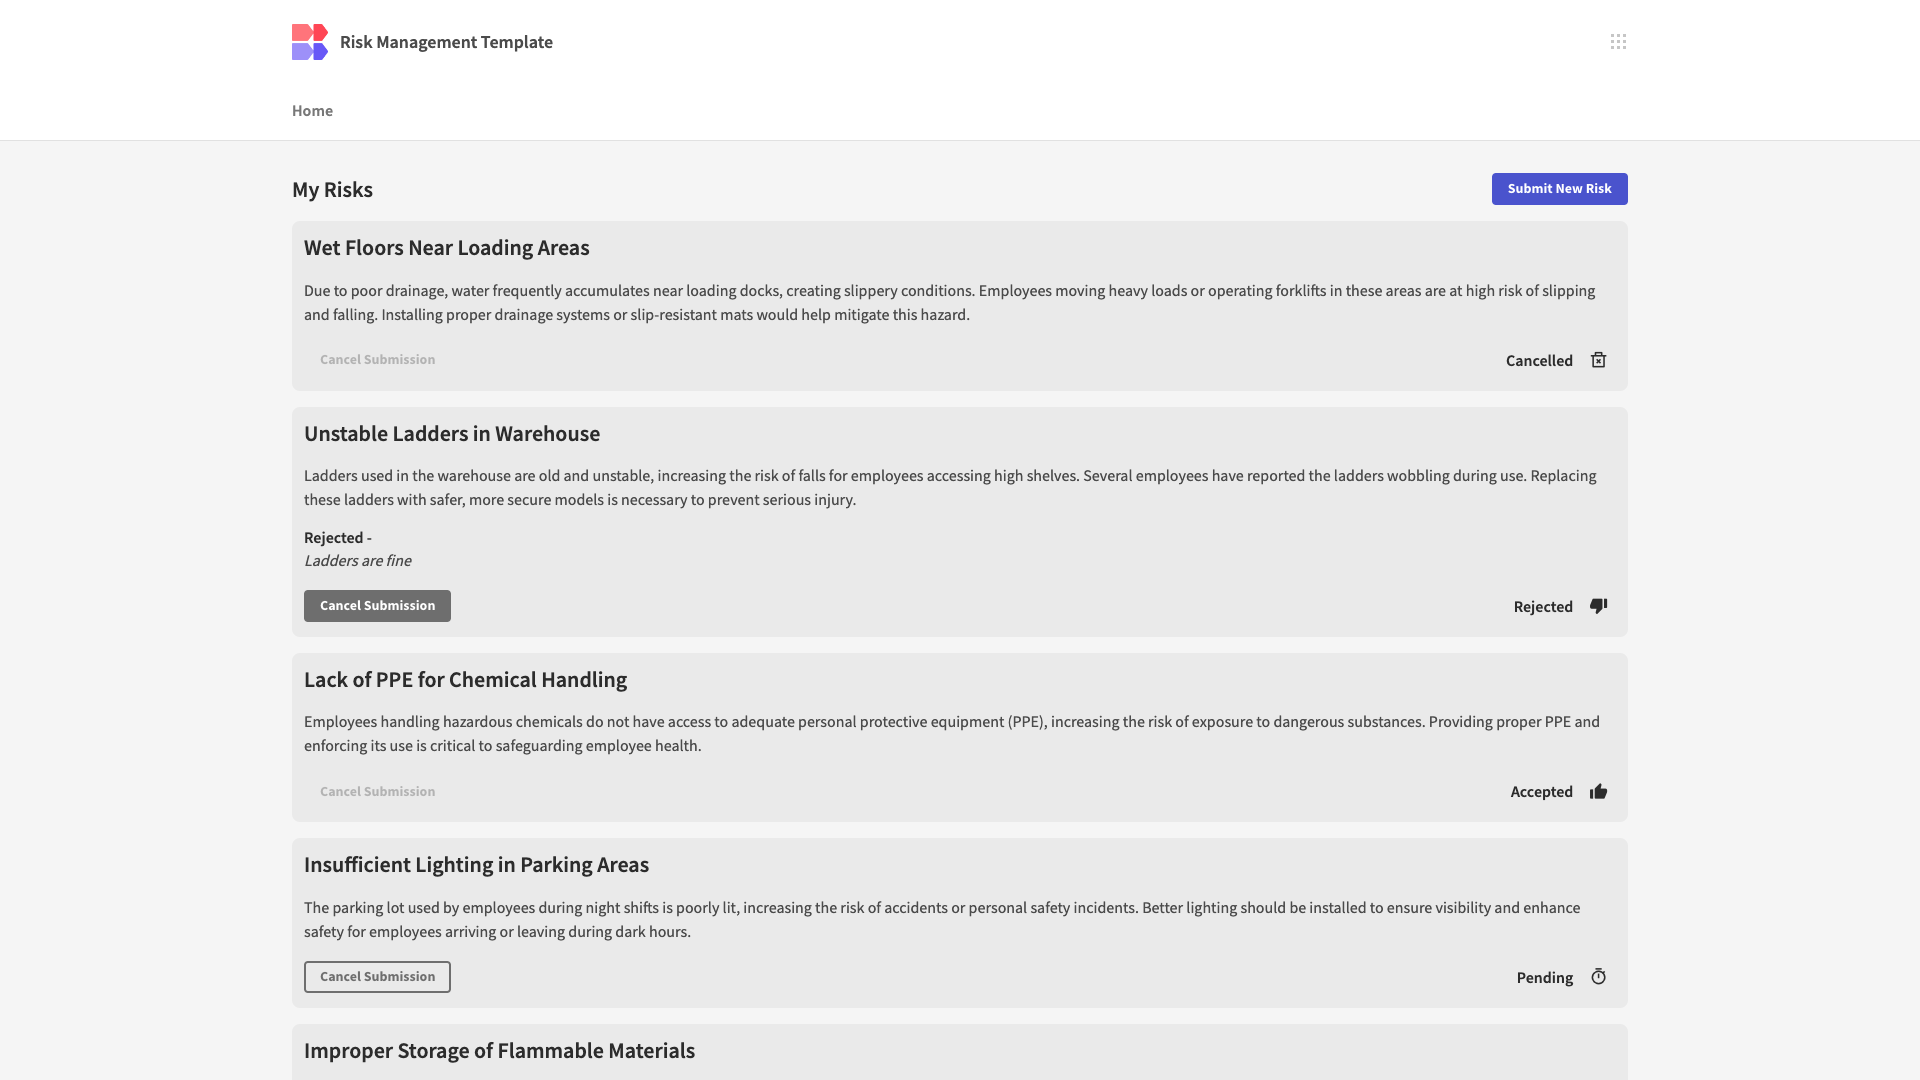
This works the same way for Improvements, Risks, and Incidents.
Approval flows
Power Users inherit all permissions from our App Users. On top of this, they can view all incoming submissions across our three tables.
They can also carry out Update actions relating to certain fields.
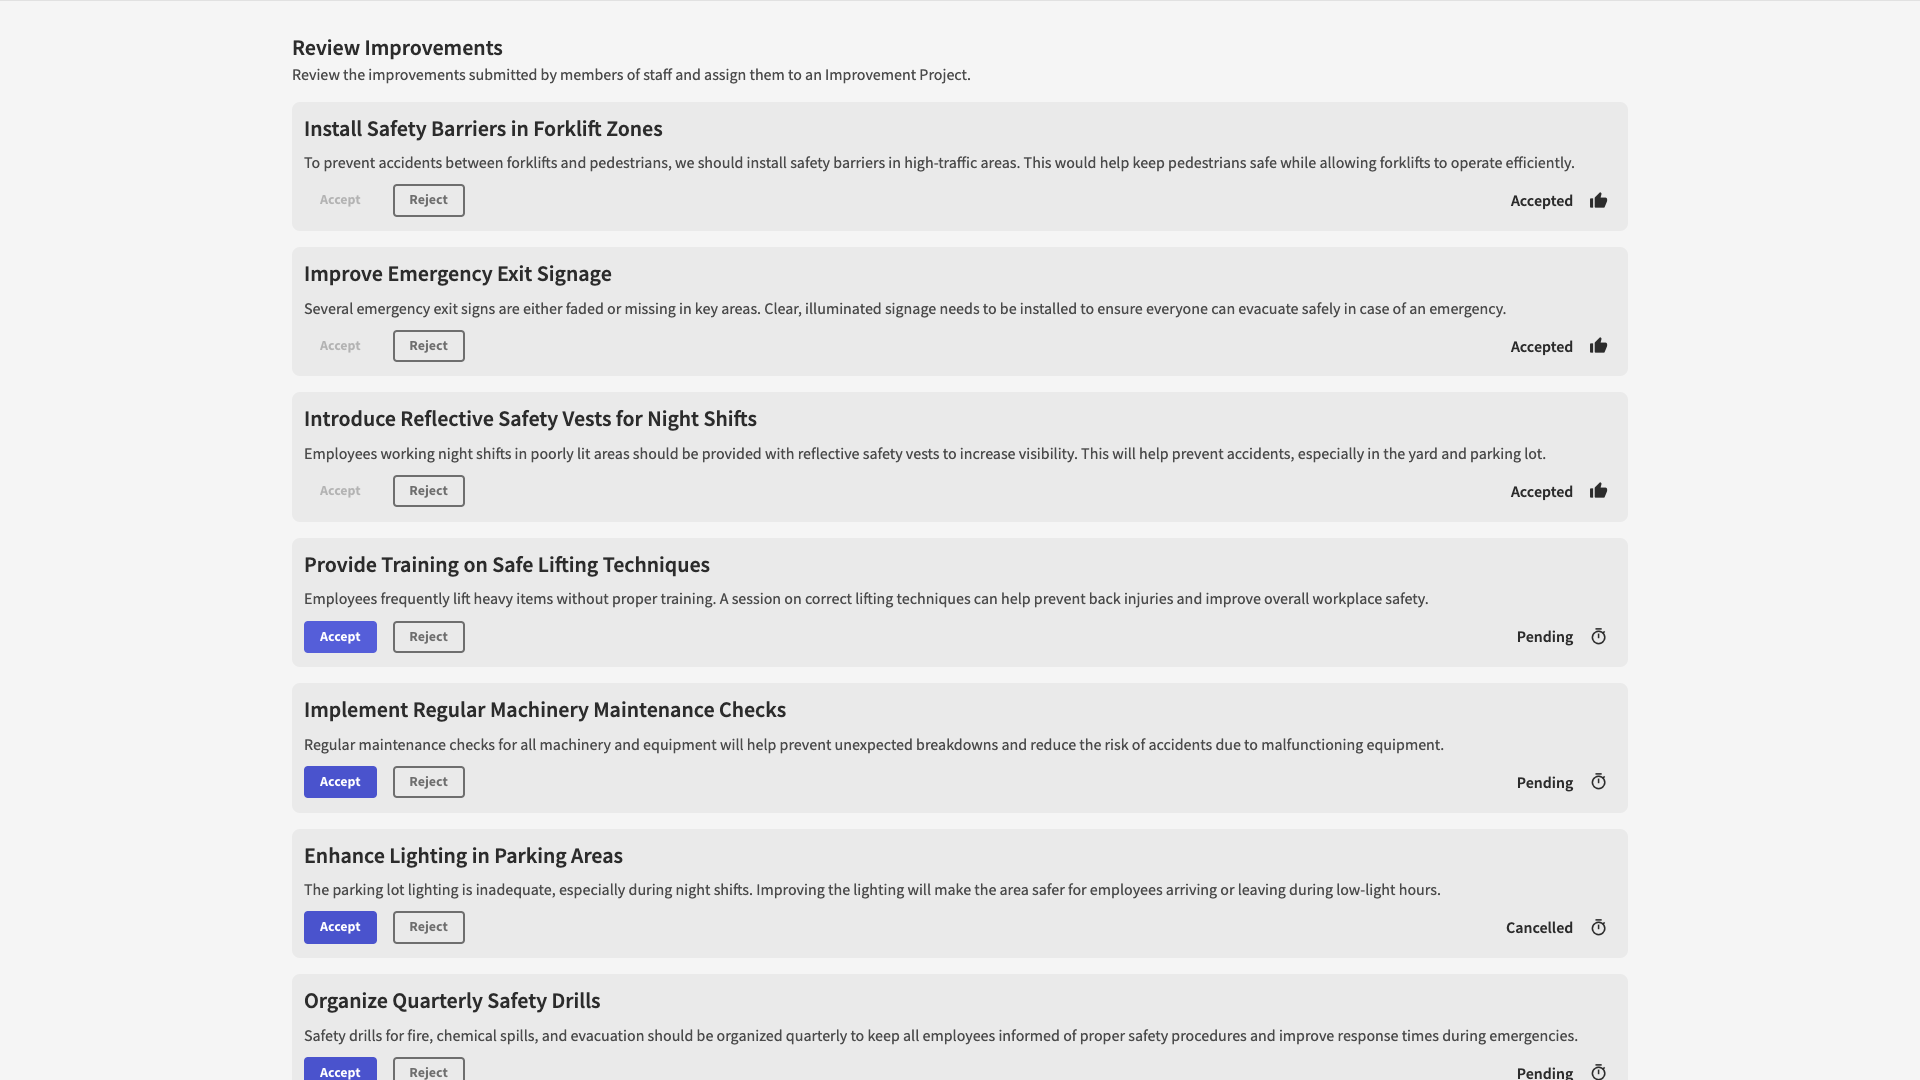
Specifically, they can use Row Actions to either Approve or Reject the row in question, updating its status attribute. At the same time, they can use a form UI to populate the Feedback column.
If a submission is Approved, it can also be assigned to a specific Improvement Project for implementation by populating a relationship column.
Tracking submission statuses
Both classes of users are able to track the status of the submissions that are relevant to them.
Again, this matches the level of data exposure that’s provided for each Role, as we laid out earlier.
So, App Users can access dedicated screens where they can check the status of any of their own previous submissions.
Meanwhile, Power Users are able to edit submissions, regardless of the user who created them, including viewing or updating their statuses.
Automated emails
Lastly, our application utilizes Budibase’s built-in email automation actions to send notifications to stakeholders based on defined events in our approval flows.
Specifically, the original creator of a submission across any of our three tables is notified when it has a response.
In the case of a Rejection or Approval, the user is notified of this outcome. When they Cancel their own submissions, they’ll also receive email confirmation of this.
Power Users receive a summary of the submissions that require their attention at fixed intervals via a separate automation.
Take a look at our documentation on working with email automations.
How does it work?
Now that we know what our template does, we can drill deeper into how it is built across the different sections of the Budibase builder.
User roles
Our risk management template relies on three user roles within Budibase’s RBAC system. RBAC enables us to assign a role to individual users in order to grant them access to appropriate data and actions.
We’ll see how permissions are actually granted in the next section.
Users with the App User role can primarily create submissions across our three tables. They can also view key details of their own previous submissions, including their status, or cancel the submission.
Power Users can view all submissions, as well as triggering approval or rejection automations and assigning them to projects. They also inherit all permissions from App Users.
Roles are configured using Budibase’s visual RBAC editor. We can use branch UIs to define how roles relate to one another, including permission inheritance.
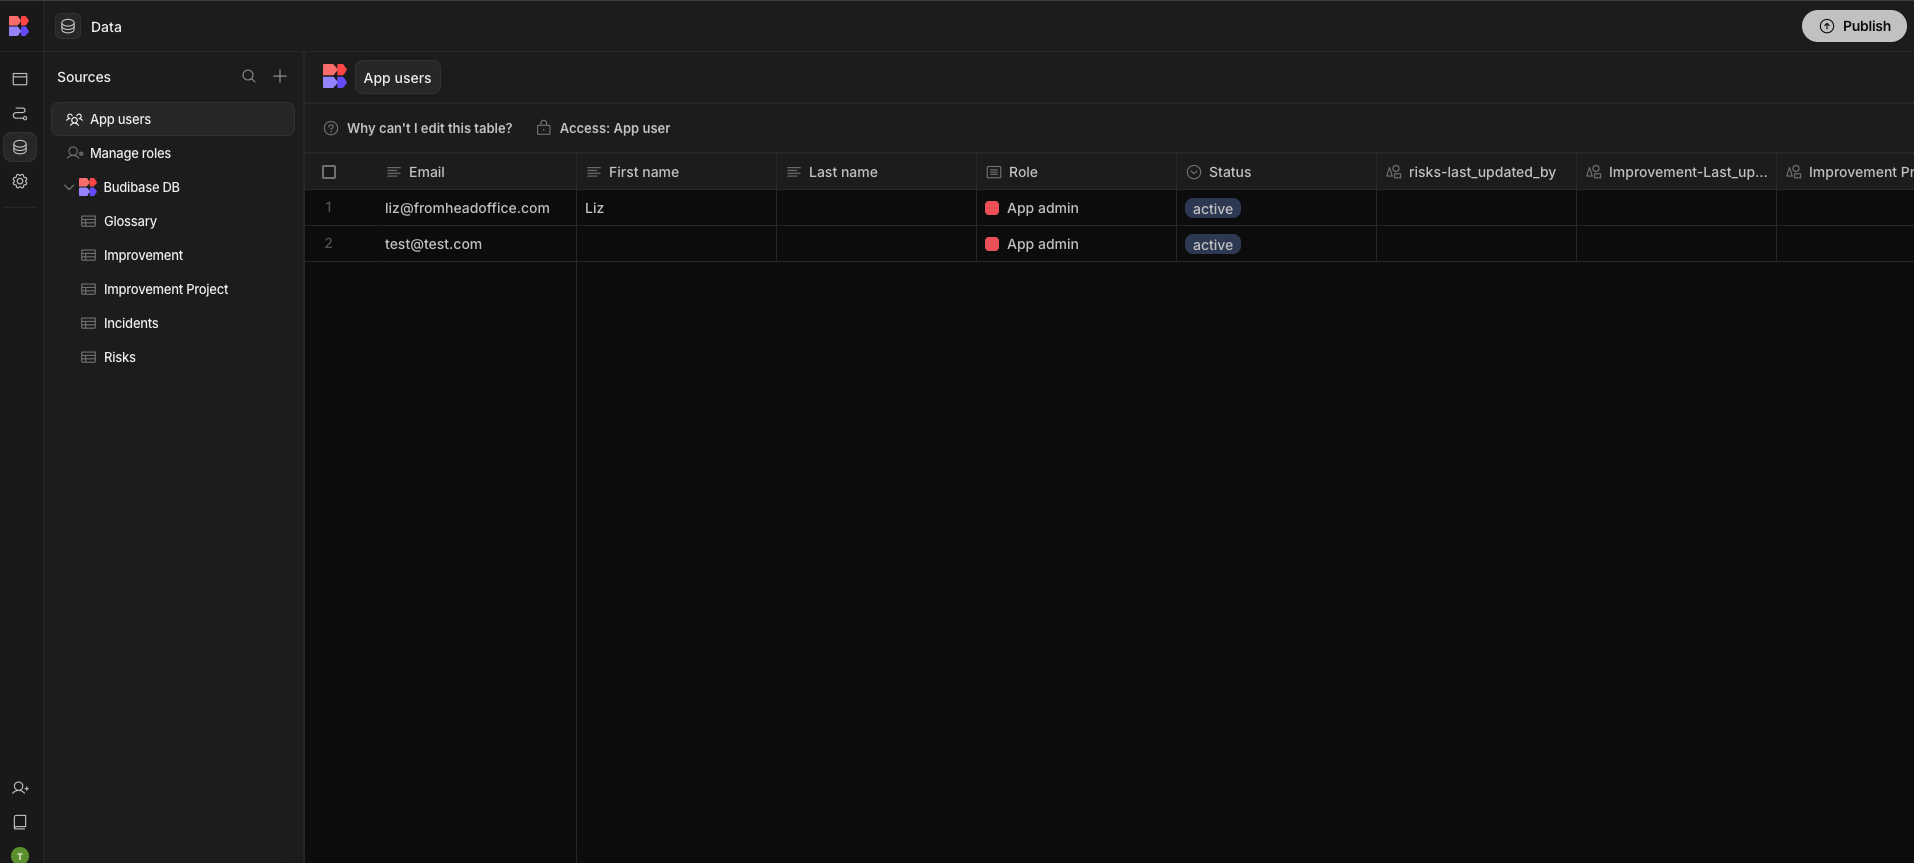
We can use this to define which actions and data each role is permitted to access from within the data section, as we’ll see in the following section.
Users with the App Admin role have full CRUD permissions across all tables.
Data structure
Our template utilizes Budibase’s internal database, enabling us to define and manage schemas using our Data section’s visual editor.
Check out our documentation on Budibase DB to learn more.
Our application relies on several interrelated internal tables, as well as role-specific Views based on these.
Let’s break it down.
Tables
As we said earlier, our template utilizes five internal tables. These are:
- Glossary - Storing definitions of our different kinds of submissions. This is provided as a reference for App Admins.
- Risks - For storing submissions relating to potential risks.
- Incidents - Where incidents are recorded and tracked.
- Improvements - Allowing customers to suggest new improvement initiatives.
- Improvement Projects - Which accepted Risks, Incidents, or Improvements can be related to.
Our app also relies on Budibase’s internal Users table to enable individual rows across these to be assigned to specific users, as we’ll see in the next section.
Our glossary simply stores definitions for each of our other tables.
Each of our other tables stores data that’s required to record and process submissions. Here’s a summary of the attributes within each.
Improvement Projects:
- title - Text,
- id - Number,
- created_by - Single User,
- last_updated_by - Single User,
- description - Long Forn Text,
- created_at - Date,
- status - Single Select,
- start_date - Date,
- end_date - Date,
- project_manager - Single User,
- improvement - Relationship,
- risks - Relationship,
- incidents - Relationship,
- updated_at - Date.
Improvements:
- title - Text,
- id - Number,
- start_date - Date,
- end_date - Date,
- created_at - Date,
- updated_at - Date,
- description - Long Form Text,
- created_by - Single User,
- last_updated_by - Single User,
- Improvement Project - Relationship,
- status - Single Select.
- feedback - Long Form Text.
Risks:
- title - Text,
- id - Number,
- created_at - Date,
- updated_at - Date,
- created_by - Single User,
- last_updated_by - Single User,
- description - Long Forn Text,
- improvement_project - Relationship,
- status - Single Select,
- feedback - Long Form Text.
Incidents:
- title - Text,
- id - Number,
- reported_by - Single User,
- employee_involved - Single User,
- date_of_incident - Date,
- date_created - Date,
- notes - Long Form Text,
- status - Single Select,
- Improvement Project - Relationship,
- feedback - Long Form Text.
Relationships
Our app utilizes two distinct types of relationships.
Relationships between tables in BudibaseDB are created using a special Relationship column. This allows us to configure links between rows across tables, either within our Data section or in end-user applications.
We’ve used three instances of this to create Many-To-One relationships from our Improvement Projects table to the Improvements, Risks, and Incidents tables.
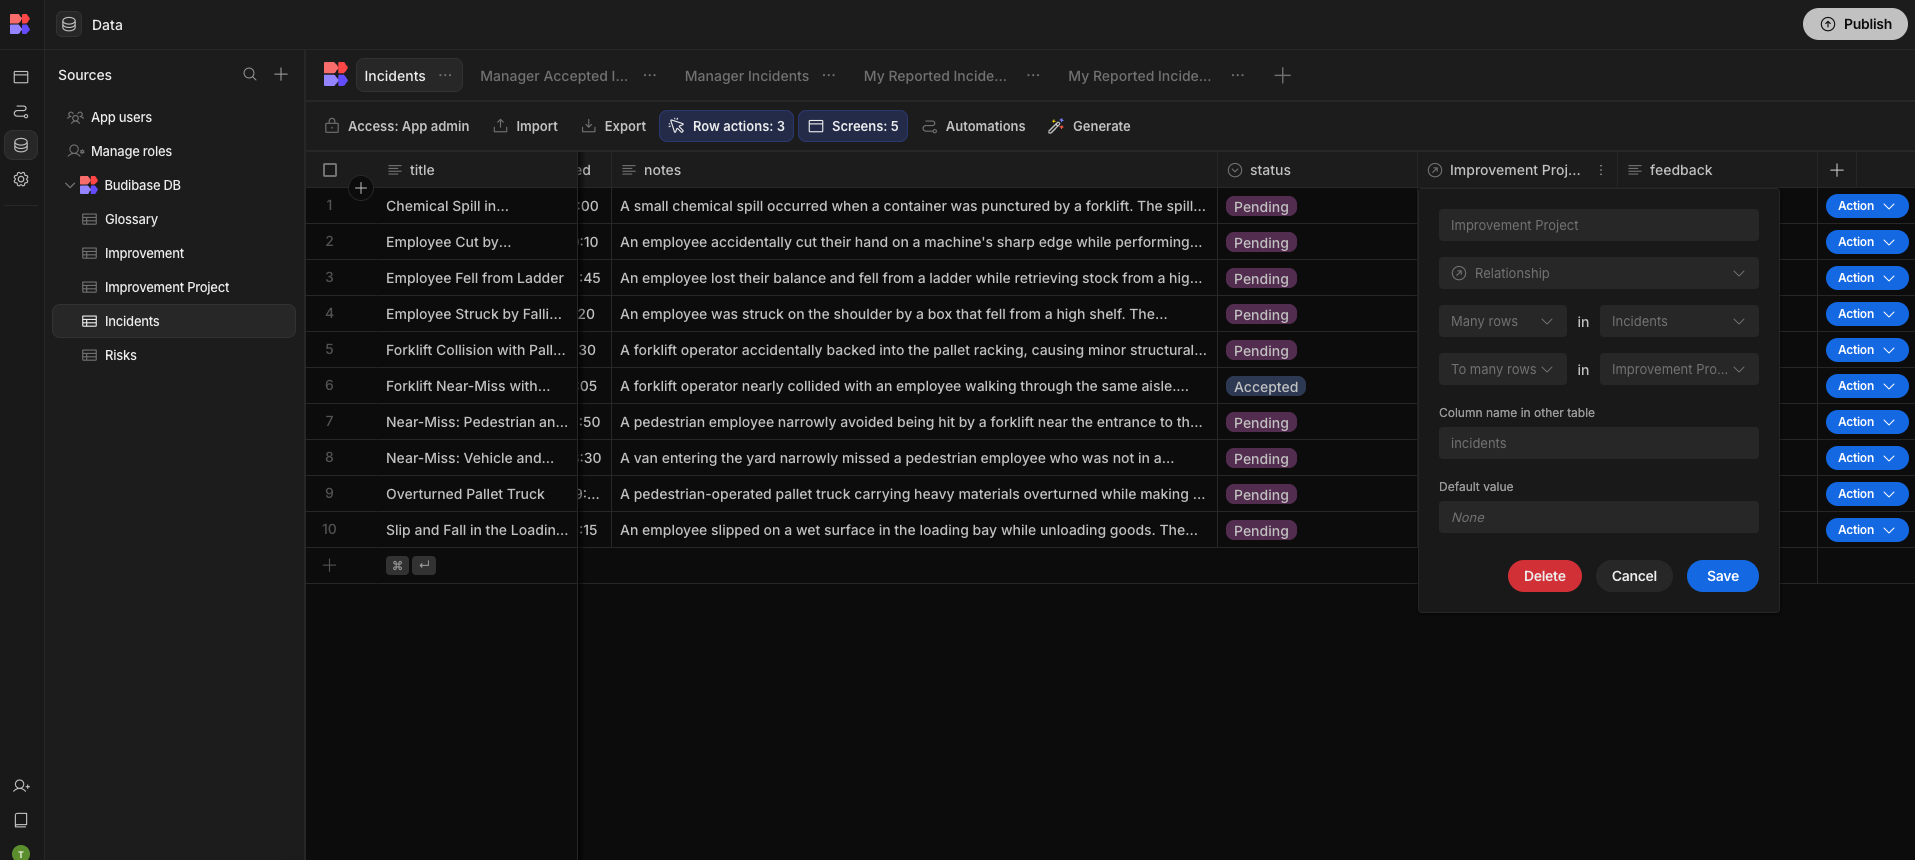
Rows in each of our tables can also be linked to records in Budibase’s internal Users table. This allows us to record which user created or updated certain submissions, as well as assigning rows to particular owners.
In Budbase, we have two dedicated columns for linking tables to User records - the Single User or Multi-User columns.
Our app utilizes Single User columns across each of our tables to represent various relationships with users.

Views
Views are subsets of data across one or more tables, with specific rules around accessing and interacting with data.
In Budibase, these are used to centrally configure what each user role can do with our stored data, including granting read or write permissions at the row or column level. We can then use these to autogenerate CRUD UIs and automation rules.
Our underlying tables have their Access settings to only be readable or writable by App Admins.

Each of our tables has distinct Views for each of our two core user roles.
For App Users, the views for our Risks, Incidents, and Improvement tables are broadly similar, enabling them to create records, read their own submissions, or set the status attribute to cancel via a Row Action.
The specific attributes that users can read or write are then defined under the Columns tab, so App Users are able to access the columns that are required to initially create their submission, check its status, or perform a cancellation.
 Each of these tables has two additional Views for Power Users. The first provides full Read and Write access across the tables, along with two Row Actions to either Approve or Reject submissions.
This is attached to the respective Review screens for each of our submissions tables.
The other provides Read-Only access for each of the submission tables. This populates the Projects screen.
We can also use Views to perform key calculations on our database tables. Our template features views for each of our three submissions tables to provide counts of submissions for individual users based on their statuses.
For instance, we have a View called My Improvements Count. Using the Configure Calculations tab, we’ve set this to return the Count of rows, Grouped By the status attribute.
This will return each unique status, along with the number of relevant entries in our table.

However, we don’t want to include any submissions that have either been canceled or rejected. We also only want to include the rows that are related to the current user in the front end.
So, we’ve applied three filtering rules. The first includes rows that have been submitted by the current user. The other two exclude rows where the status is Rejected or Canceled.
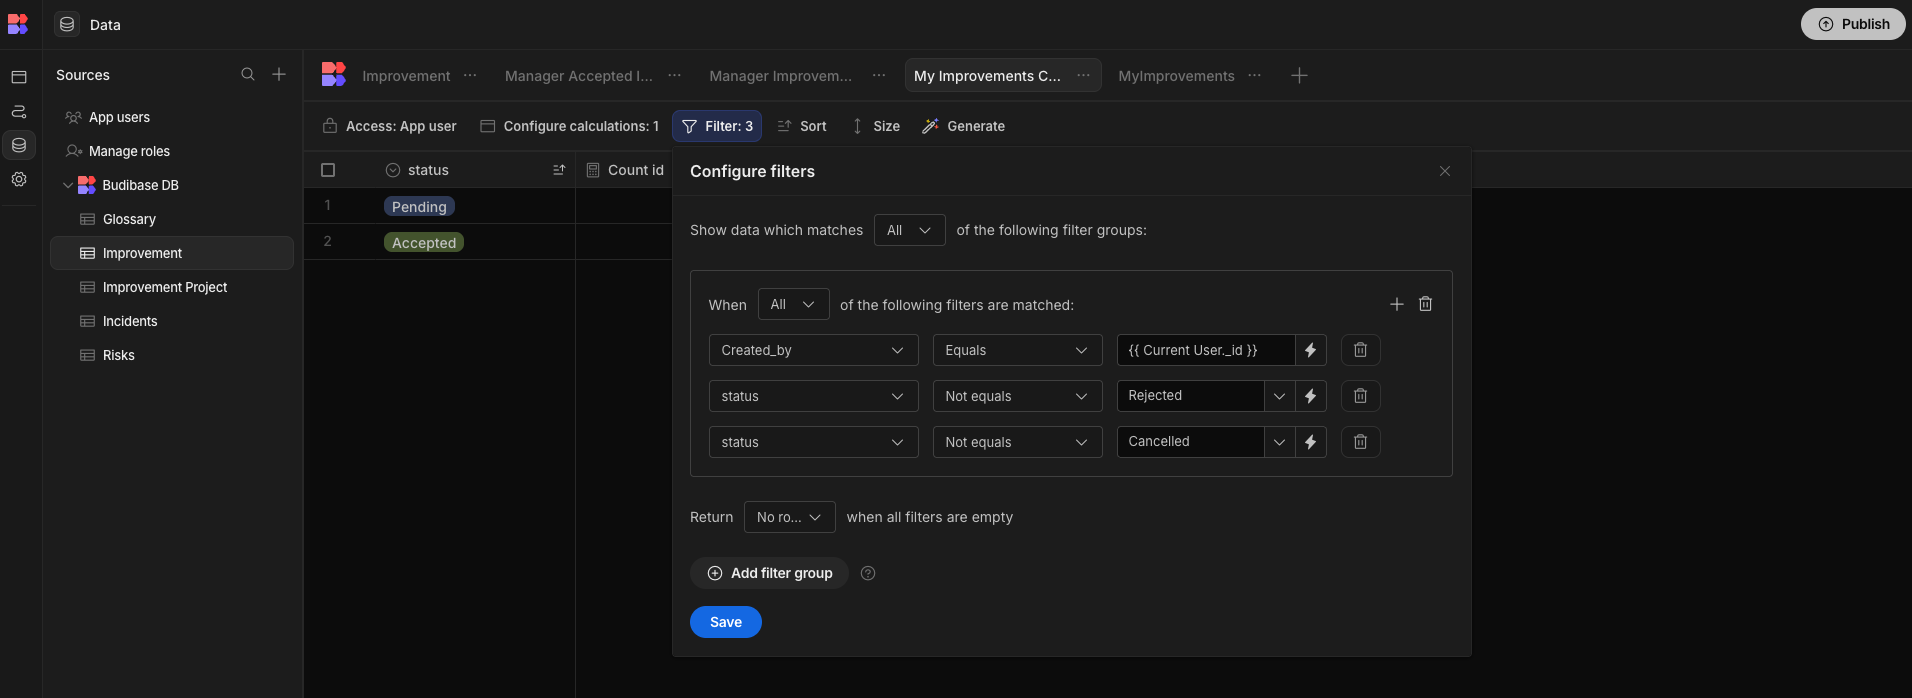
These are then displayed on the home screen for App Users, as we’ll see in a moment.
User interfaces
Our application uses a combination of fully custom screens and UIs built around Budibase’s autogenerated layouts.
Check out our docs page on working with screens within Budibase.
The screens available for each user cohort across our three types of submissions follow a broadly similar pattern.
App Users can access three kinds of screens. Firstly, there are three data collection forms, where they can create records on our three submission tables. These rely on Budibase’s autogenerated Form layout, with minor changes to their design.
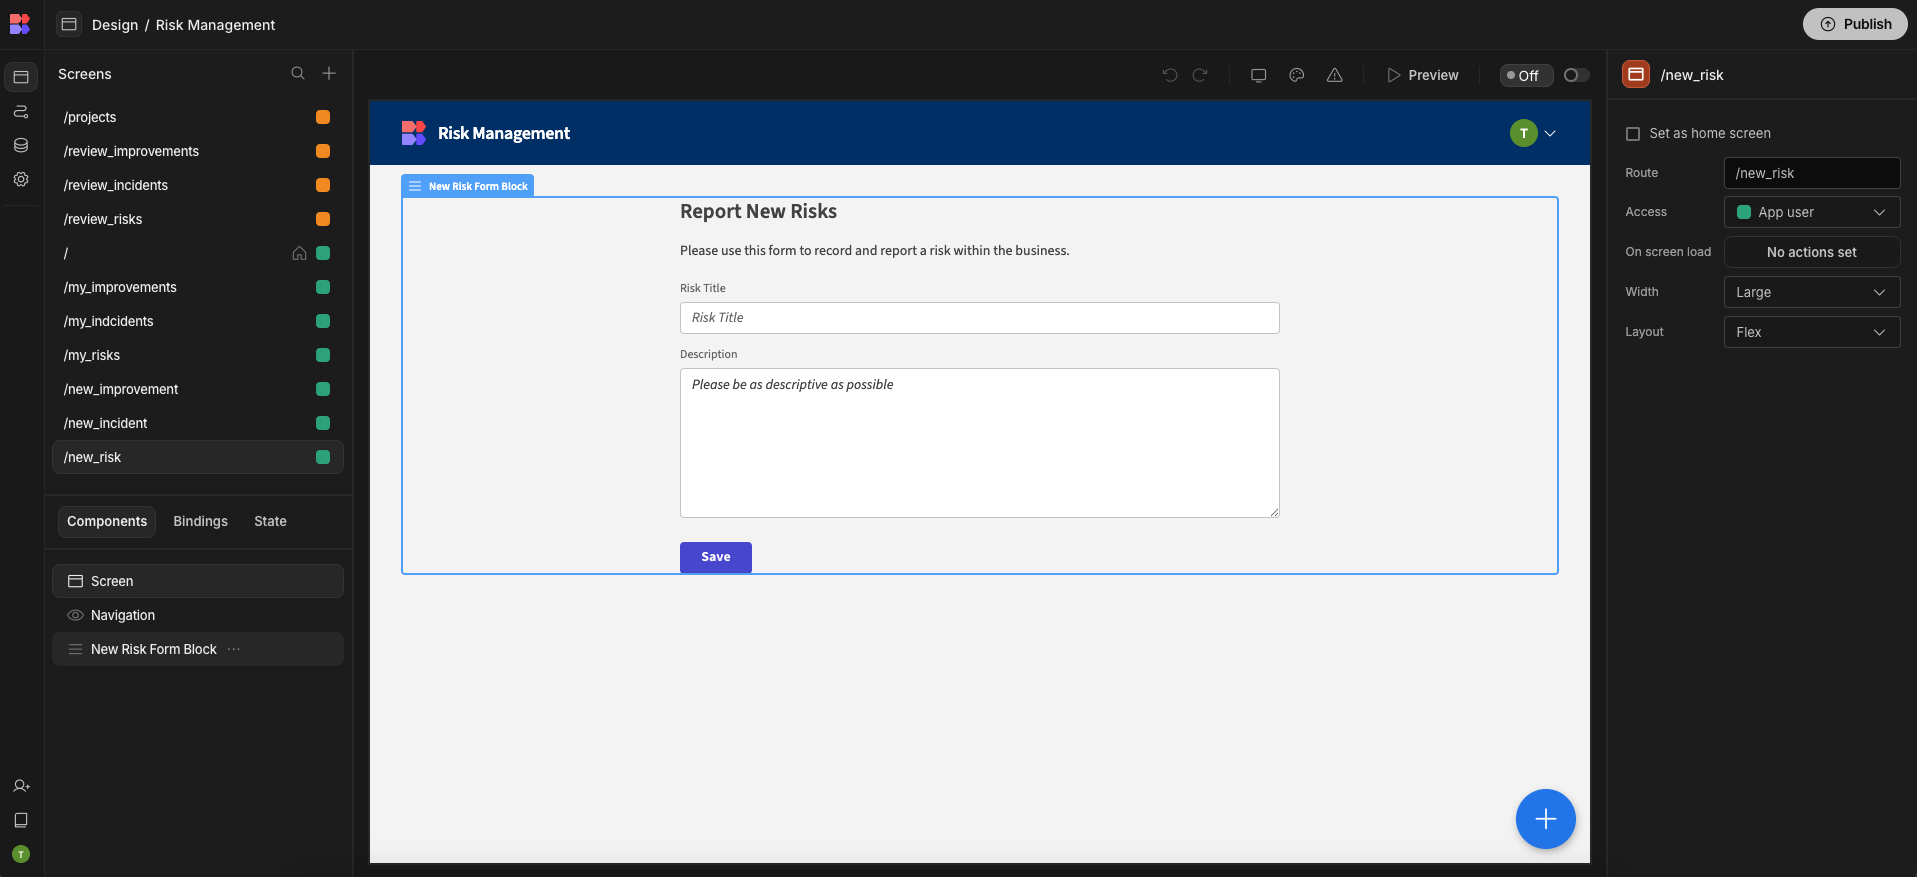
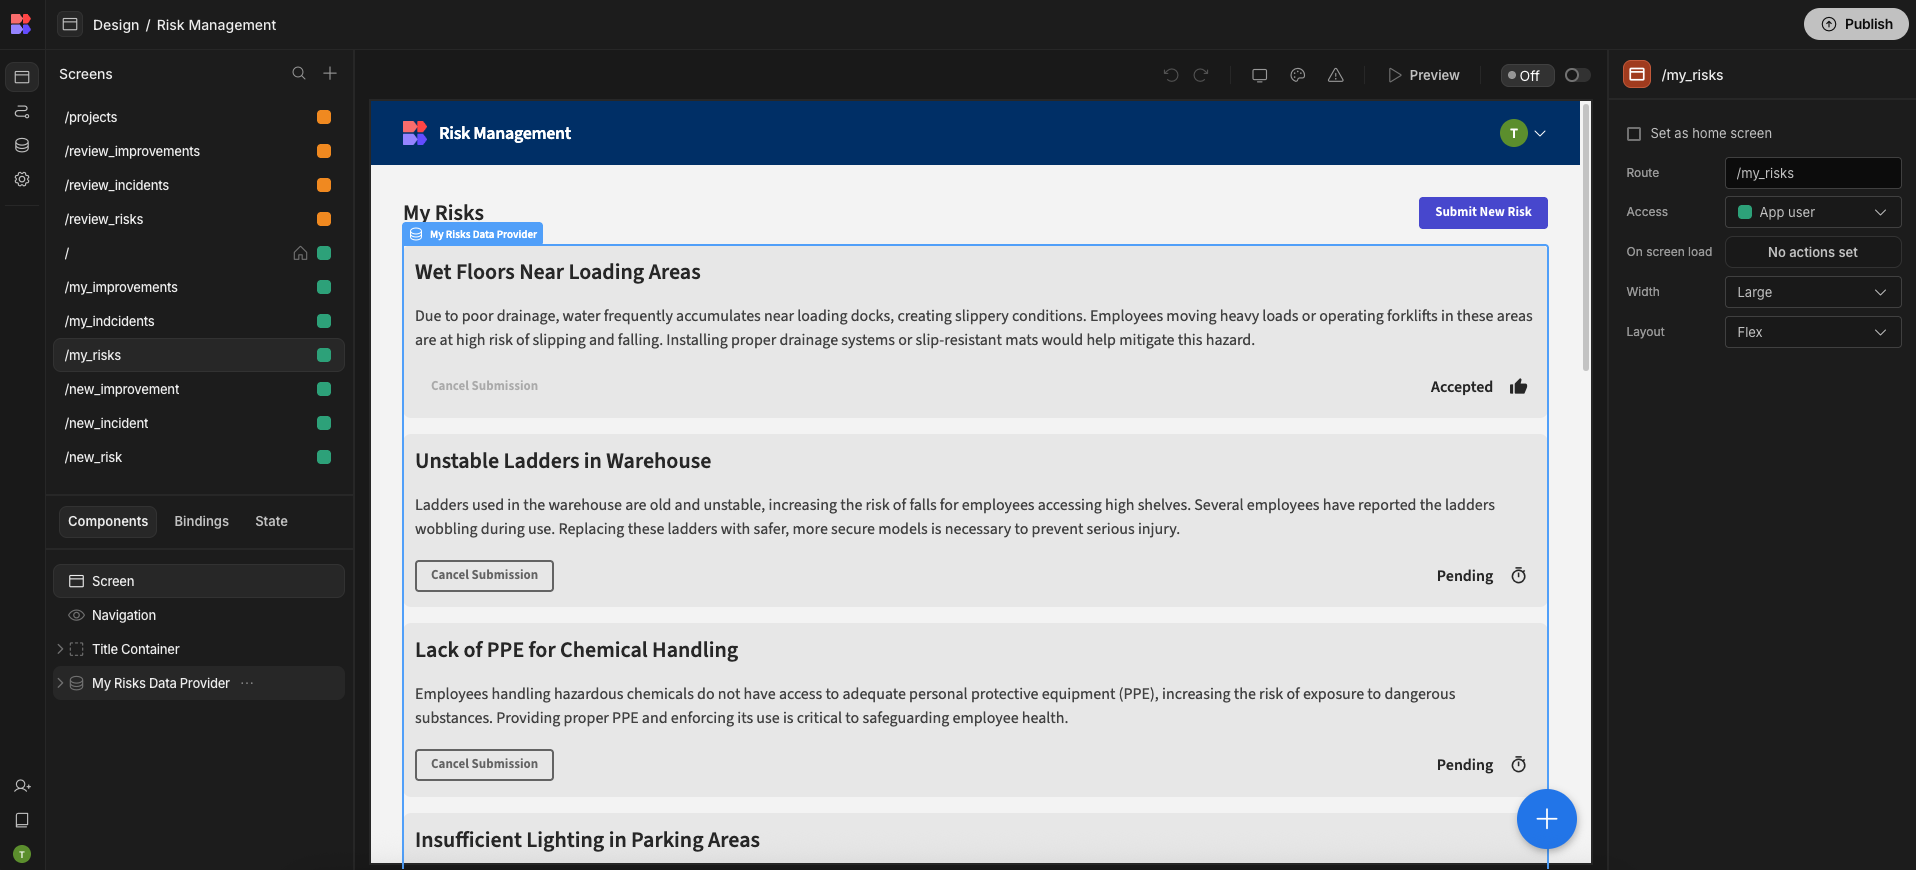
We’ve provided fully custom screens for App Users to view, track, or cancel their own submissions. These are made up of a variety of nested components wrapped in Data Providers and Repeaters to populate display elements with values from the relevant Views.
Take a look at our documentation on working with data in design to learn more about how this works.
We’ve also created a dedicated home screen for App Users. This provides links to navigate to the screen for each type of submission. Its design relies on stylized Container and Text components.
The Container relating to each type of submission displays the total number of entries that the user has created, along with how the active submissions break down by status.
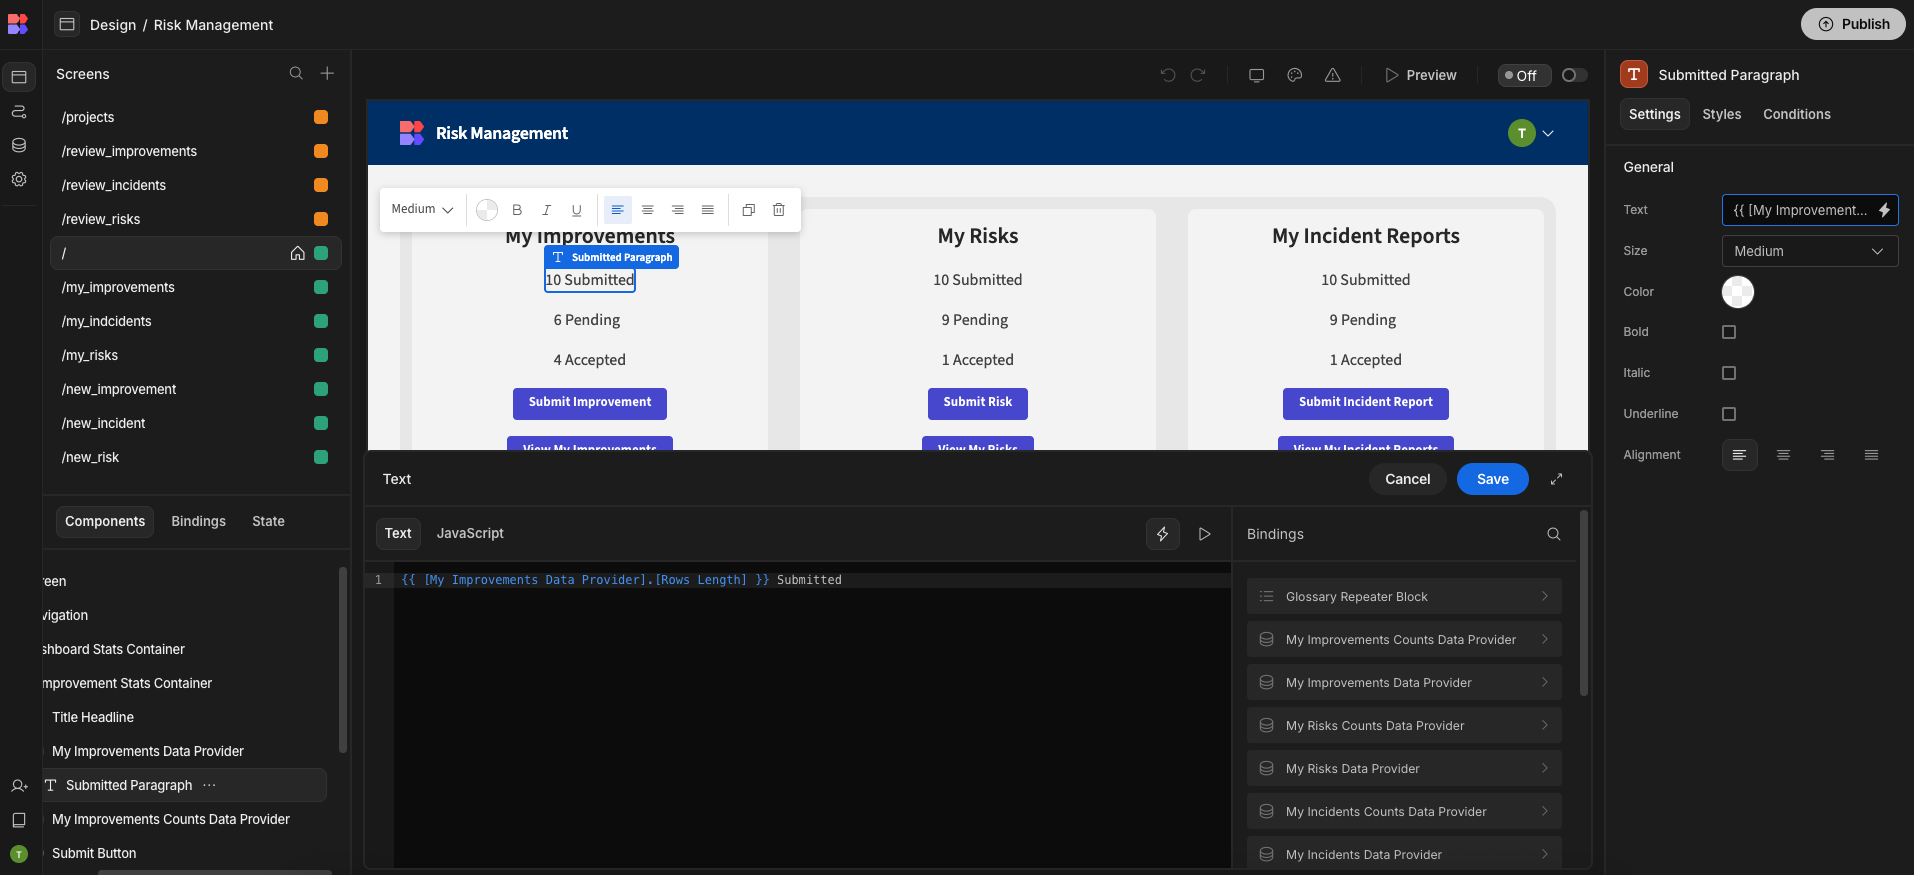
First, we have a Text component that displays the total number of each type of submission by the current user, by calculating the length of the relevant View. So, for improvements, we use {{ My Improvements Data Provider.Rows Length }} Submitted
The My Improvements Data Provider has a filtering expression to exclude entries where the status is set to canceled.
Beneath this, we have a second Text component which is wrapped in a Data Provider and Repeater.
These components will connect to a data source and display each of the elements nested within them for each individual row. In our case, we’re displaying the status and count from our View Calculation, using:
{{ Improvements Counts Repeater.My Improvements Counts.Count id }} {{ Improvements Counts Repeater.My Improvements Counts.status }}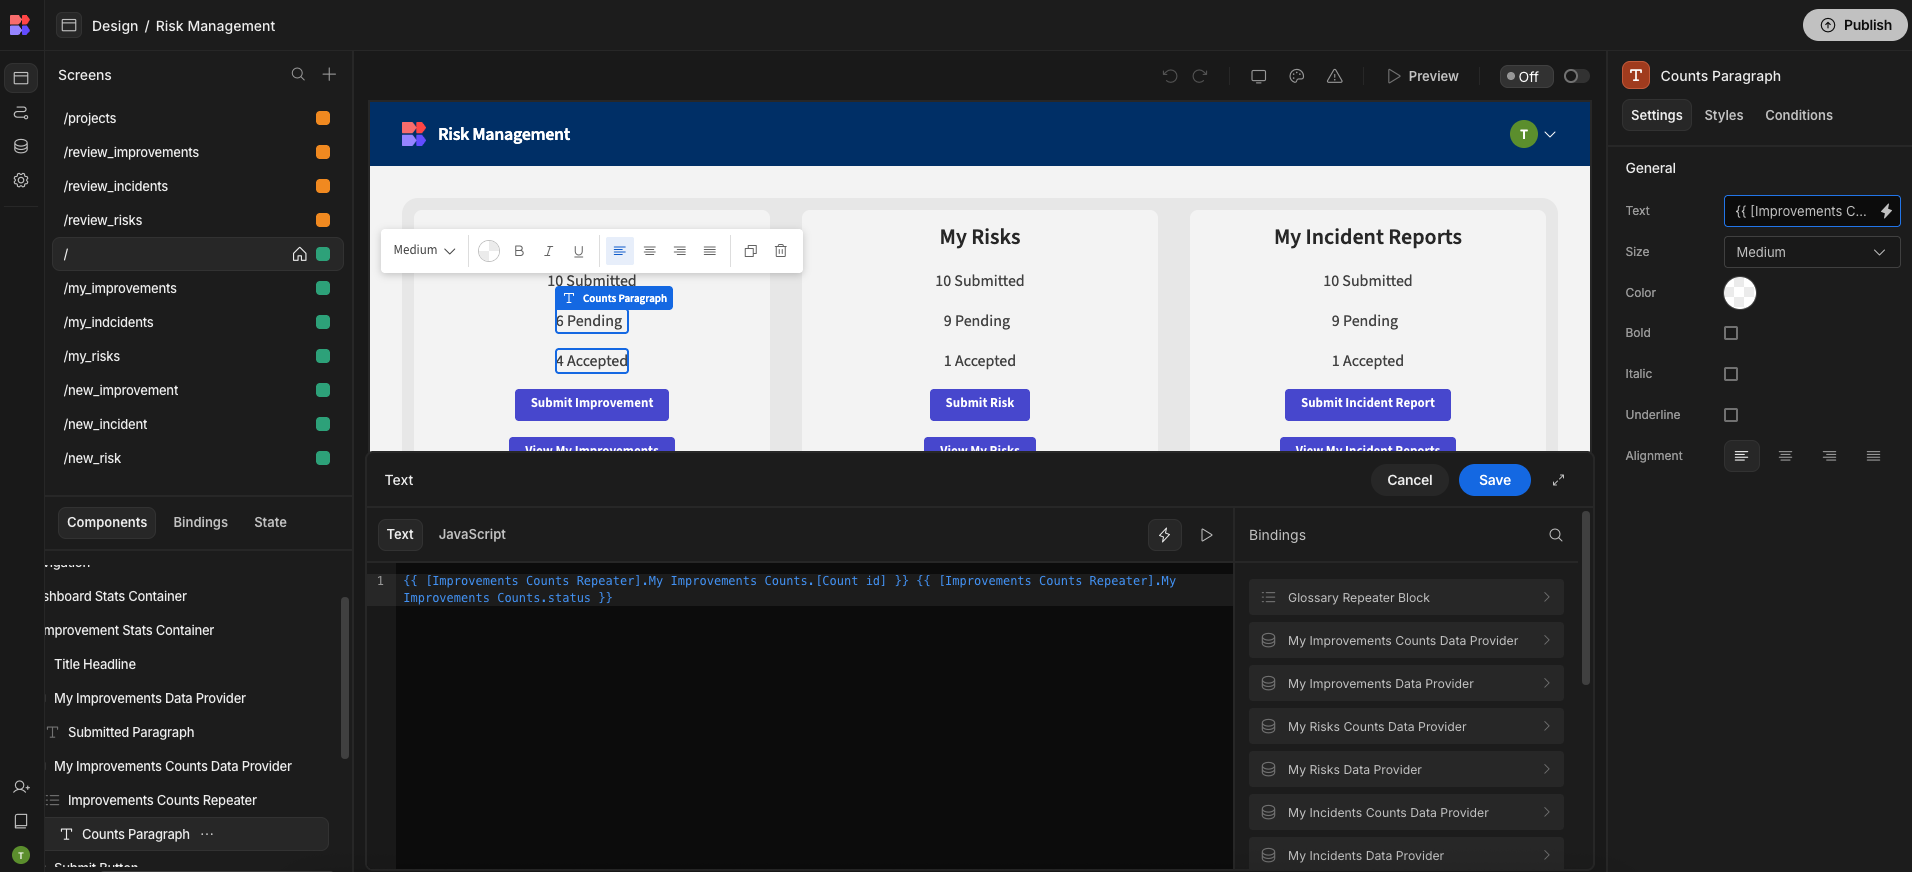
App Users can also use buttons to navigate to either the submission form or table UI for each respective type of submission.
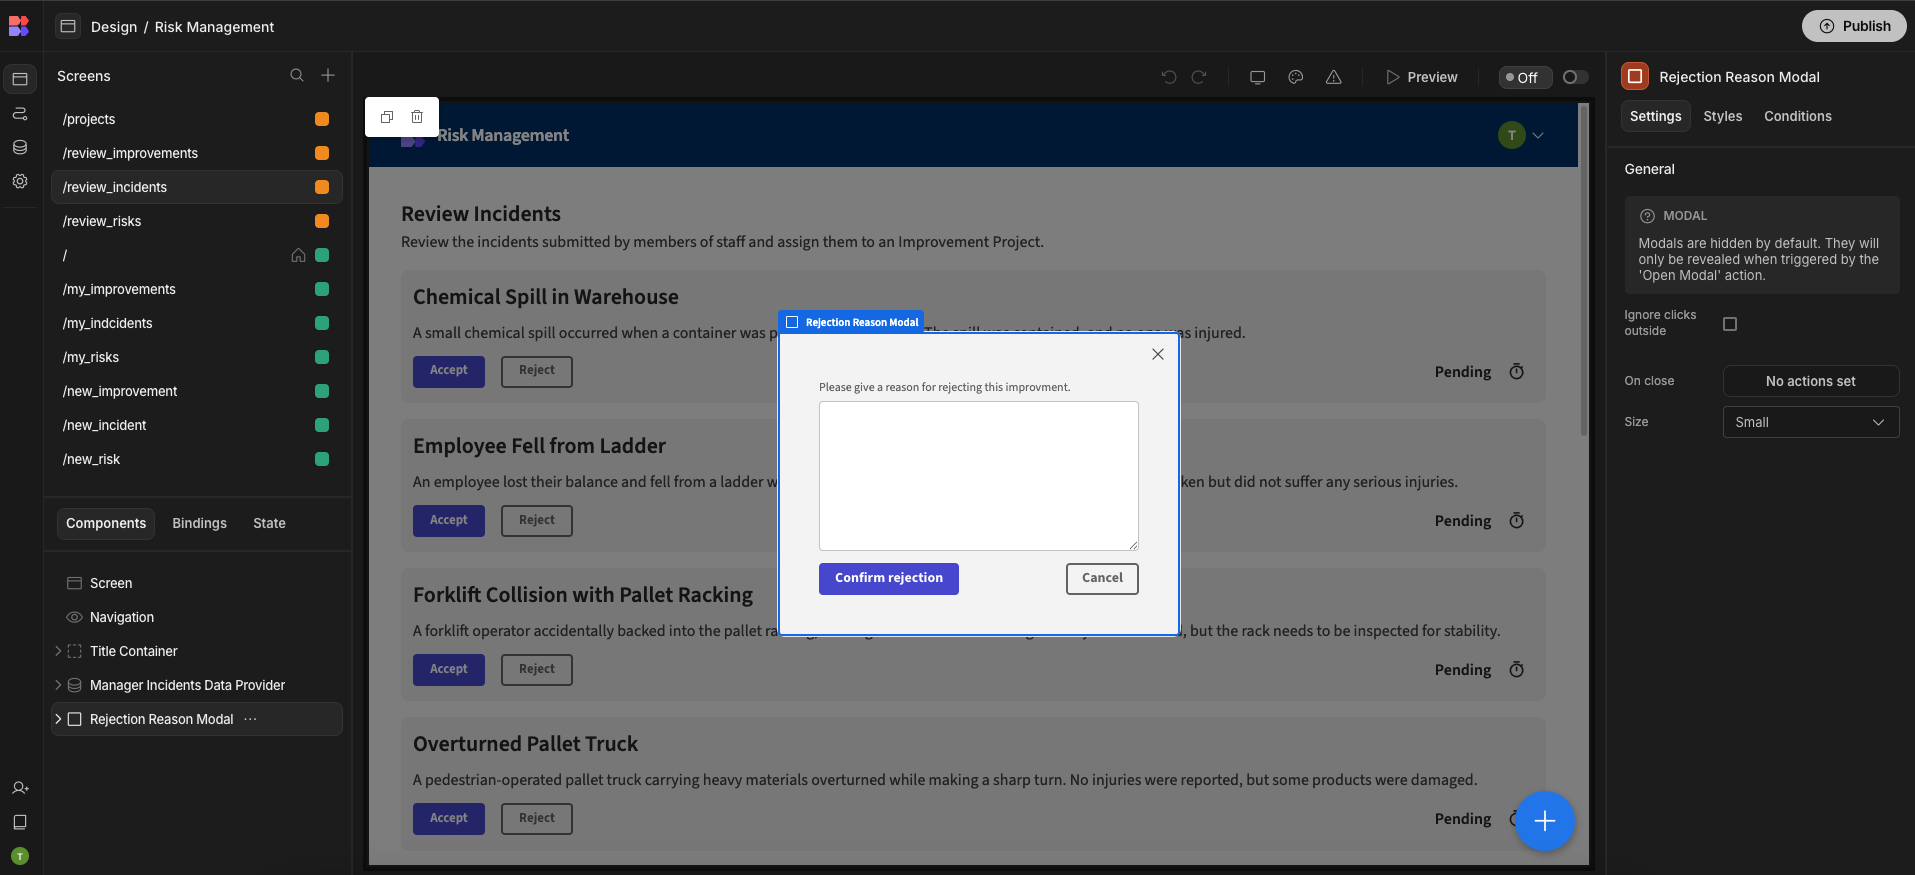
Our Power User screens for reviewing submissions follow the same pattern as the App User versions we saw earlier, with the additional ability to Approve or Reject records.
They can add additional details on a modal form that’s displayed when they hit reject.
Power Users can also access a similar screen for viewing or editing Improvement Project records, including reading all of the details of associated submissions, via the View we discussed earlier.
Automations
In Budibase, the Automation section is used to create workflow logic within our applications, including enabling users to take specific actions. Take a look at our automation docs to learn more.
Our template makes extensive use of Row Actions. These are user-triggerable automation flows that run on a specific row within a database table. These can be created from the Data section, under the Row Actions tab within a database table or view.
The App User view for each of our submission tables features a Row Action called Cancel.
Once triggered, this performs two actions. First, it updates the Status attribute of the trigger row to Cancelled. Then, it sends a template email to the user, confirming that this has been successful.
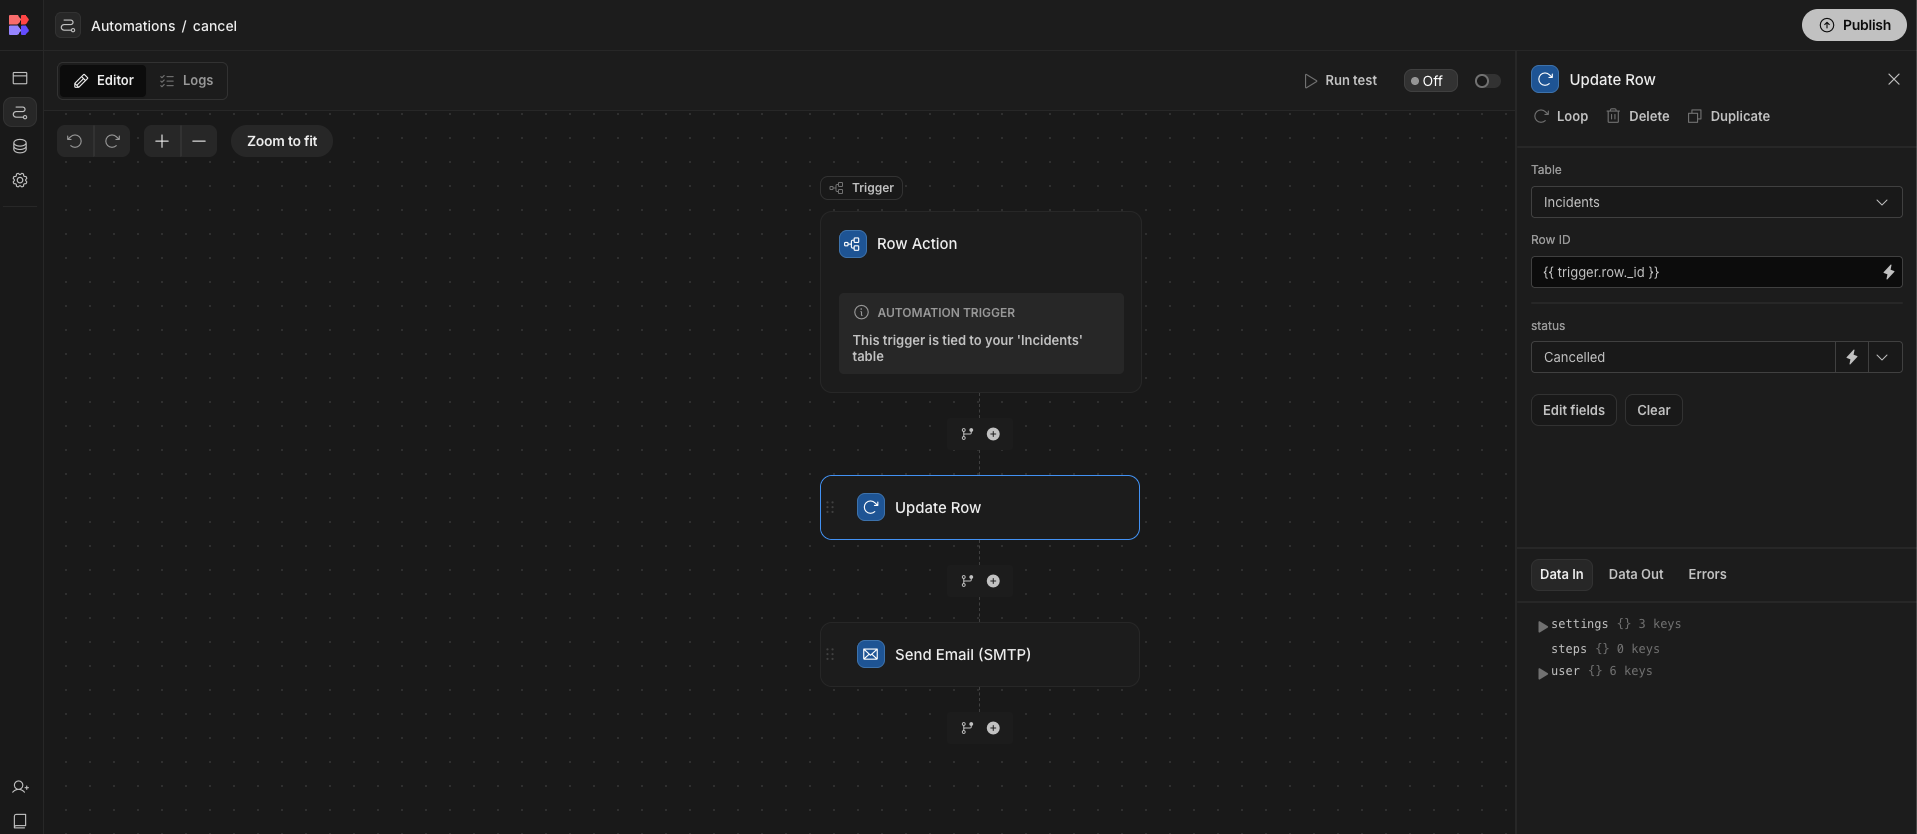
Power Users have two additional Row Actions for each submission table, called Approve and Reject. These follow the same structure as our Cancel action, changing the Status to Approved and Rejected, respectively.
They then send an email template to the original submitter, notifying them of the outcome.

Lastly, we’ve built an Automation called Outstanding Attributes, using a Chron Trigger. This enables us to set rules which are executed at defined intervals. Ours runs every Monday and Thursday morning at 09:30.
We’ve set our Cron Trigger manually, but we also have the option of using AI to generate an expression.
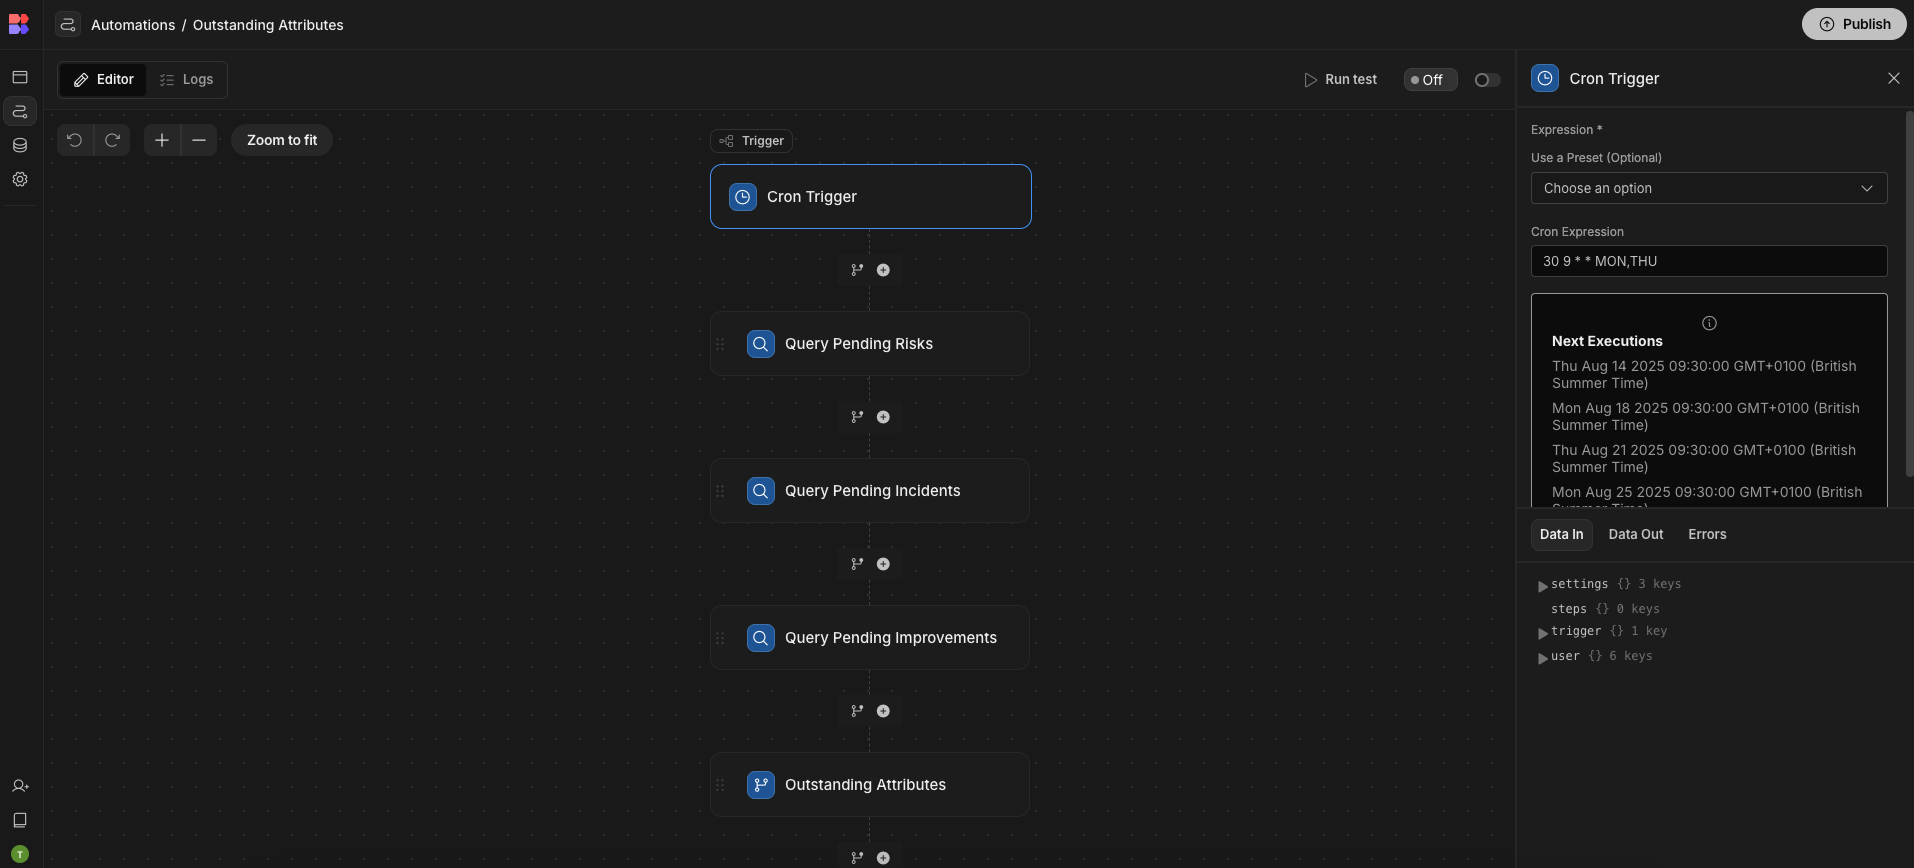
This uses three Query Rows steps to return all of the rows from our Risks, Incidents, and Improvements tables with Status attributes set to Pending.
We then use a Condition block, with some custom JavaScript, to count the total number of rows across all three tables that are currently Pending. If this is not 0, we continue.
Lastly, we use an Email action to notify relevant users that submissions need their attention. By default, this is set to notify the current user, but this can be overridden to target a specific email address or a comma-separated set of emails.
Alternatively, we could configure this to notify all users with a particular role, such as Power User or App Admin.
By default, this Automation is set to Paused.
Customizing our risk management template
Budibase templates are created as ready-to-use solutions, but they also provide a basis for you to build your custom workflow apps.
Let’s think about some of the key ways that you can modify our change management template within Budibase.
Updating the data model
The Data section is the core of every Budibase app. Our template utilizes Budibase’s internal database. So, we have two broad options for customizing our data model. We could swap this for an entirely different database, or we could alter the schema of our existing one.
If we wanted to connect to an external SQL database, for example, we could recreate the various Views that we have in place for our existing database before connecting this to our existing UIs and automations.
We can also easily modify the schema of our existing database, including adding, removing, or editing existing tables and columns, using the spreadsheet-like interface in Budibase’s Data section.
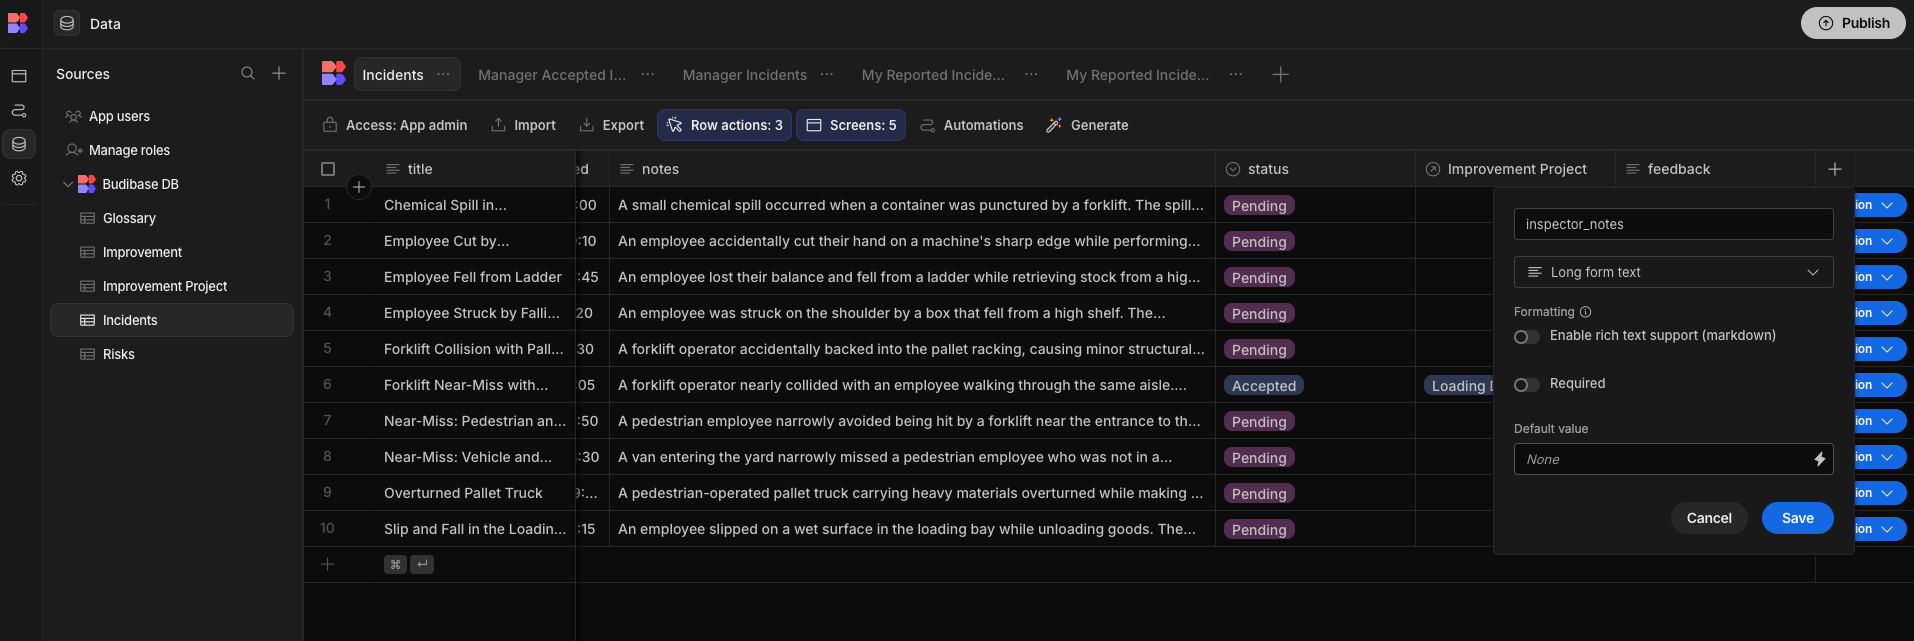
For example, say we wanted to add a new Long Form Text column to our Risks table, called inspector_notes.
We could do this by hitting the + icon at the top of our table.
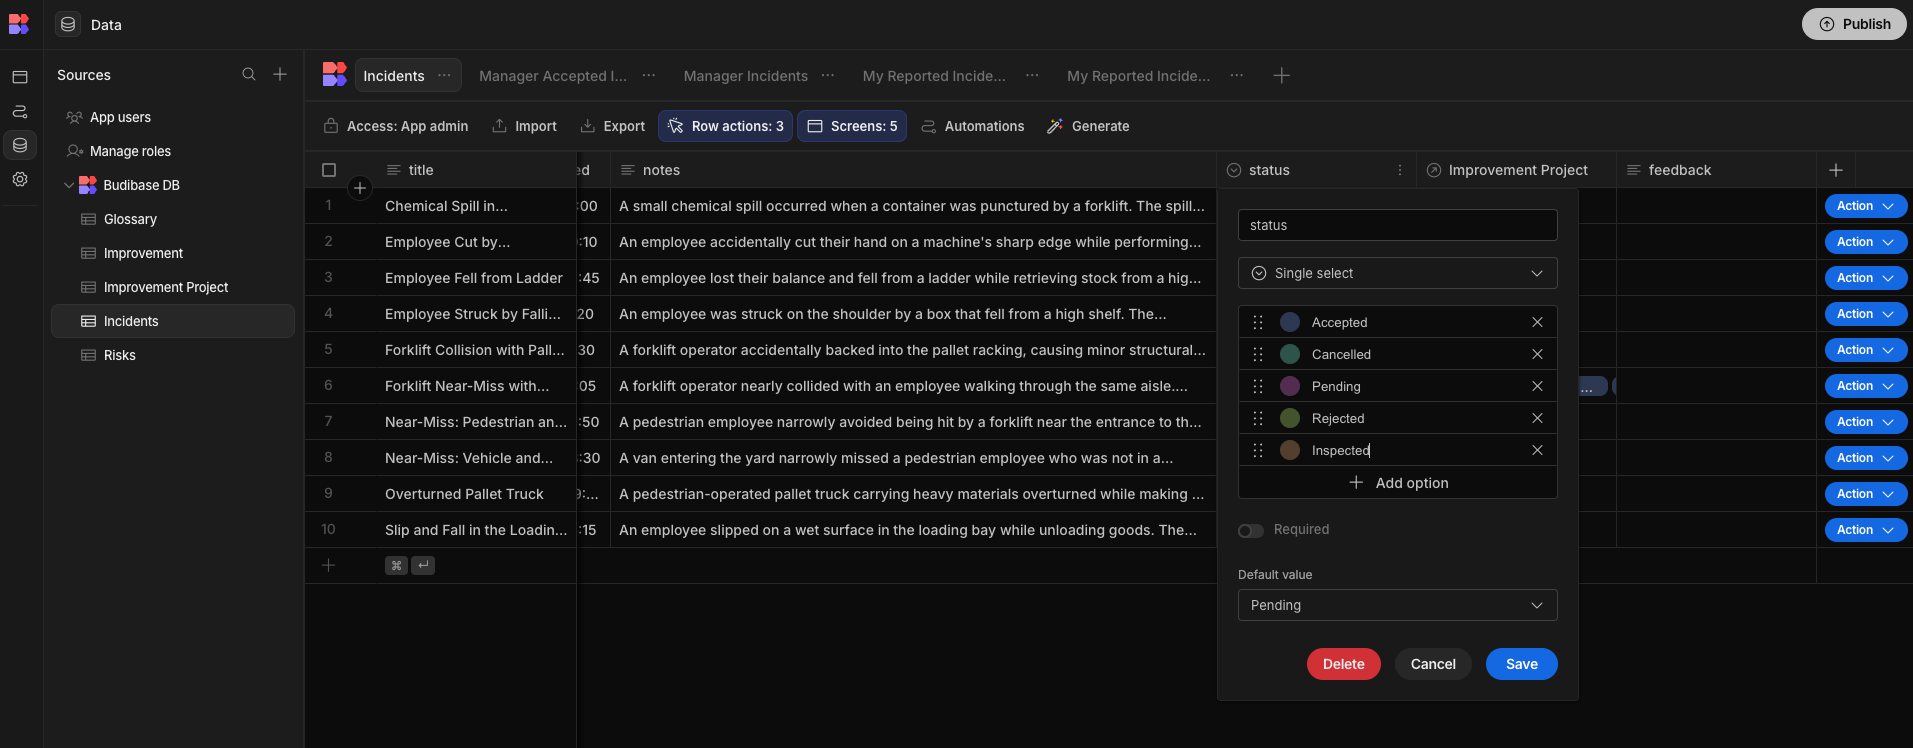
At the same time, we might update our existing status attribute by adding an option called Inspected.
Adding and altering user roles
Another key area where you can modify our template is its user roles. Budibase offers a fully visual interface for creating and configuring user roles, including with branching inheritance.
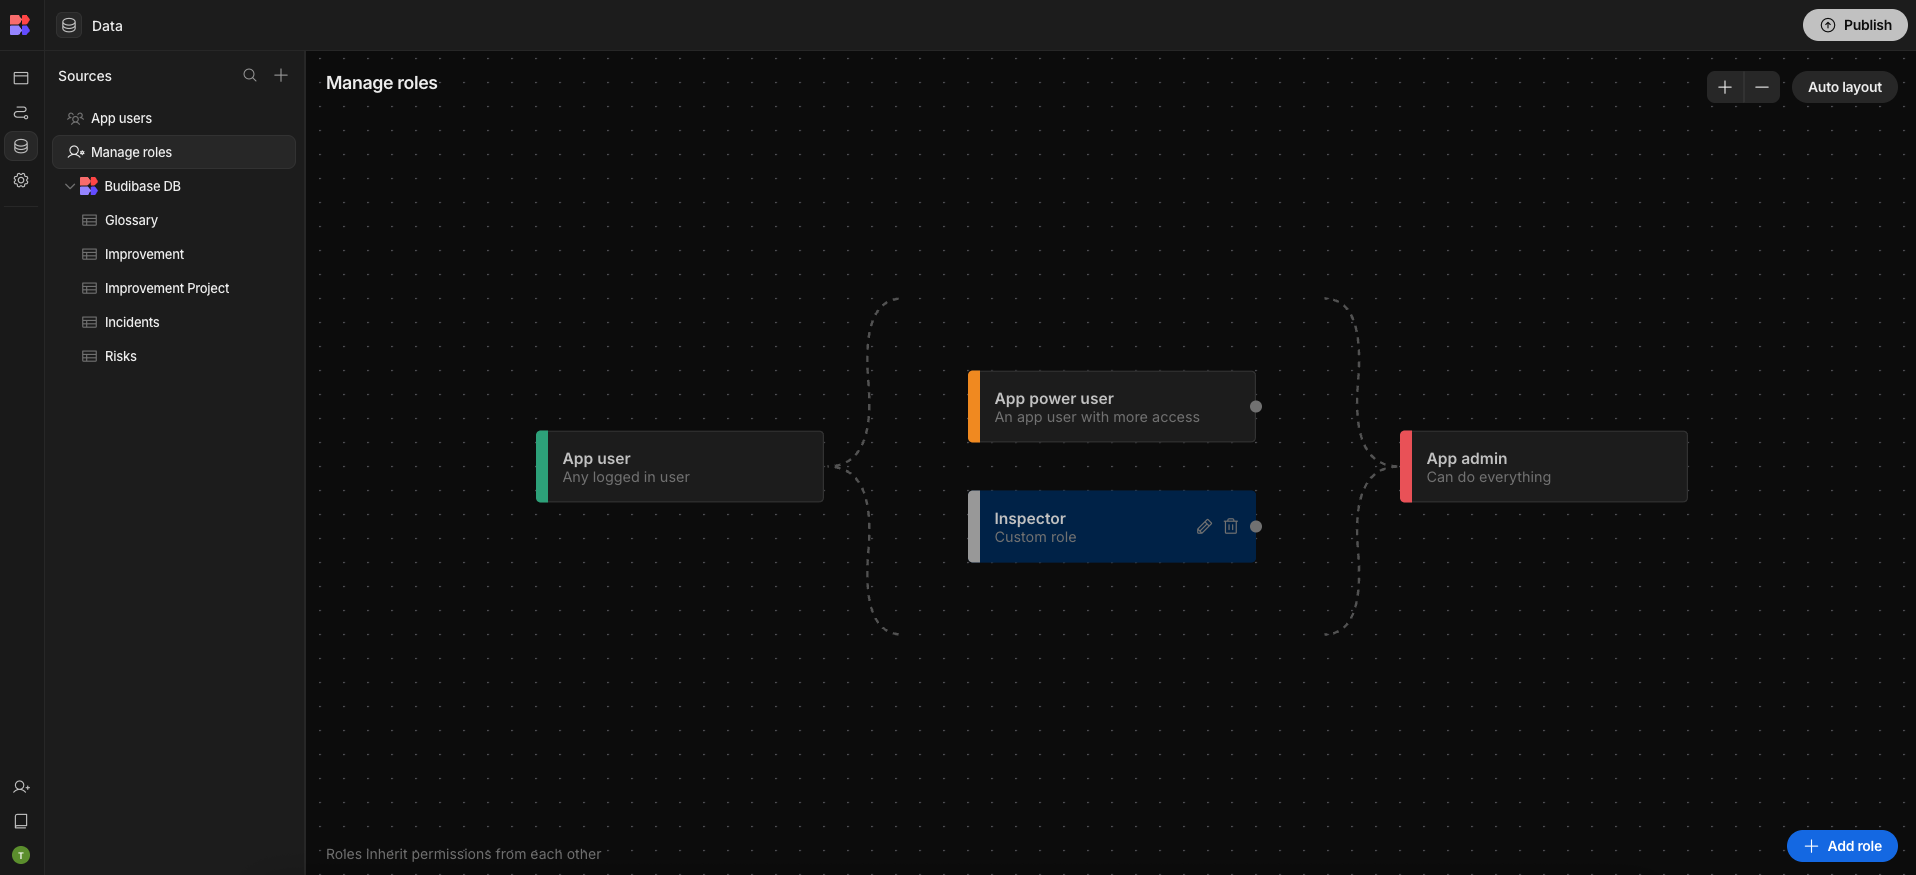
We’re going to create a new role called Inspector this will inherit permissions from the existing App User role, but it will be placed in its own branch, separate from the Power User role.
This means that Inspectors will be able to create any submissions that App Users can, as well as whatever additional permissions we grant them. However, this will be unrelated to the existing Power User role’s permissions.
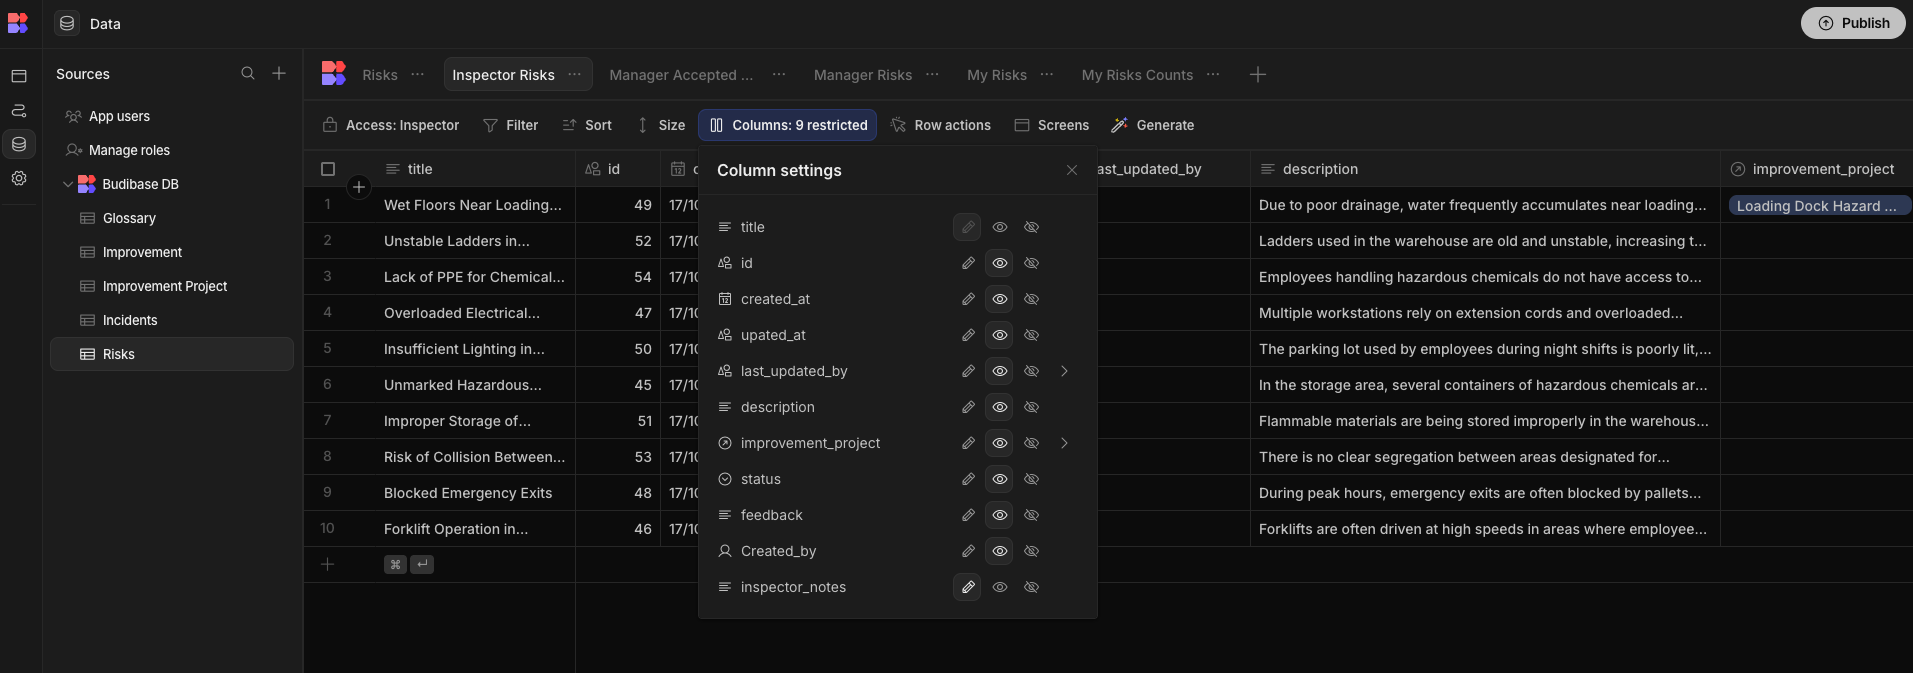
To go along with this, we’ll create a new View and set its Access to the Inspector role. We’ll then make all columns except for Inspector Notes read-only.
We’ll also set a filter to only include entries where the status is set to Pending.
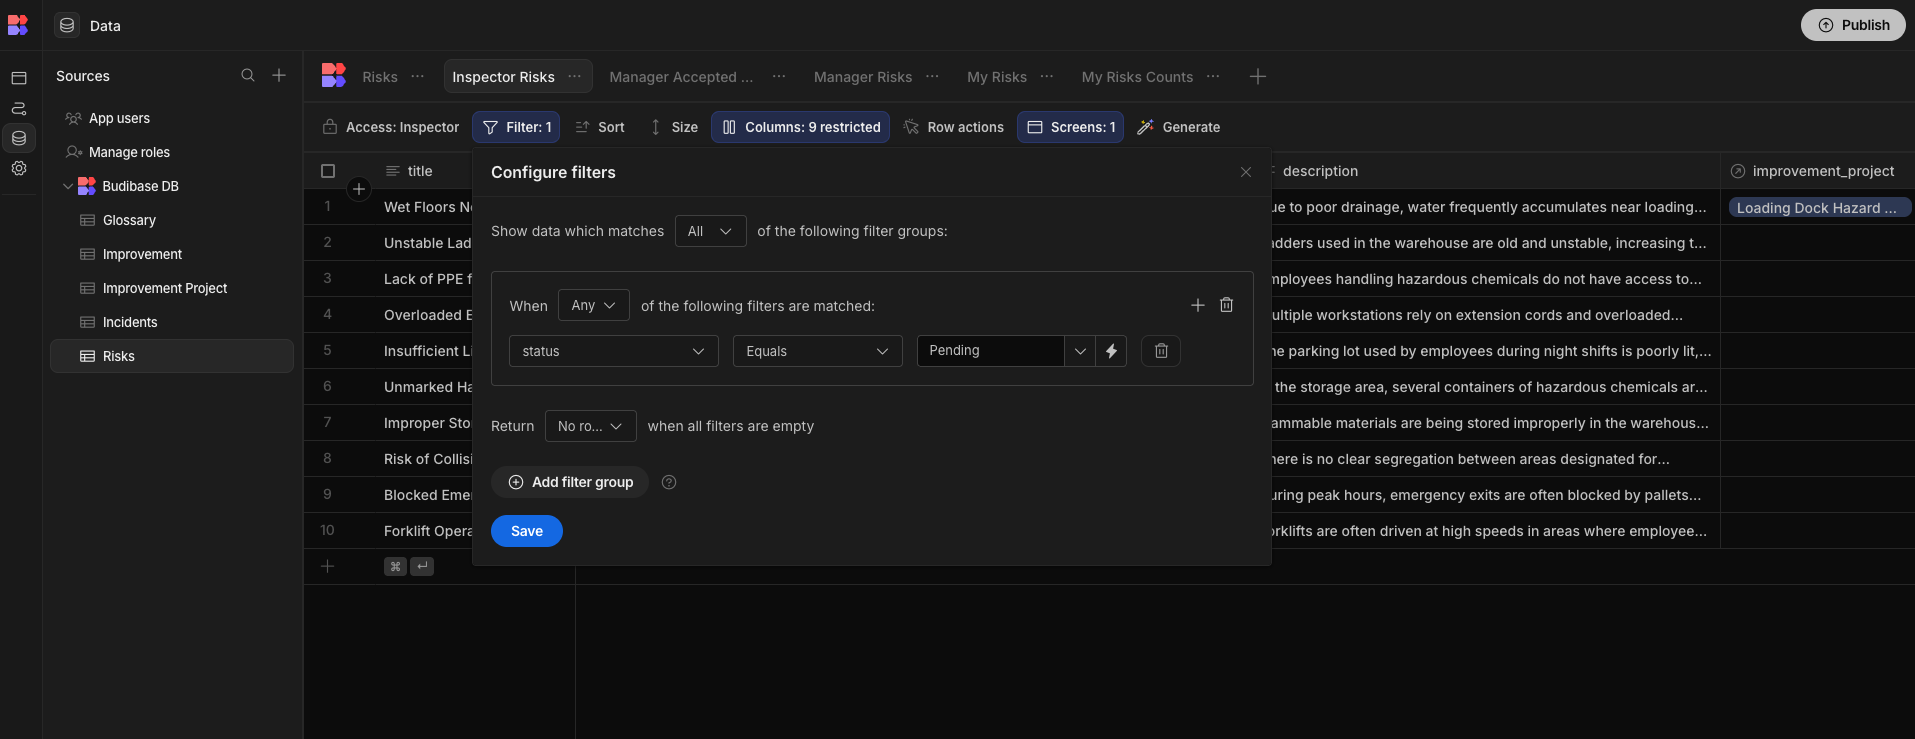
Now, Inspectors have permission to view all pending Risks entries, and add their notes.
Adding extra screens
Next, we need to provide an interface for our inspection workflow.
This will be relatively simple, enabling Inspectors to read our entries and populate the Inspector Notes field.
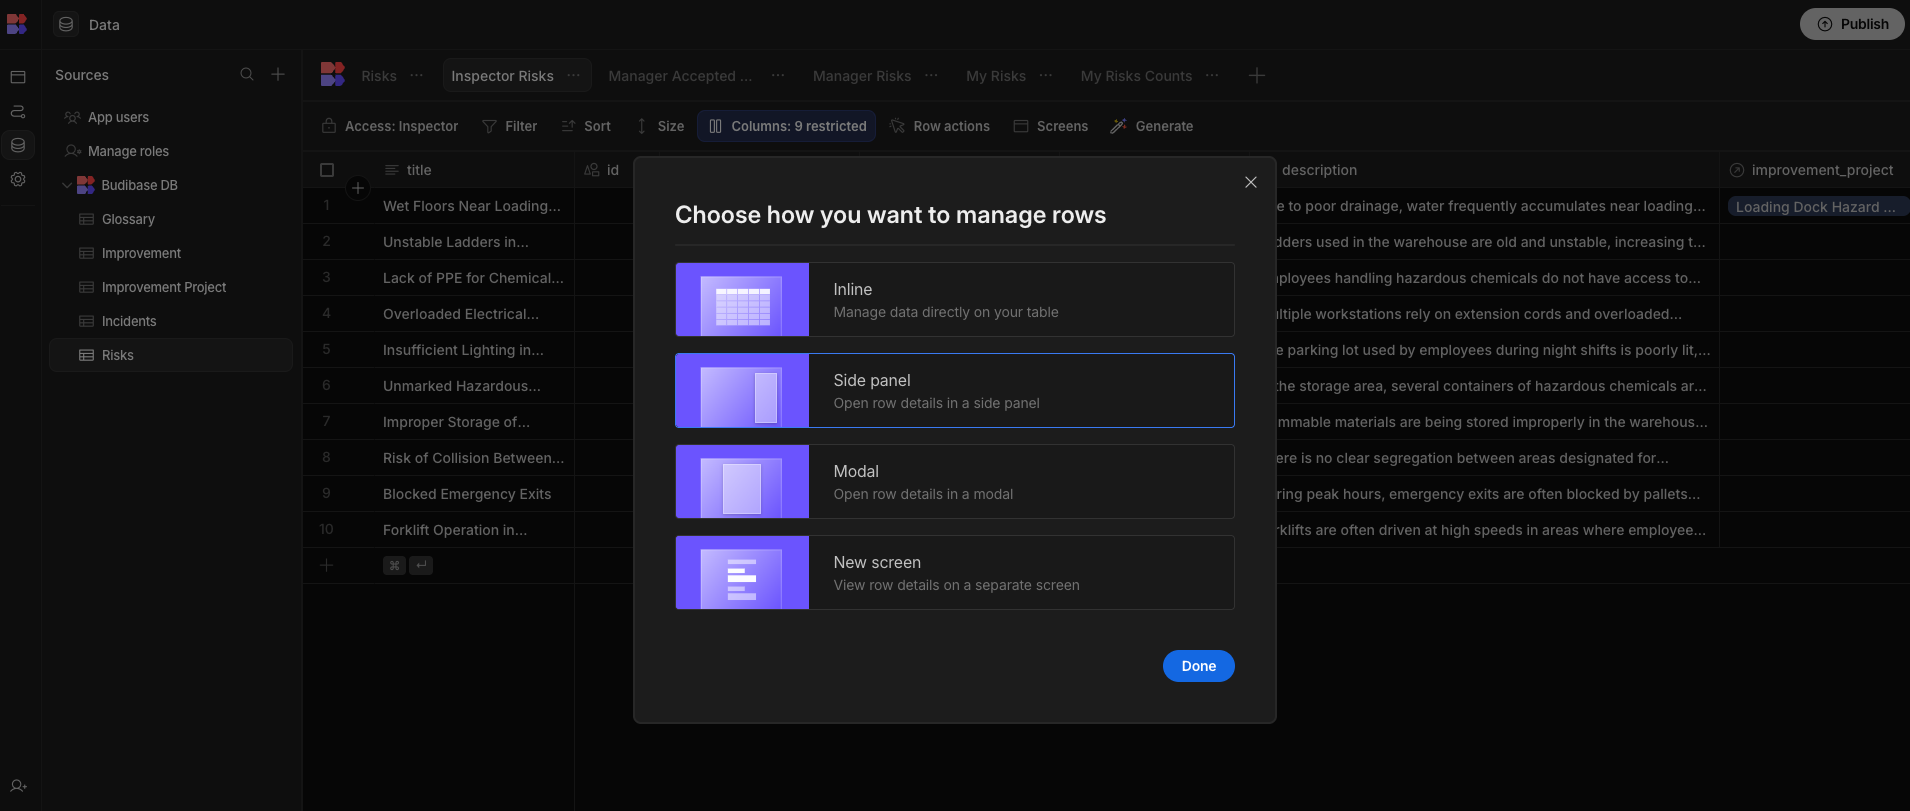
From our new view, we’ll start by autogenerating a Table screen with the Side-Panel Form option.
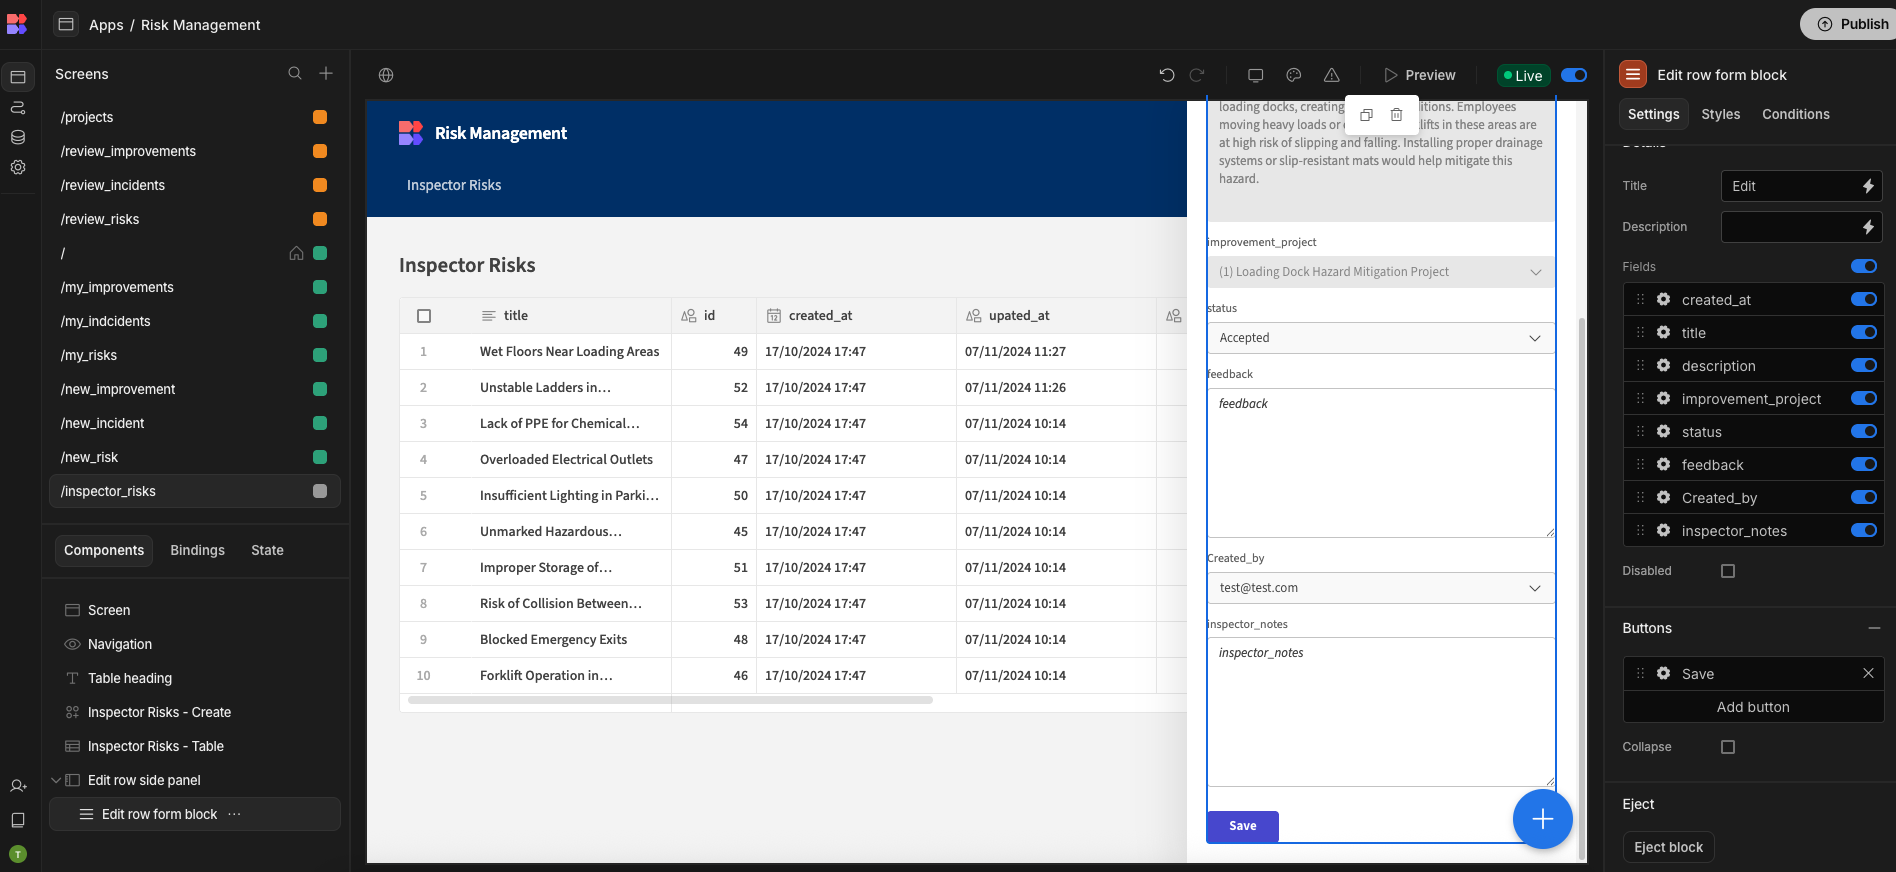
Then, within the Design section, we’ll make a couple of UX tweaks. Specifically, we want to remove the Create Form. On our remaining Edit form, we’ll remove the Delete button and set all fields except for Inspector Notes to Disabled.
Adding your own business rules
Lastly, we can use the Automation section to add our own application logic. To carry on our example we want to add an automation flow so that when the Inspection Notes field is populated, the status is updated to Inspected.
We’ll then email the original submitted, notifying them of this update.
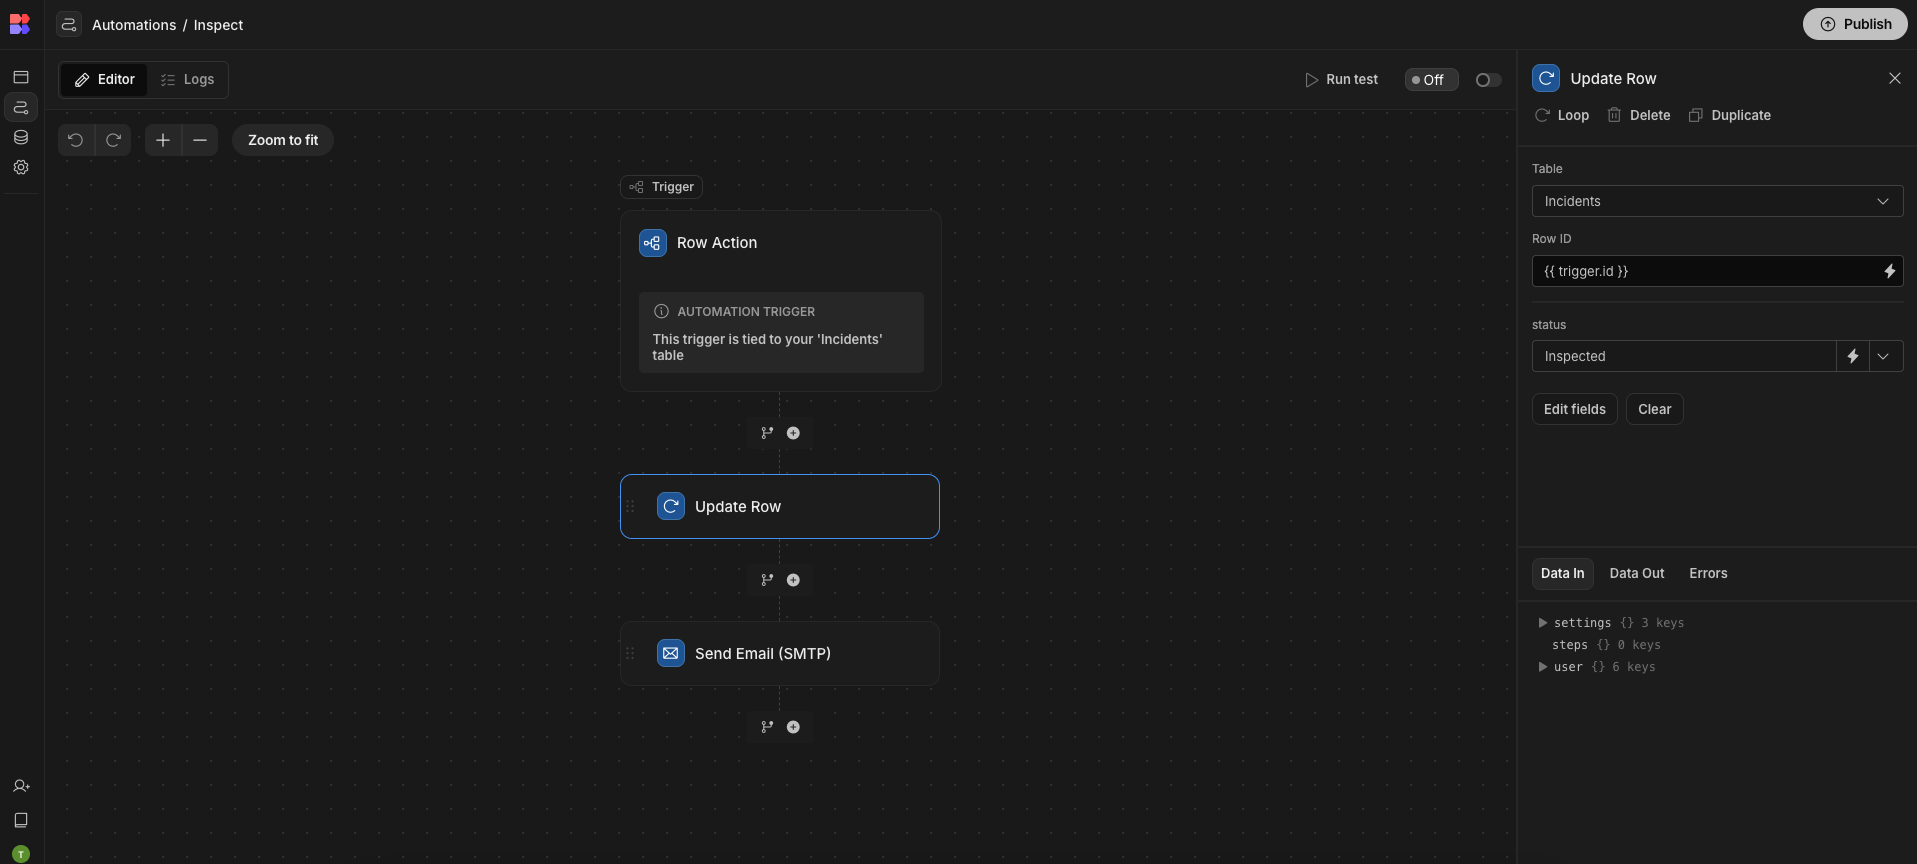
We’ll start by creating a Row Action from our new database View. We’ll call this Inspect.

We’ll then mimic the structure of our existing Row Actions, first adding an Update Row step, followed by an Email step.
To update our row, we’ll set the ID to our trigger ID and the status to Inspected. We’ll populate the Send To, Subject, and Body fields of our Email action too.
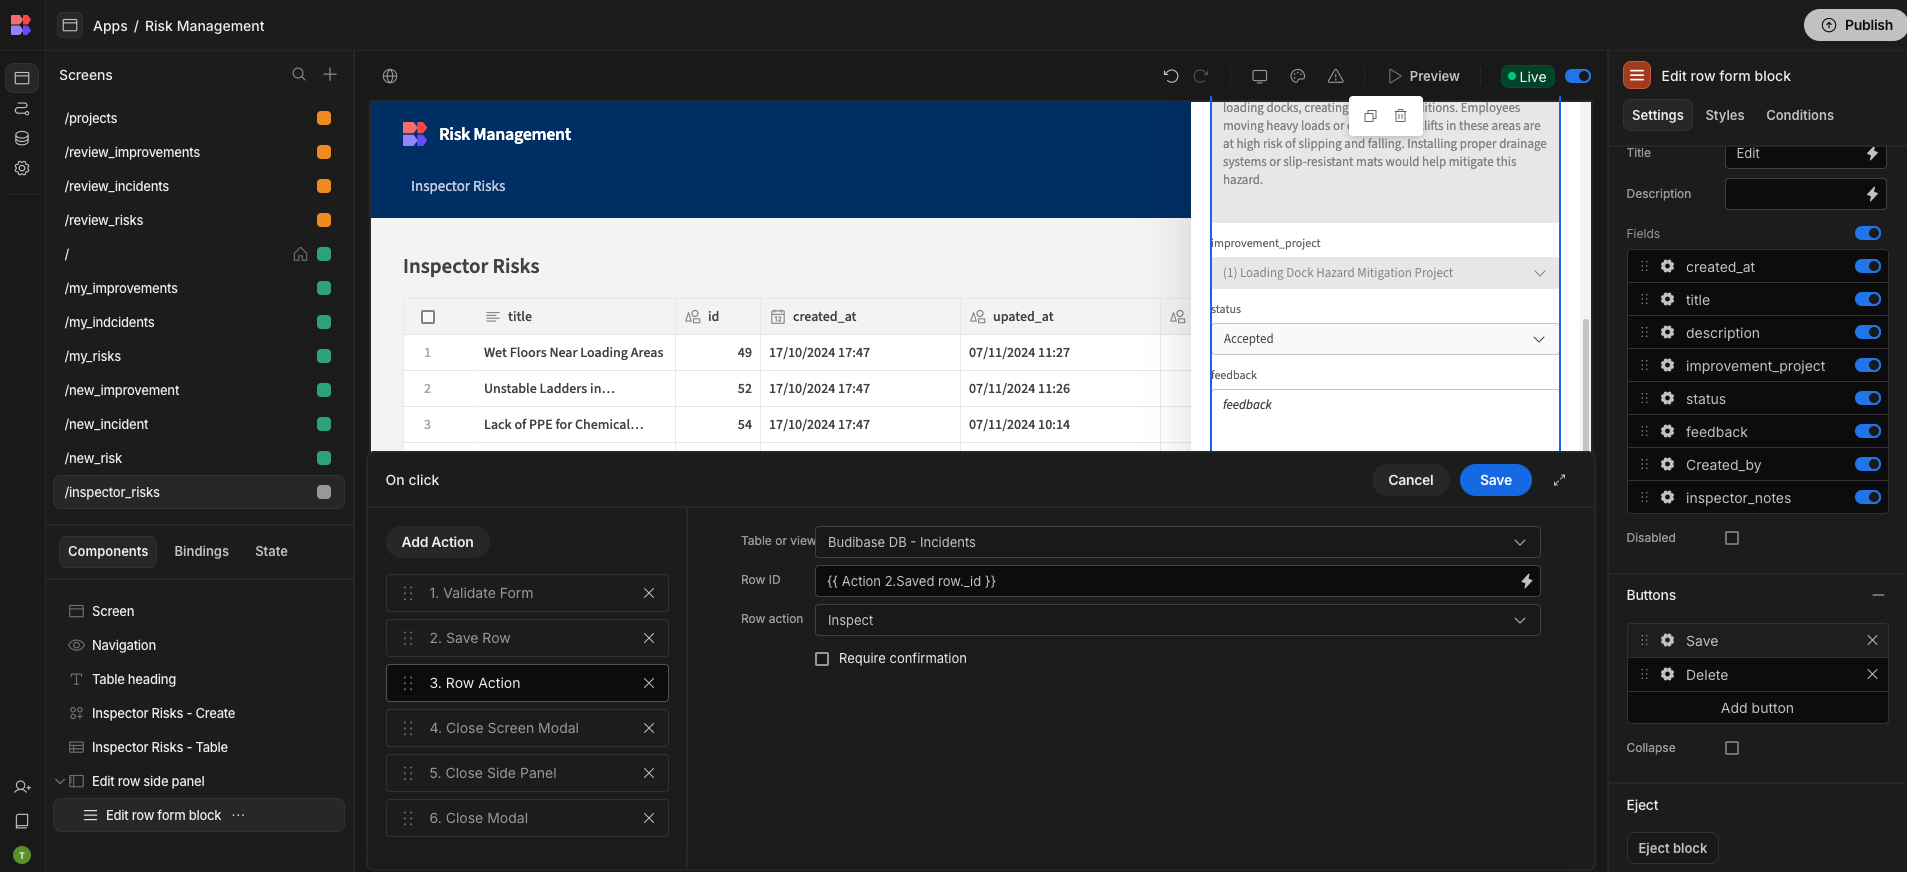
Next, we need to provide a way to trigger this automation from our app’s UI. Head back to the Design section, and we’ll add a Button Action to the form on our Inspection screen.
Here, we’ll add a Row Action step. Our Form Block has an attribute called RowID, which we’ll copy into the corresponding field on our button action.
Updated 5 months ago