MySQL / MariaDB
Using a MySQL Database Server as a datasource for Budibase
SQL DatabasesBudibase is designed to integrate with any core SQL database.
Read more about SQL Datasources.
Video tutorial
Tutorial: Building a HR portal
In this tutorial we will look at building a Budibase app from scratch using a MySQL employees sample database.
The full dataset and installation instructions can be found on GitHub: datacharmer/test_db.
Adding the datasource
When you have a MySQL or MariaDB Server instance running, with the sample database installed, we can begin pulling that data into Budibase.
First create a new Workspace. We will set up our MySQL datasource and app here.
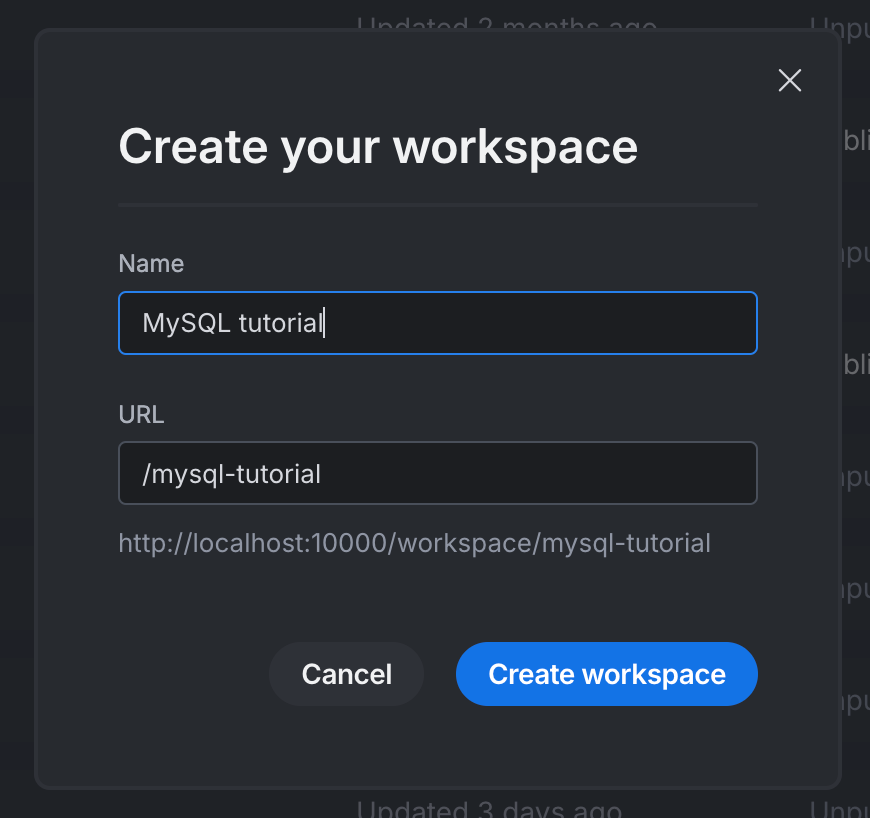
Once the new workspace has been created, click Add source and select MySQL, even if you are using MariaDB, or any other storage engine.
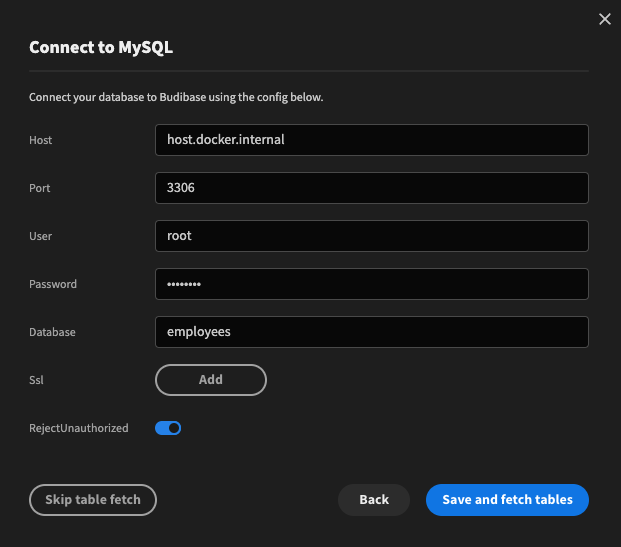
Click Save and fetch tables to finish.
SSL
You have the option to provide an SSL which prompts you with two additional fields key and value. The ssl key in the connection options takes a string. There are a lot of different options that can be used here, the 3 main ones are listed below.
ca:The certificate(s) to trust instead of the ones Node.js is configured to trust. This refers to the value of the certificate(s) and not a filename of the certificate(s).cert:The client certificate to use in the SSL handshake.ciphers:The ciphers to use to use in the SSL handshake instead of the default ones for Node.js.
Additional information on other keys or more information on the 3 listed above can be found here.
The value is the actual content of the SSL certificate files, and the paths provided in the MySQL configuration are pointers to these files. /path/to/private-key.pem
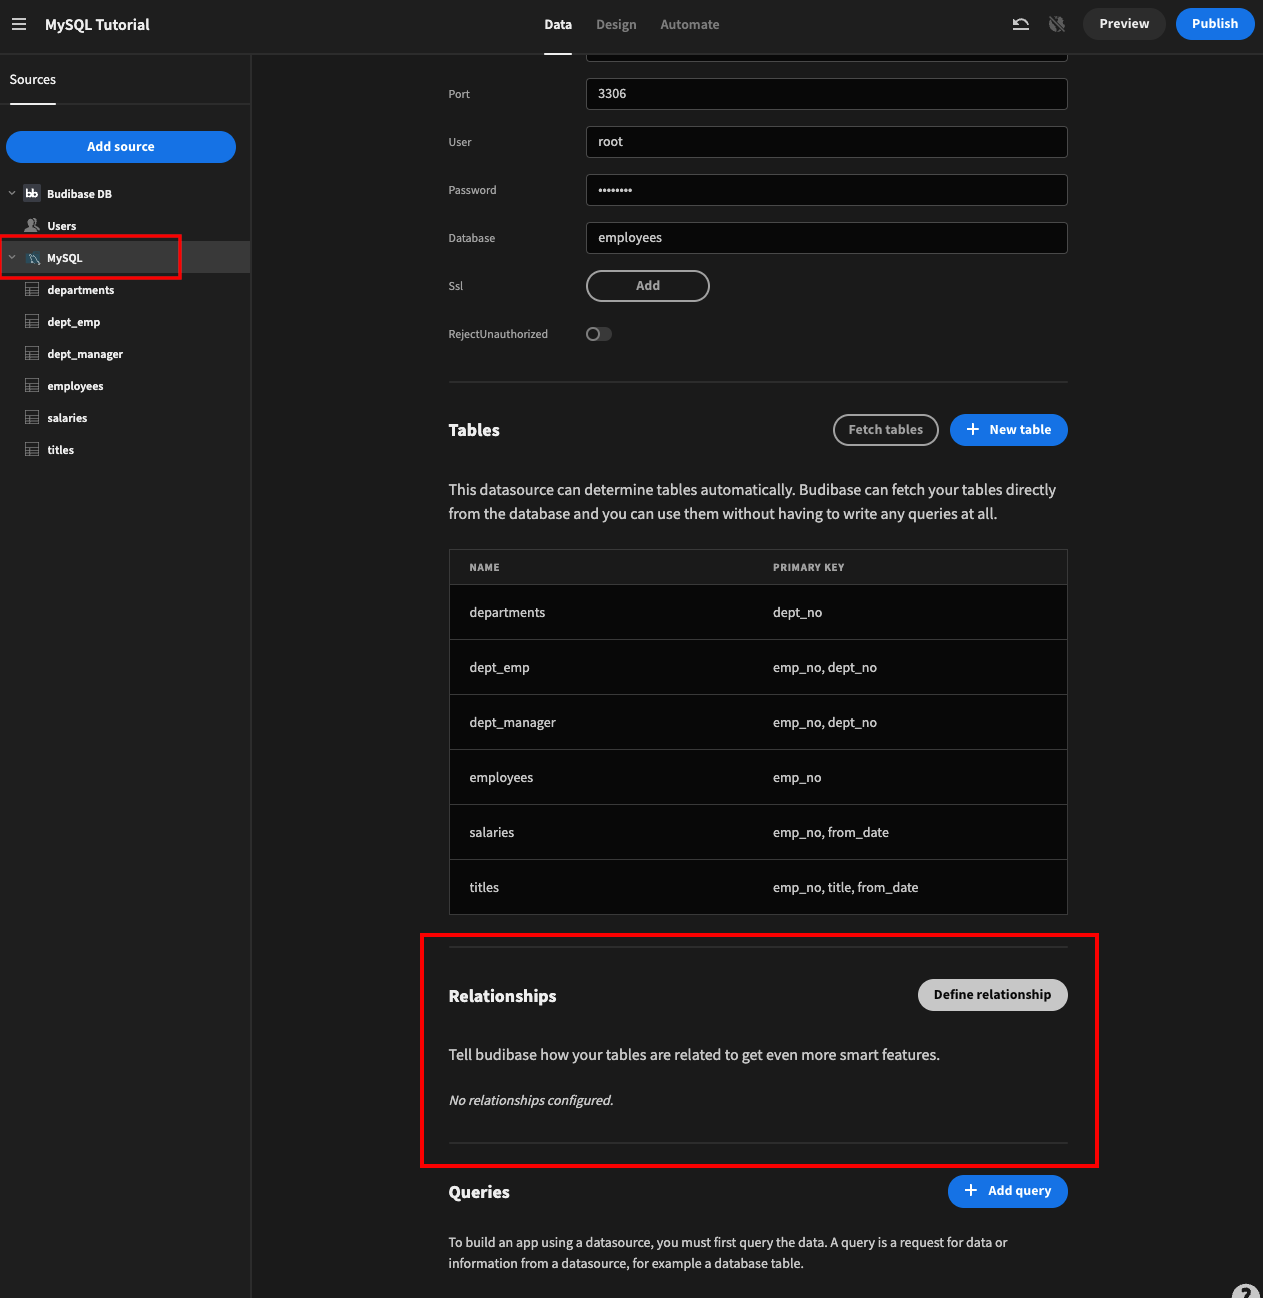
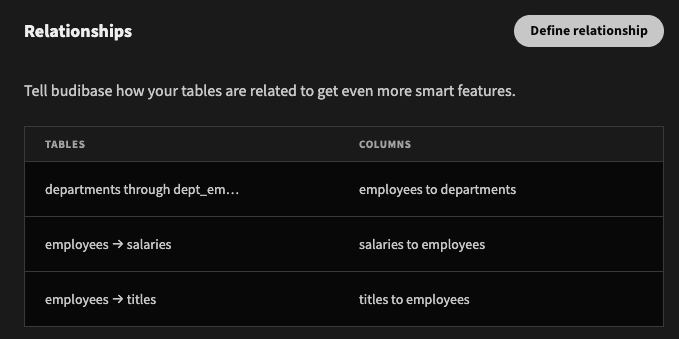
Define existing relationships
Now that we have pulled in our tables, we need to inform Budibase how the tables relate to each other.
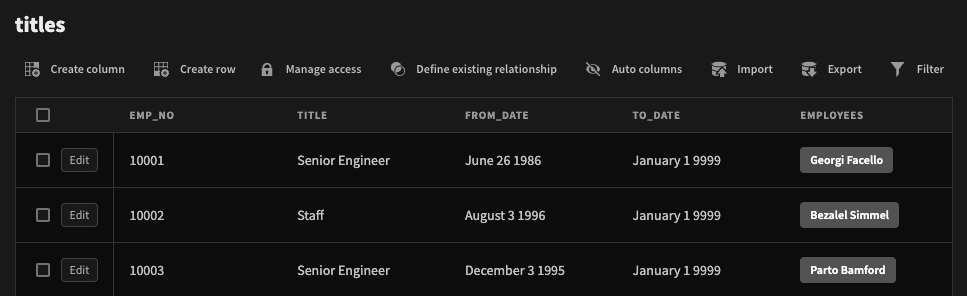
- One Employee -> Many Titles (Historical)
- One Employee -> Many Salaries (Historical)
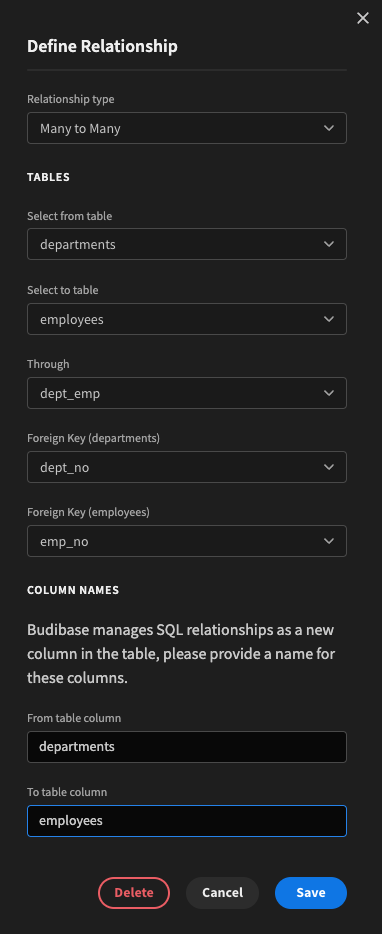
- Many Departments -> Many Employees / Managers
To define these relationships, click on the MySQL datasource in the datasource list and scroll down to and click Define relationship.
For the one employee to many titles and salaries, define a relationship like so:
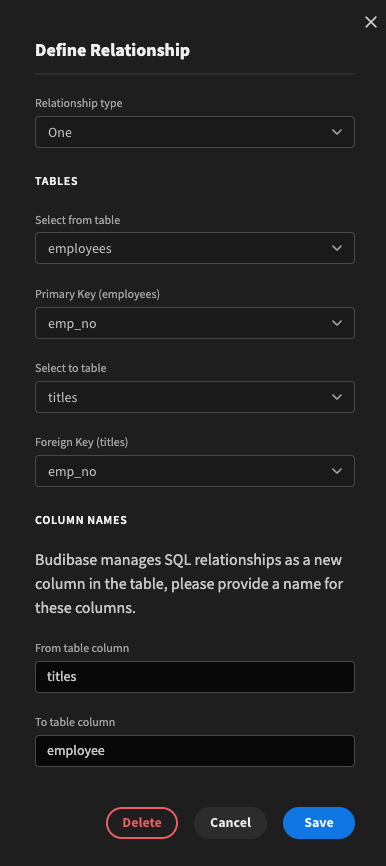
One employee -> Many titles (matching on emp_no)
For the relationship between departments and employees, there are joining tables, e.g. dept_emp. Usually we would setup a many-to-many relationship using the joining table as the Through table. Unfortunately in this case, the joining tables do not meet the requirements outlined by Budibase:
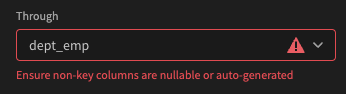
dept_emp is not a suitable Budibase joining table
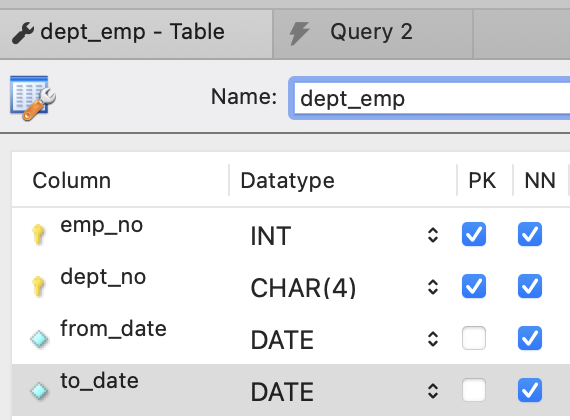
from_date and to_date are invalid
Luckily, this is an easy fix. Within MySQL Workbench, or through an alter SQL statement, make the from_date and to_date fields nullable for both joining tables.
ALTER TABLE `employees`.`dept_emp`
CHANGE COLUMN `from_date` `from_date` DATE NULL ,
CHANGE COLUMN `to_date` `to_date` DATE NULL ;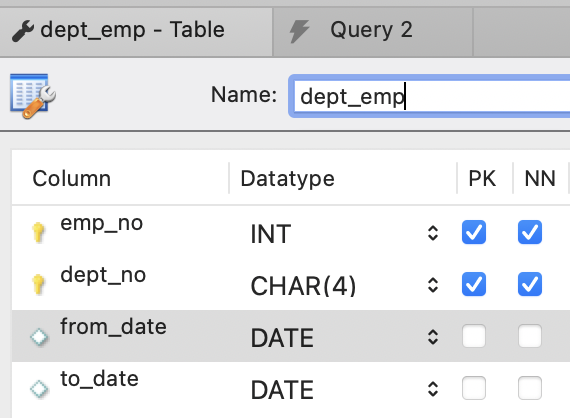
dept_emp is now a suitable joining table
Adding the Many -> Many relationships for dept_emp should now work.
Make sure to re-fetch the tables to pull down the new schema information!
Many Departments -> Many Employees
An additional Many -> Many relationship cannot be added for two tables that already have a Many -> Many relationship established, but for this tutorial we do not need the dept_manager table.
Because the Many -> Many relationship between departments and employees will pull down a huge amount of information, we will also create a Custom SQL query called Get Departments Only to simply get the departments without any employee data when needed.
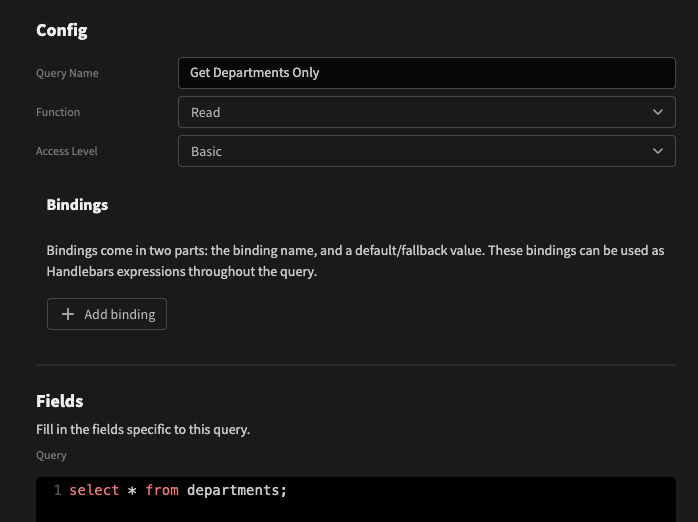
Simple select statement with no relationship data
In the end your relationships table should look something like so:
By default the display name for the relationships will be the ID, but this isn't very readable:
To improve upon this, we can select a display column for each table. This will be the column that appears in the relationship pills. As an example, for the employees table, open the menu on the first_name column and select Use as table display column.
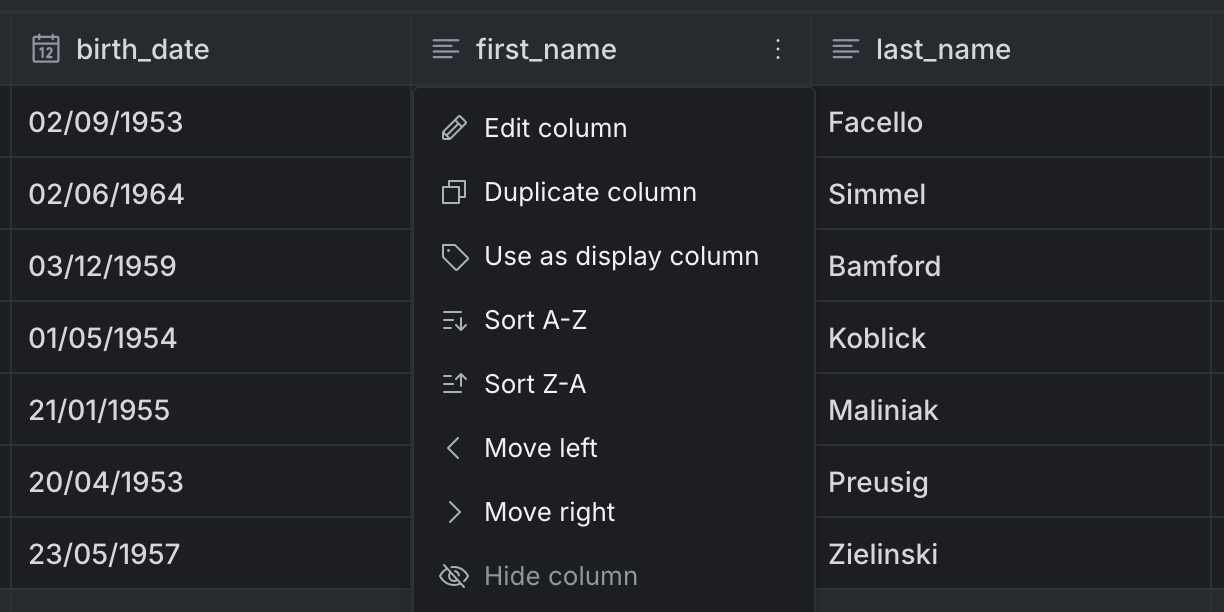
Setting the first_name to be the display column
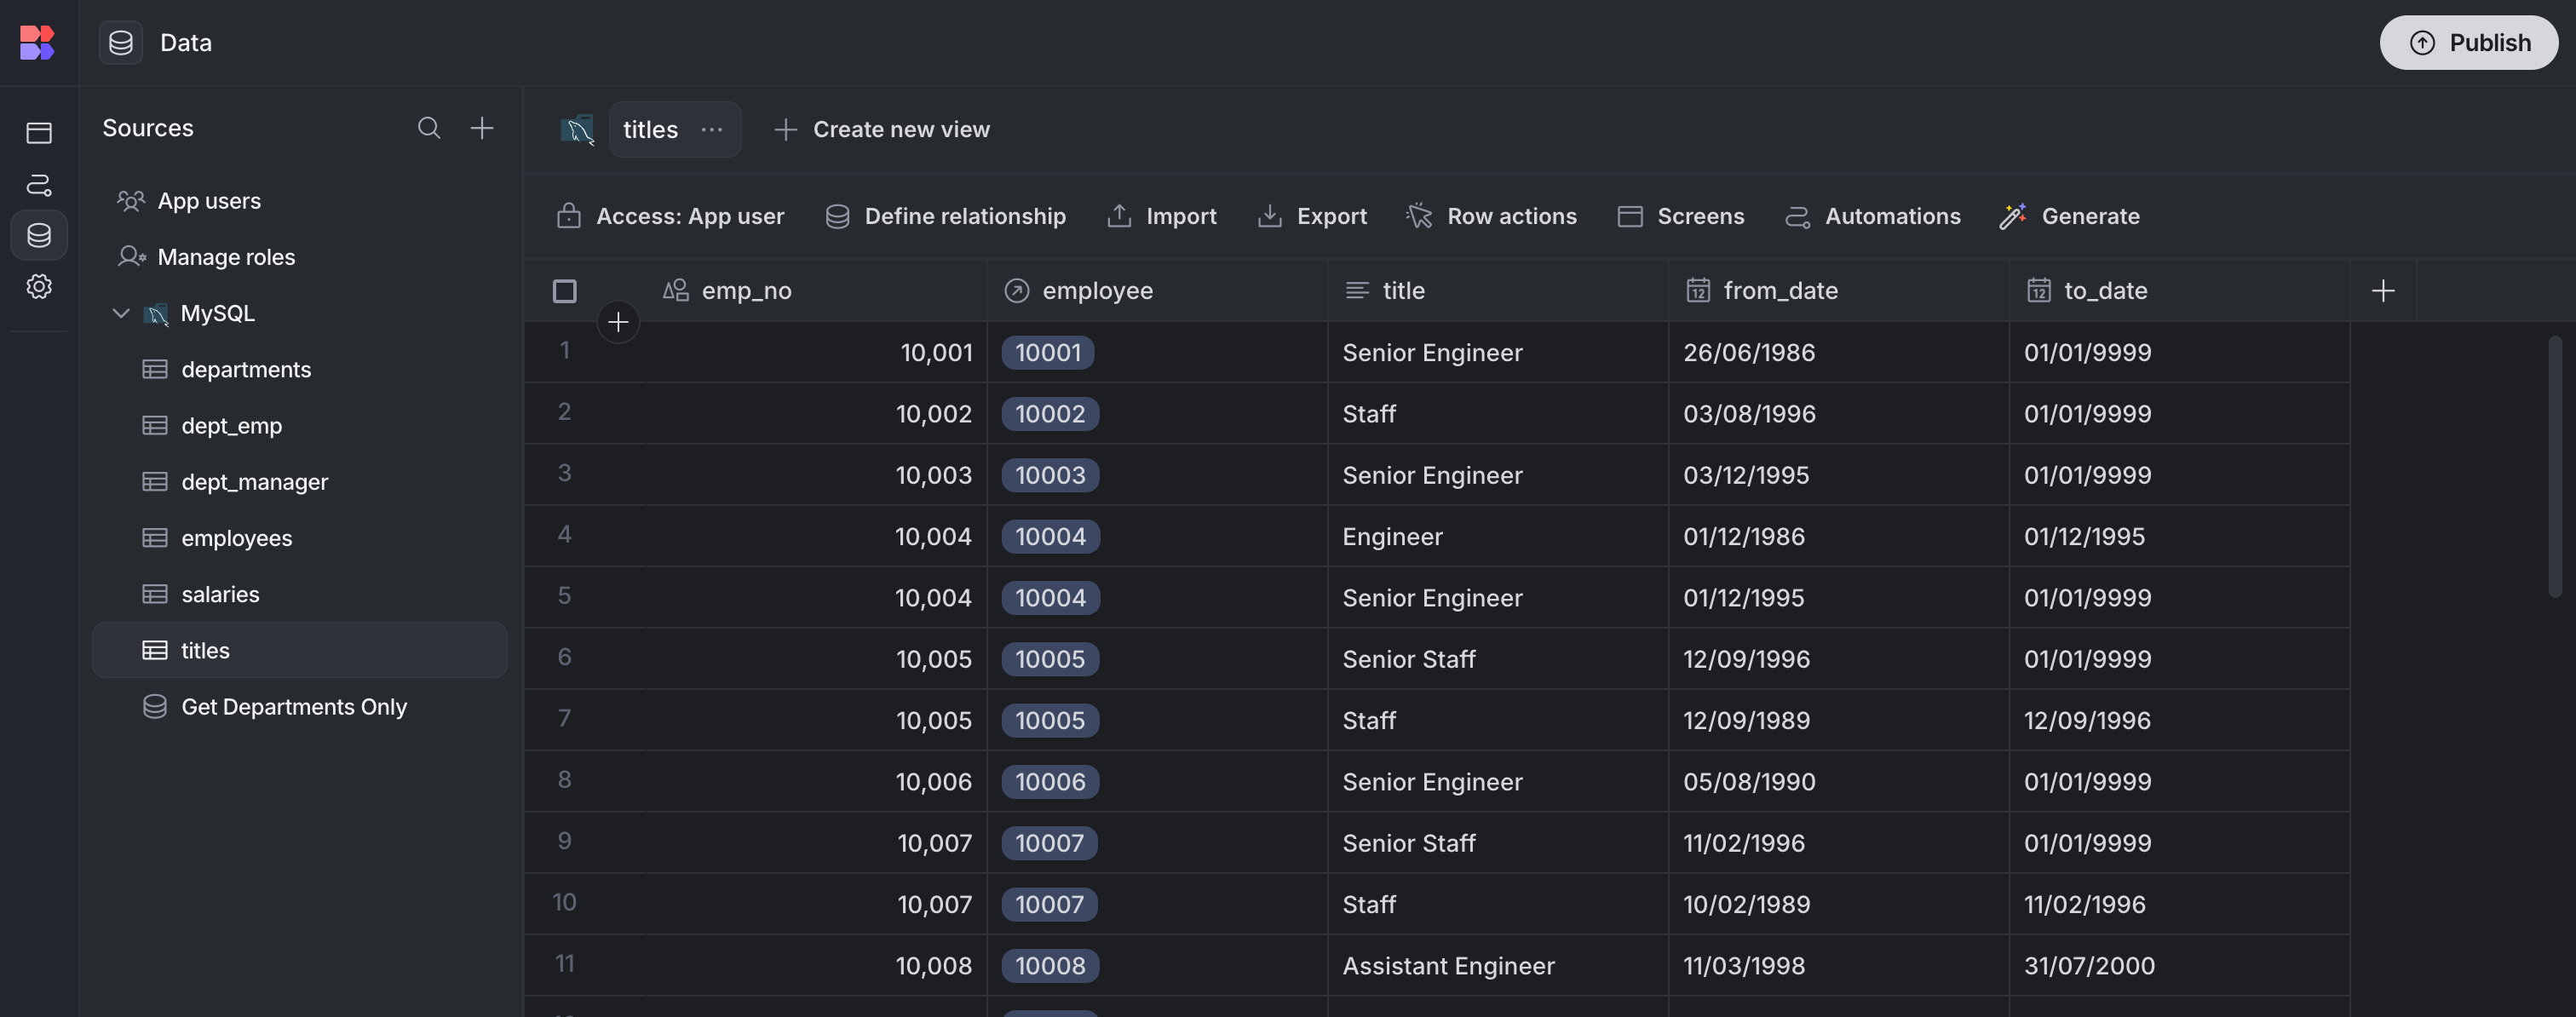
The employee relationship in the related tables, such as titles, is now more human readable. You can also use Formula columns to combine the first and last names of the employee into a single display column.
Create a new formula column in the employees table called 'full_name' with the following binding expression: {{ first_name }} {{ last_name }}. Set this column as the table display column.
Org chart screen
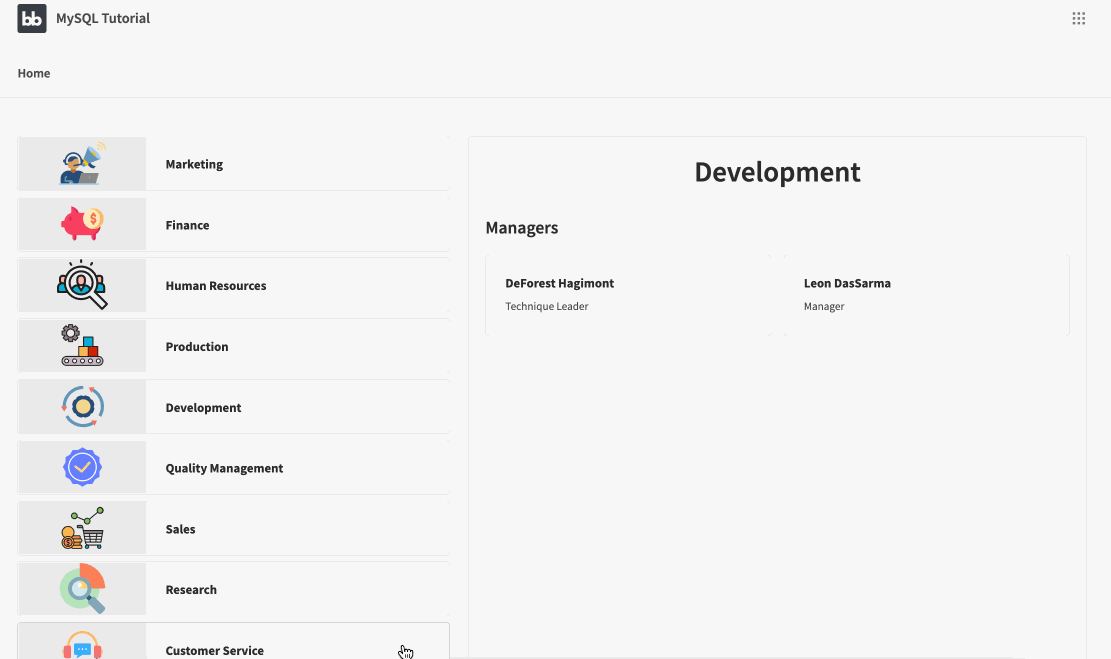
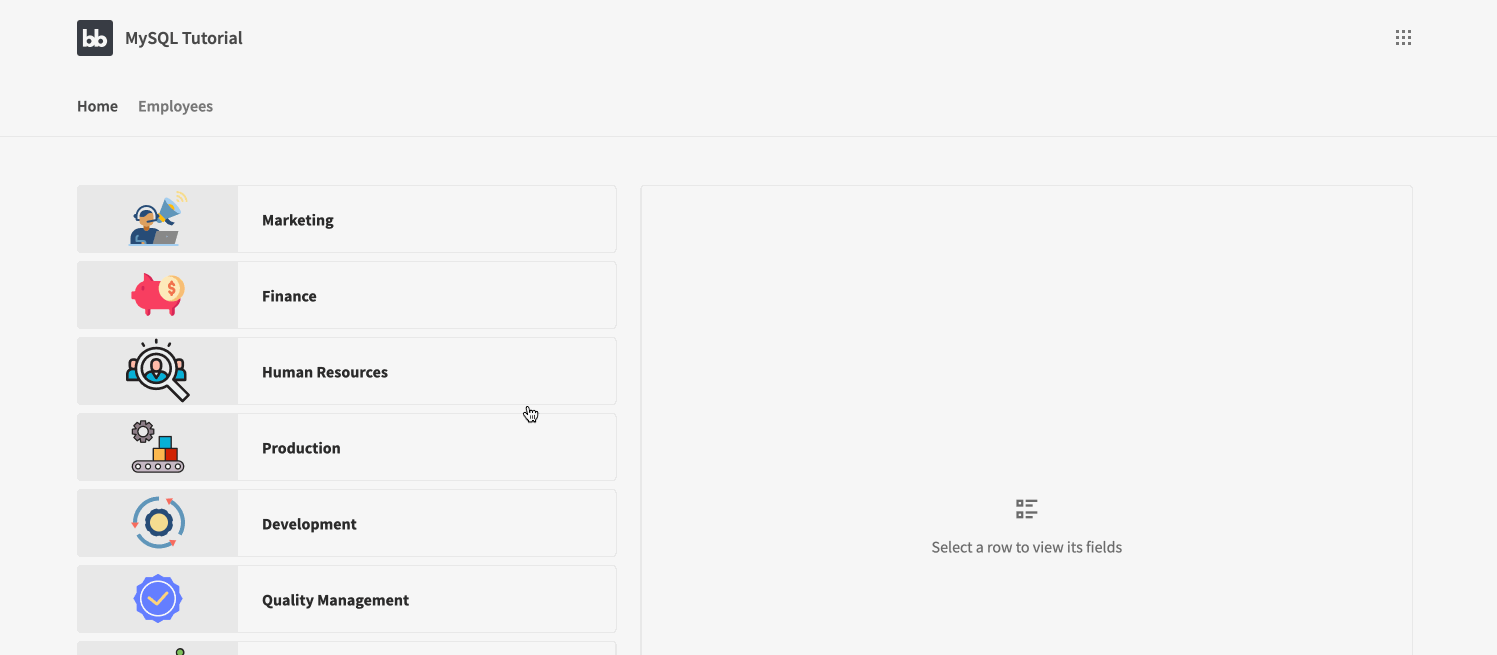
Now that we have the data pulled into Budibase, let's create a screen that allows HR to see the various departments and the org structure for each.
Step 1 - Adding the row explorer
On the home screen, click Add component and select the Row Explorer Block. For the table select departments, and remove the height - we will display all nine departments at once without the need for scroll.
Next in the Cards section, set the Title to match the dept_name, and remove the Subtitle and Description.
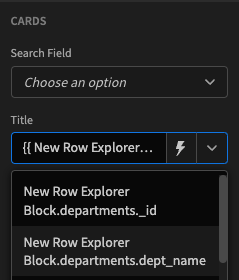
Selecting the department name as the card title

List of clickable department names
(Optional) Adding icons for each department
To add a little bit of flavour to the row explorer, we can provide an Image URL for each department. One way to do this would be to host the images in a public repository and name the files to match the department names. Another approach is to create a column in your table to store a URL icon path, which is what we'll do in this example.
- Within Budibase, click on the departments table, and click
Create column. - Add a Text column called icon_url.
- For each department row, add a URL path to an appropriate icon. I have found svgrepo.com to be a good resource for free SVG icons. For your convenience, I have provided SQL update statements:
UPDATE departments SET icon_url = 'https://www.svgrepo.com/show/428772/marketing-market-social.svg' WHERE dept_no = 'd001';
UPDATE departments SET icon_url = 'https://www.svgrepo.com/show/381027/finance-bank-piggy-business-money.svg' WHERE dept_no = 'd002';
UPDATE departments SET icon_url = 'https://www.svgrepo.com/show/218257/human-resources-search.svg' WHERE dept_no = 'd003';
UPDATE departments SET icon_url = 'https://www.svgrepo.com/show/430190/production-industrial-automation.svg' WHERE dept_no = 'd004';
UPDATE departments SET icon_url = 'https://www.svgrepo.com/show/428736/development-cognitive-progress.svg' WHERE dept_no = 'd005';
UPDATE departments SET icon_url = 'https://www.svgrepo.com/show/422994/quality-premium-certificate.svg' WHERE dept_no = 'd006';
UPDATE departments SET icon_url = 'https://www.svgrepo.com/show/430192/sales-shop-analytics.svg' WHERE dept_no = 'd007';
UPDATE departments SET icon_url = 'https://www.svgrepo.com/show/119008/research.svg' WHERE dept_no = 'd008';
UPDATE departments SET icon_url = 'https://www.svgrepo.com/show/429955/customer-service-hotel.svg' WHERE dept_no = 'd009';- In the Design section, click on the Row Explorer block and set the Image URL to the icon_url field.
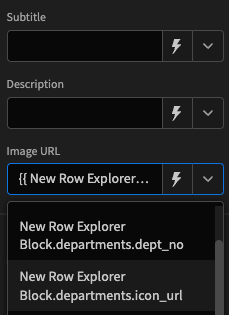
Selecting an image url
- The image icons are not in the correct aspect ratio or a consistent size, but we can use the following Global styling to format the background image as needed:
<style>
.spectrum-Card-coverPhoto {
  background-size: 64px 64px;
  background-repeat: no-repeat;
}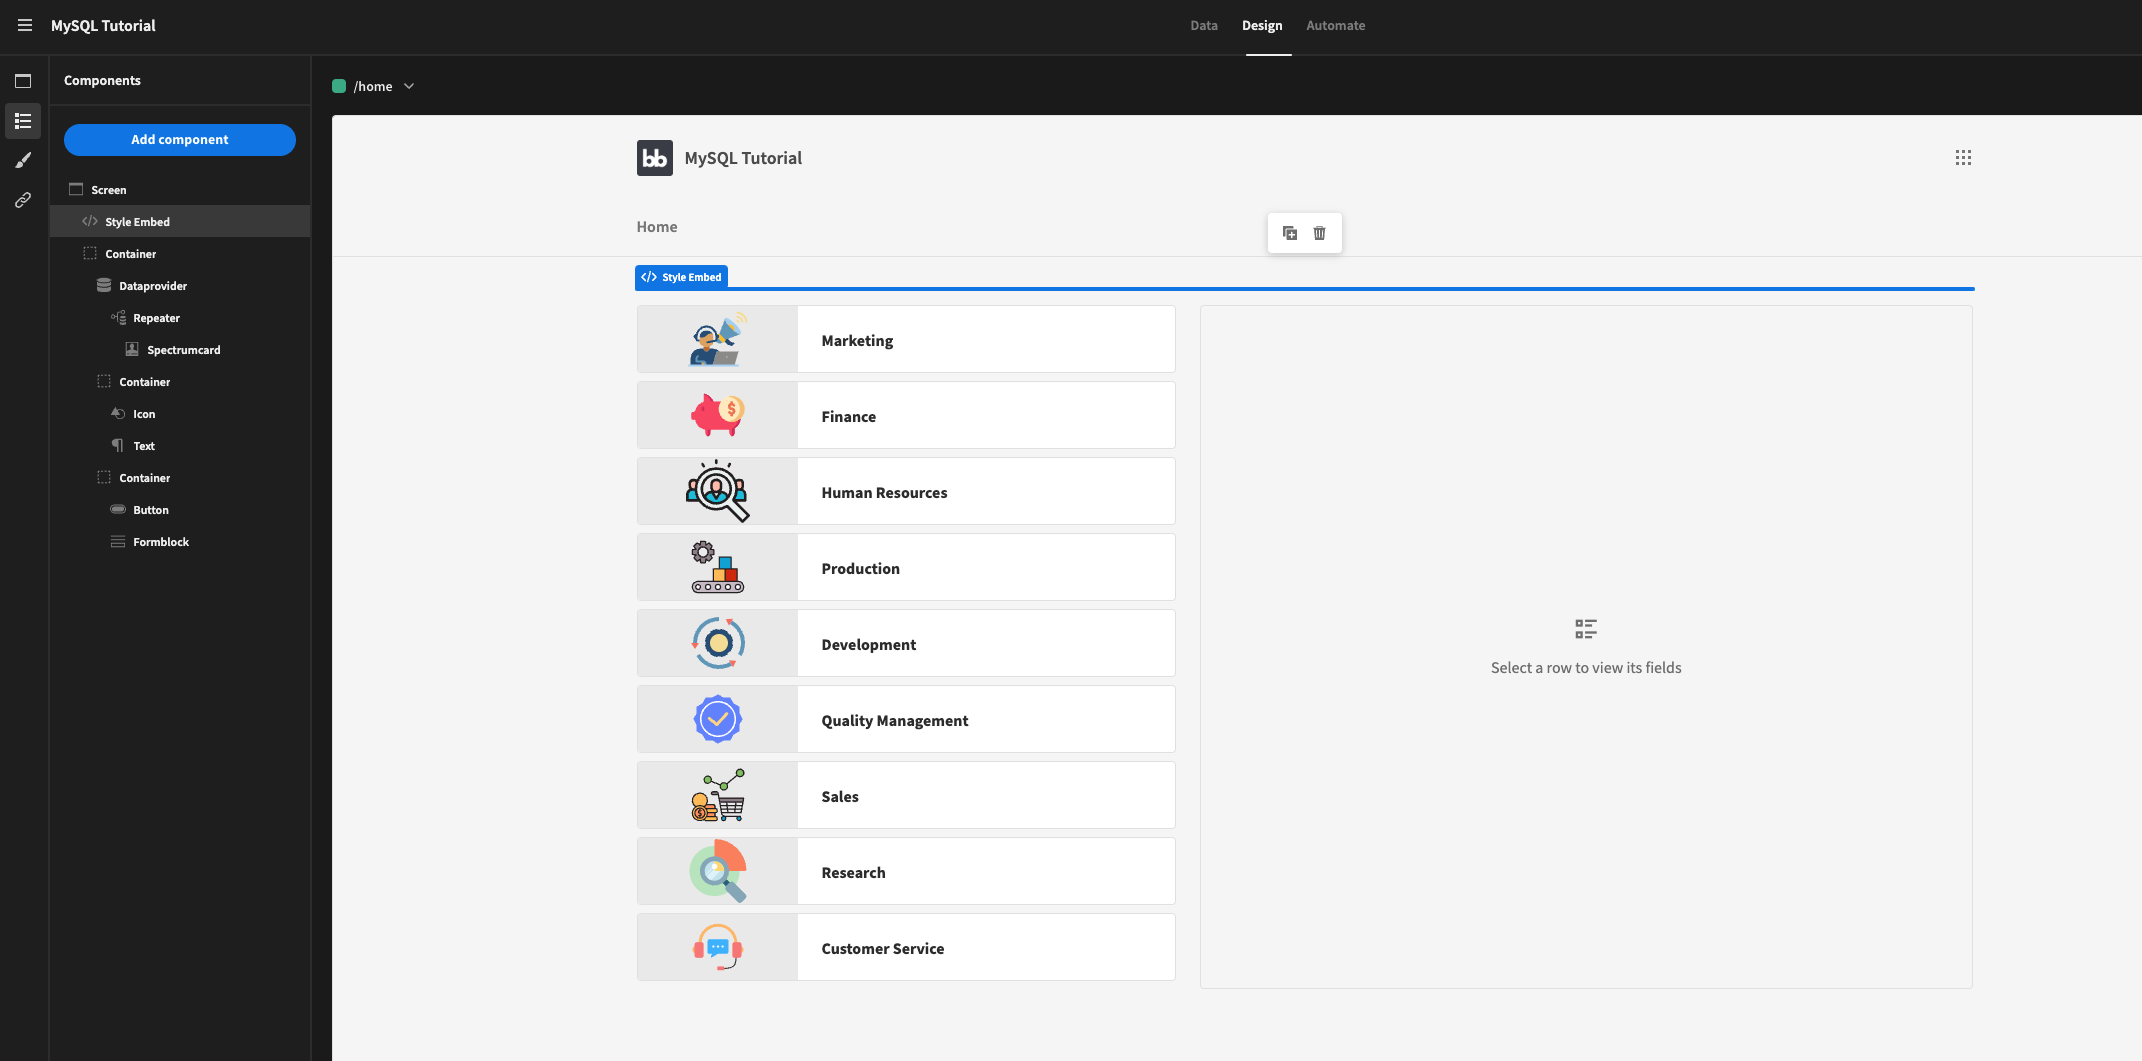
</style>- We also do not need the search, so we should Eject the block and delete the form. Your builder should appear like so:
Step 2 - Adding the manager and employee cards
After ejecting the row explorer block, we need to change the Data provider source to the Get Departments Only as we do not want the relational employee data in this simple list of departments.
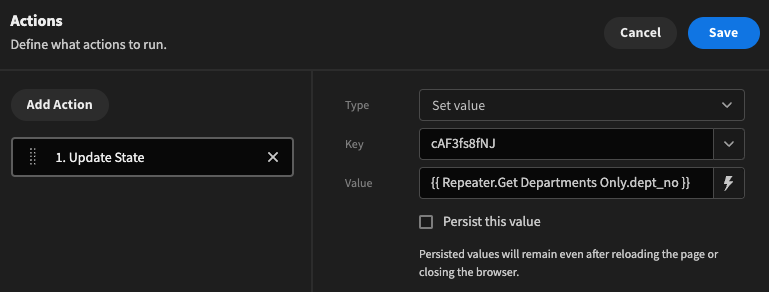
In addition, the auto-generated click action of the Spectrumcard will need to be updated. Click Define actions and change the state value to the dept_no from the query:
At the moment upon previewing the app, a basic form is shown on click of each department row. Instead we want to display a card for the department managerial team and their employees.
First delete the Form block and button components from the container. Next we want to make sure the clicked department name is available in the explorer panel. To do this, we will push the clicked row department name into App state.
Click on the Spectrumcard component and within the Settings Panel click Define actions. Then click Add Action -> Update State and set a variable called DepartmentName as follows:
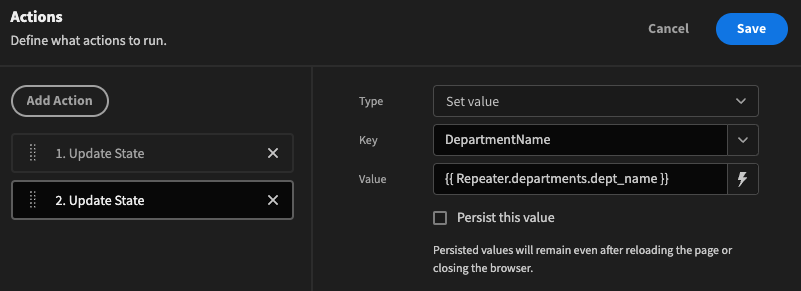
Be sure to click the Save button!
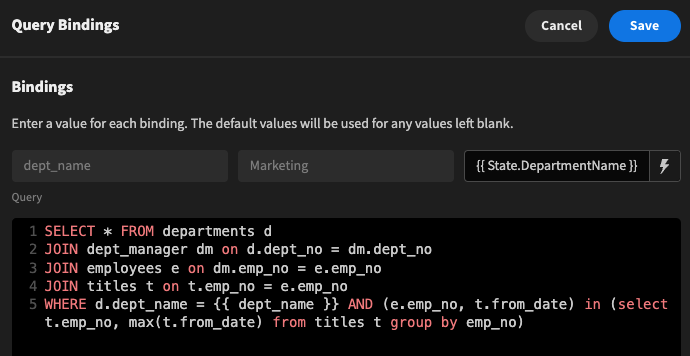
Whilst we could use multiple nested repeaters to pull in all of the department detail we want to display, it is much more efficient to use a Custom SQL query. Use the following SQL:
SELECT * FROM departments d
JOIN dept_manager dm on d.dept_no = dm.dept_no
JOIN employees e on dm.emp_no = e.emp_no
JOIN titles t on t.emp_no = e.emp_no
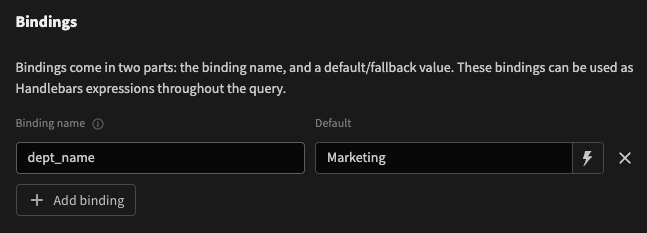
WHERE d.dept_name = {{ dept_name }} AND (e.emp_no, t.from_date) in (select t.emp_no, max(t.from_date) from titles t group by emp_no)Also add a binding for the dept_name, and give the query the name Get Managers by Department Name. Make sure to save!
Back to the Design section, add a Cards Block for the managers using the SQL query datasource just added, passing in the binding: {{ State.DepartmentName }}. This will replace the form block we removed.
Within the Cards section set the Title to {{ Managers.Get Managers by Department Name.first_name }} {{ Managers.Get Managers by Department Name.last_name }}.
For the Description, we want to display the managers current (most recent) job title: {{ Managers.Get Managers by Department Name.title }}
With the card block setup, it is also worth adding a headline component to indicate which department has been selected. Above the cards block, add the headline component with the title {{ State.DepartmentName }}. Add some styling such as margin bottom and Extra Large size.
A preview of the app should show the following so far:
Employees screen
As this data set has thousands of employees per department, cards are not an ideal way to display the data. Instead we can display this data in a paginated Table block filtered on an encoded department ID passed via URL variables.
To get started, click Add screen and select Autogenerated screens. Tick the employees table and confirm.
Next we want to be able to pass through the emp_no and dept_name from the home screen. To support this, configure the screen route as follows:
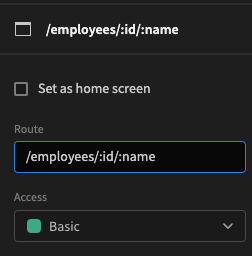
Employees screen with two variables
Use the name URL variable in the Title of the table block.
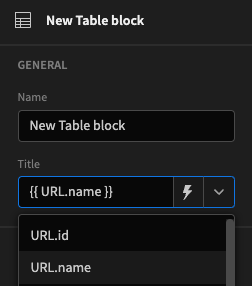
Access the department name from the URL
With so many records, search will be very important. Under Search Fields select some searchable fields.

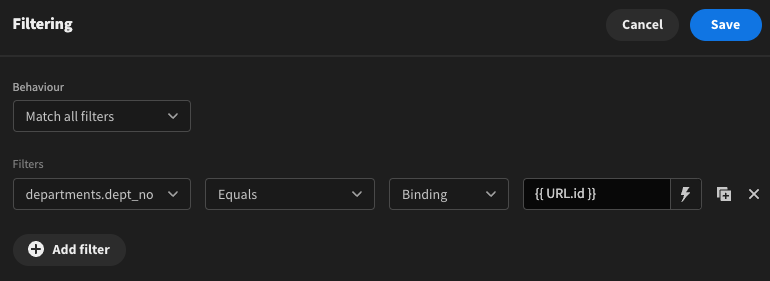
Now let's make use of the {{ URL.id }} binding to filter our employees by department. Define filters of the table block. The dept_no will be available via the dept_emp relationship, and we can match that against the ID in the URL as follows:
Also set the Scroll Limit of the table block to 50.
We will also want to Configure columns. Click on Add all columns and then press the x beside the departments column. We don't want to display the relationship because it will be the same for all rows.
Linking from the home screen
The employee screen is ready to go, but we still need to link it to the home screen.
Add a Link component underneath the Managers card block. Add some margin top for some space. Give the URL the following binding: /employees/{{ State.cAF3fs8fNJ }}/{{ State.DepartmentName }}. The ID state will be different in your case.
Salary history
The salaries table holds a historic record of each employees salary at a particular time. This time series can be displayed in a chart.
Eject the Table block in the employees screen.
Within the newly exposed Details side panel, select the Details form block and deselect departments and salaries from the Fields dropdown. We already know the department from the table heading, and we will be displaying the salaries in a chart instead of the Multi-select picker.
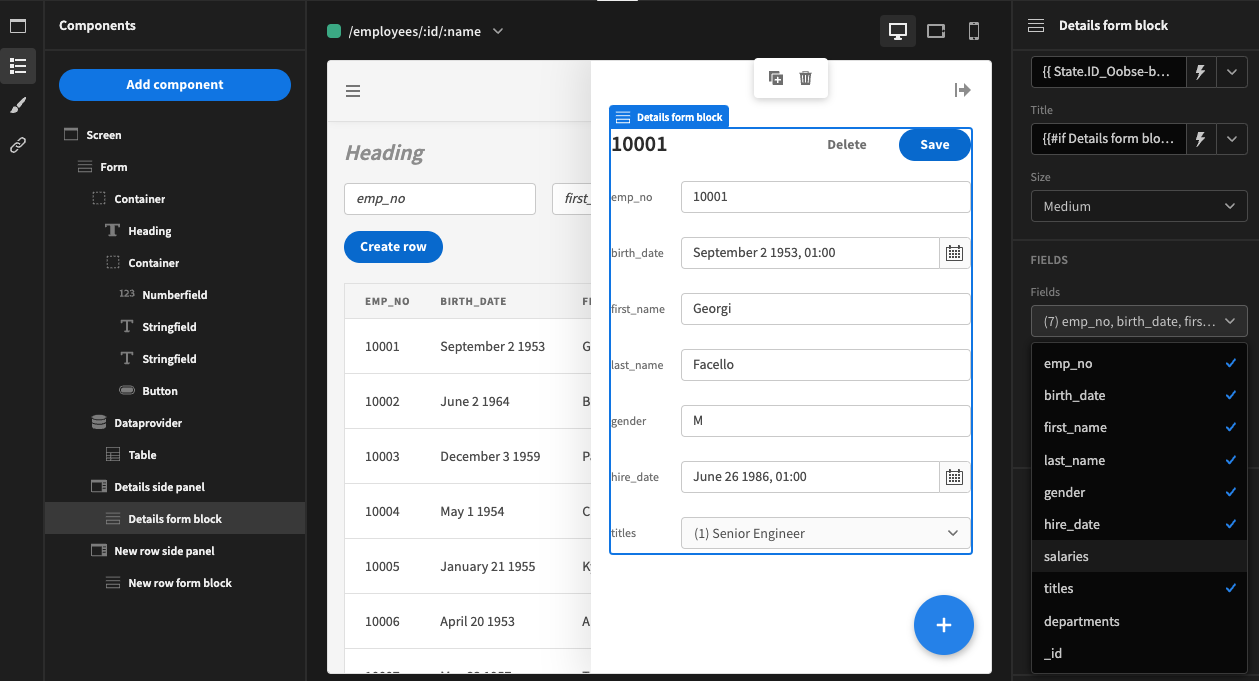
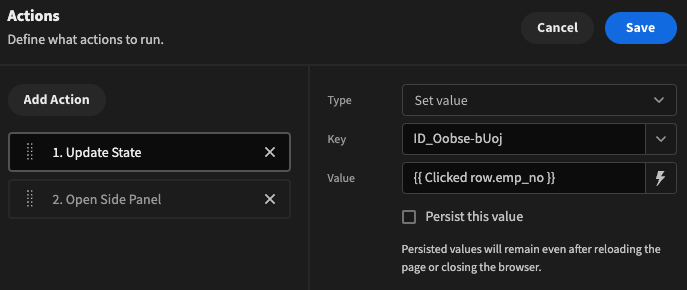
We also want to make sure that we pass the correct ID through to state when clicking on a row. Click on the Table underneath the Data provider, and click Define actions under the On Row Click section of the Settings Panel.
By default you will see the value binding of {{ Clicked row._id }} for the Update State action. Replace this with {{ Clicked row.emp_no }} as we want to use the actual primary key and not the URL-safe encoded link.
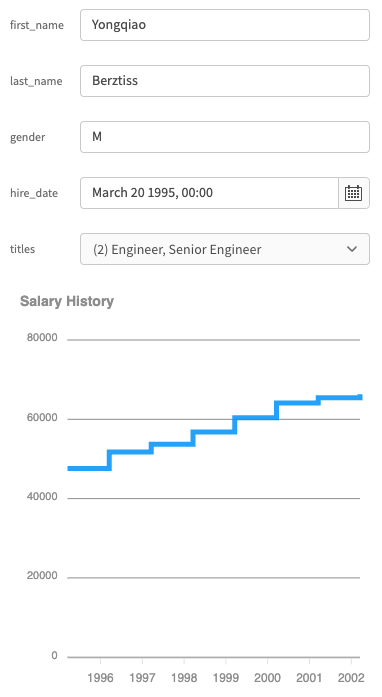
Adding the chart
Under the Details form block add a Chart block. Choose a Chart Type of 'Line' and the salaries table as the datasource. Set the title to 'Salary History'.
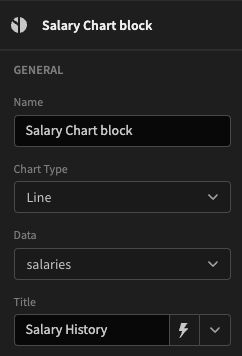
Salaries Line Chart block
Next Define filters to add a filter on the employee number as follows:
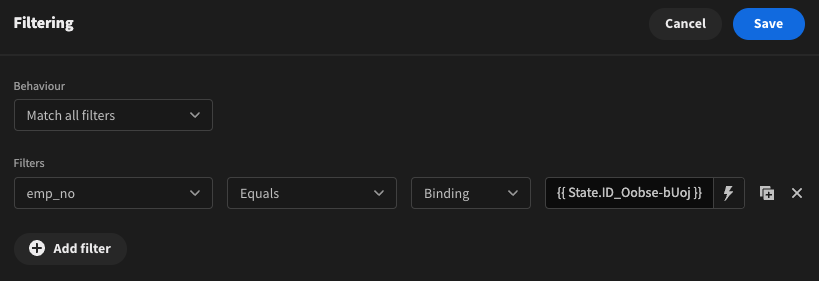
The State ID will only be set when a row is clicked, thus the chart display in the builder may display differently than the previewed/published app.
Finally select the from_date column as the Label Col. and the salary column as the Data Col.. A Stepline curve is the ideal way to display this data.
Config | Result |
|---|---|
 |  |