SSO with Okta
OpenID ConnectTo become familiar with OpenID Connect in Budibase, see: OpenID Connect
Configuration
Create the application
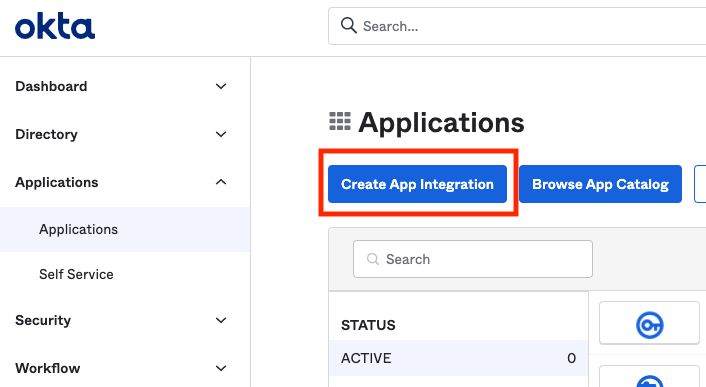
Create the Budibase application in your Applications list.
Select OIDC - OpenID Connect and Web Application
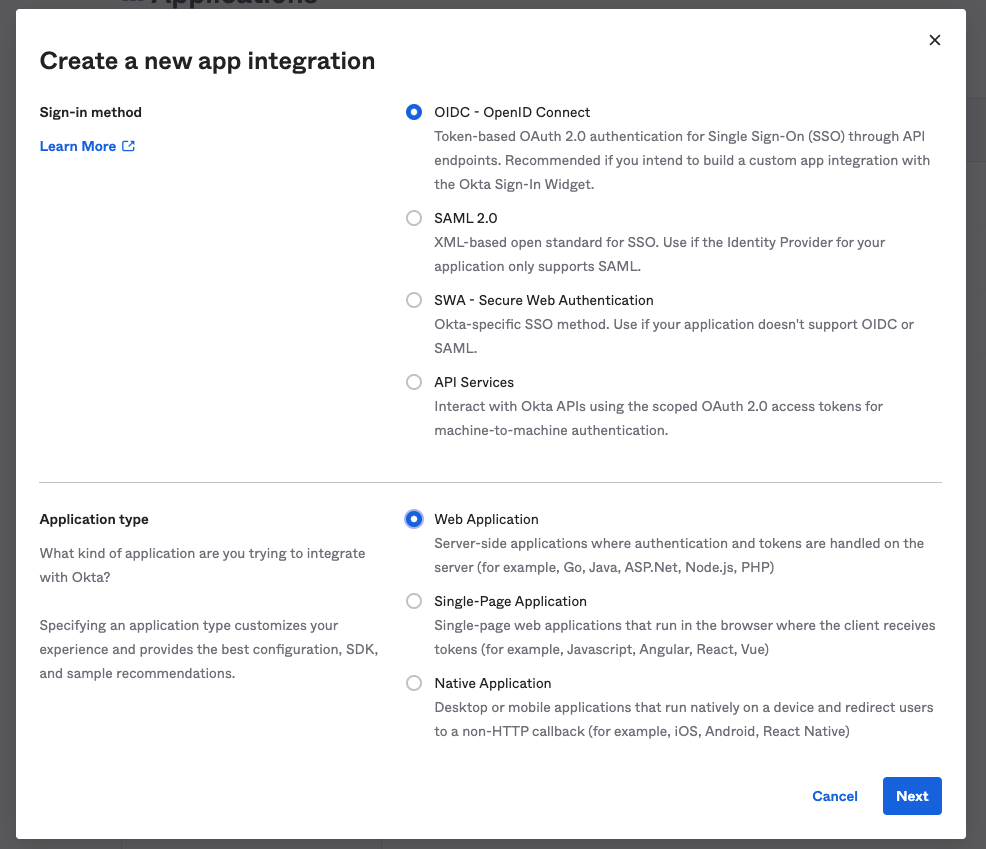
Enter your application name on the next screen and save.
Find your configuration details
Visit the 'General' tab in your application.
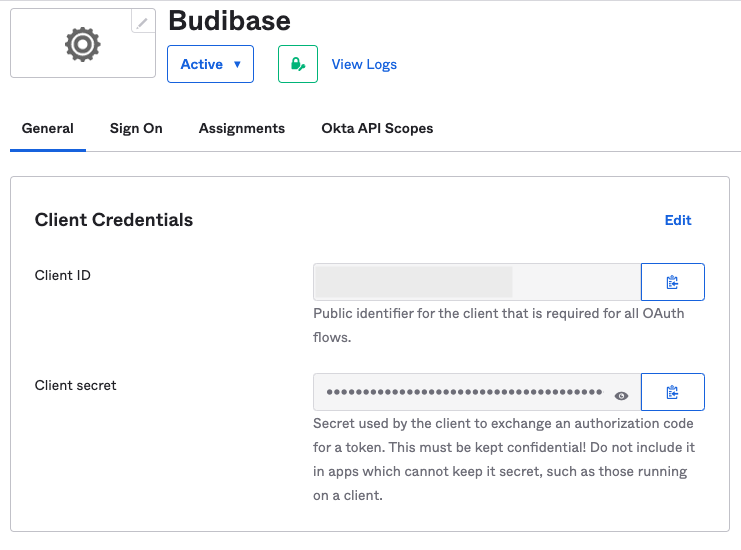
Client ID
Use the Client ID field as your Client ID in Budibase.
Client Secret
Use the Client Secret field as your Client ID in Budibase.
Configuration URL
Visit the 'Sign On' tab in your application.
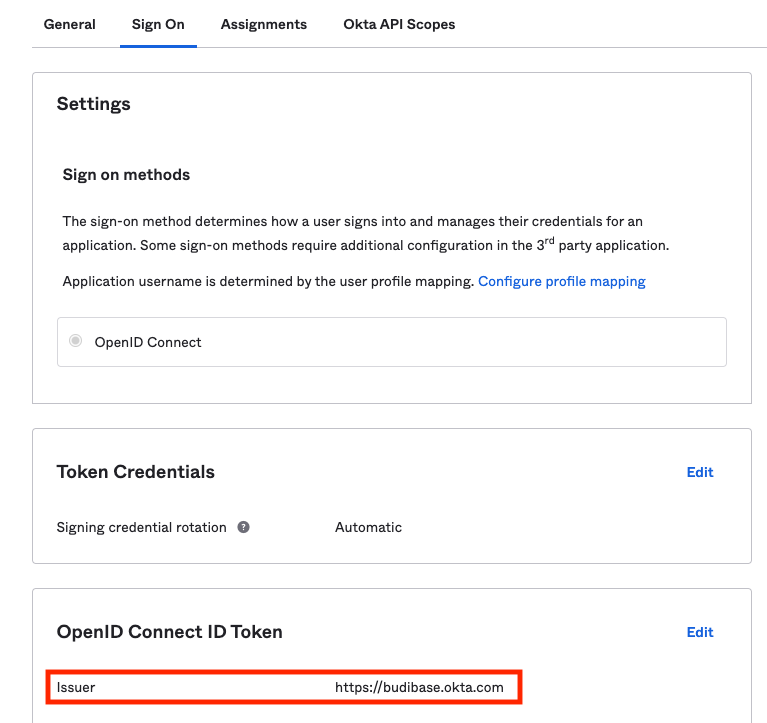
Use the Issuer field to construct your Configuration URL in Budibase. e.g. https://{Issuer}/.well-known/openid-configuration
Add your callback URL
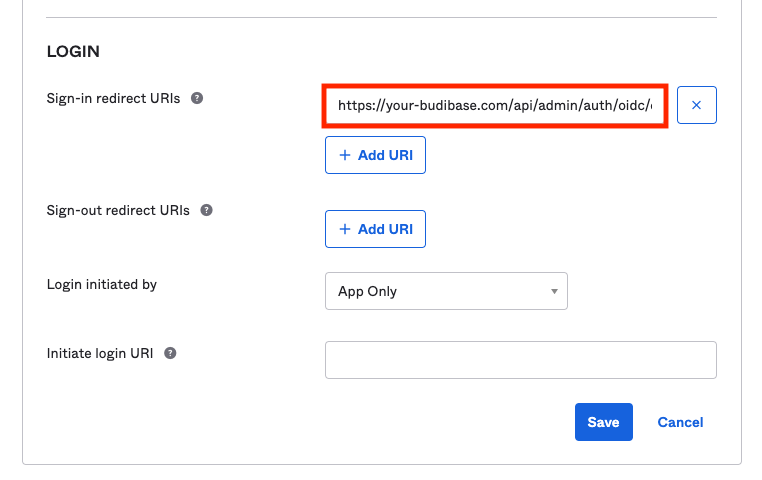
Visit the 'General' tab in your application, scroll down and edit the 'General Settings' section. Enter your callback URL
Updated 5 months ago