Change Requests
Our change management template offers a fully functional solution for handling incoming requests. Use it as a ready-to-deploy app or customize any aspect of its data, design, and logic to suit your own unique processes.
In this guide, we outline exactly what our template does, how it’s built, and some of the key areas where you can put your own stamp on it using Budibase.
To use this template, click here.
Let’s jump right in.
What does this template do?
Change requests are a key part of managing projects, processes, or services. This presents a few challenges:
- Gathering request data.
- Enforcing approval workflows.
- Documenting decisions and outcomes.
- Handling follow-on actions, including communicating with stakeholders.
Our solution is based around a two-step approval workflow. It’s built on two tables in Budibase DB.
Here’s a summary of core functionality.
CRUD Operations
Users can take distinct CRUD actions across the application, according to their role. Different users can create, read, update, or delete specific data depending on their needs within the change request workflow.
In Budibase, user permissions regarding CRUD actions are defined in the Data section. Once we’ve configured which data users can interact with, we can autogenerate CRUD UIs that reflect these permissions.
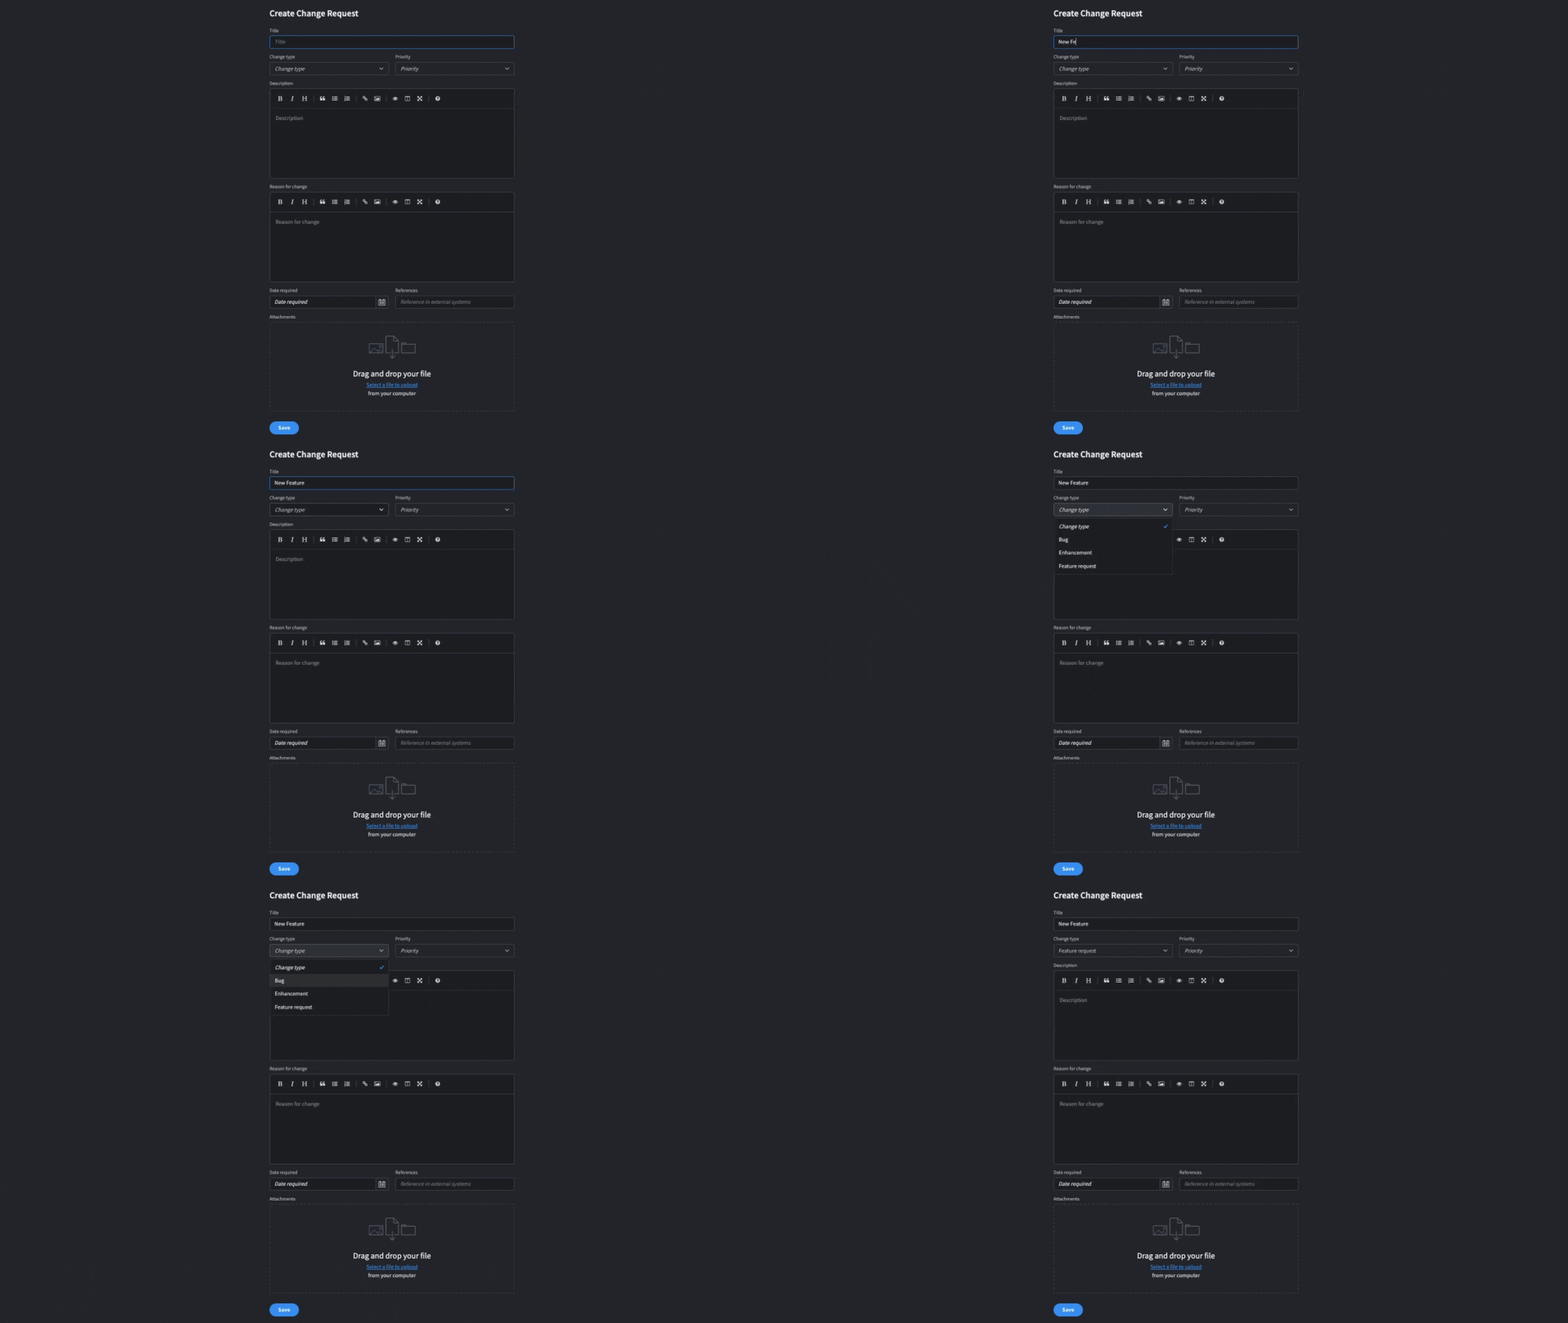
Our app UI is made up of a range of task-specific forms and tables. For example, enabling users with the Requestor role to add new records to our requests table:
Approval flows
When a request is submitted, its status attribute is automatically set to Submitted using Budibase’s default values. At this point, a Row Action automation is triggered, notifying a Manager that a new request needs their attention.
The manager then has the option to Accept or Reject the request using separate Row Actions. When a request is accepted by the manager, its status is updated to In-Review.
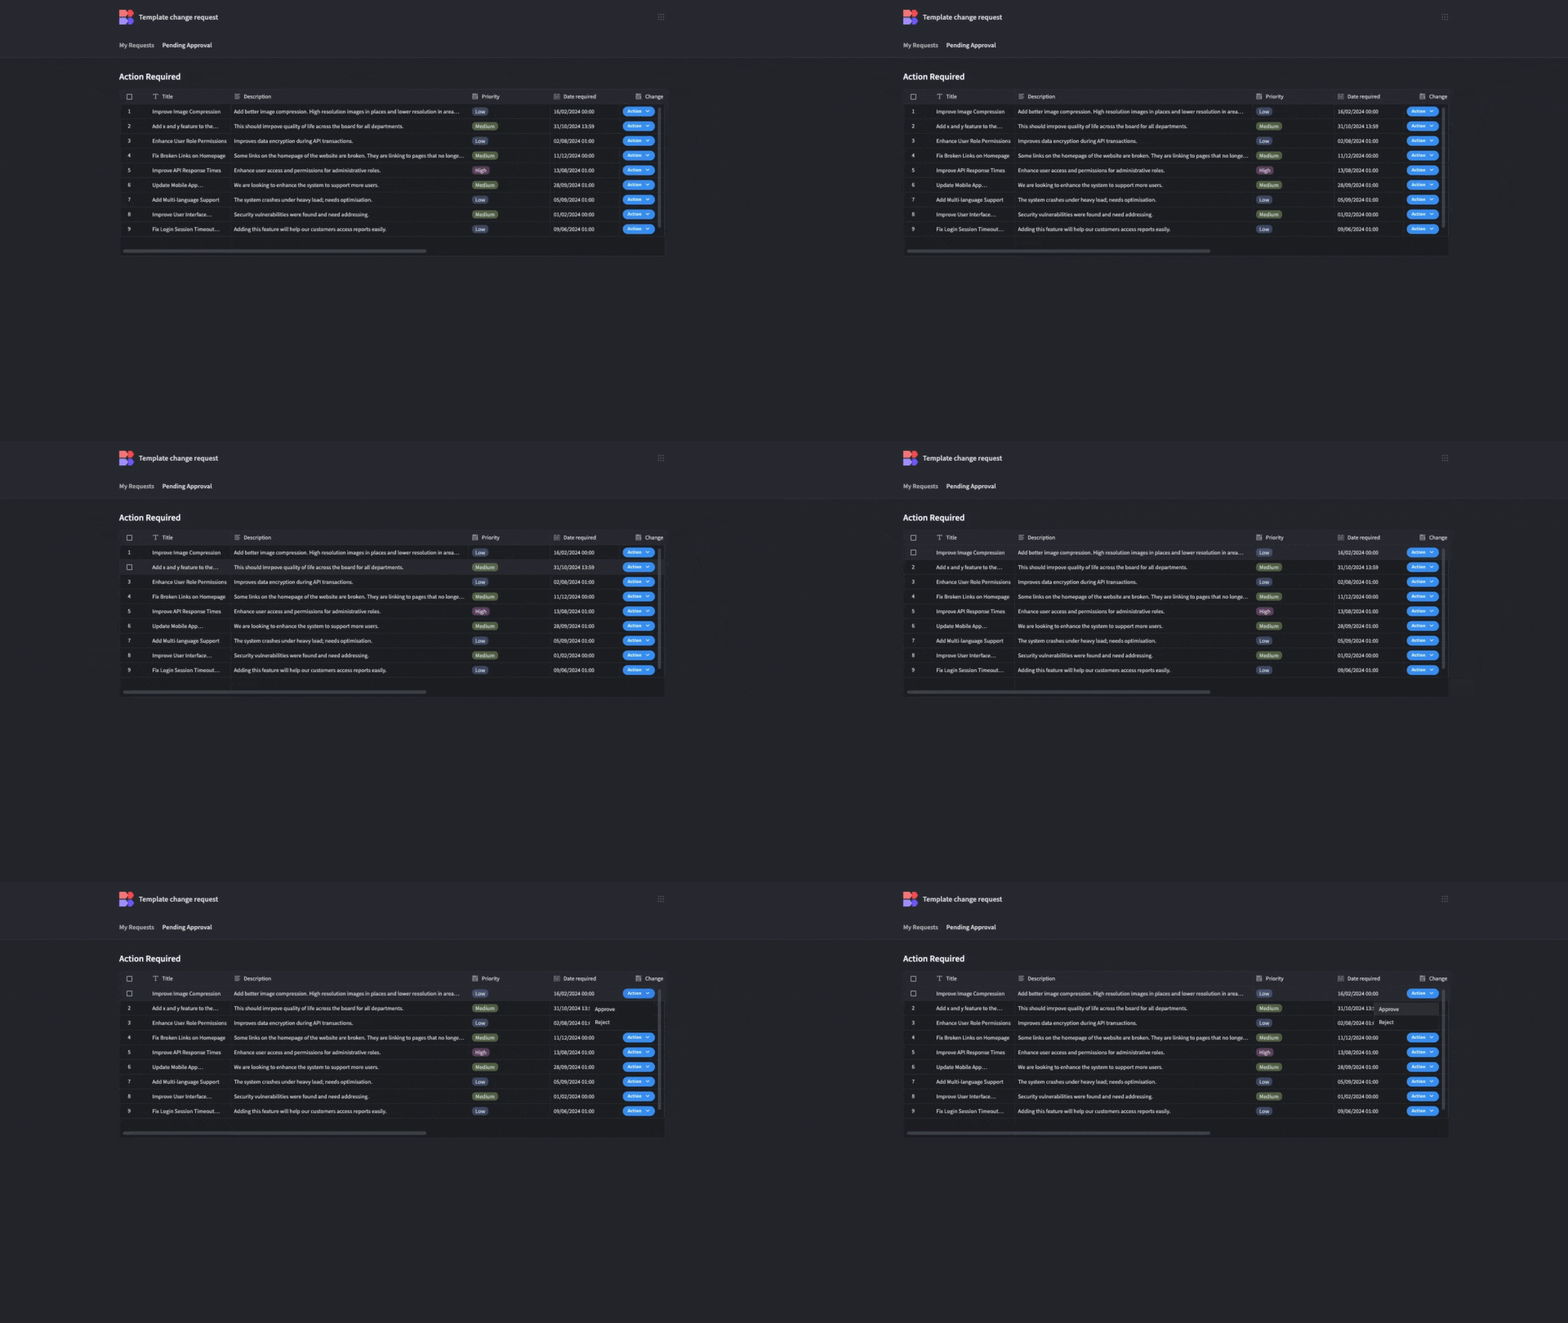
At this point, it is sent to all users with the Reviewer role.
Reviewers are able to provide the final sign-off for the request.
Tracking change statuses
A key part of change management is documenting exactly what has been adopted and who signed it off.
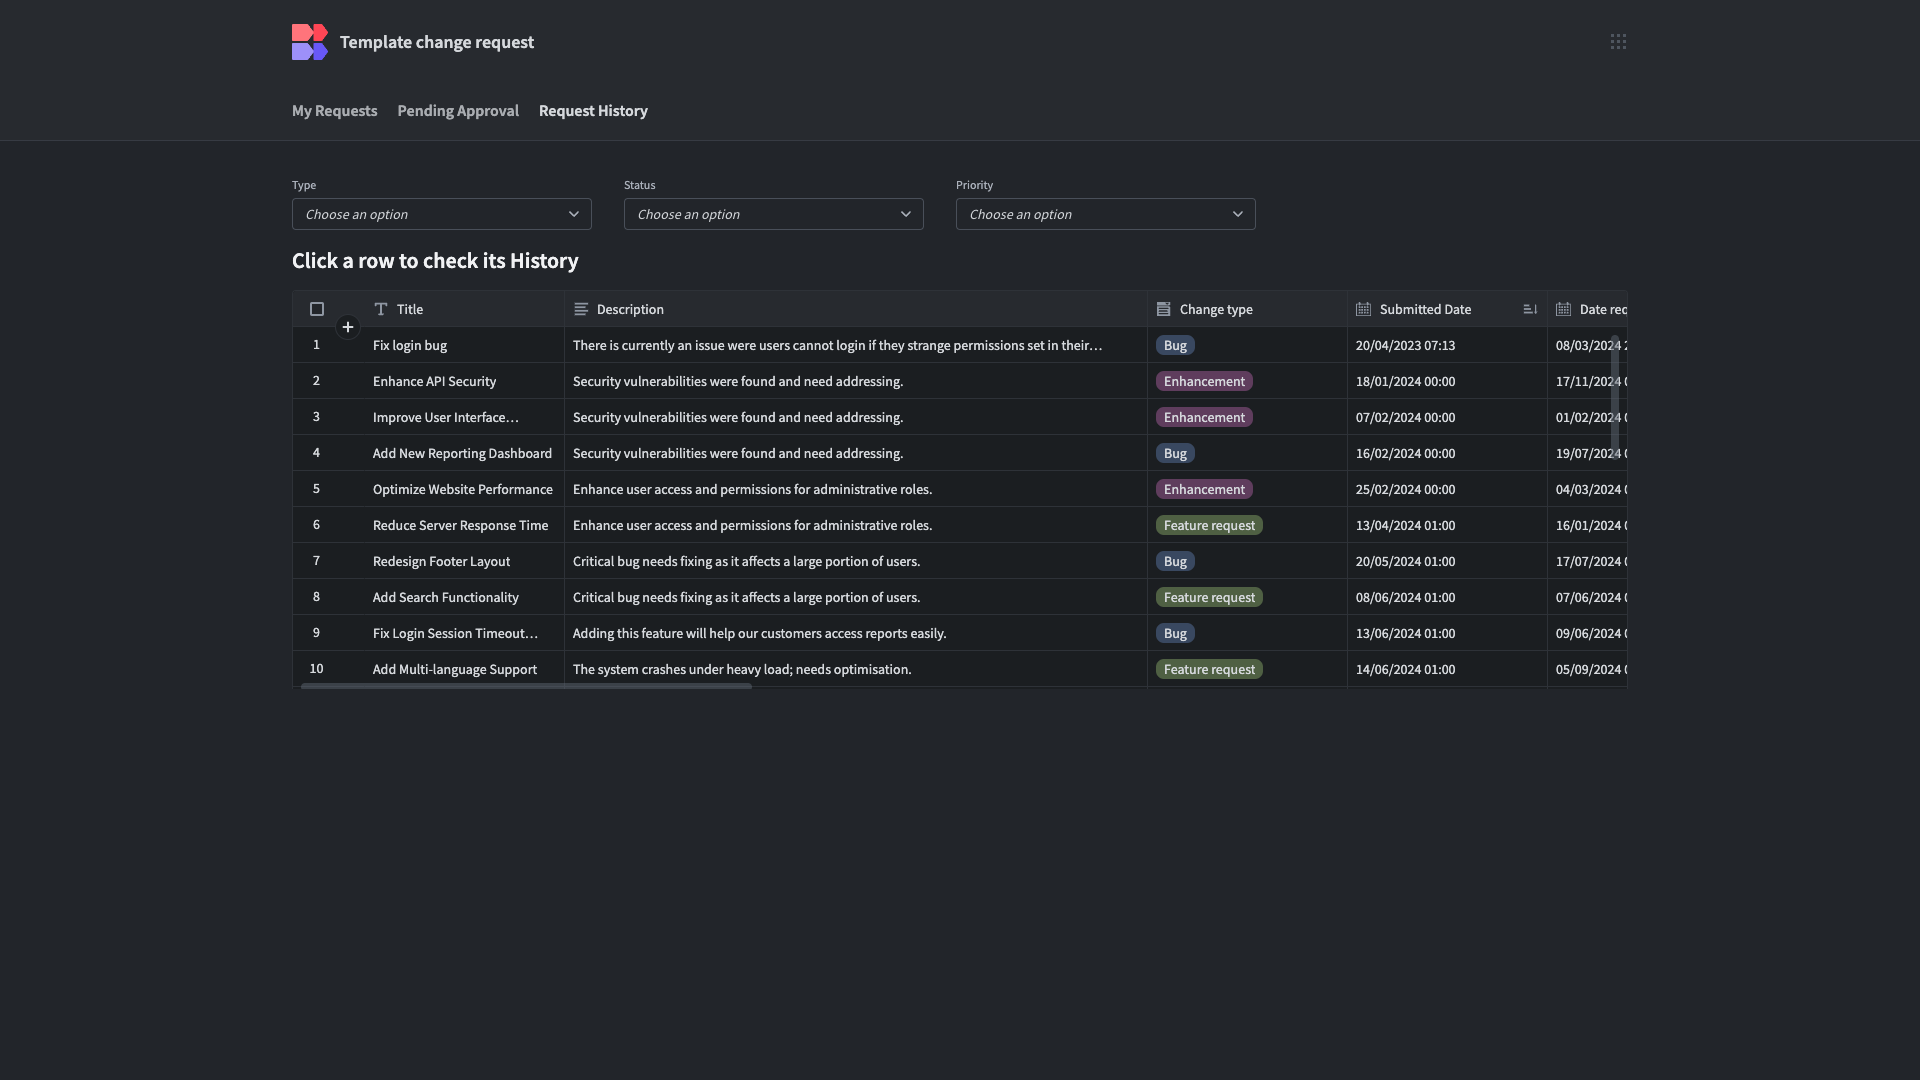
Our template features a dedicated Status History table. Each time a Request’s status attribute changes, this table is updated with a new row. The new status, previous status, user, and timestamp are automatically recorded.
This provides a clear record of how requests progress through our approval process, providing oversight and auditability.
We can view these records using a dedicated History UI, which is accessible only to users with the Admin role.
Automated emails
As a change request progresses through our workflow, it’s important to keep stakeholders up to date with developments.
Our application utilizes Budibase’s automated email capabilities as the status of requests changes, notifying users when there’s something that requires their attention, as well as the final outcome of requests.
Take a look at our documentation on working with email automations.
User roles
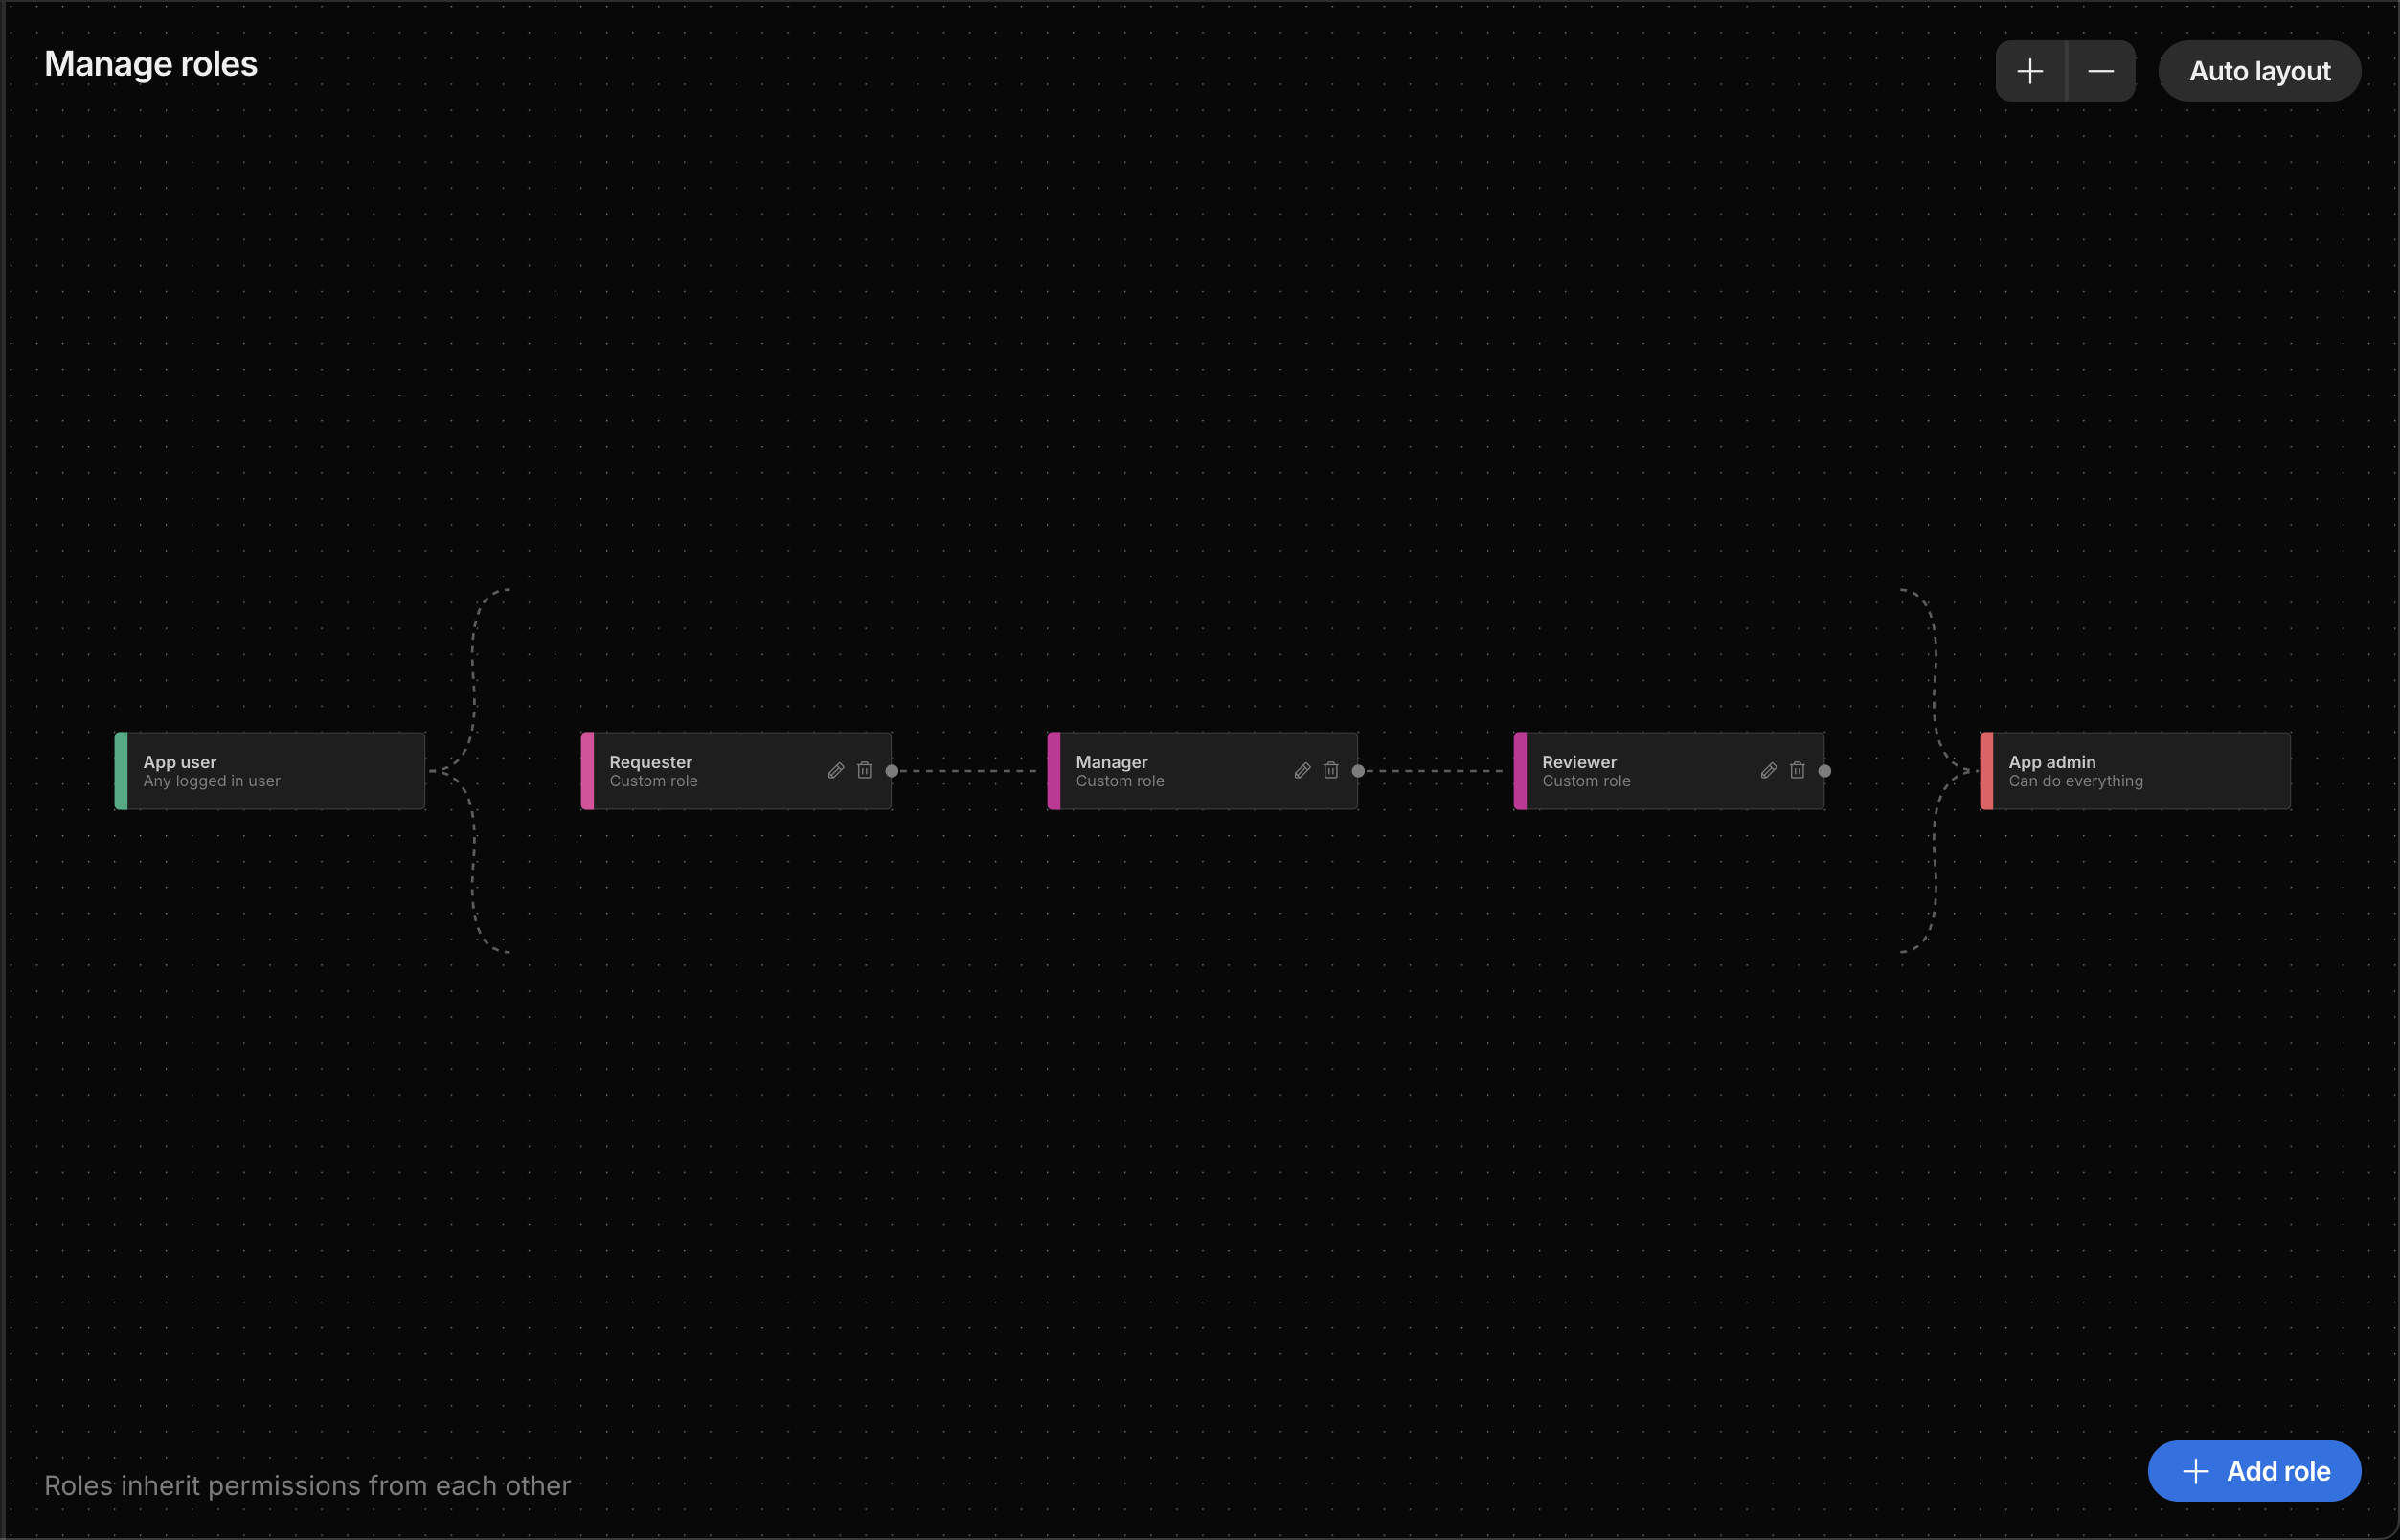
Our change management workflow utilizes three custom access roles, along with Budibase’s default Admin user type.
These are used to determine data exposure and permitted actions for end users.
The permissions associated with each of our roles are as follows.
Requesters are able to submit change requests or view and edit their own previous submissions.
Managers inherit all permissions from the Requester role. On top of this, they can review all requests with a Submitted status and trigger approve or reject row actions. When a Manager approves a request, it is passed to the next stage of our approval workflow.
Reviewers also inherit permissions from Requesters, and from Managers. They can then carry out row actions for final approval or rejection and provide additional information.
Admins can manage application settings, users, and roles. They also have full CRUD permissions across all connected data.
How does it work?
Our templates are designed to help you get started with Budibase. They’re fully working solutions, but you can customize them as much as you need to suit your change request management workflows.
Let’s check out how our change request app is built.
Data structure
In Budibase, the Data section is at the core of the app-building experience. In addition to configuring our app’s data, we can use this to set access rules, define user actions, and even generate UIs.
Check out our documentation on Budibase DB to learn more.
Our template is built on two tables within Budibase’s internal database. It also utilizes several role-specific views to control which data different kinds of users can interact with across these.
Here’s how this works.
Tables
Our application utilizes two database tables and Budibase’s internal Users table.
One is Change Request, which stores all information about incoming requests and additional details provided during the approval process.
The other is Status History, which stores information about how the Status attribute of individual Change Request rows has changed.
The Change Request table stores the following attributes:
- Title - Text,
- Description - Long Form Text,
- Change type - Single Select,
- Submitted date - Date,
- Date required - Date,
- Status - Single Select,
- Submitted by - Single User,
- Priority - Single Select,
- Reason for change - Long Form Text,
- Attachments - Attachment,
- References - Text,
- Date signed - Date,
- Status history - Relationship,
- Review signature - Signature,
- Rejection reason - Long Form Text,
- Completion date - Date,
- CrId - Number.
Meanwhile, the Status History table maintains a record of updates to the Status attribute on our Change Request table, with the following attributes:
- New status - Text,
- Previous status - Text,
- Timestamp - Date,
- Changed by - Single User,
- Change request - Relationship.
Whereas the Change Request table is primarily populated manually by users, entries on the Status History table are created automatically when the Status is updated. We’ll see how this works a little later.
Relationships
Our data model relies on a relationship between our two database tables and between each of these and Budibase’s internal Users table.
The Relationship table allows us to configure links between rows across tables in BudibaseDB. Our application uses a One-To-Many relationship from our Change Request table to Status History.
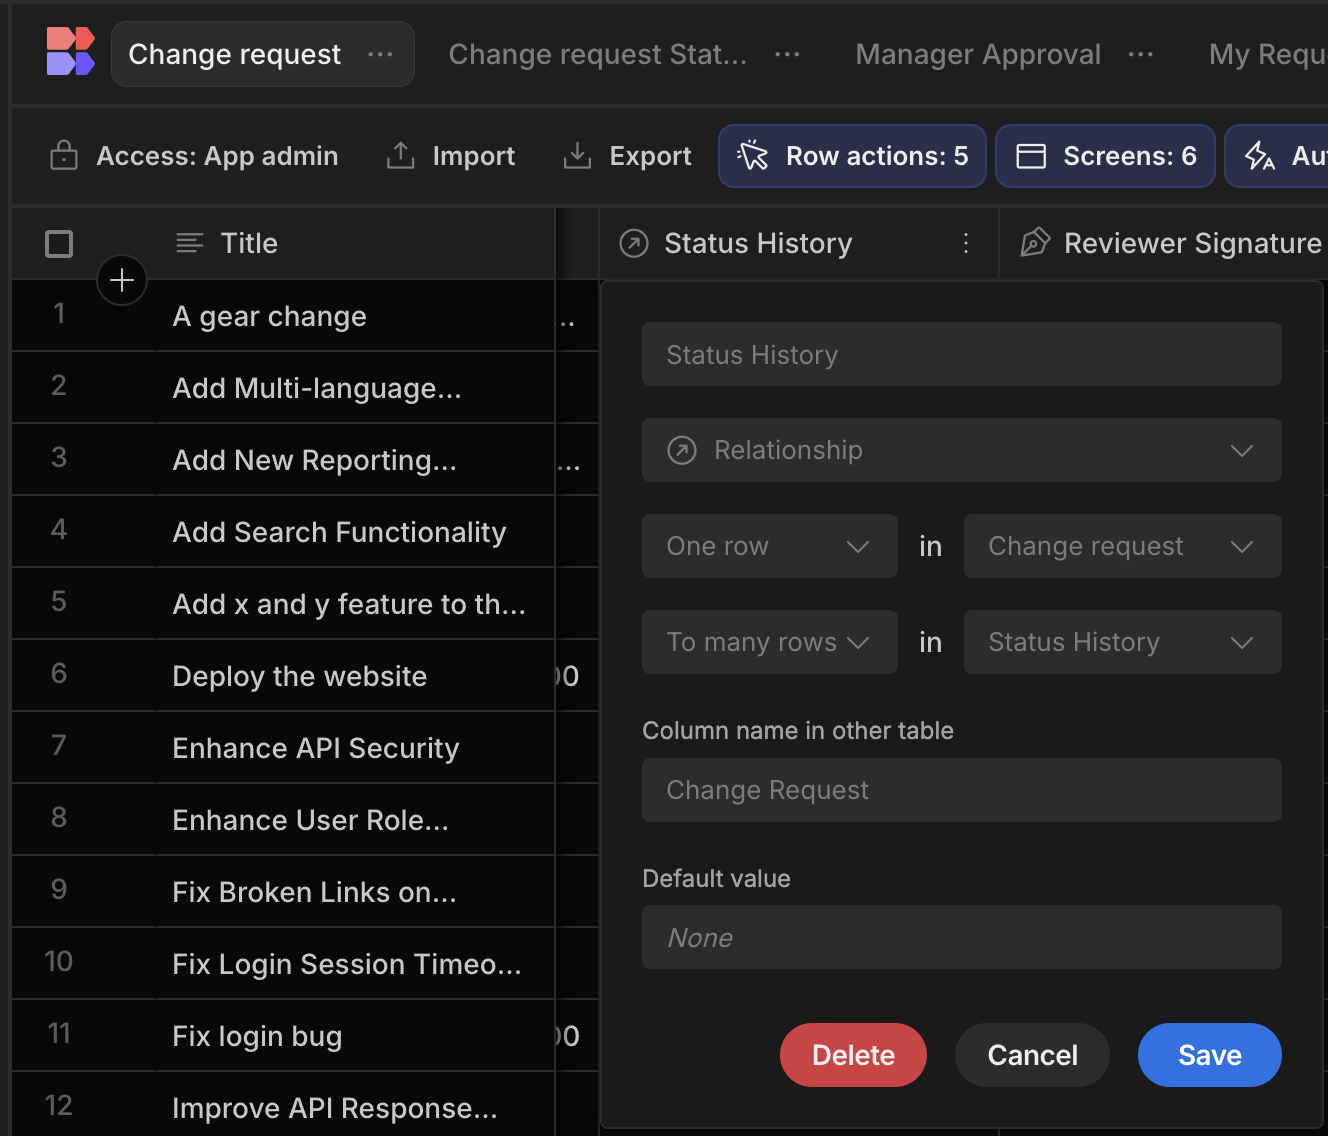
Budibase also allows us to set up relationships between our database and the internal Users table. For instance, to assign a row to a particular record, or track who has created a row.
This is also helpful when defining data permissions for specific users. For instance, only allowing users to view their own submissions or assigned rows.
We can do this with two special data types, the Single User and Multi User columns.
Across our two tables, we’ve included several Single User columns, primarily to track actions. For instance, the Submitted by column on our Change request table.
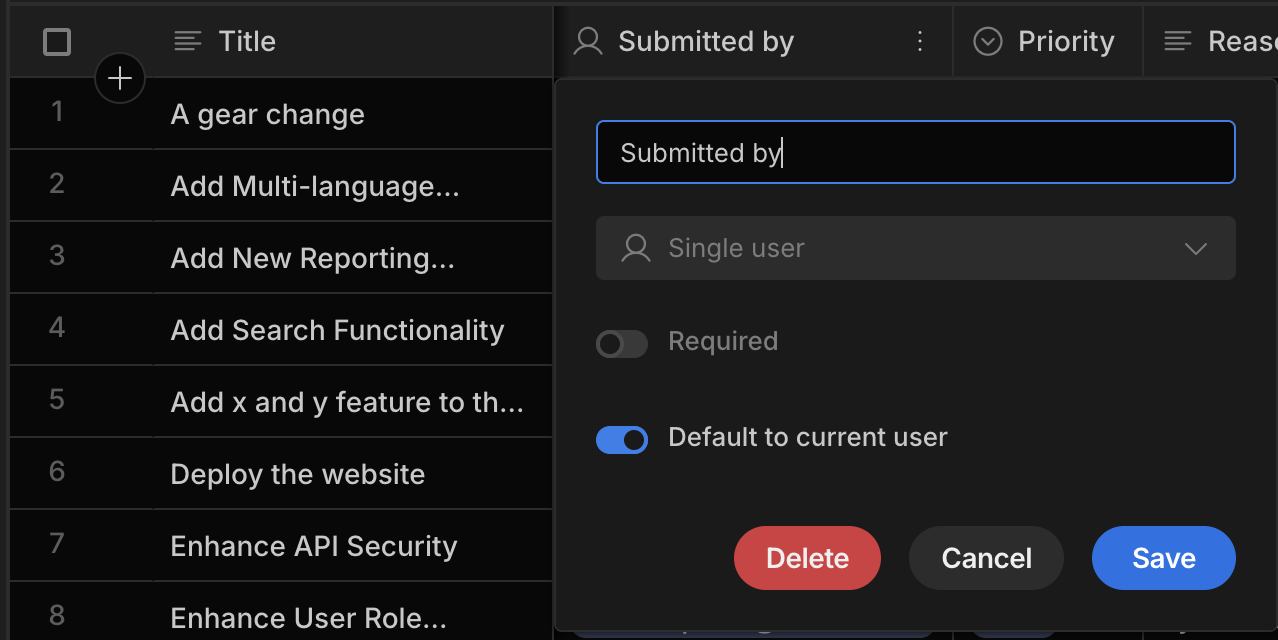
Views
Views are subsets of data across one or more tables that we can create for a specific purpose or function by setting rules for which rows, columns, or permitted actions to include. We can then set access rules, defining which Views can be used by different user roles.
We’ve created three Views based on our Change Request table to provide Employees, Managers, and Reviewers with data exposure that’s appropriate for their roles.
Employees can submit data or view their own previous submissions using a View called My Requests. This uses a filter expression to only return the rows where the Submitted by attribute is set to the Current User in app’s front-end.
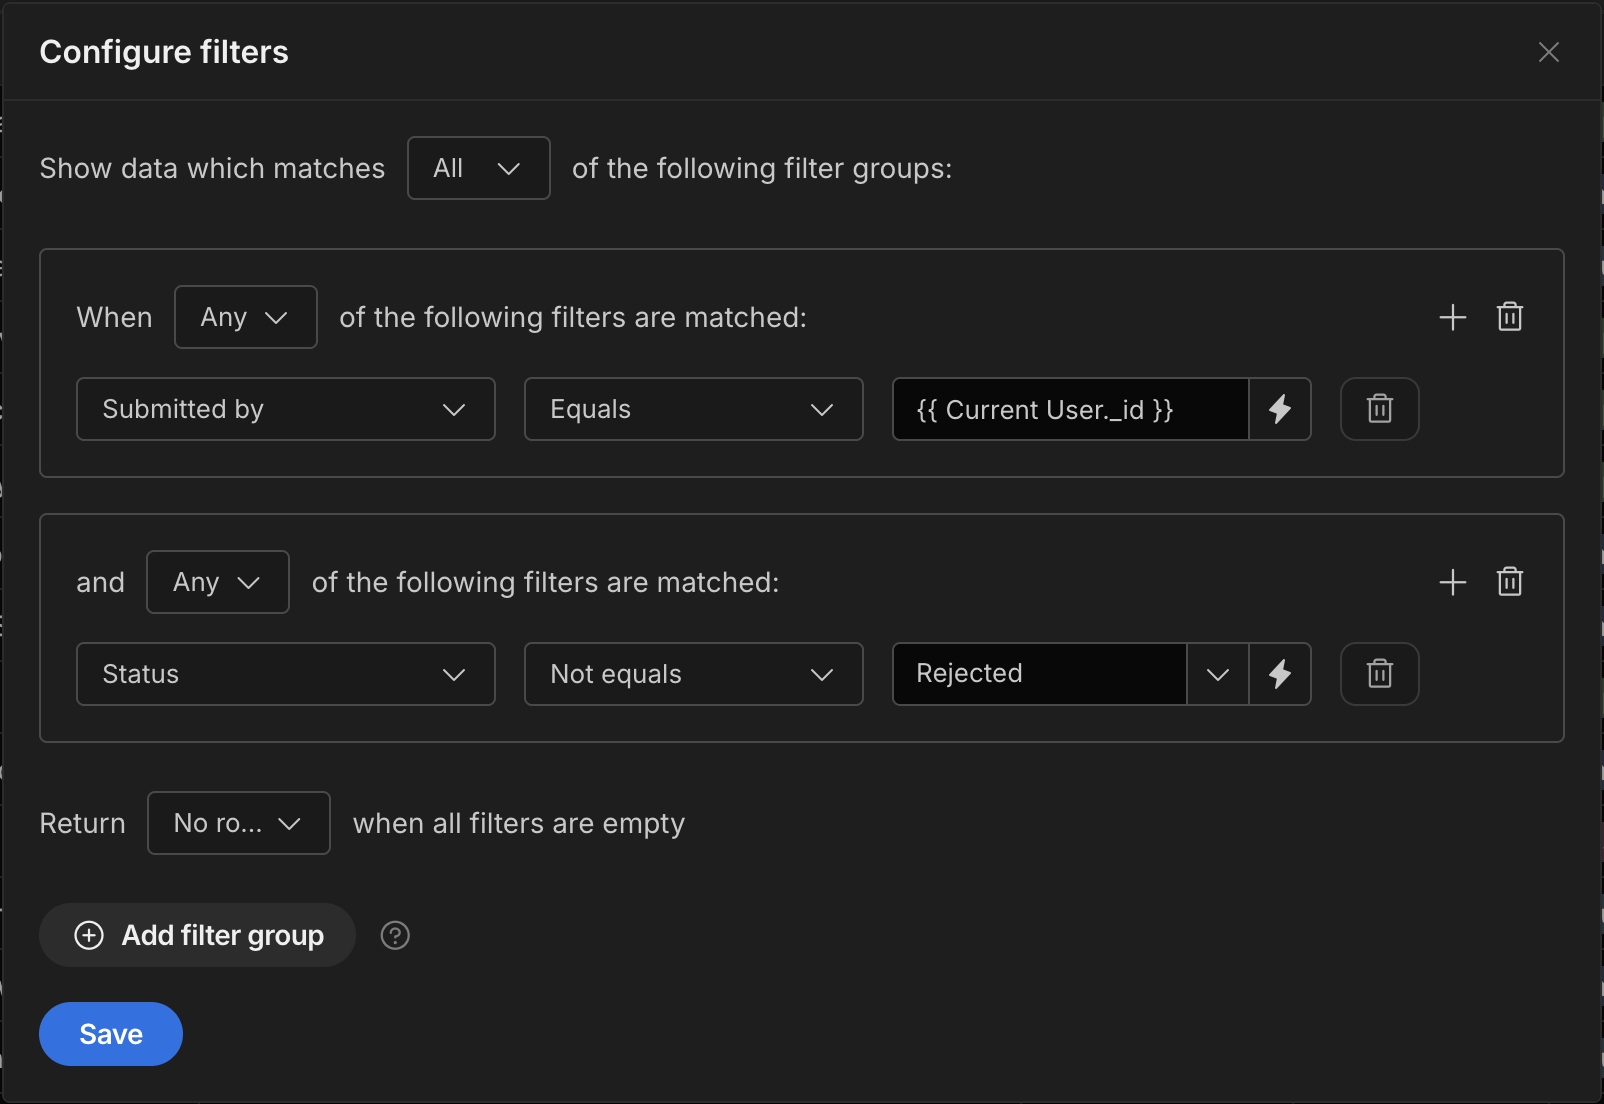
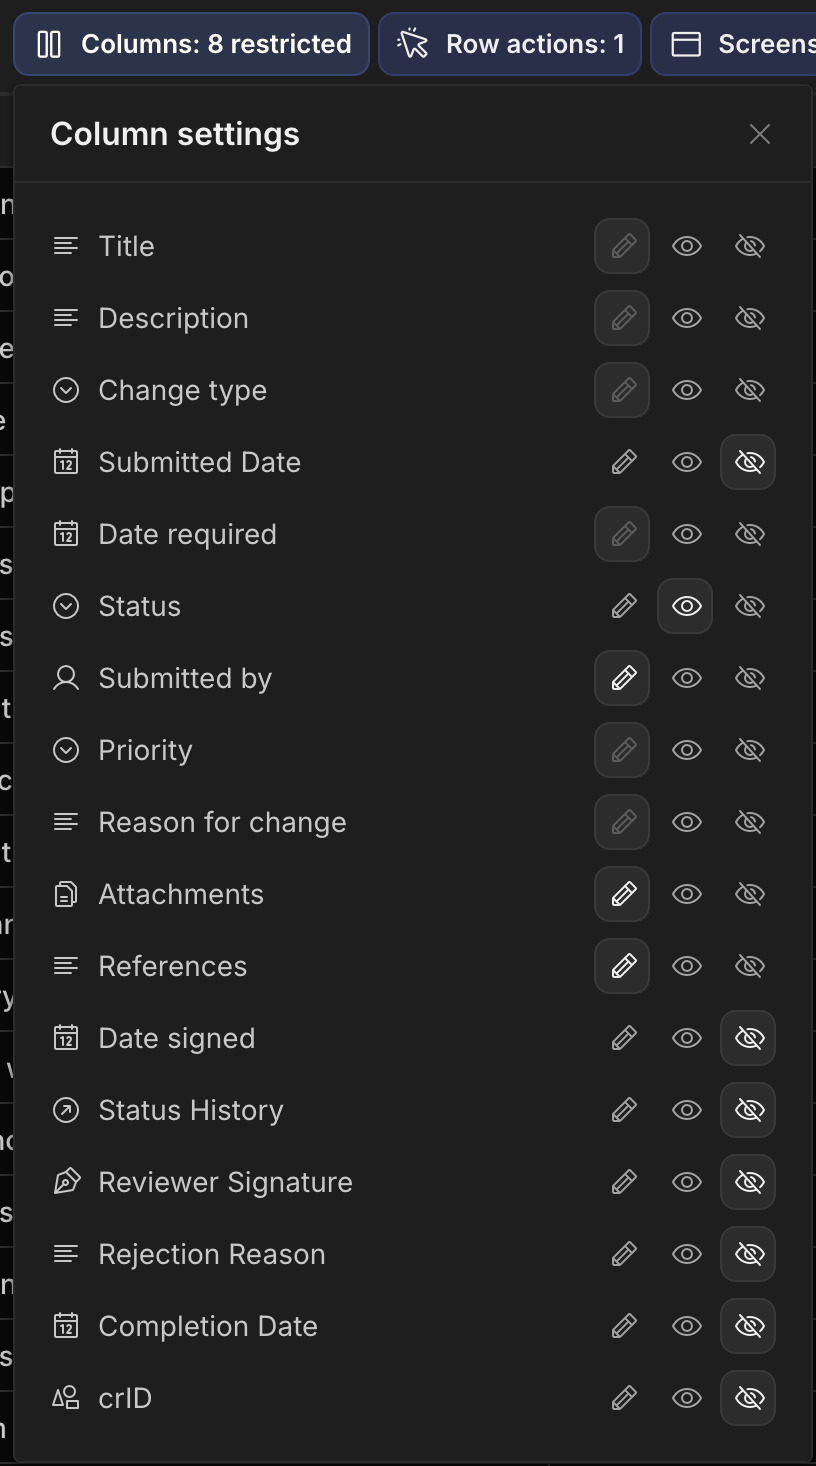
Under the Columns tab, we’ve granted Write permissions for all attributes required to create an initial change request, as well as Read access for the Status column.
Our Manager Approval and Reviewer Approval views include rows irrespective of which user created them. Instead, they’re filtered by their current Status, enabling these users to access requests that are at an appropriate stage in our workflow for their role.
Managers can access rows where the Status is Submitted while the Reviewer Approval View returns requests that are In Review.
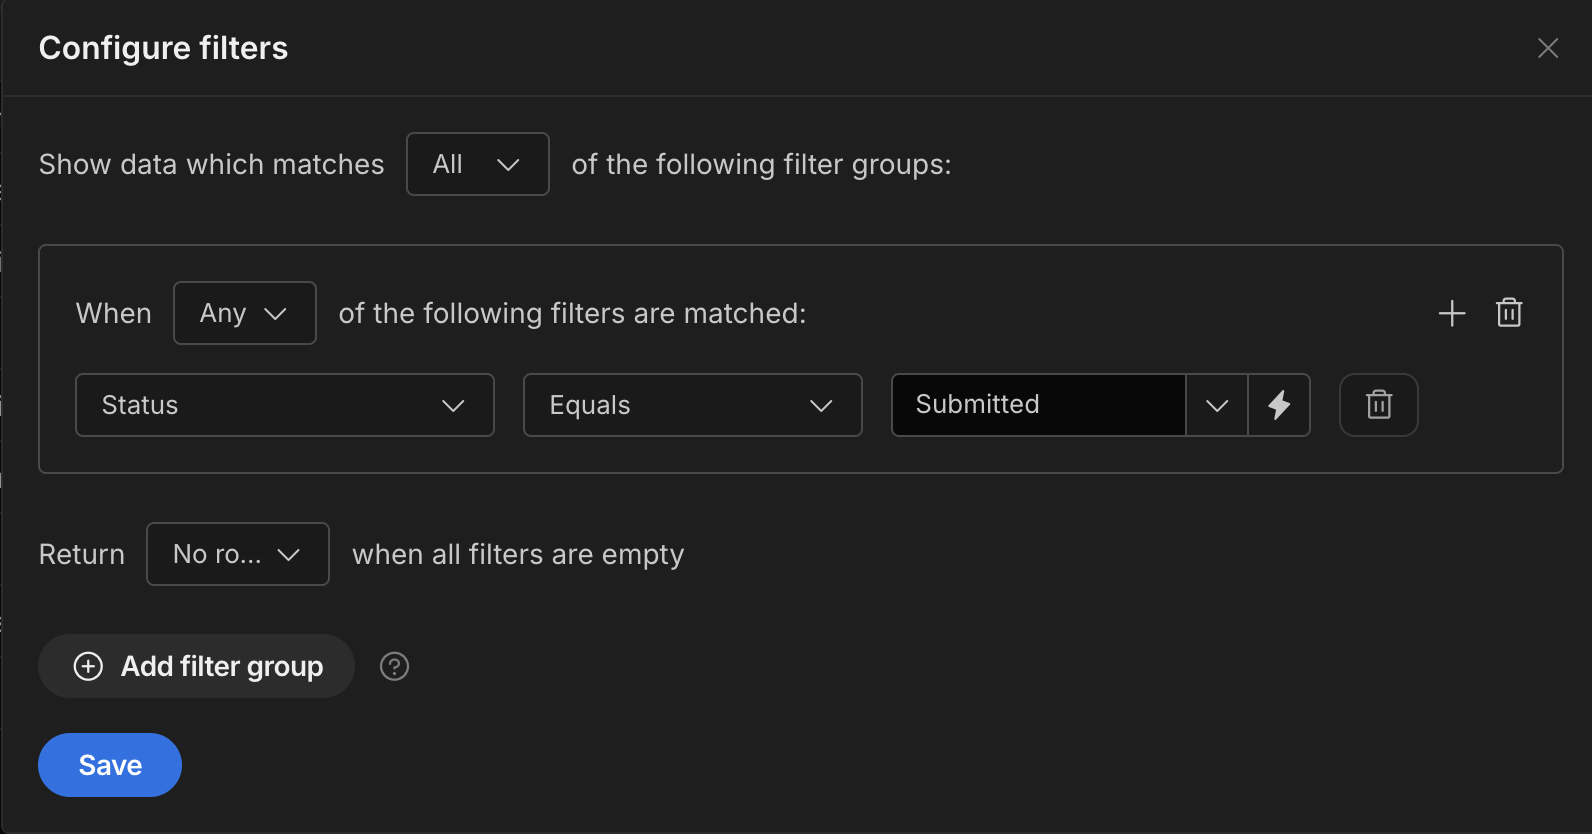
They also each have Read and Write permissions for the columns that are required for each of them to respond to requests.
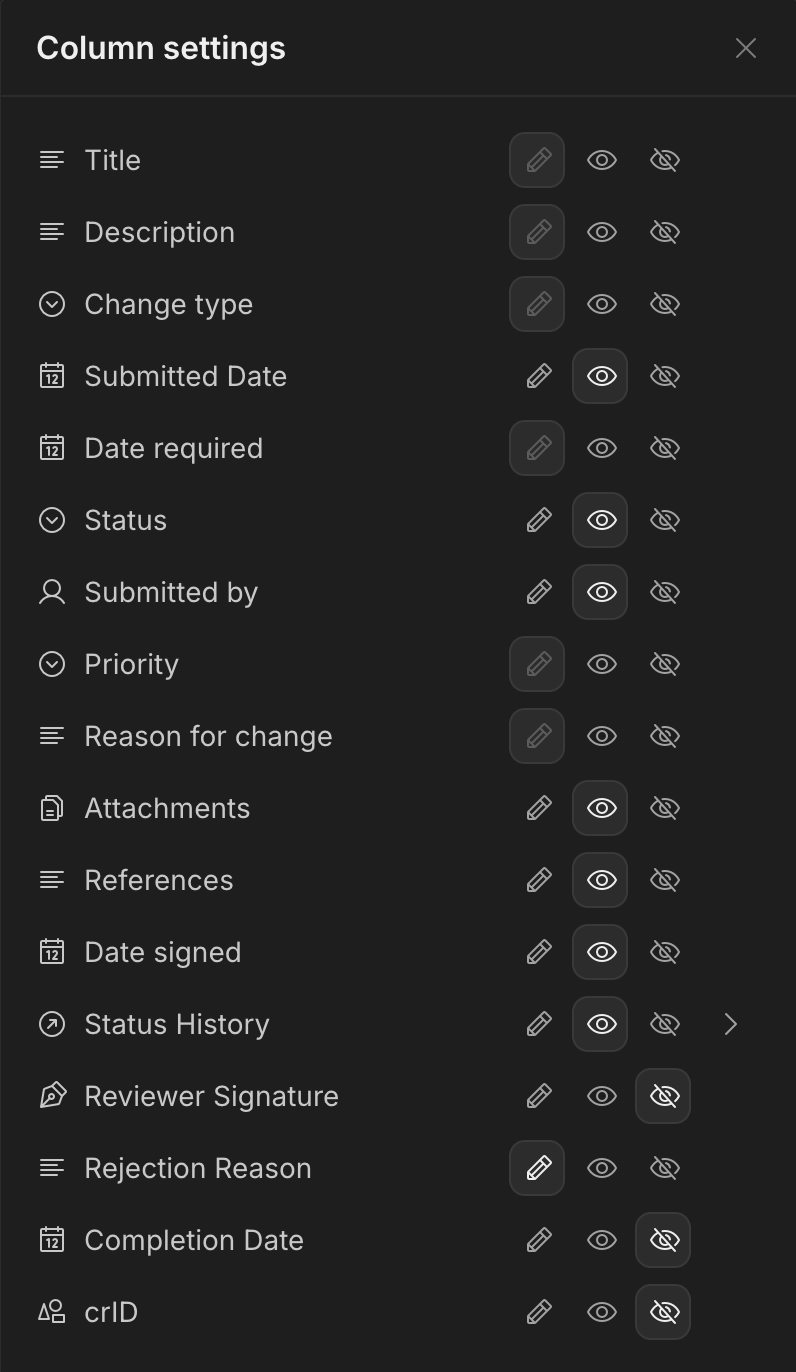
Users with the Admin role have full Read and Write permissions for both our Change Request and Status History tables.
User interfaces
Next, let’s check out how our template’s front end is built. Check out our docs page on working with screens within Budibase.
Since users primarily need to either create database entries or view and update existing ones, our app relies heavily on Budibase’s autogenerated Form and Table layouts.
These inherit the access roles of the tables or views they’re based on.
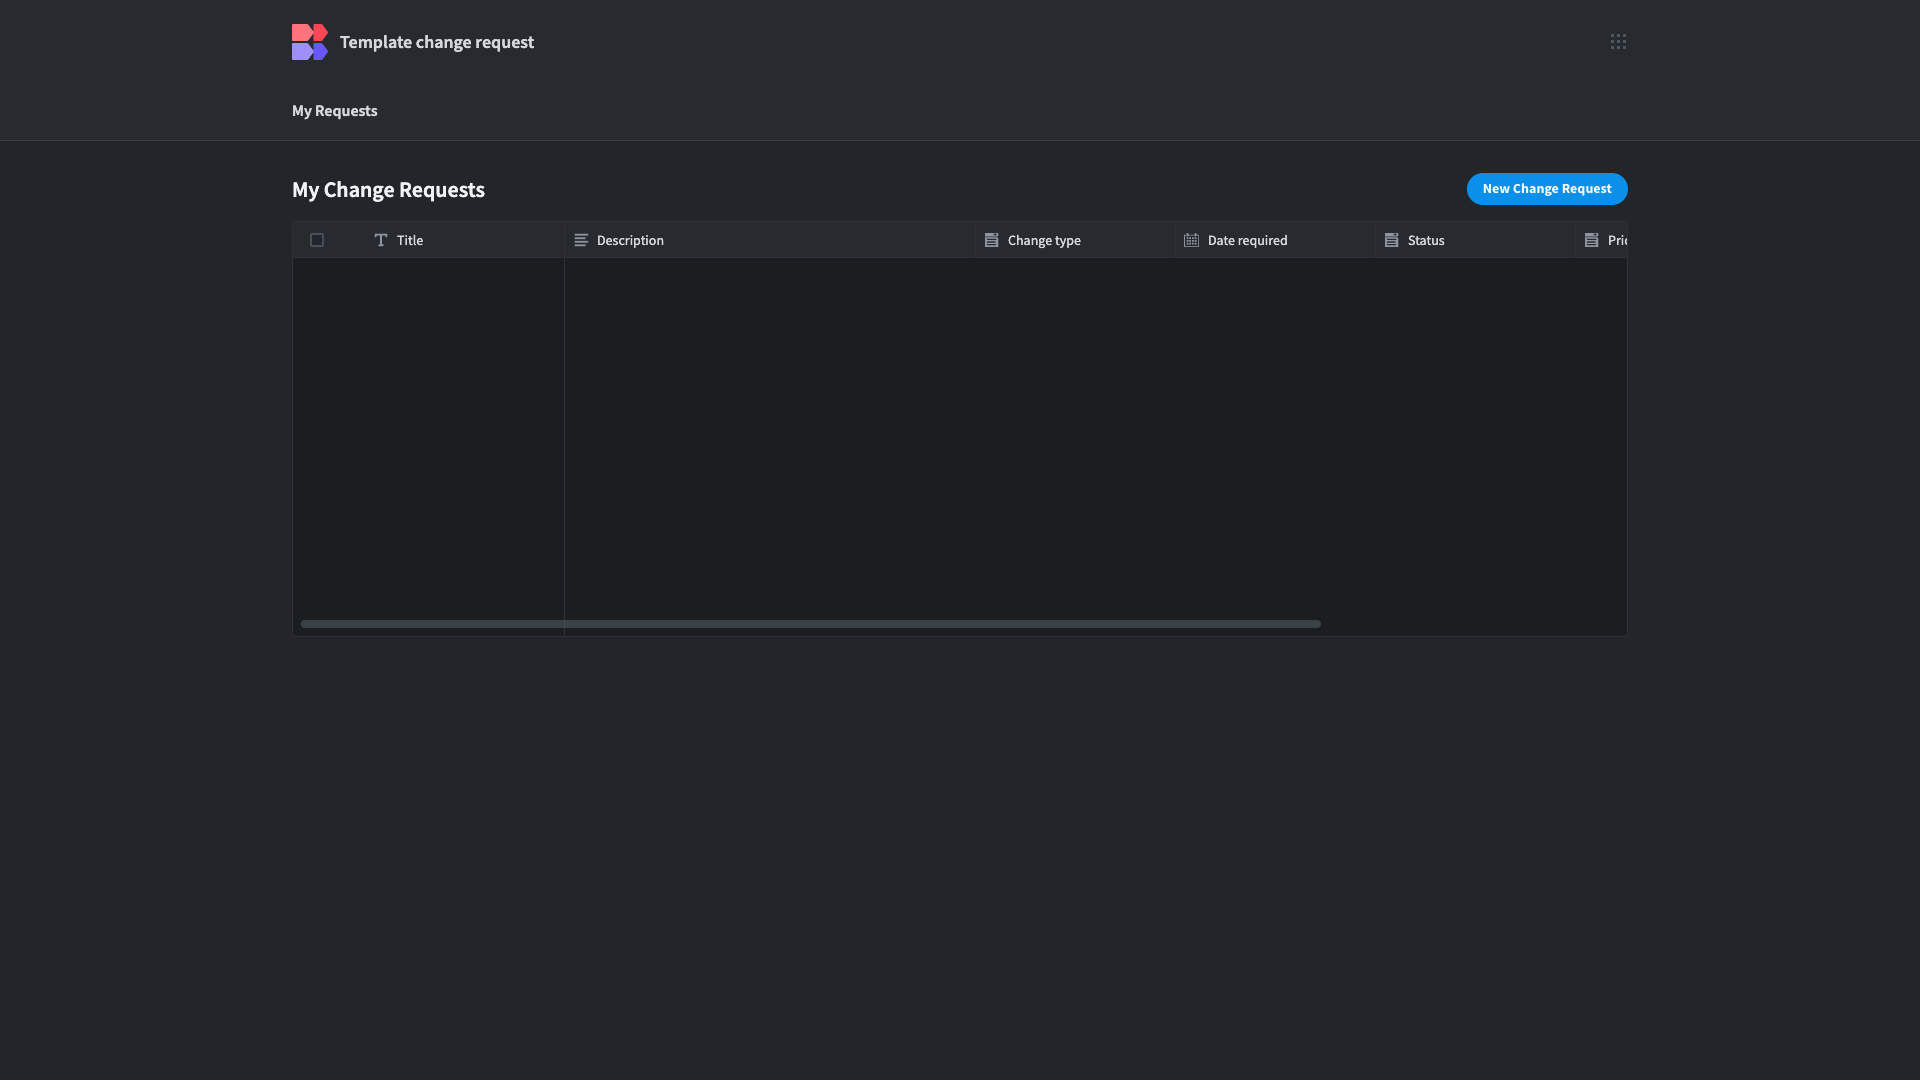
For Employees, the app’s home screen is CRUD UI. This has been auto-generated from the My Requests View, using the Table layout with separate form screens.
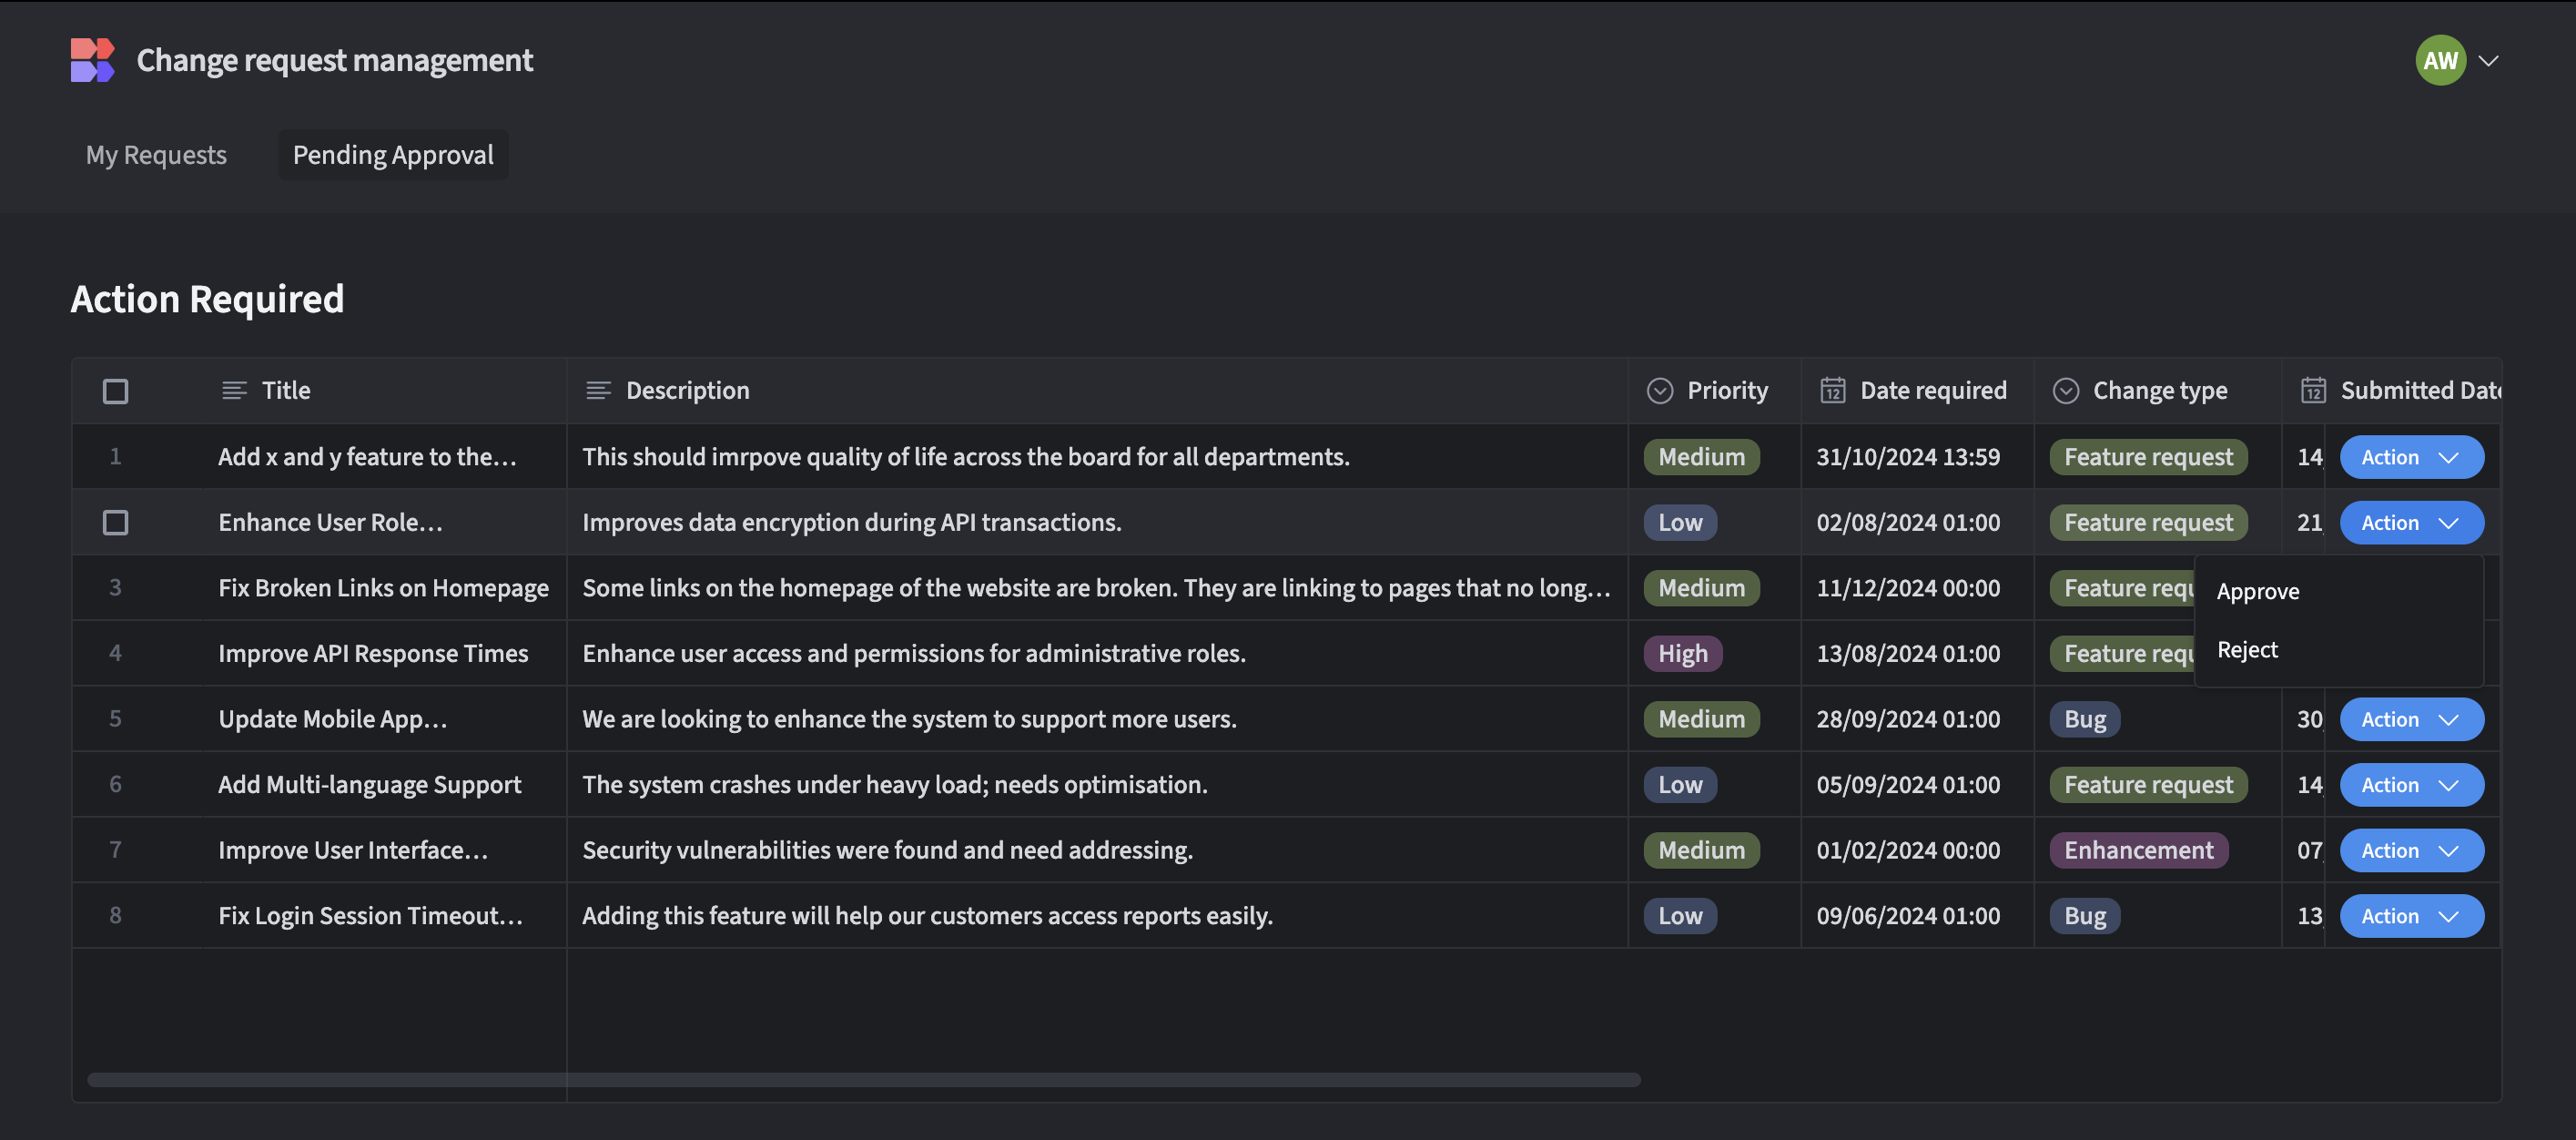
Our template uses a single screen for handling both Manager and Reviewer actions. This displays relevant Change Request records for each type of user within a Table UI where they can open modal forms to Approve or Reject submissions and provide notes.
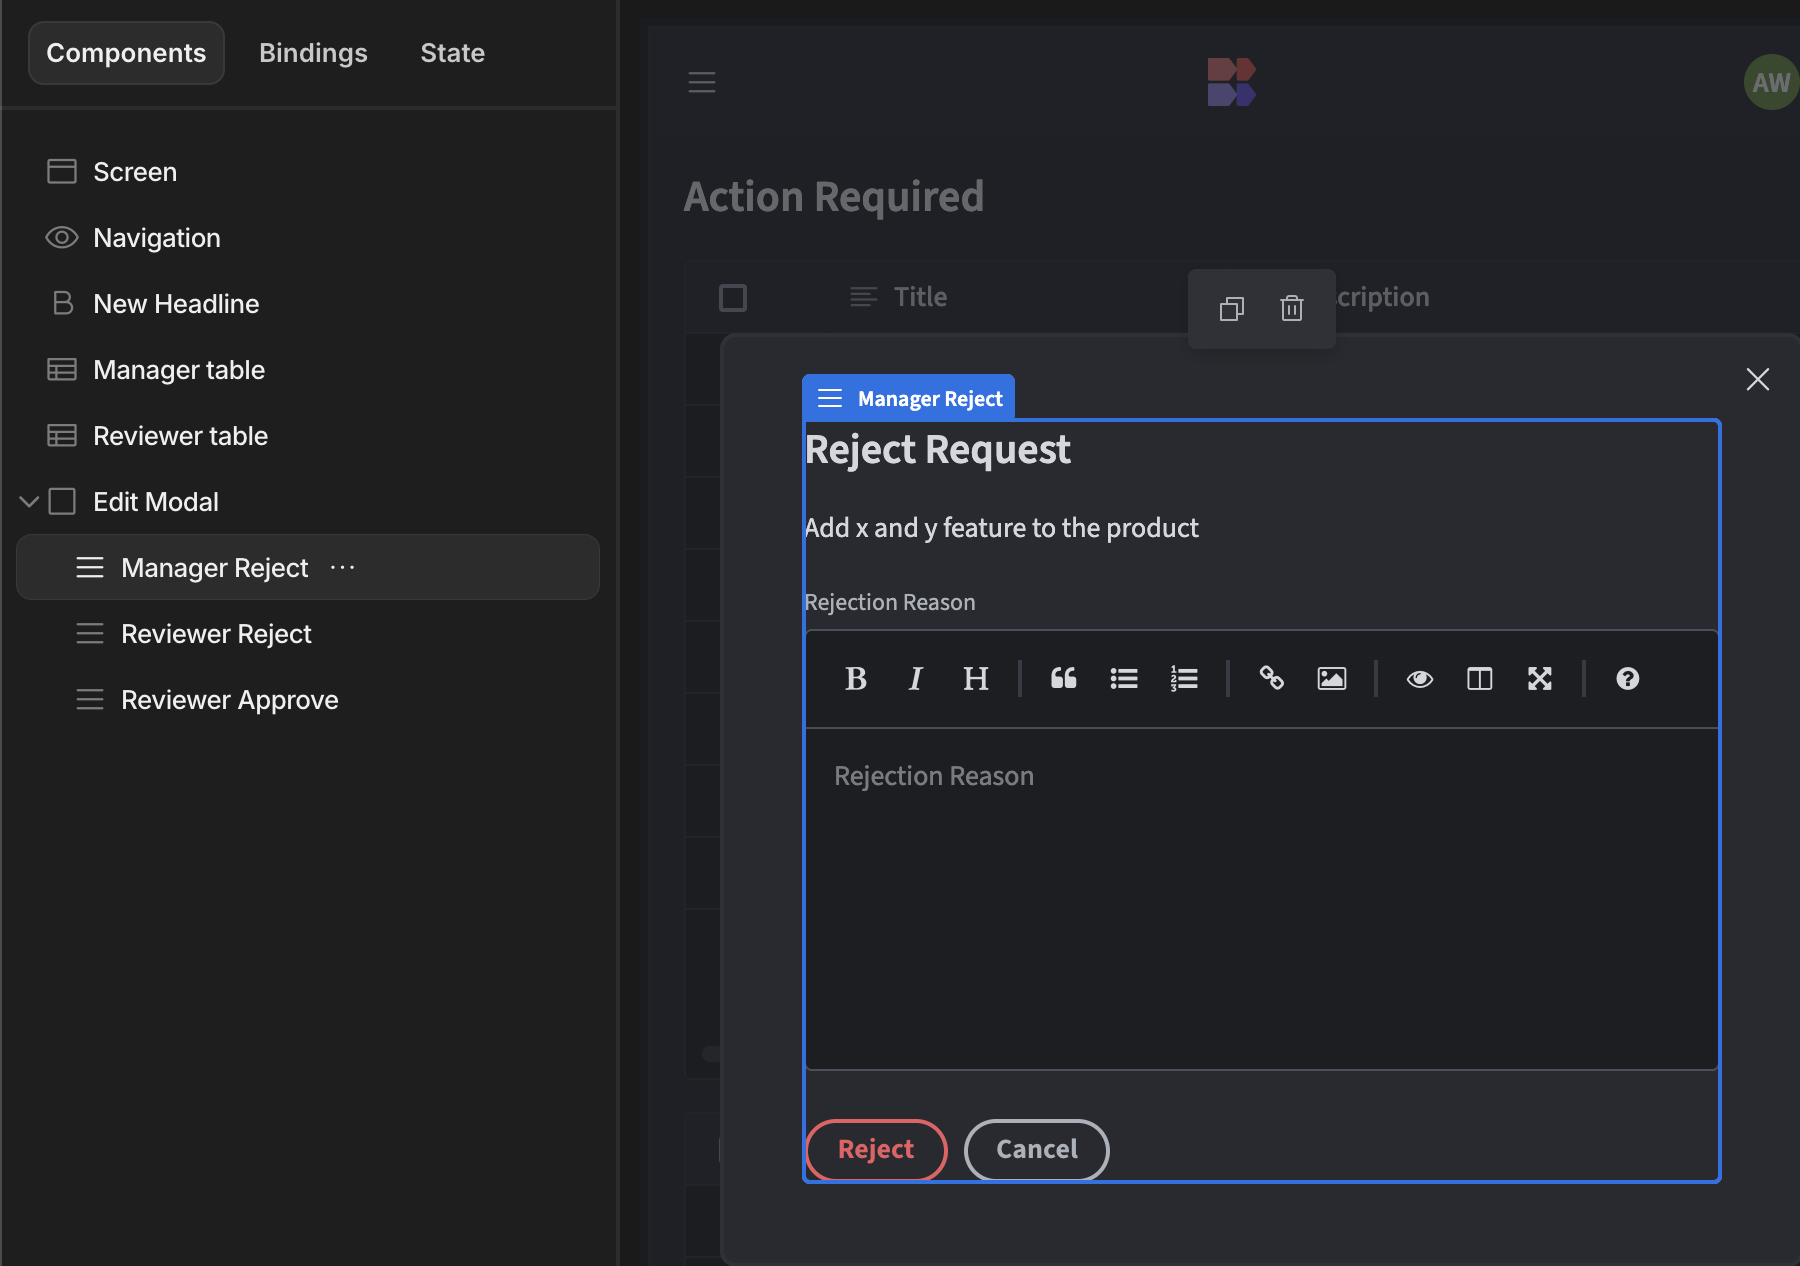
In the Budibase builder, this screen actually contains two separate tables. We’re using conditionality rules to determine which one to display in the end-user app, depending on the current user’s role.
Take a look at our documentation on working with data in design to learn more about how this works.
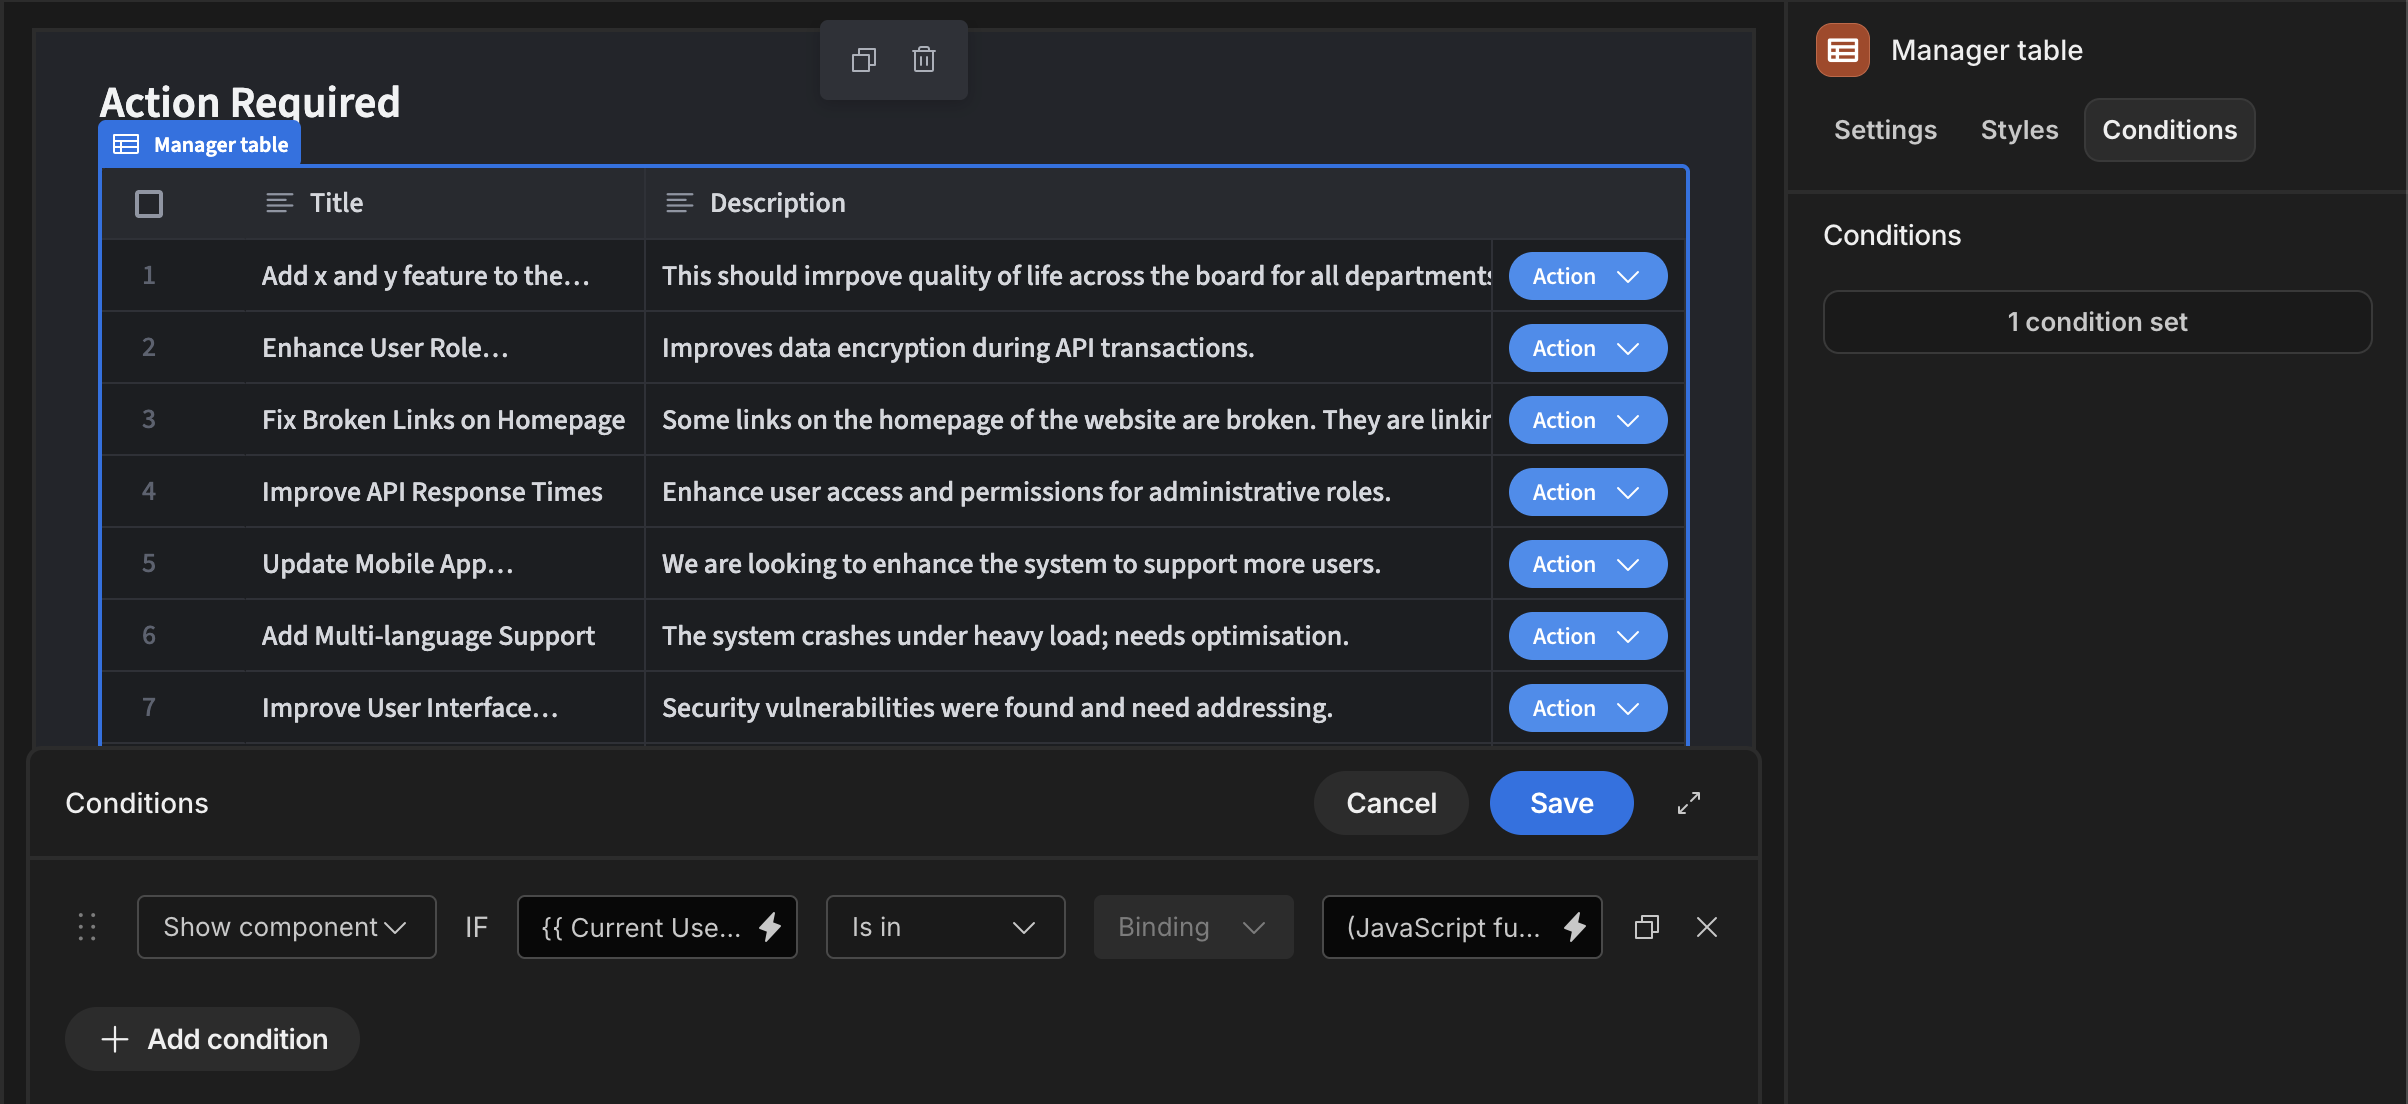
The specific form that loads within the modal is determined by which action the user has selected. This works by setting an in-app state when they initially hit Approve or Reject and applying a conditionality rule to our forms based on this.

Lastly, our Administration screen is also based on an autogenerated Table layout with some important modifications. Firstly, we’ve nested our table inside a form and added filter expressions based on user selections in the provided form fields.
This means that our table can be filtered from the front-end, so Admins can more easily find the history of specific Change Request records.
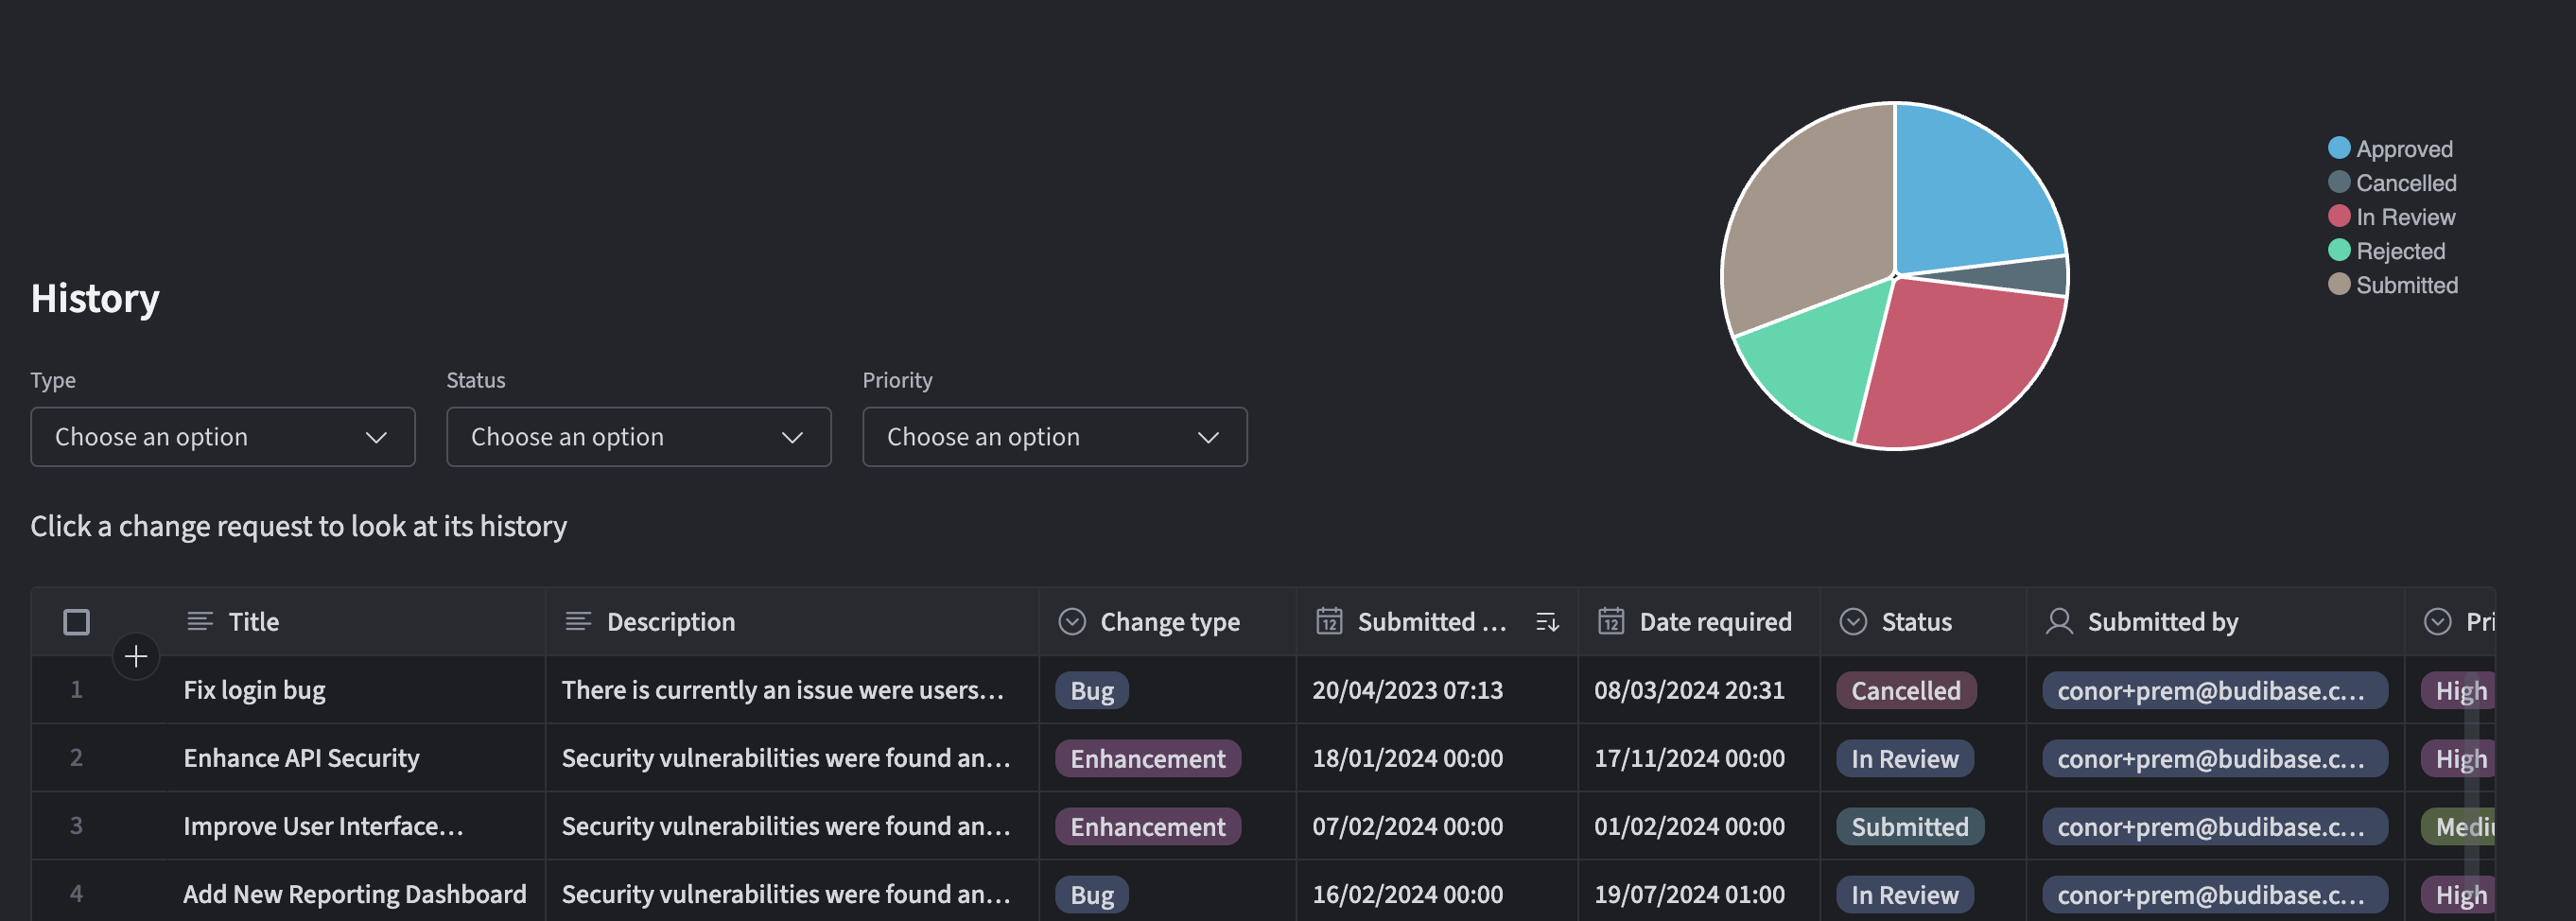
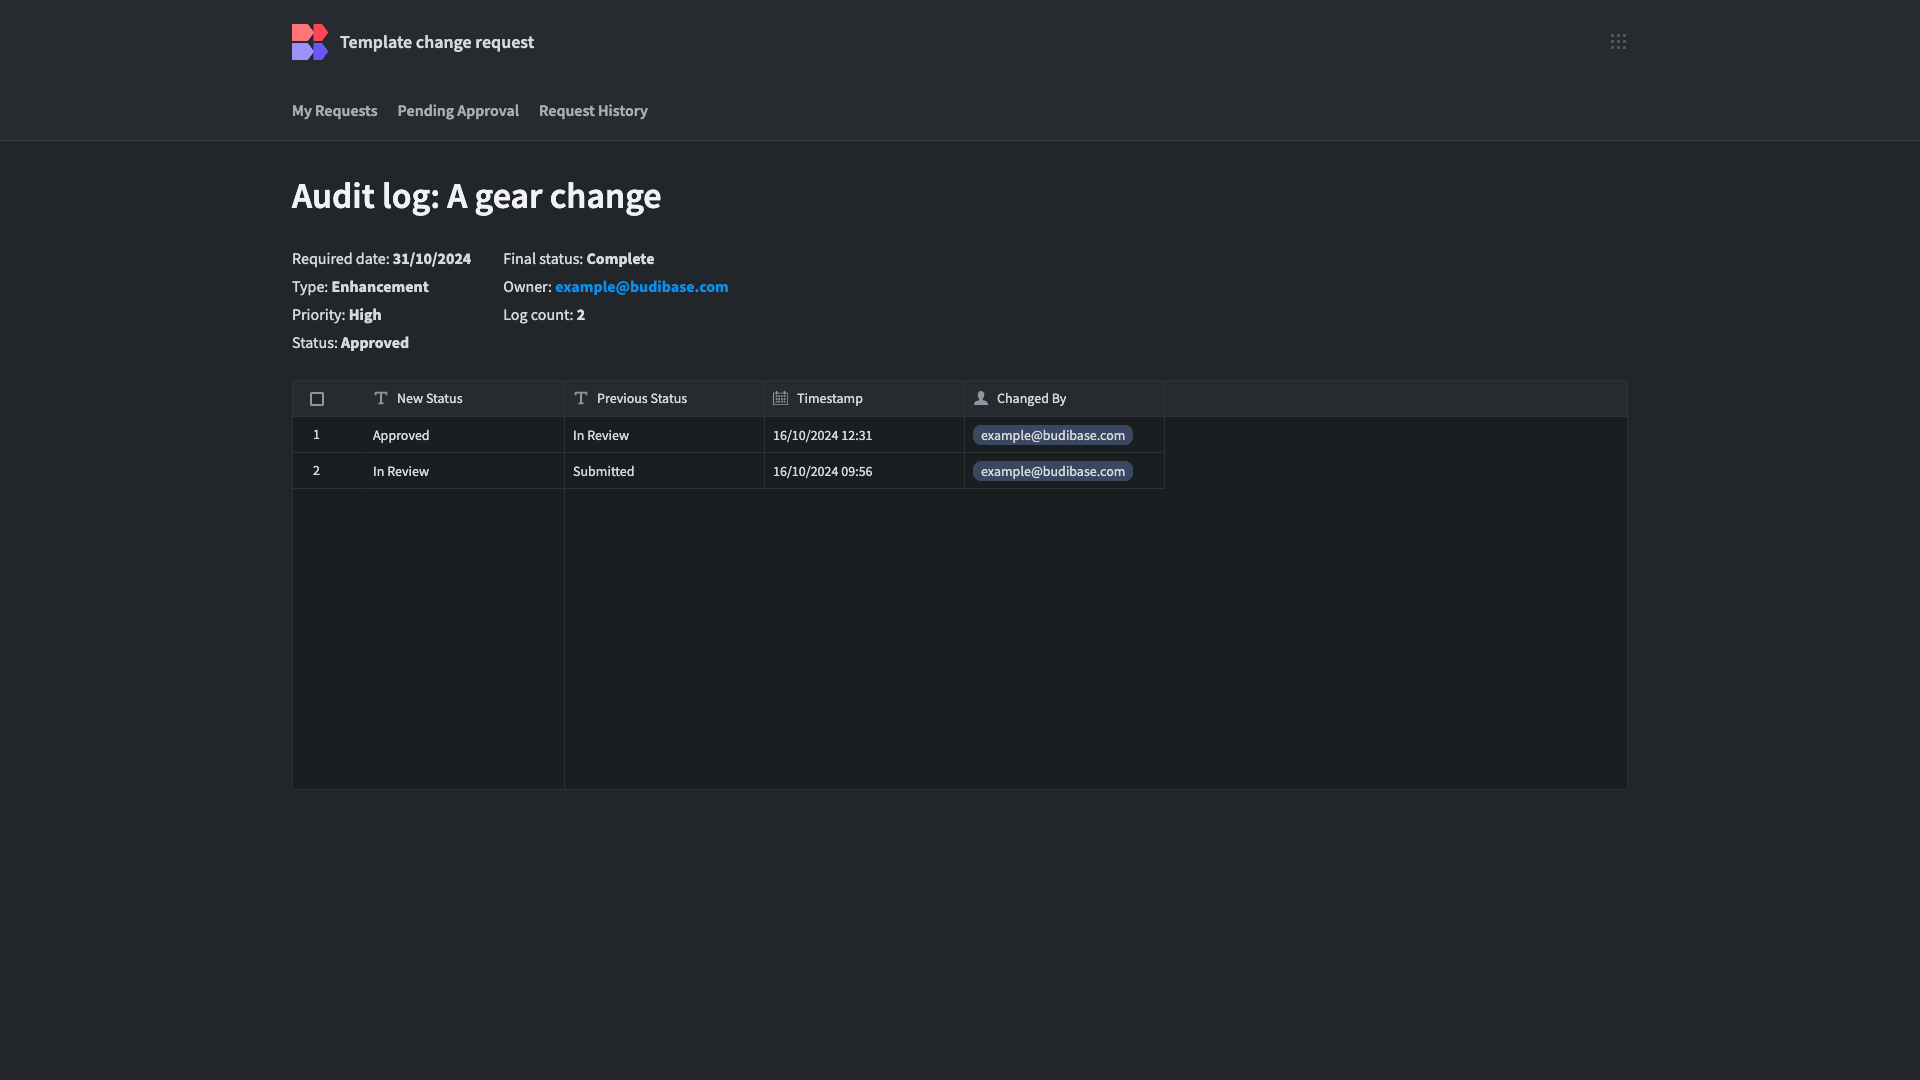
Secondly, rather than opening an Update form, when a user clicks a row, it opens a custom screen to expand the details of the specific Change Request.
This utilizes a series of Markdown Viewer components and Containers to display the data from the original request, as well as a Read-Only table of all related Status History rows.
Automations
In Budibase, Automations are used to define sequences of steps that can be triggered by user actions, database events, cron expressions, or other triggers. Take a look at our automation docs to learn more.
We’ve used several Automation flows across our template to handle key interactions with our data, as well as notifying users of how their submissions are progressing.
Many of these rely on Budibase’s Row Actions functionality. A Row Action is a user-triggered automation rule that relates to a particular entry in a database or view. Others are triggered when a database entry is created or updated.
Let’s check these out.
Request submission and cancellation
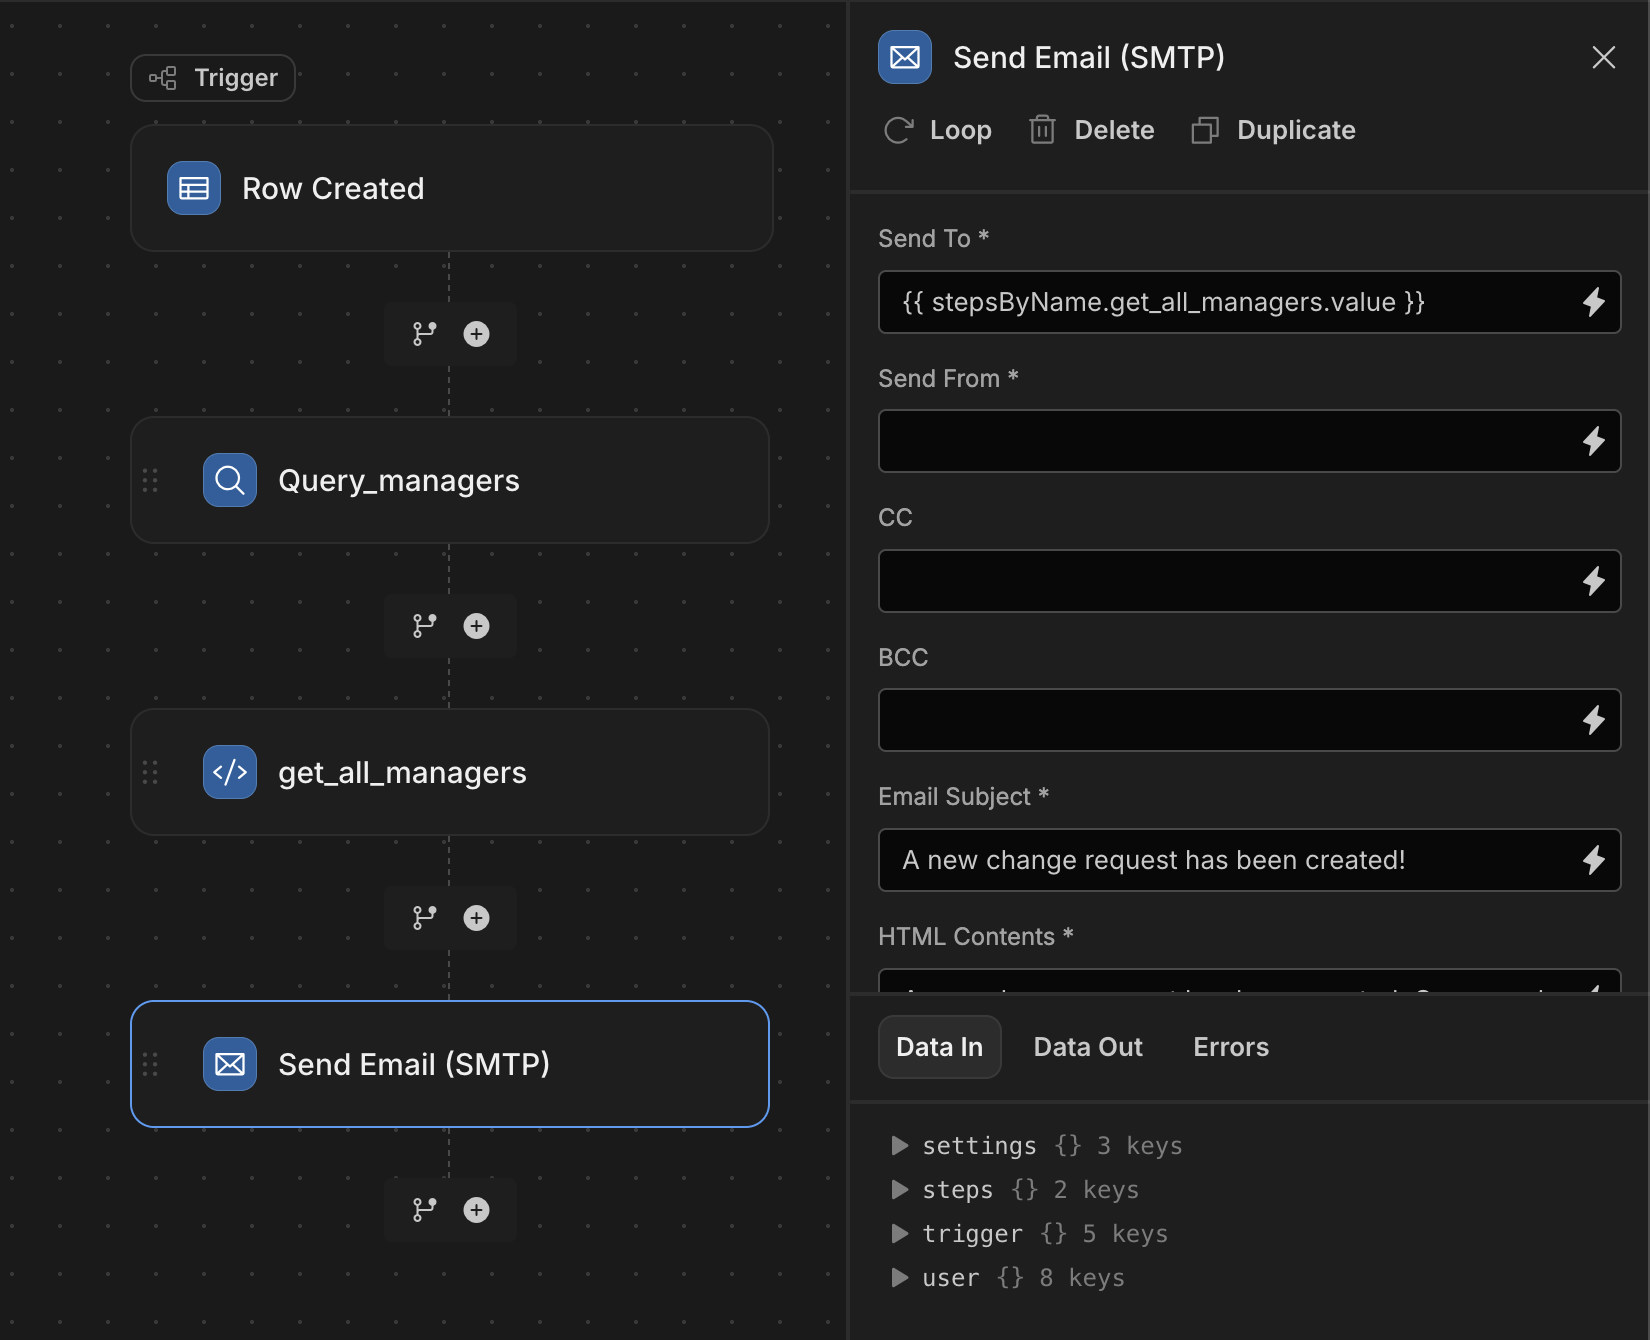
Our first Automation is called Submitted Change Request. This uses a Row Created trigger on our Change Request table. So, it will run each time a user creates a new request.
This flow contains three steps. First, we use a Query Rows action to return all rows in the Users table with their role set to Manager. Second, we use some custom JavaScript to pass these users’ emails into an array.
Thirdly, we use an Email action to notify all Managers that there’s a new request that requires their attention.
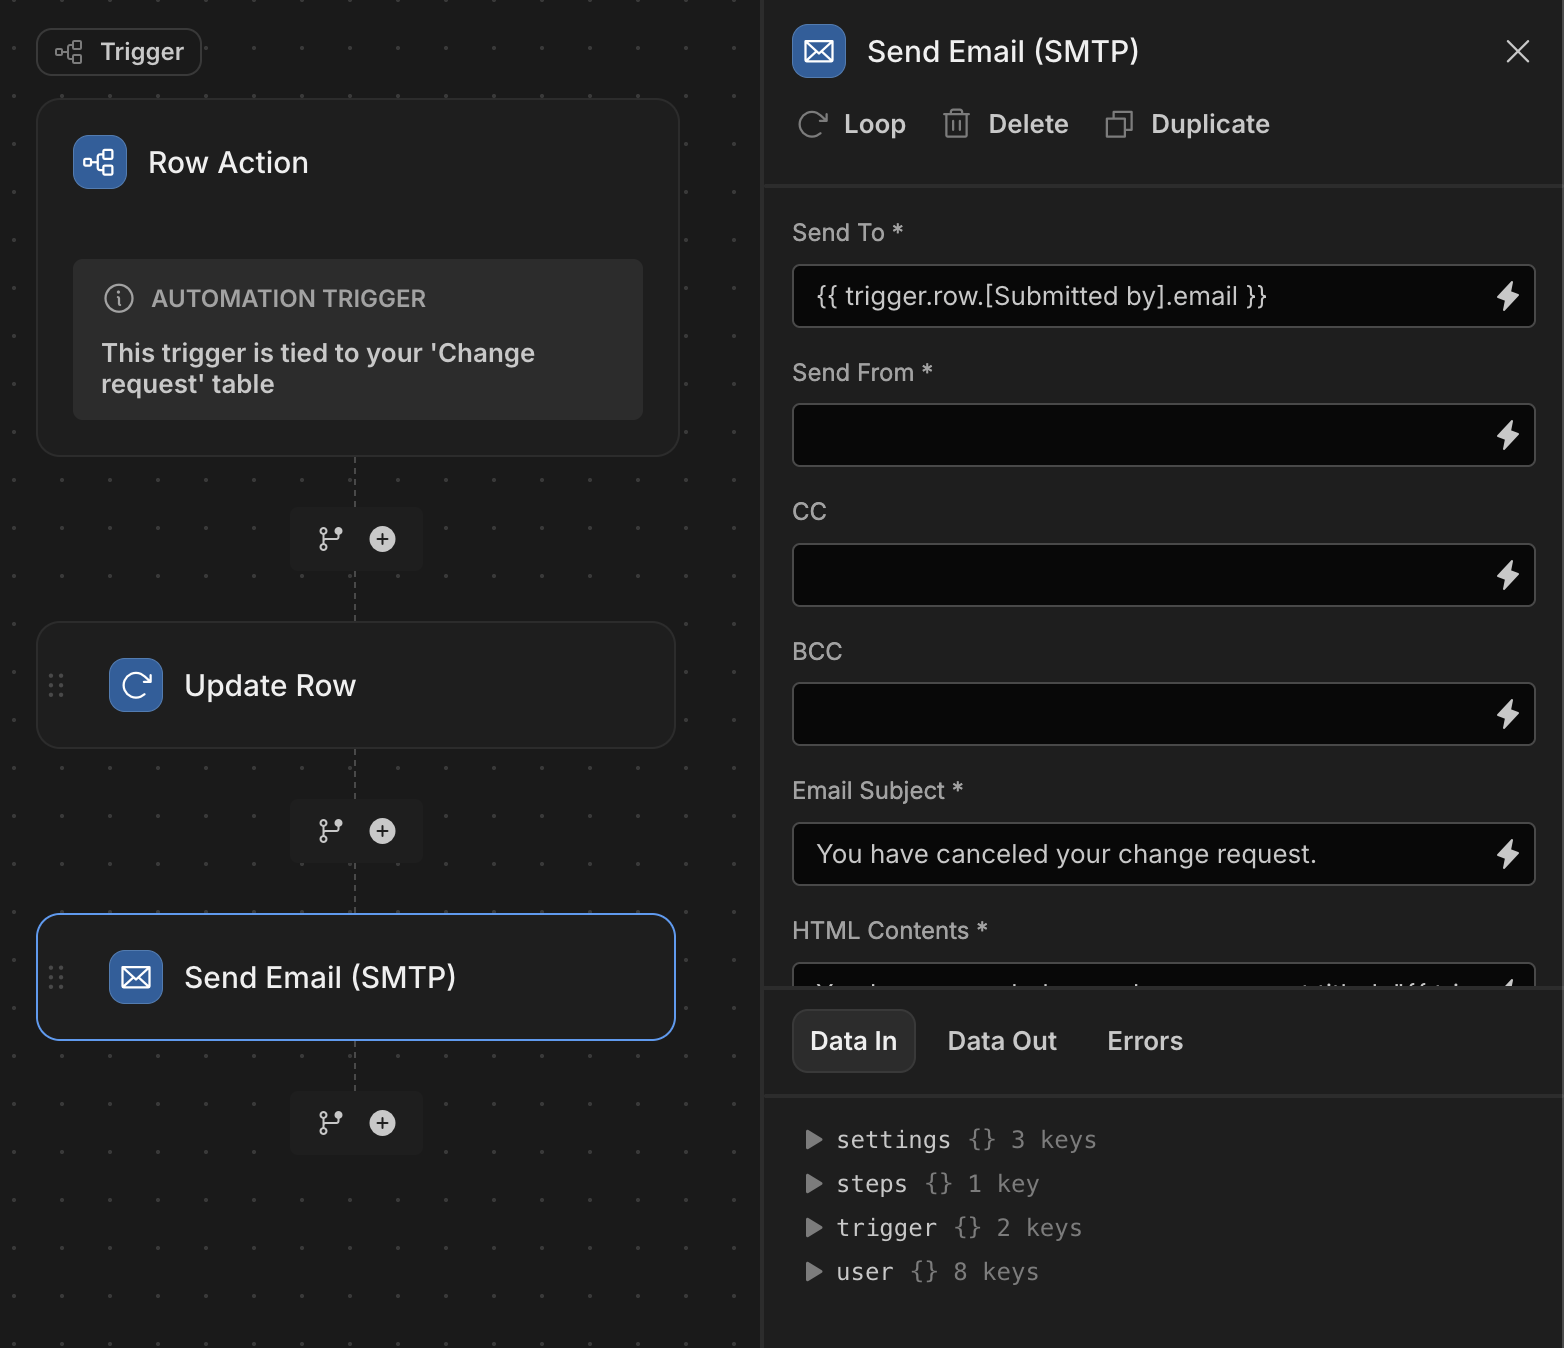
We’ve also included a Cancel row action. This uses an Update Row step to change the Status attribute of the trigger row to Cancelled, before emailing the original submitter to confirm that this has been successful.
This is triggerable from the front-end using a dedicated Cancel button within the Update Form for Requesters.
Approval/rejection
Row Actions are also central to our review and approval workflow.
Specifically, we’ve created two sets of Approve and Reject actions for our Manager and Reviewer roles. These follow the same pattern but with a couple of important differences.
Manager: Approve sets the Status of the original request to In Review, before querying the Users table for entries with the Reviewer role, passing their emails to an array, and notifying them that the request needs their attention.
Manager: Reject updates the Status to Rejected and notifies the original submitter.
Both of these are triggerable from the Managers version of our review screen, using button actions.
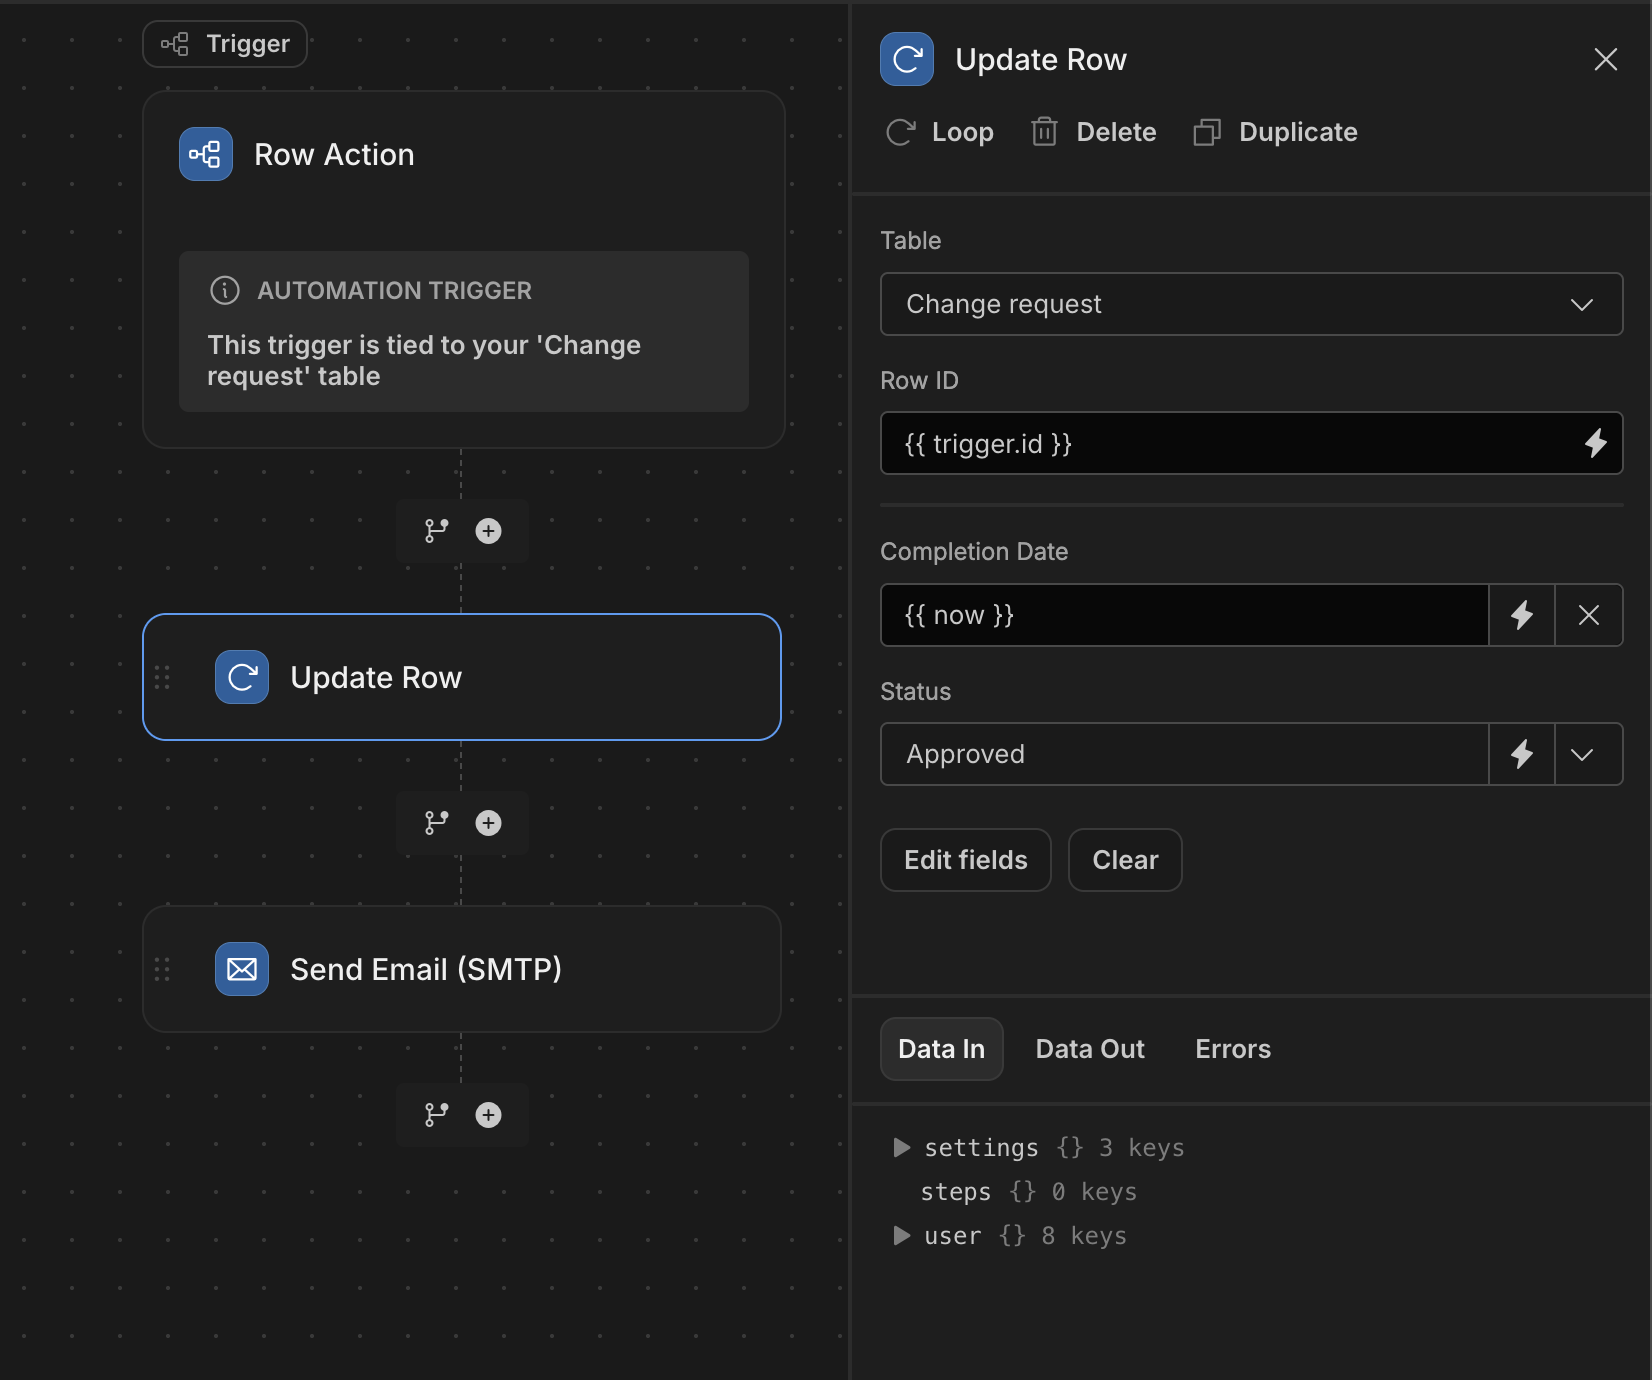
Reviewer: Approve and Reviewer: Reject follow the same pattern as Manager: Reject.
These update the Status to Approved or Rejected, respectively. Both then send an email notification of this update to the original Requester.
They’re triggerable from the Reviewer UI.
Change history
Our final Automation works slightly differently, utilizing a Row Update trigger for our Change Request table. This means that it will run each time a row is updated, regardless of how this change was initiated.
When this is triggered, it carries out three actions.
First, we use a Query Rows action with a filter set to return all existing Status History rows that are related to the Change Request row in our trigger.
Next, we use a Condition step so that our automation only continues if the most recent returned row does not have the same Status as our trigger row.
Lastly, we use a Create Row action to add a record to our Status History table, recording the current status, previous status, timestamp, and the user who made the update.
Customizing our change request template
Budibase templates are fully functional apps, but they’re also designed with customization in mind.
Let’s think about some of the key ways that you can tailor your application to match your internal change management processes.
Updating the data model
Budibase apps center around the Data section. This isn’t just where we set up the data our app connects to. It’s also a centralized location for managing access and permissions or generating screens and automations.
At the most basic level, we might want to make adjustments to existing attributes within our data model. For instance, we could add additional options to our Status column to reflect a more complex approval process.
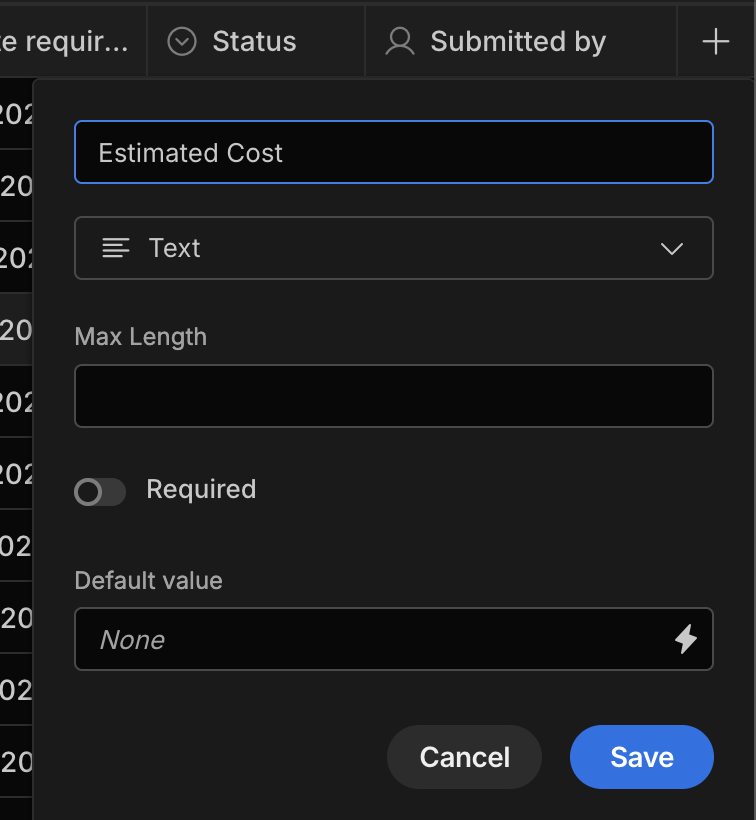
Alternatively, we could remove certain attributes or add entirely new ones. For example, we could create a Number column called Estimated Cost on our Change Requests table using the plus icon.
Alternatively, you might want to make more wholesale changes to our app’s backend, such as entirely swapping out the database.
Budibase offers connectivity for a huge range of external datasets. We can even connect to SQL databases and interact with them in the Data section, exactly as we would in Budibase DB.
We could then recreate our role-specific views and connect these to our existing screens and automations. Alternatively, we might recreate these from scratch using the Generate button.
Adding and altering user roles
Our change management app relies on Budibase’s customizable RBAC system. If we wanted to create a more sophisticated approval flow, we could start by adding additional user roles.
Say we wanted to update our approval flow so that the CTO can fast-track requests, by setting their status to Approved, regardless of their current status. We’d start by creating a new user role called CTO.
RBAC within Budibase applications utilizes visual branches to establish hierarchies and handle permission inheritance.
We want our CTO to inherit all of the permissions that our Reviewer role has but with access to additional data and actions.
Therefore, we’re placing our CTO in the same branch as our existing roles, to the right of Reviewer.

Adding your own business rules
After adding a new role, we need to define which data and actions they’ll be able to access. Let’s carry on with the example of only allowing our CTO to approve high-priority requests.
Currently, our Reviewers and Managers have permissions to view and approve all requests with certain Statuses. Our CTO will be able to approve any request, regardless of its current status.
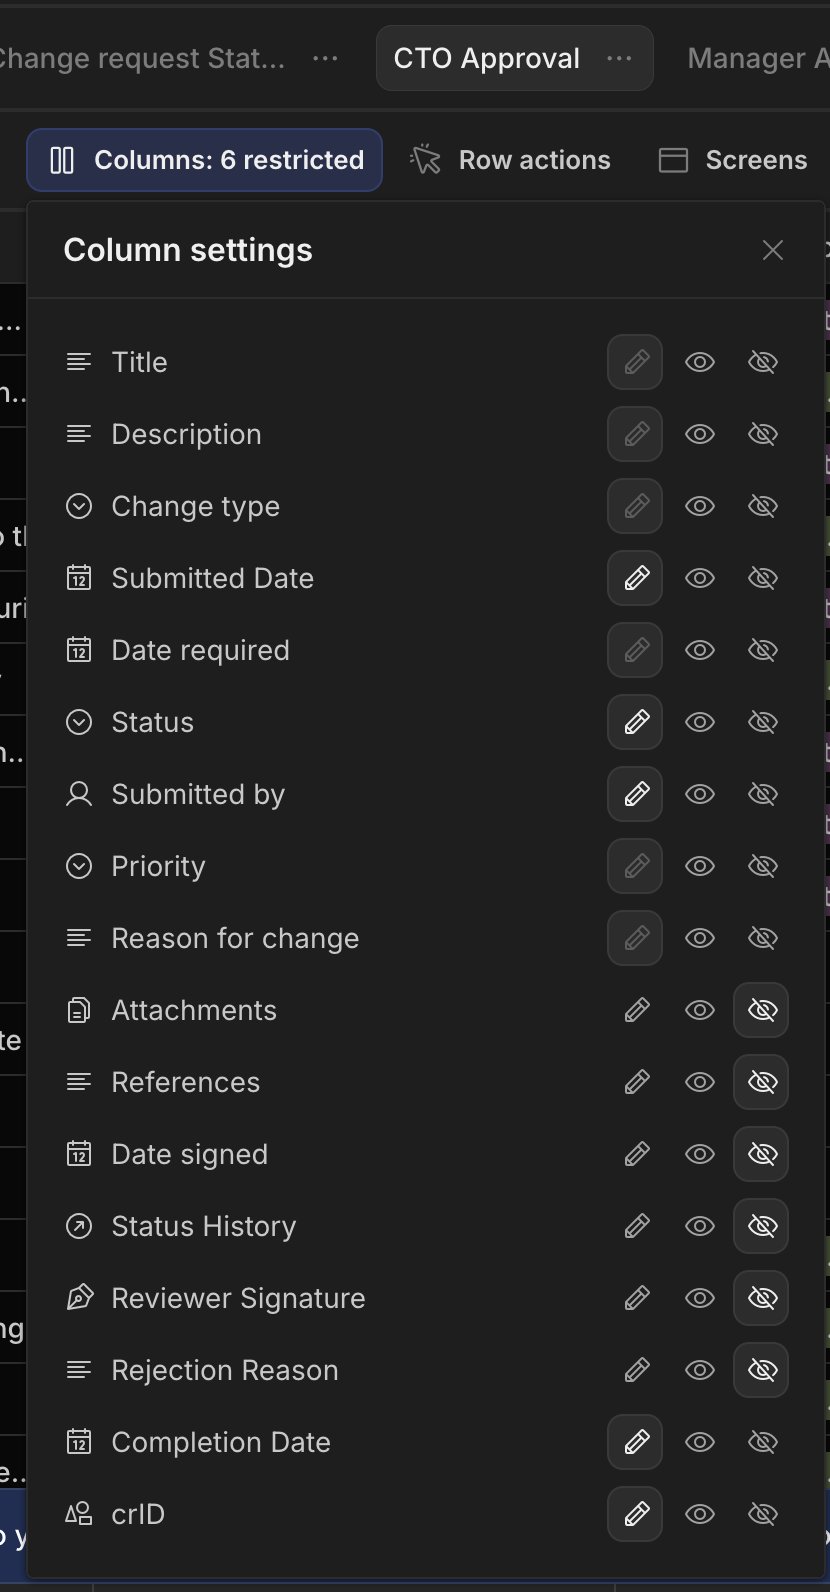
Then, we’ll create a new view and call it CTO Approval. We’ll assign the Access to our new CTO role.
Here, we want to recreate our Reviewer View but omit the filtering expression for the status attribute.
Creating new user actions
Currently, our Reviewers approve or reject requests, using Row Actions, as we saw earlier. We’ll need to set up similar actions for our new CTO Approval view.
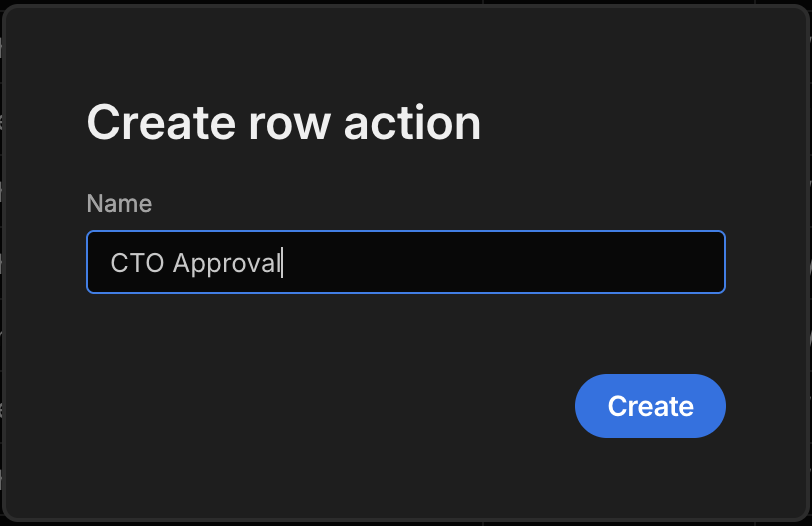
We’ll start by hitting Row Actions and creating an action called CTO: Approve.
Within the Automation section, we can follow the same pattern as our existing Automations, adding the following steps:
- Update Row - Updating the original Change Request’s Status to approved.
- Email - To notify the original Requester of this update.
We could also add a corresponding CTO: Reject rule using the same process.
Modifying our screens
Lastly, we’ll need to add an appropriate UI for our CTO role. This will essentially match our existing Managers and Reviewers UI with our updated data view.
We can achieve this by duplicating one of the existing tables on our Review screen, and updating the Data Source for the new one to our CTO View, making sure to also update the corresponding conditionality rule and button actions.
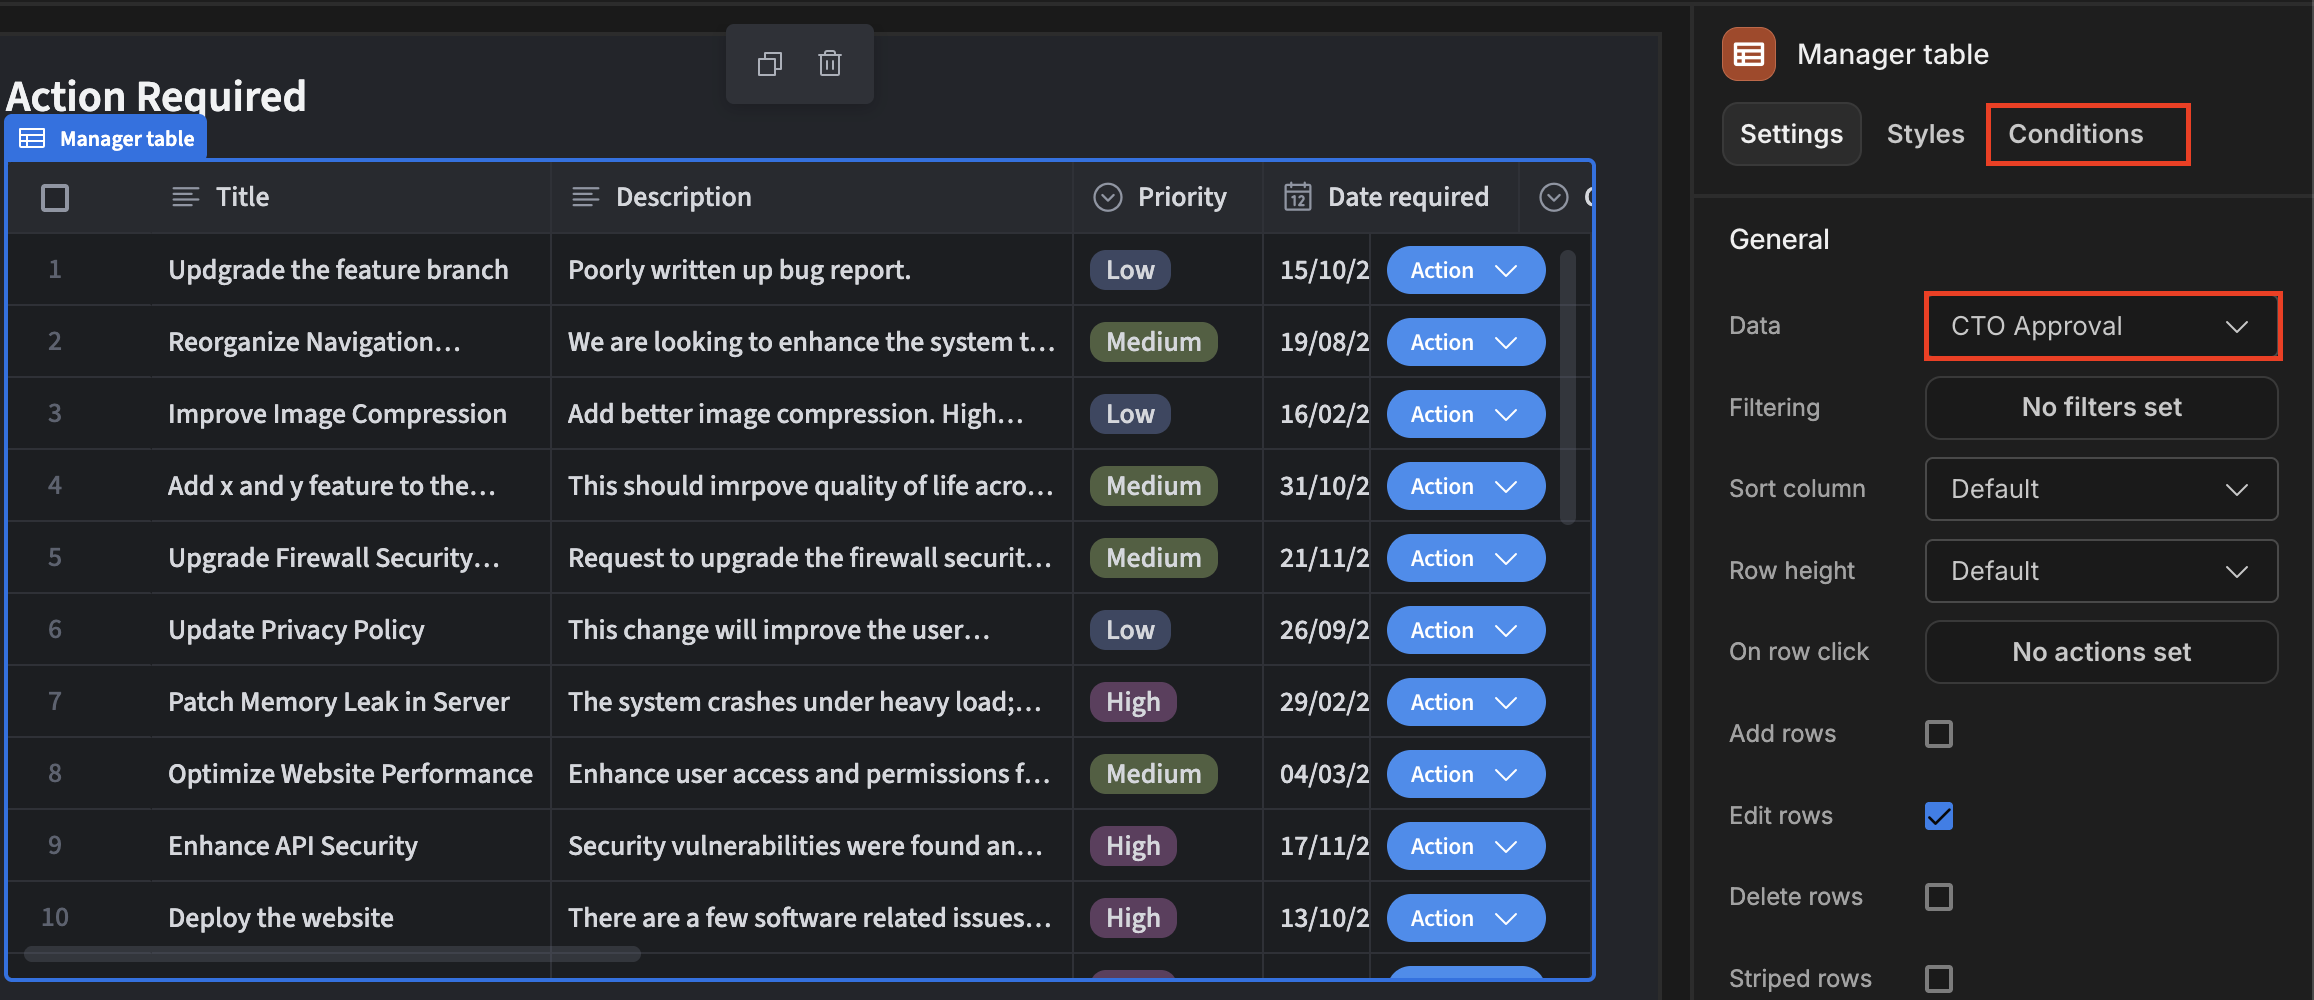
We’ll then repeat this process to provide conditional forms for our CTO: Approve and CTO: Reject row actions, mimicking our current settings, including setting an app state as one of the initial button actions.
Updated 5 months ago