Relationships
This section covers one of the more complex topics of your Budibase web app, the ability to create relationships between different rows. The relationship is bi-directional, in that when it is created, each row will have a relation to the other one. A row is also allowed to relate to many rows, meaning that many to many relationships can be created in your web app.
Creating a relationship column
- Select two tables that the relationship should be formed between.
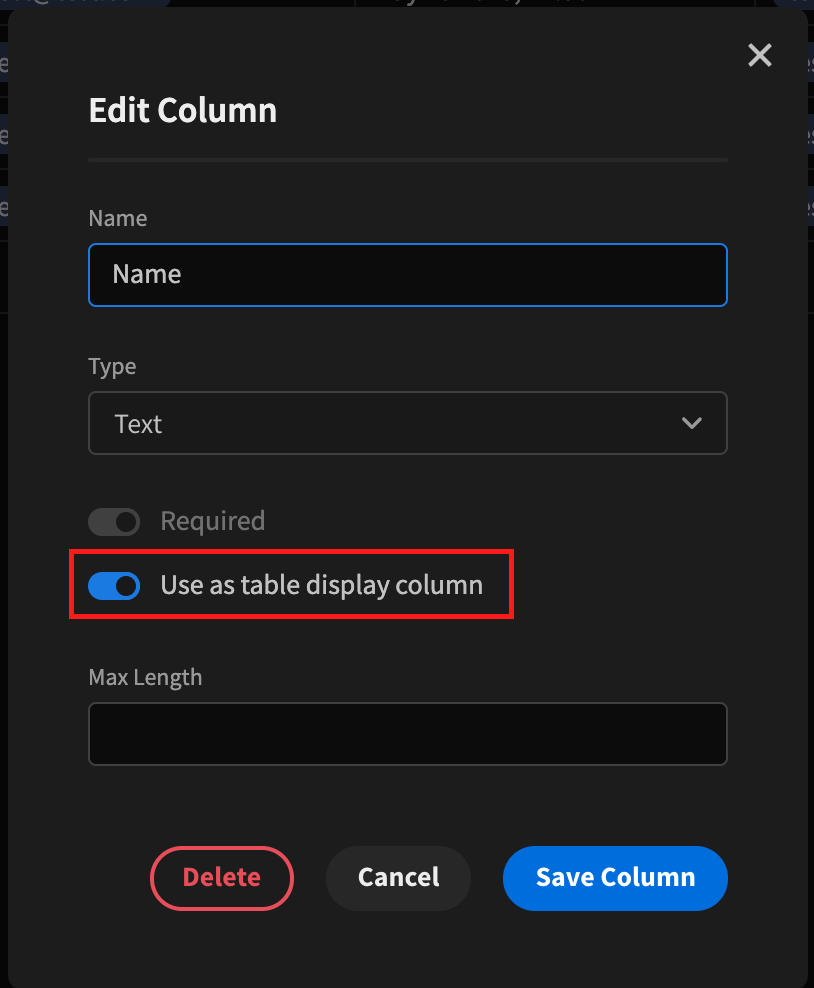
- Make sure that in both tables there is a column defined that can be used for display purposes. When creating this column make sure to set it with the Display column toggle.
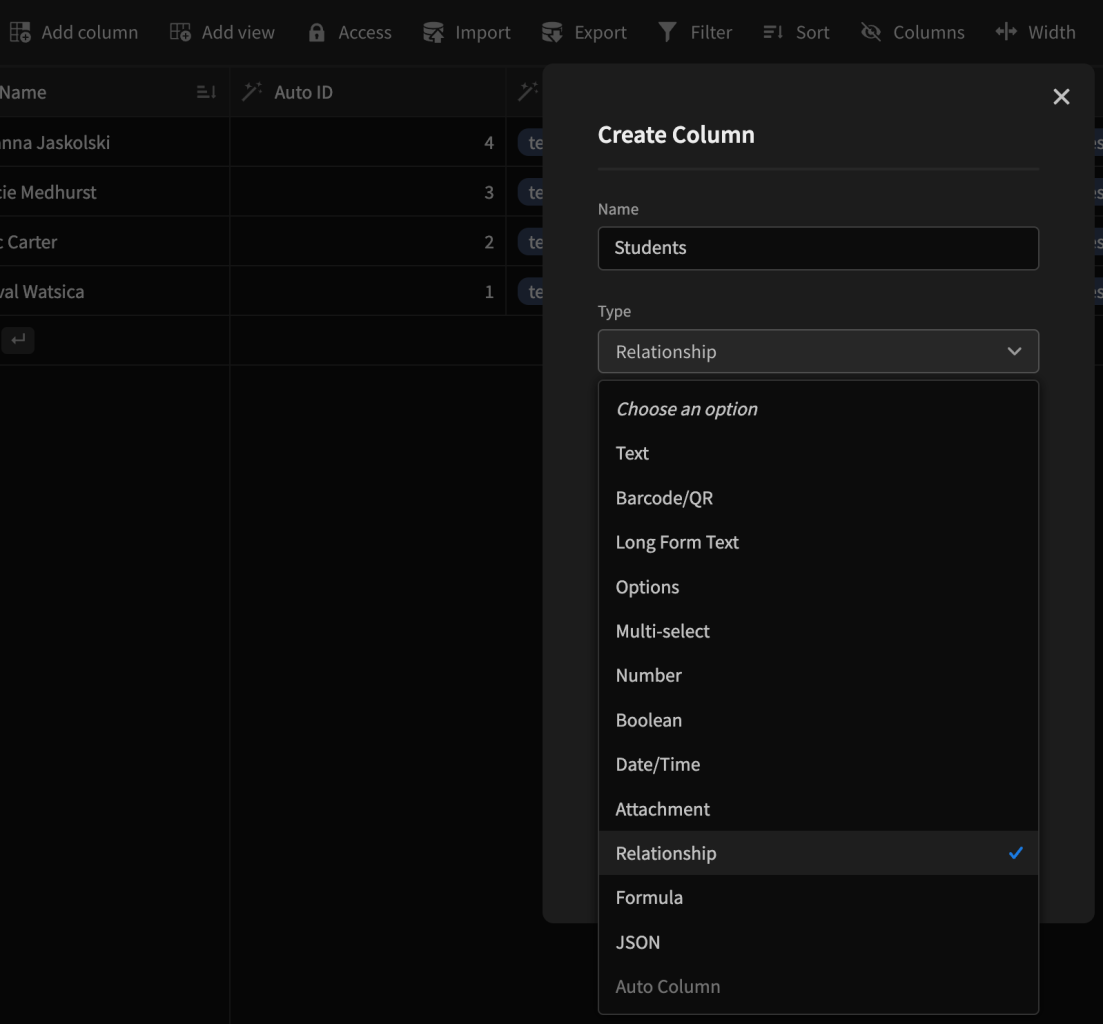
- Click the Create new column button in either of the two tables and select the Relationship data type from the dropdown.
- Here you will need to select two options, the tables to which this column relates, and the name of the relationship column in the other table as well.
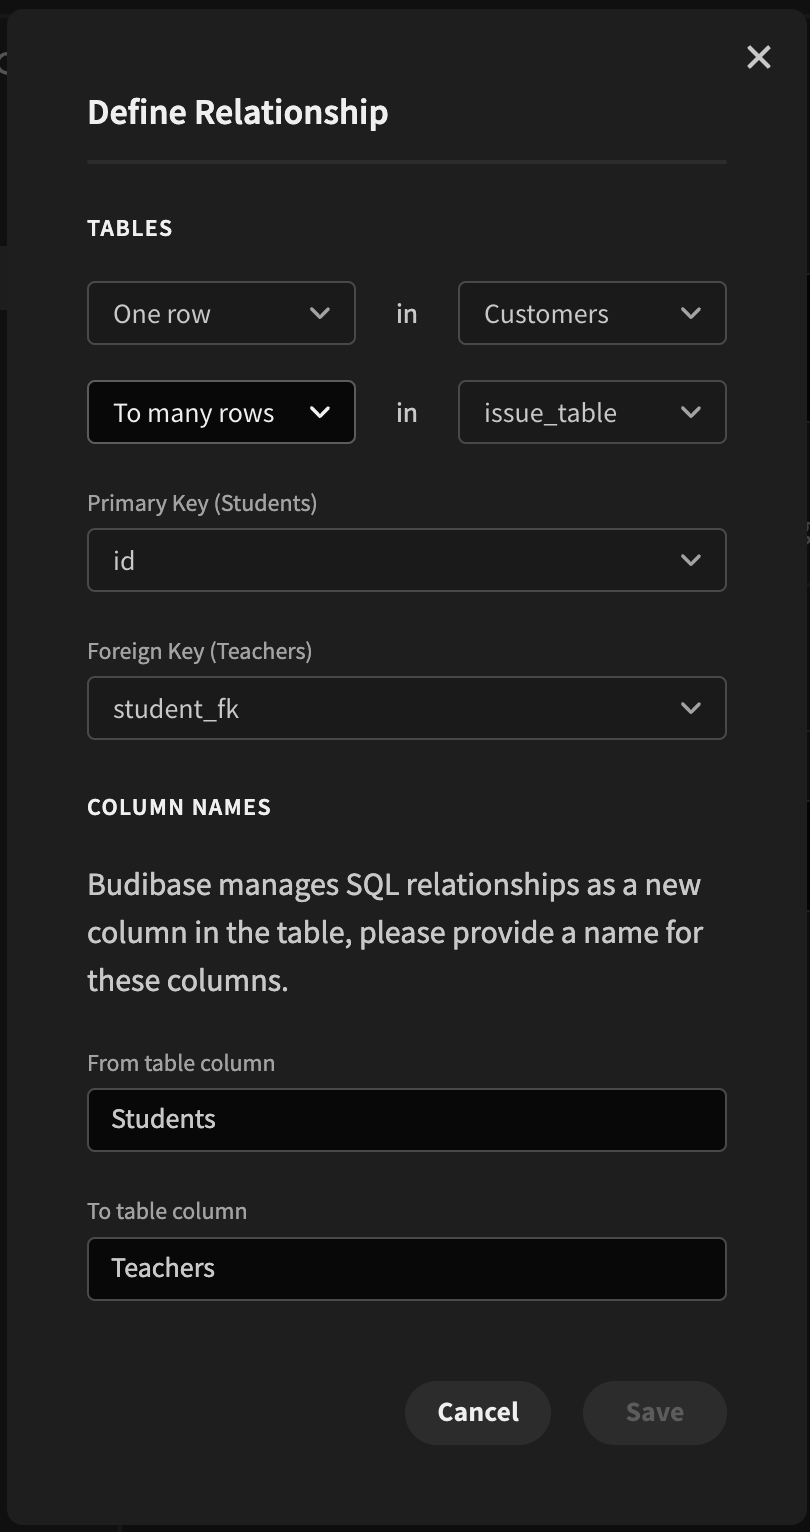
- At this point, you will now have a relationship formed between the two tables. If you create a row in one of the tables, then go to the other table and create a row you should see the first row that was created as an option in the relationship multi-select.

Example
In this example, we will be creating a web app for tracking students, teachers, parking spots for teachers and classes in a school - specifically how they relate to each other.
Specifically, we are going to break these down into the three relationship types that can be modelled with Budibase. Below we will map out the relationships that we are going to create, first describing them then walking through how to build them.
One-to-many

The second relationship we can model in Budibase is one of the most common, linking a single row to many other rows. Here we can see that a class can only be taught by a single teacher however a teacher is capable of teaching many different classes.
Many-to-many

The last relationship we can model is arguably one of the most complexes but again very common in real-life systems. Here we can see that students are able to take many classes and each class can have many different students in it.
Building it in Budibase
To create this in Budibase all we need to do is:
- Create the four tables, students, classes, teachers, and parking spots. In each of these, we will initially create a display text column and mark these as the Display column - for example, Name or Subject.
- First, we will create the teacher to parking spot relationship, starting in the teacher table we create a relationship type column, call it
ParkingSpotand set the table to parking spots - then name the column in the other tableTeacher. - Second, we create the teacher to classes relationship, hopefully, at this point, it should be clear how this is done. Simply create a relationship from the teacher table to the class table, name the column
Classesand in the other table call the columnTeacher. - Lastly, we create the students to classes relationship, the same as before but set the relationship table to classes, call the column in the students table
Classesand call the column in the other tableStudents.
As you can see by creating three relationship columns we were able to make a fairly complex web of relationships, which can now be easily managed when creating/updating rows in any of the tables.
Video Demonstration
Based on the example above here is a video showing how easy it is to create in the Budibase Builder!
Considerations
The Budibase DB in a NoSQL database. As such, there are implicit limitations when it comes to handling relational data for larger more complex applications.
Watch the video below for more information on deciding which database type is best to use.