Dynamic filter
The Dynamic Filter component is a powerful tool that allows you to filter data from your Data Provider's data set. This is accessible in both Data View and Design View, making it highly versatile for customising your Budibase app to display relevant data effectively.
Data view
You can no longer apply filters to the base table. Instead, you must create a view to apply filters to. To help you quickly locate specific data, the Data View in your Budibase app includes a Filter button at the top right of each view. Clicking this button opens the Dynamic Filter, allowing you to apply advanced filtering criteria to data within your views for faster, more targeted access.
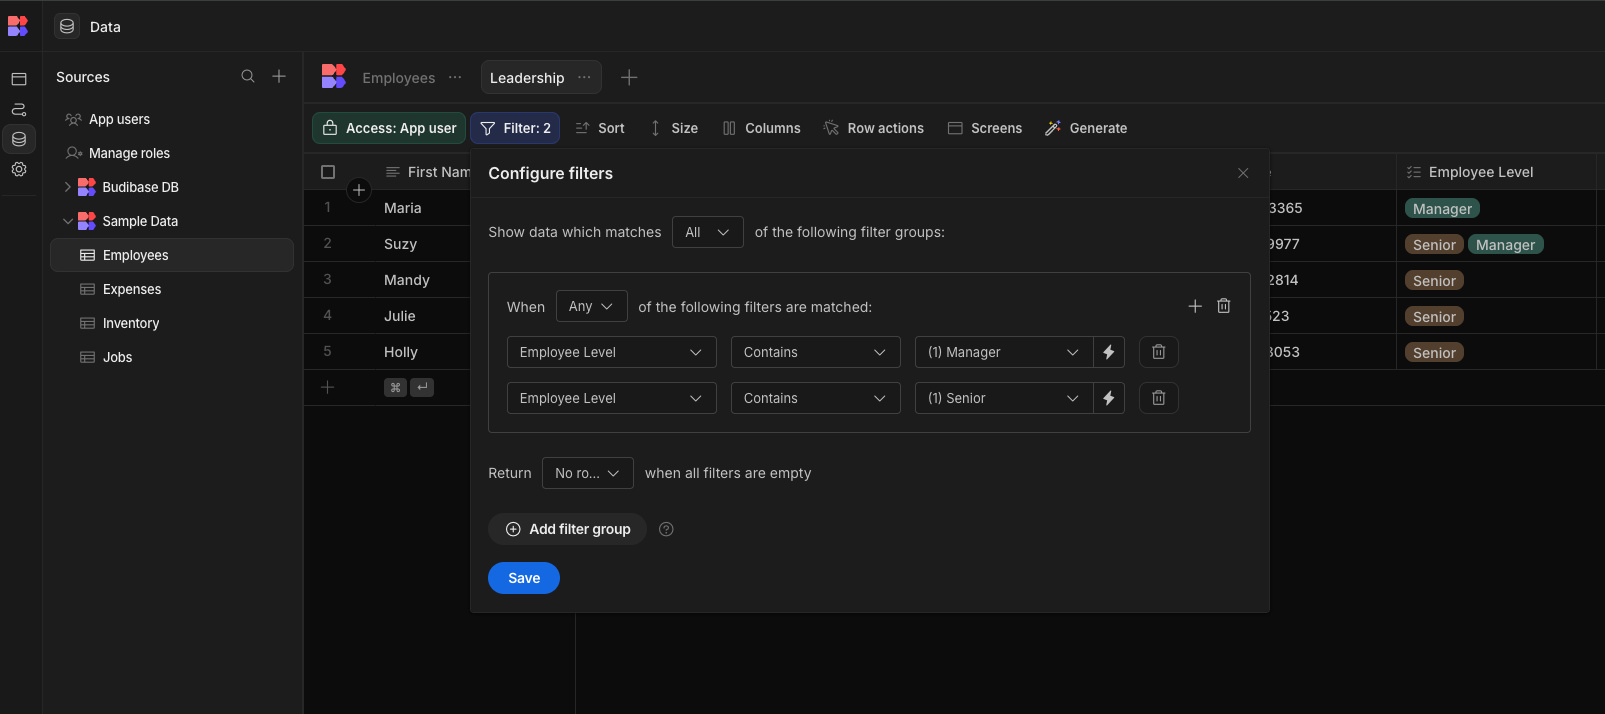
Adding and Configuring Filters
To add a filter, click the "Filter" button and Add Filter button. This will open a context menu, allowing you to customise your filters to display your data.

You can then add a filter-group. In many cases, a single group is all that is required, but multiple filter groups can be added as needed. Inside a filter group, specific filters can be added
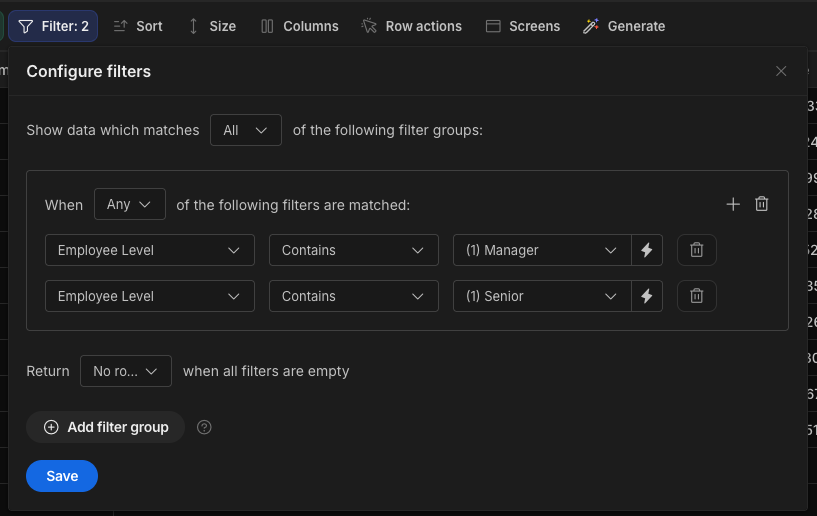
With the setting "When Any of the following filters are matched" in this setup will fetch anyone from the Employees table who has either Manager or Senior in their Employee Level. Switching this to "When All of the following filters are matched" will return only rows that contain both Senior and Manager.
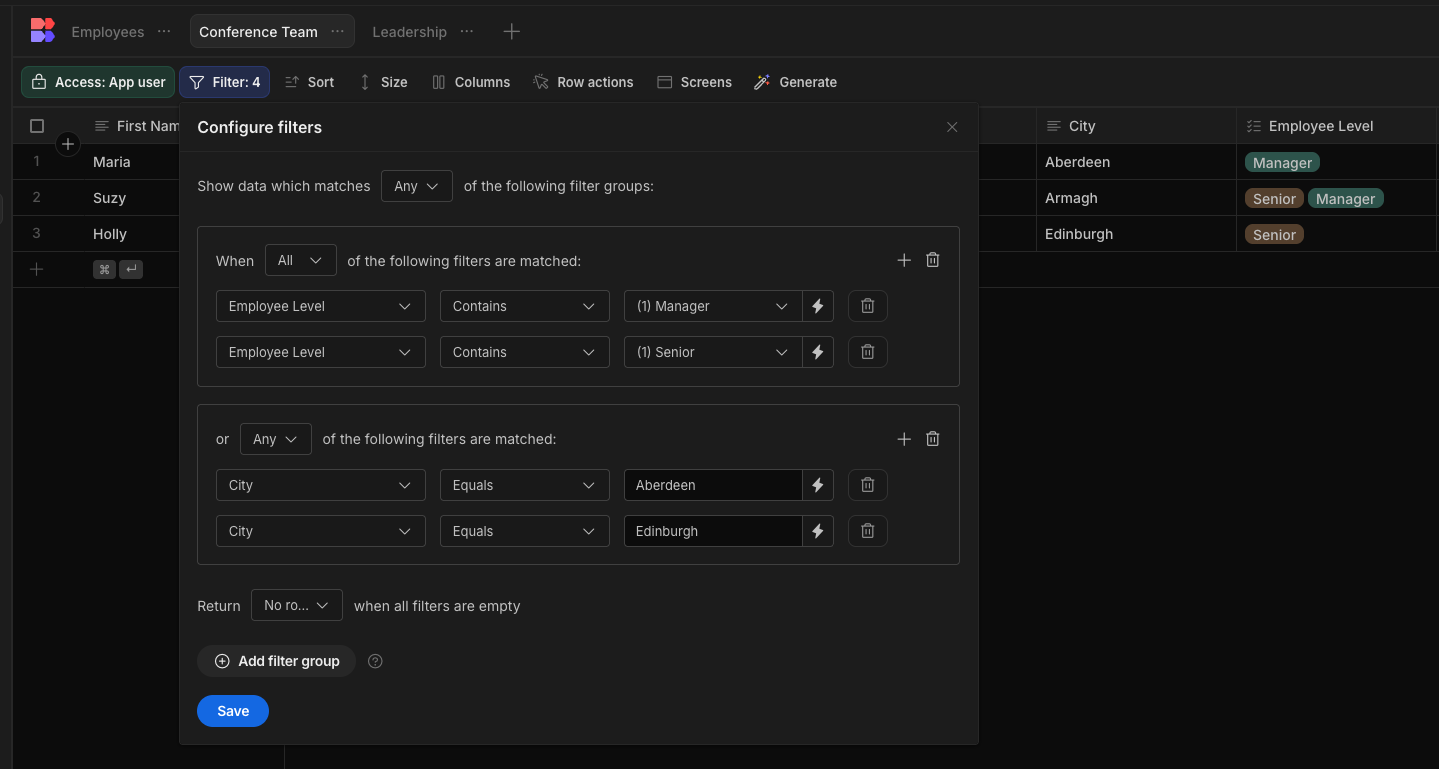
An additional filter group could be added in order to find more rows with completely independant properties. The settings below will find anyone who has both "Senior" and "Manager" in the Employee Level column, or anyone who is in Aberdeen or Edinburgh.
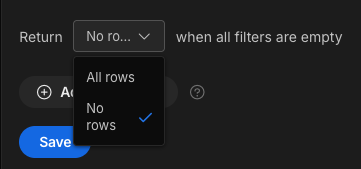
Lastly - it is important to determine what should happen when there are no rows matching the filters; selecting "All rows" will return everything, as though there were no filters imposed at all. Returning "No rows" will return nothing.
Design view
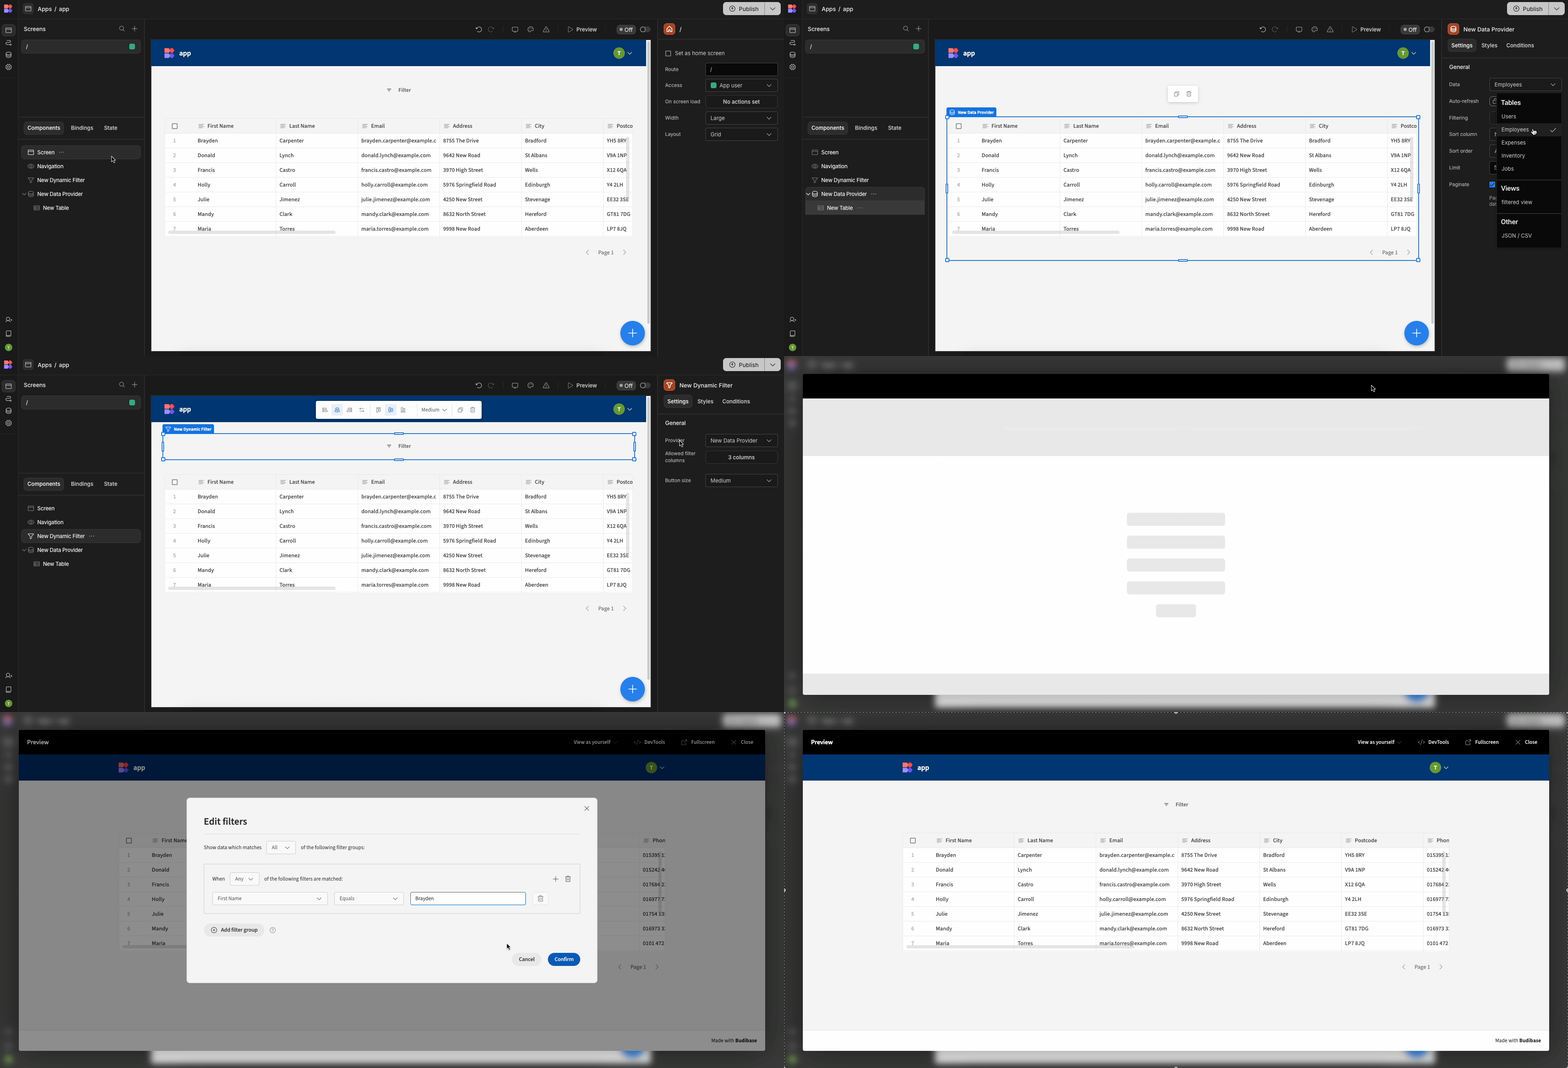
The Dynamic Filter component functions the same way in Design View as in Data View but offers additional flexibility when used alongside the Data Provider's component.
Quick setup process
- Add a Card Block component and then eject it to enable customisation.
- Add the Dynamic Filter as a child component within the Data Provider's component
- Users can then configure the filters accordingly and pull out relevant information they require
This dynamic approach makes it easy to customise data display based on complex filtering conditions, whether working in Data View or Design View.
Updated 5 months ago