Billing and Usage
Keep track of your workspace plans
Usage
Within a Workspace the Usage tab allows you to see if you are nearing any limits for the current plan.
Each workspace will keep track of usage independently. For example, if you reach the maximum number of Creators in one workspace, you won't be prevented from adding creators in another workspace.
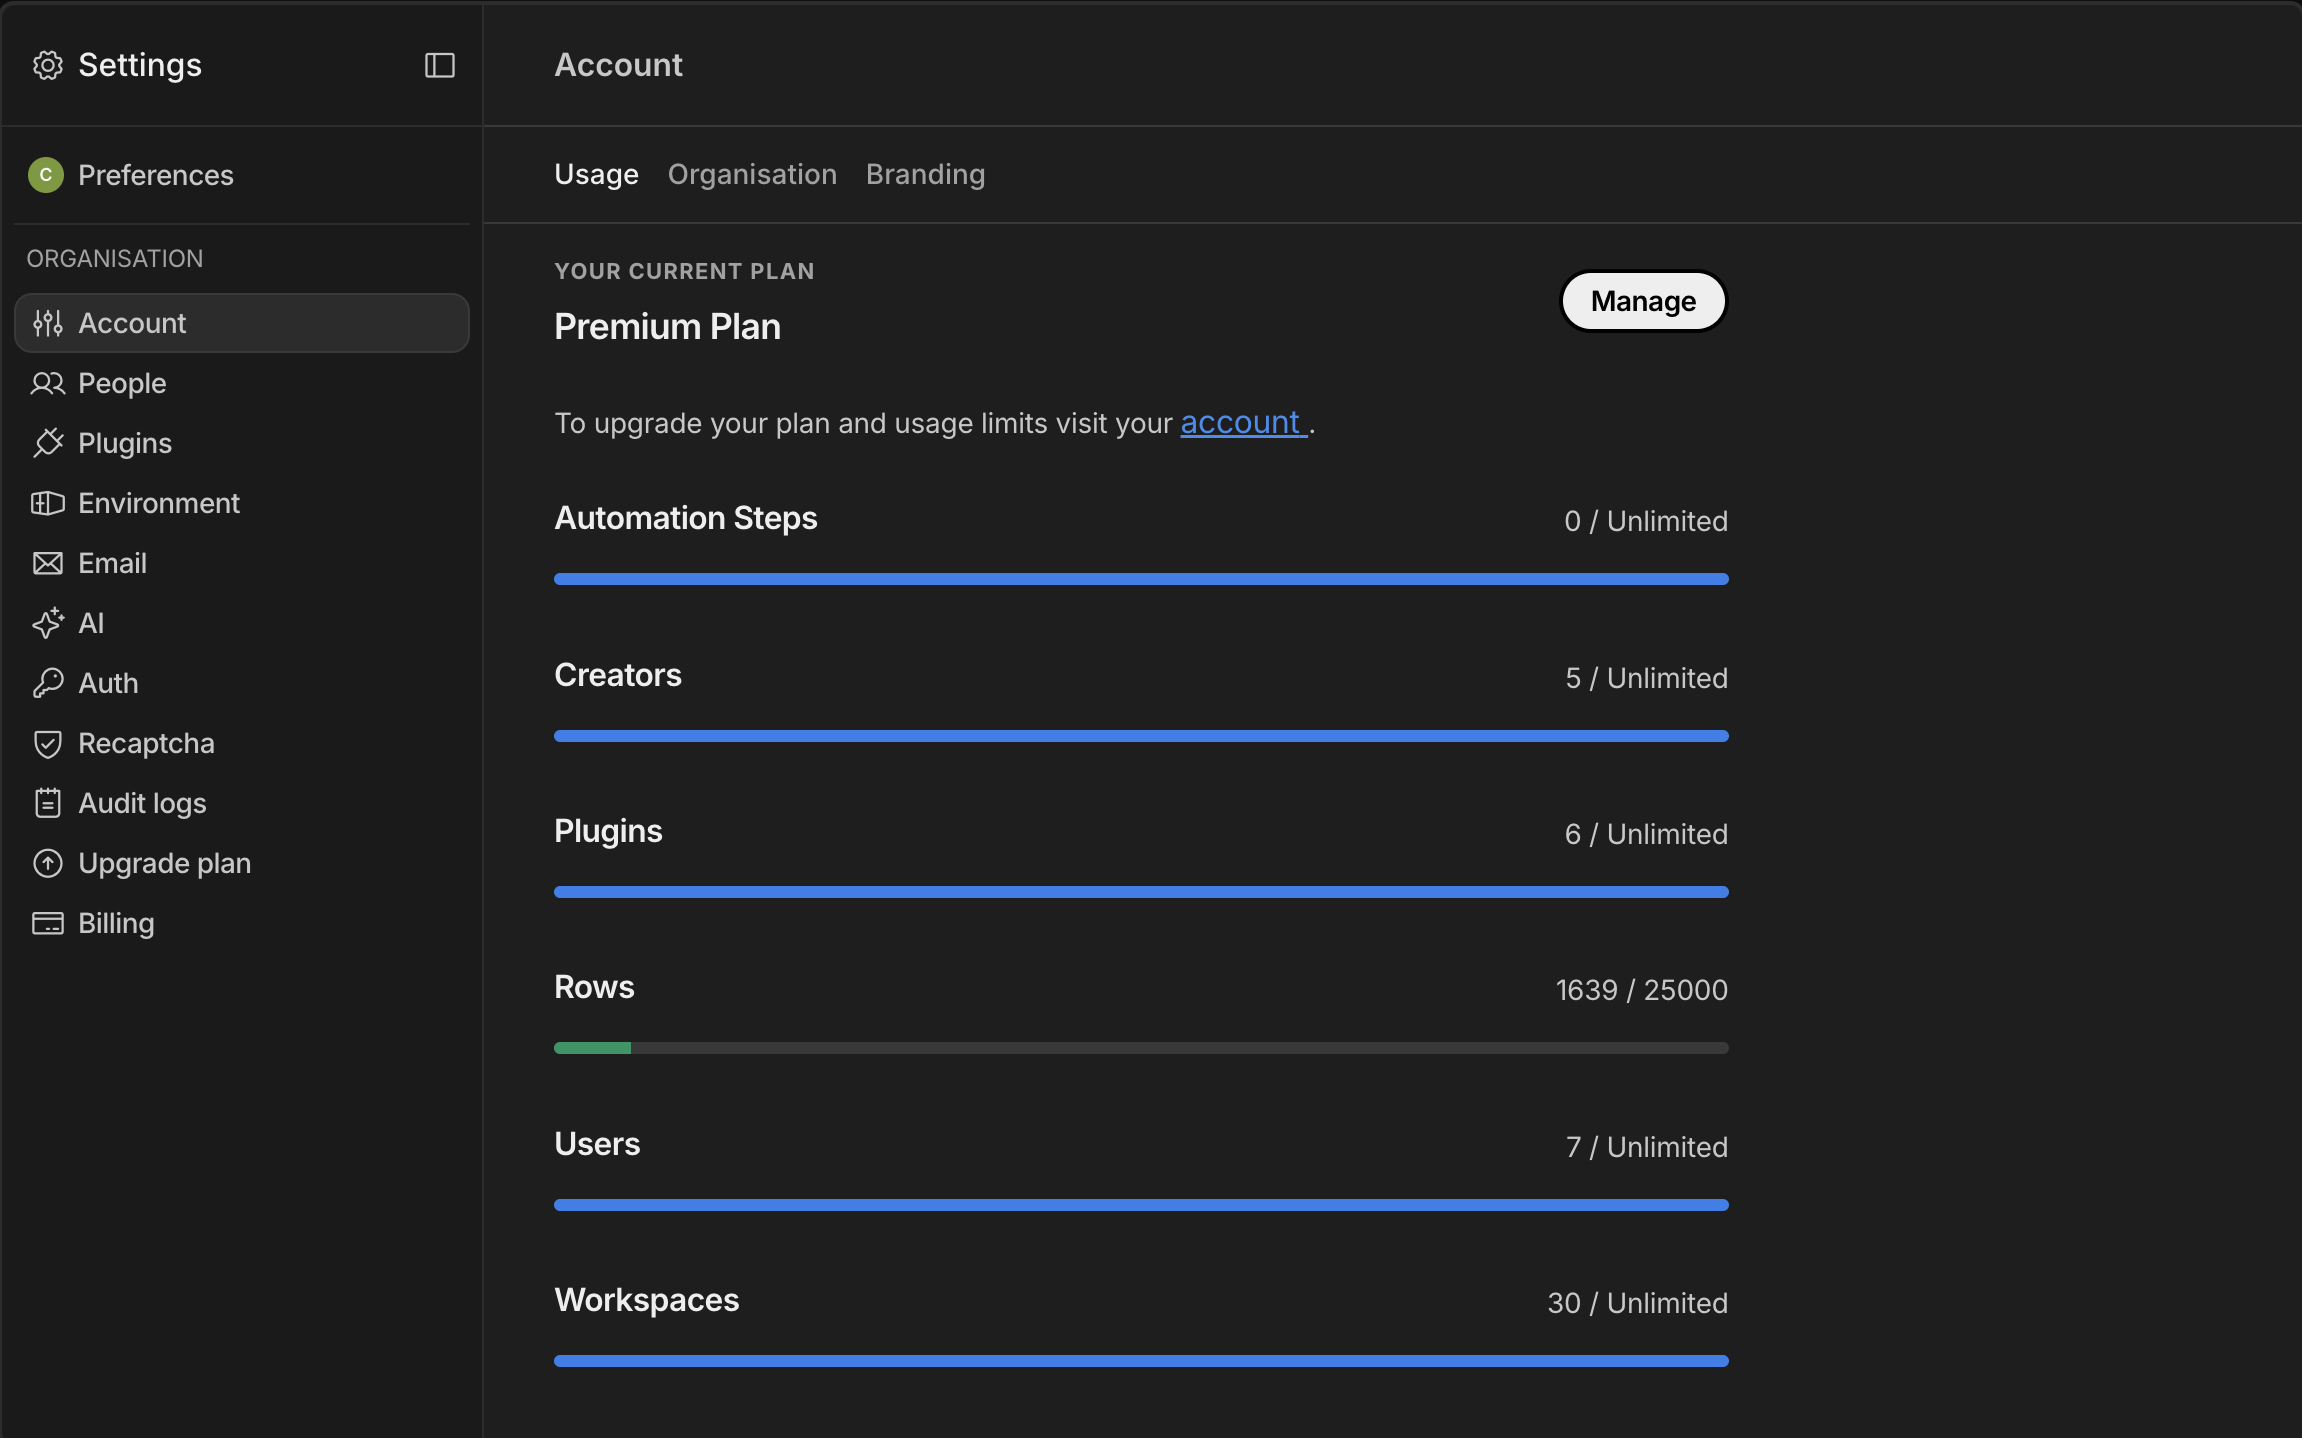
There are two types of quotas:
- static: This sets a fixed upper limit for the lifespan of your workspace. For example, on the free plan, there is a limit of 1 app and 5 users.
- monthly: These quotas reset at the end of each month
To increase your quotas, upgrade your workspace. The available plans can be viewed on our pricing page.
Billing
The Billing tab allows Account Holders to see an overview of all the workspace Subscriptions.
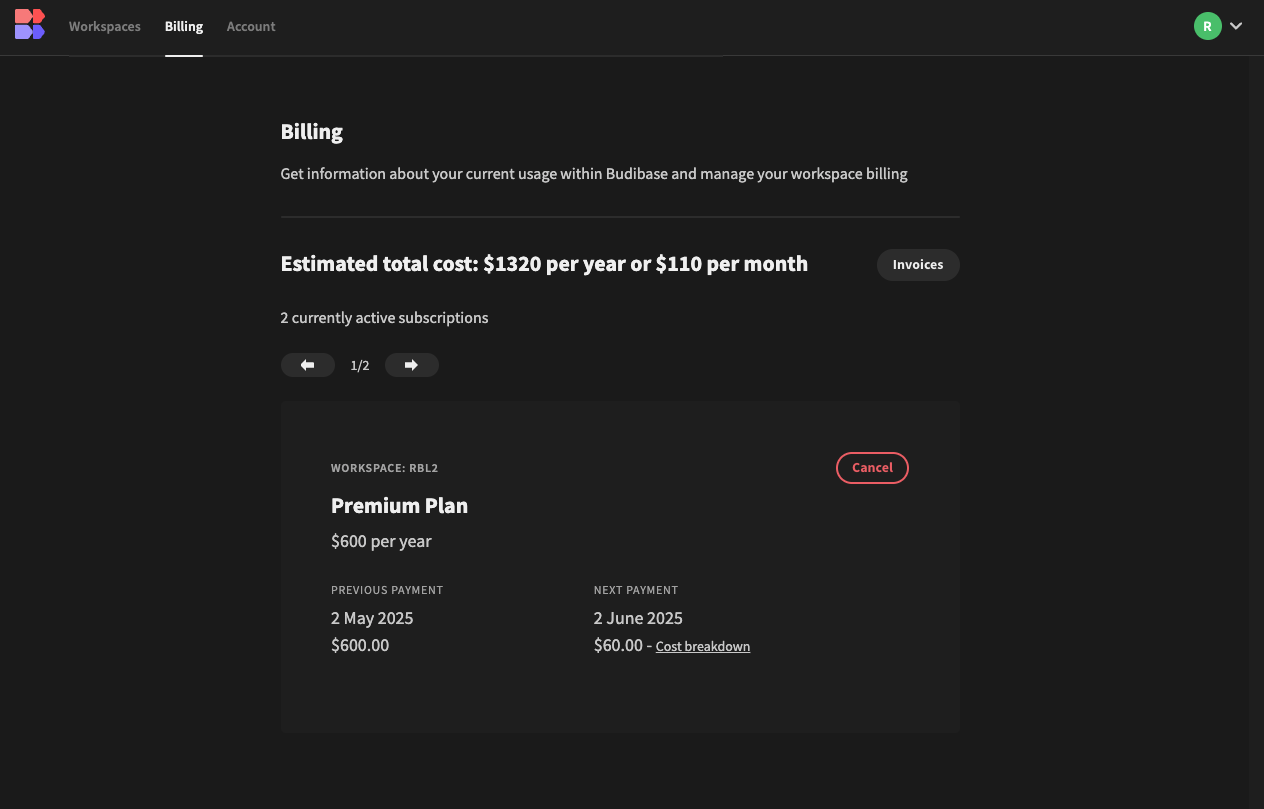
In this example, the account has two Premium tier workspaces:
- a cloud workspace with monthly payments
- one self-host workspace with annual payments
The Estimated total cost is displayed at the top, which sums the cost of all your workspace subscriptions.
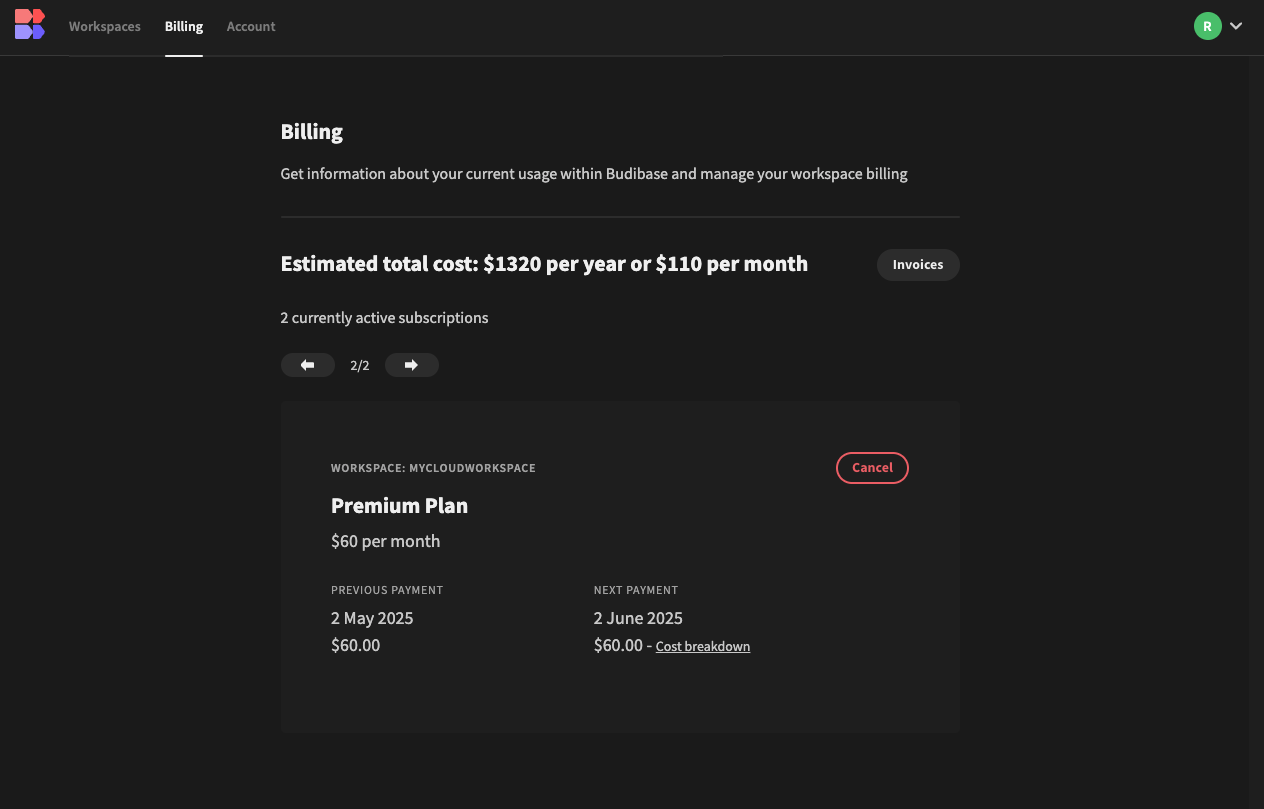
Click the arrows to cycle through your workspace subscriptions
The reason it is an estimate is that you can cancel a subscription at any time, and the payment periods for each workspace subscription can differ between monthly and yearly.
In the above example, the total cost is calculated as $600 annual + $60 monthly. The monthly cost of $60 is estimated to be $720 per year, therefore the total annual estimate is $600 + $720 = $1320, and the monthly estimate is simply a twelfth of that.
Additional creators and usersIf you have a yearly subscription, any additional creators or users will be billed monthly.
You can view these under Cost breakdown
Updated 5 days ago