ArangoDB
Multi-model non-relational database
ArangoDB is a multi-model NoSQL database which allows you to store your data either as key/value pairs, documents or graphs. This page will show you how to use ArangoDB as a datasource within Budibase.
Configuration
Get started with ArangoDBIf you haven't got ArangoDB set up yet, check out their quick start guide here
The only prerequisites for this guide are that you need a Budibase instance, an ArangoDB server and a collection set up within one of your databases.
Add the ArangoDB datasource
The first step is to create your ArangoDB datasource. When in the Data tab in the Budibase builder, click the Add source button in the top left corner. A modal will appear allowing you to select what type of datasource you want. Select ArangoDB and then click Continue.
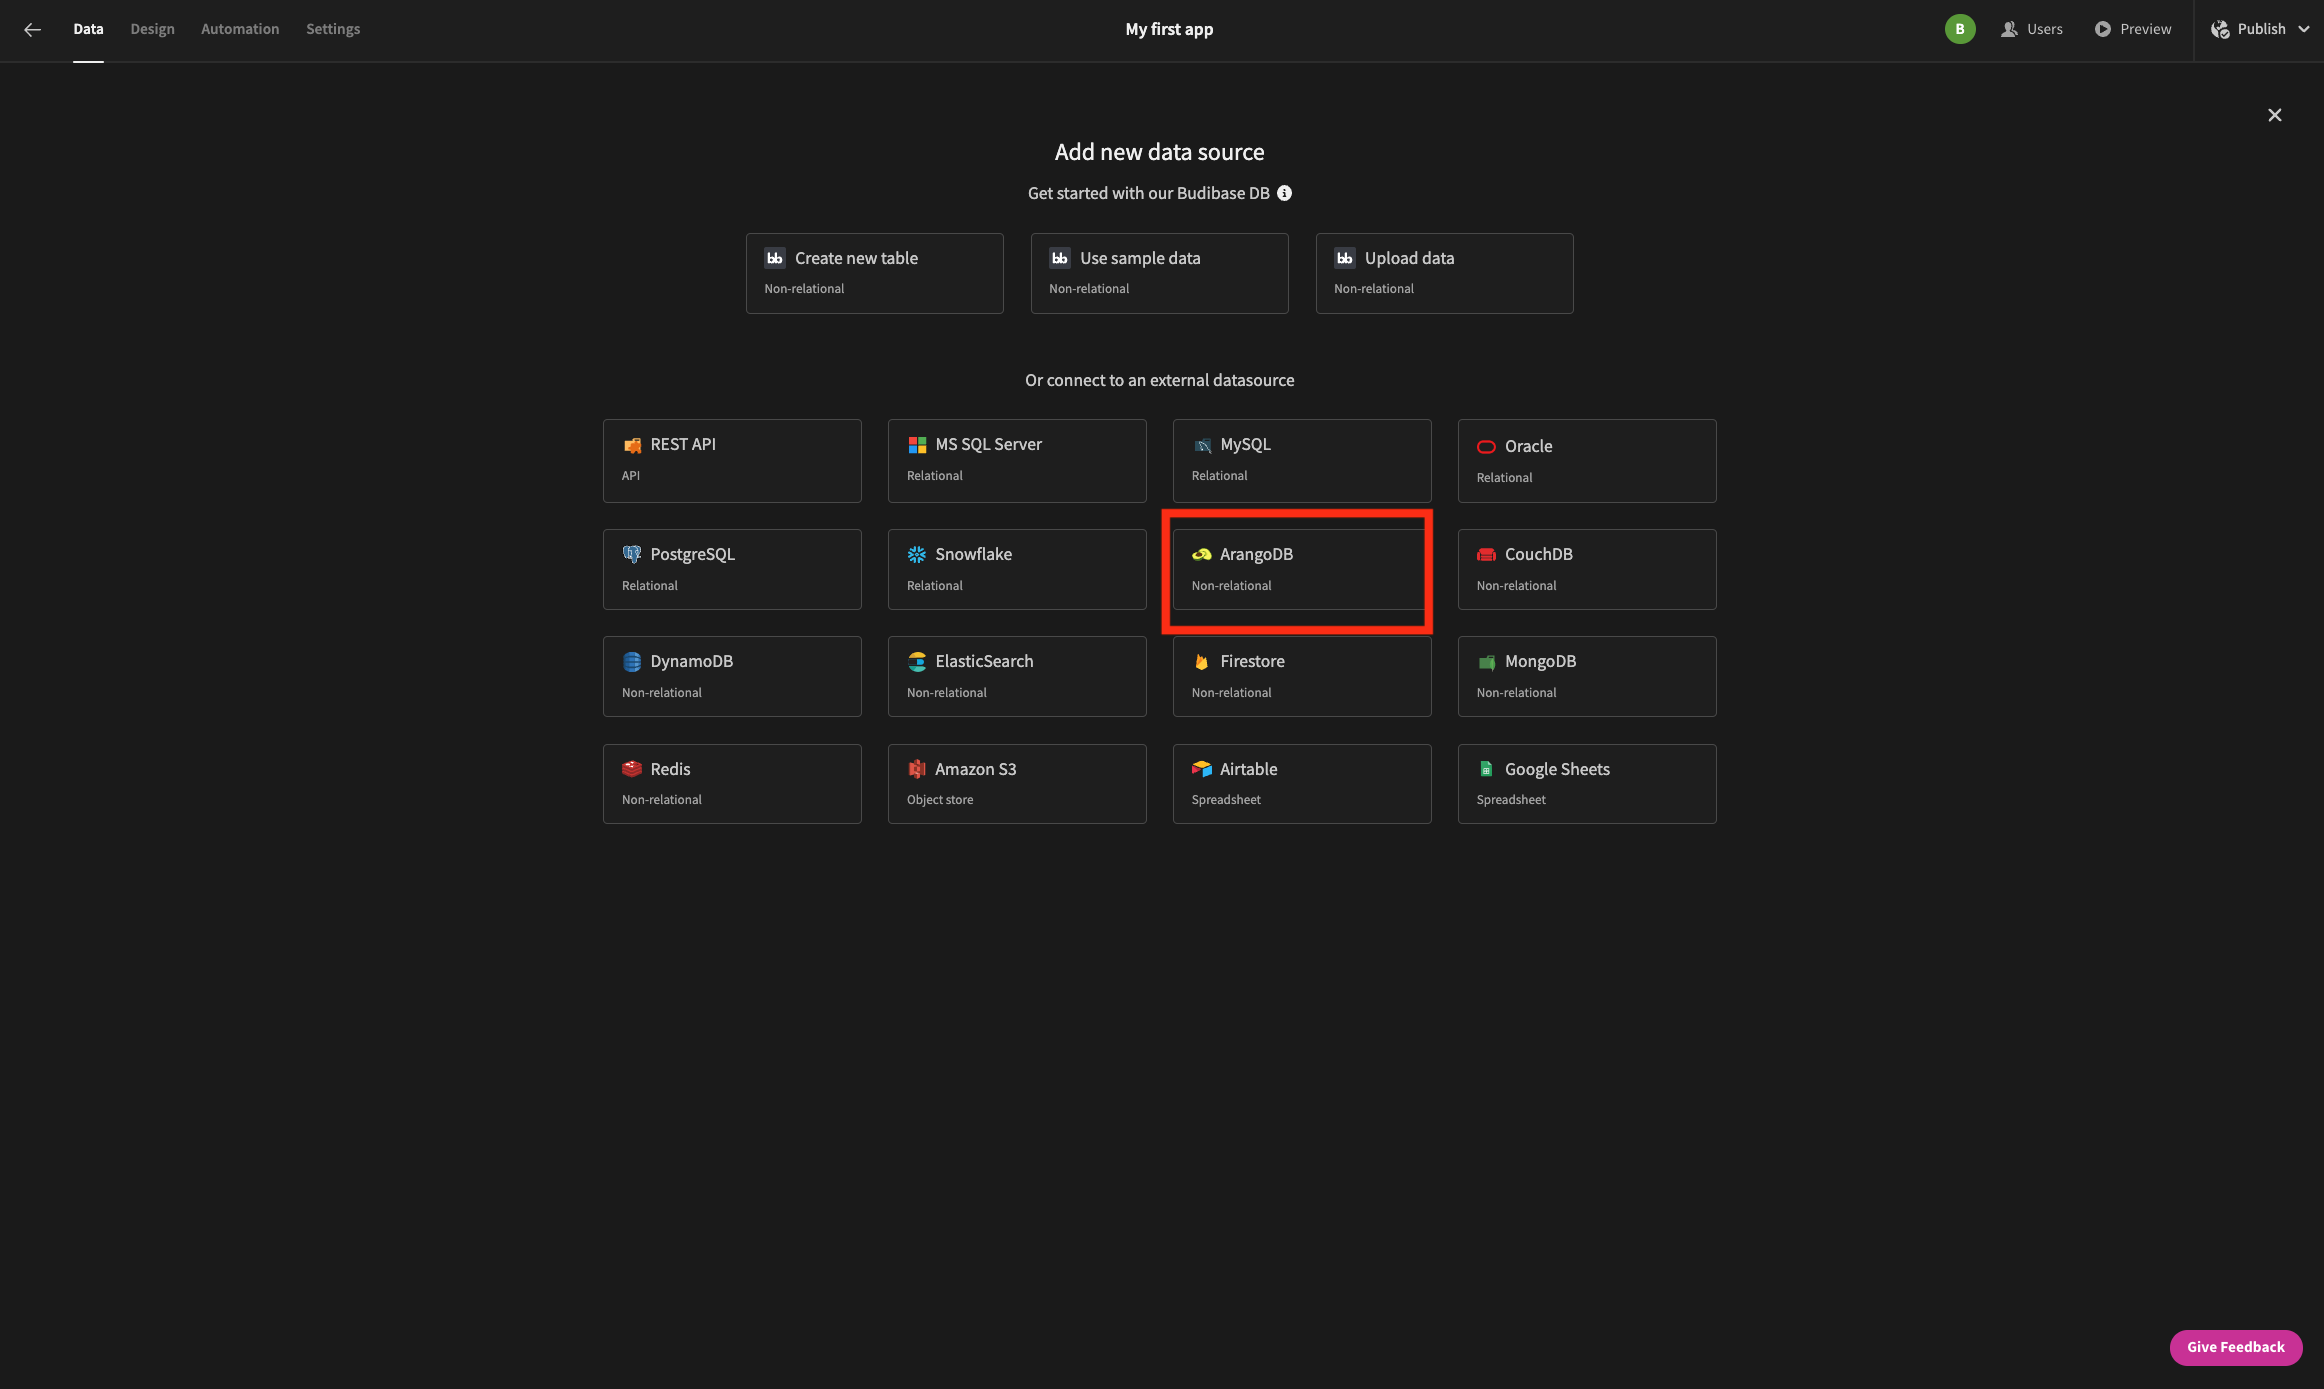
Select the ArangoDB datasource
The next step is to add the relevant connection info so that Budibase can connect to your ArangoDB instance. By default the Username will be root and the Database Name is _system.
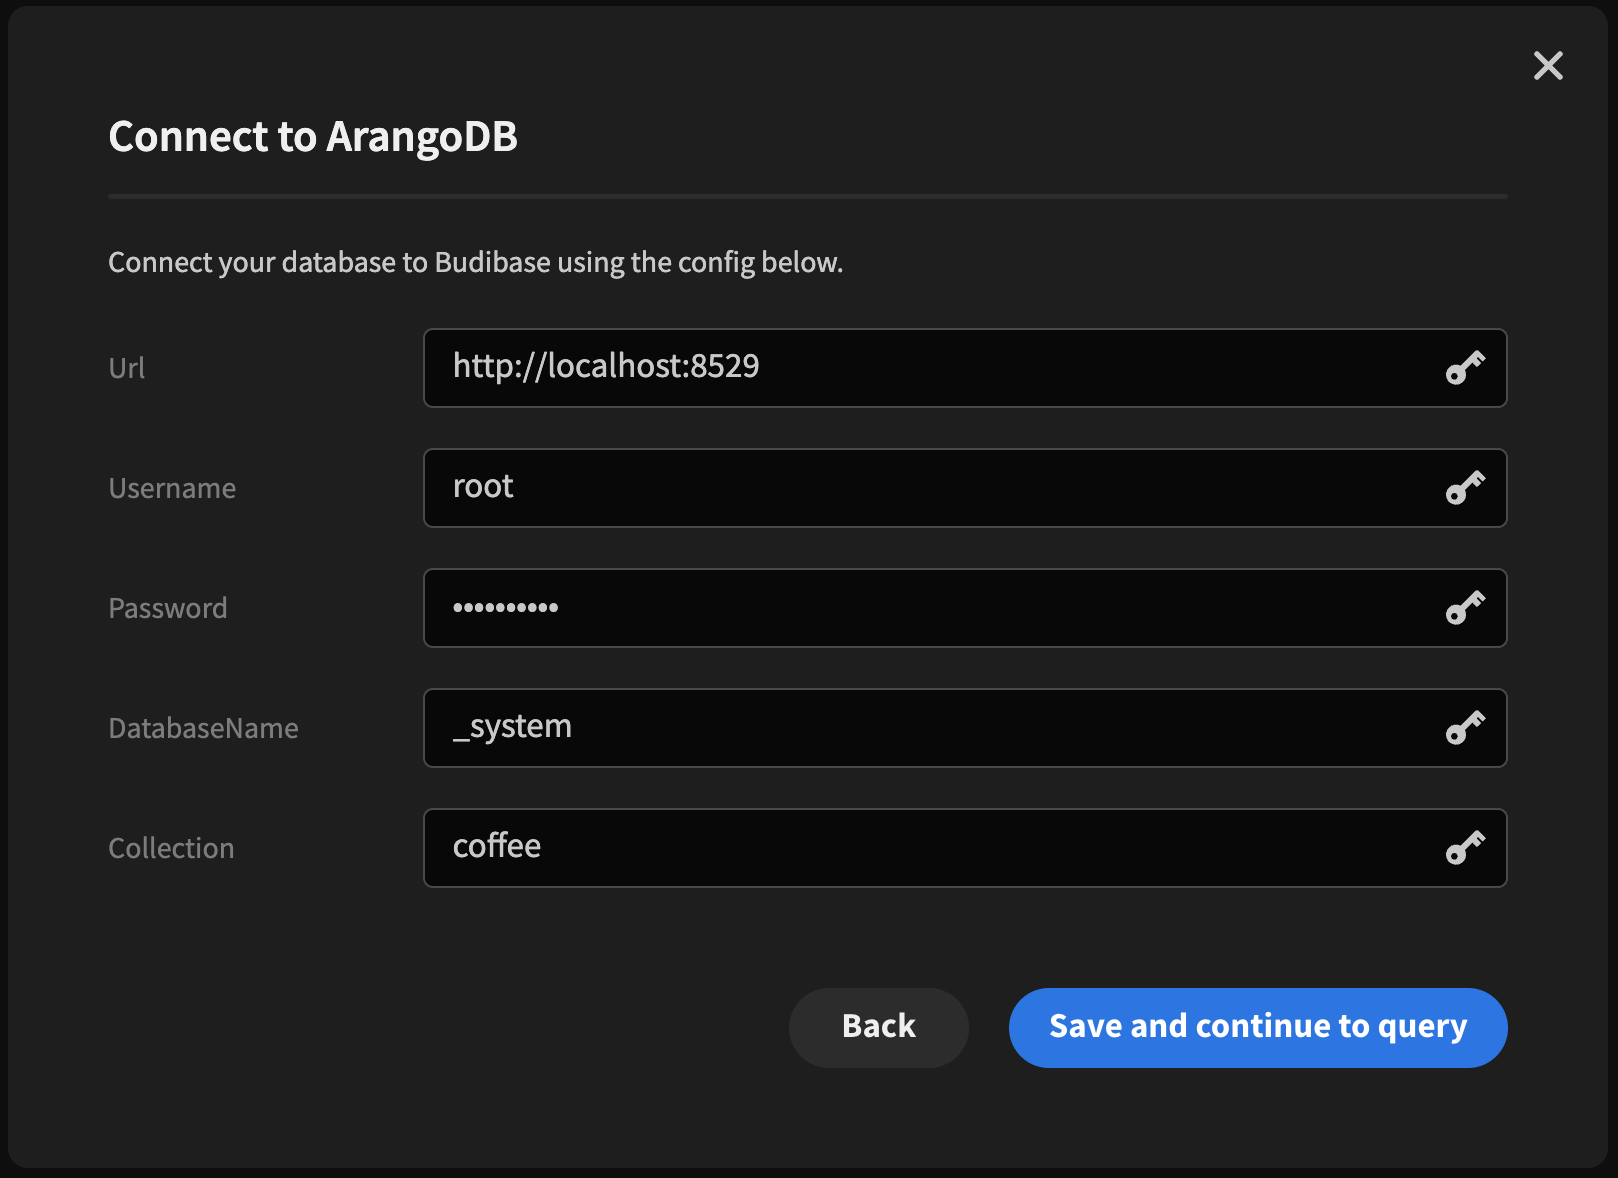
ArangoDB connection info
If you don't have a Collection yet, go to the URL of your ArangoDB instance - by default this is localhost:8529 if you're running it locally - and then sign in to add a new collection.
Once your connection details have been entered, click Save and continue to query to save those and test the connection.
Queries
To work with ArangoDB data in Budibase, we need to create queries. There are two types of queries: Read and Create. The names are pretty self explanatory, but we will take a detailed look at how to use each for ArangoDB below. To get started, click Add query.
Create
Create queries are very simple in the Budibase ArangoDB integration. They run an insert statement for the collection specified in the datasource configuration with data you provide in JSON format.
Simply enter the document object into the Fields field. If you want to use Bindings, you can set them up above with a Binding name and a default value. Then in your query, place the binding name where you want it to be used as shown below. We'll see the full power of bindings later in this guide.
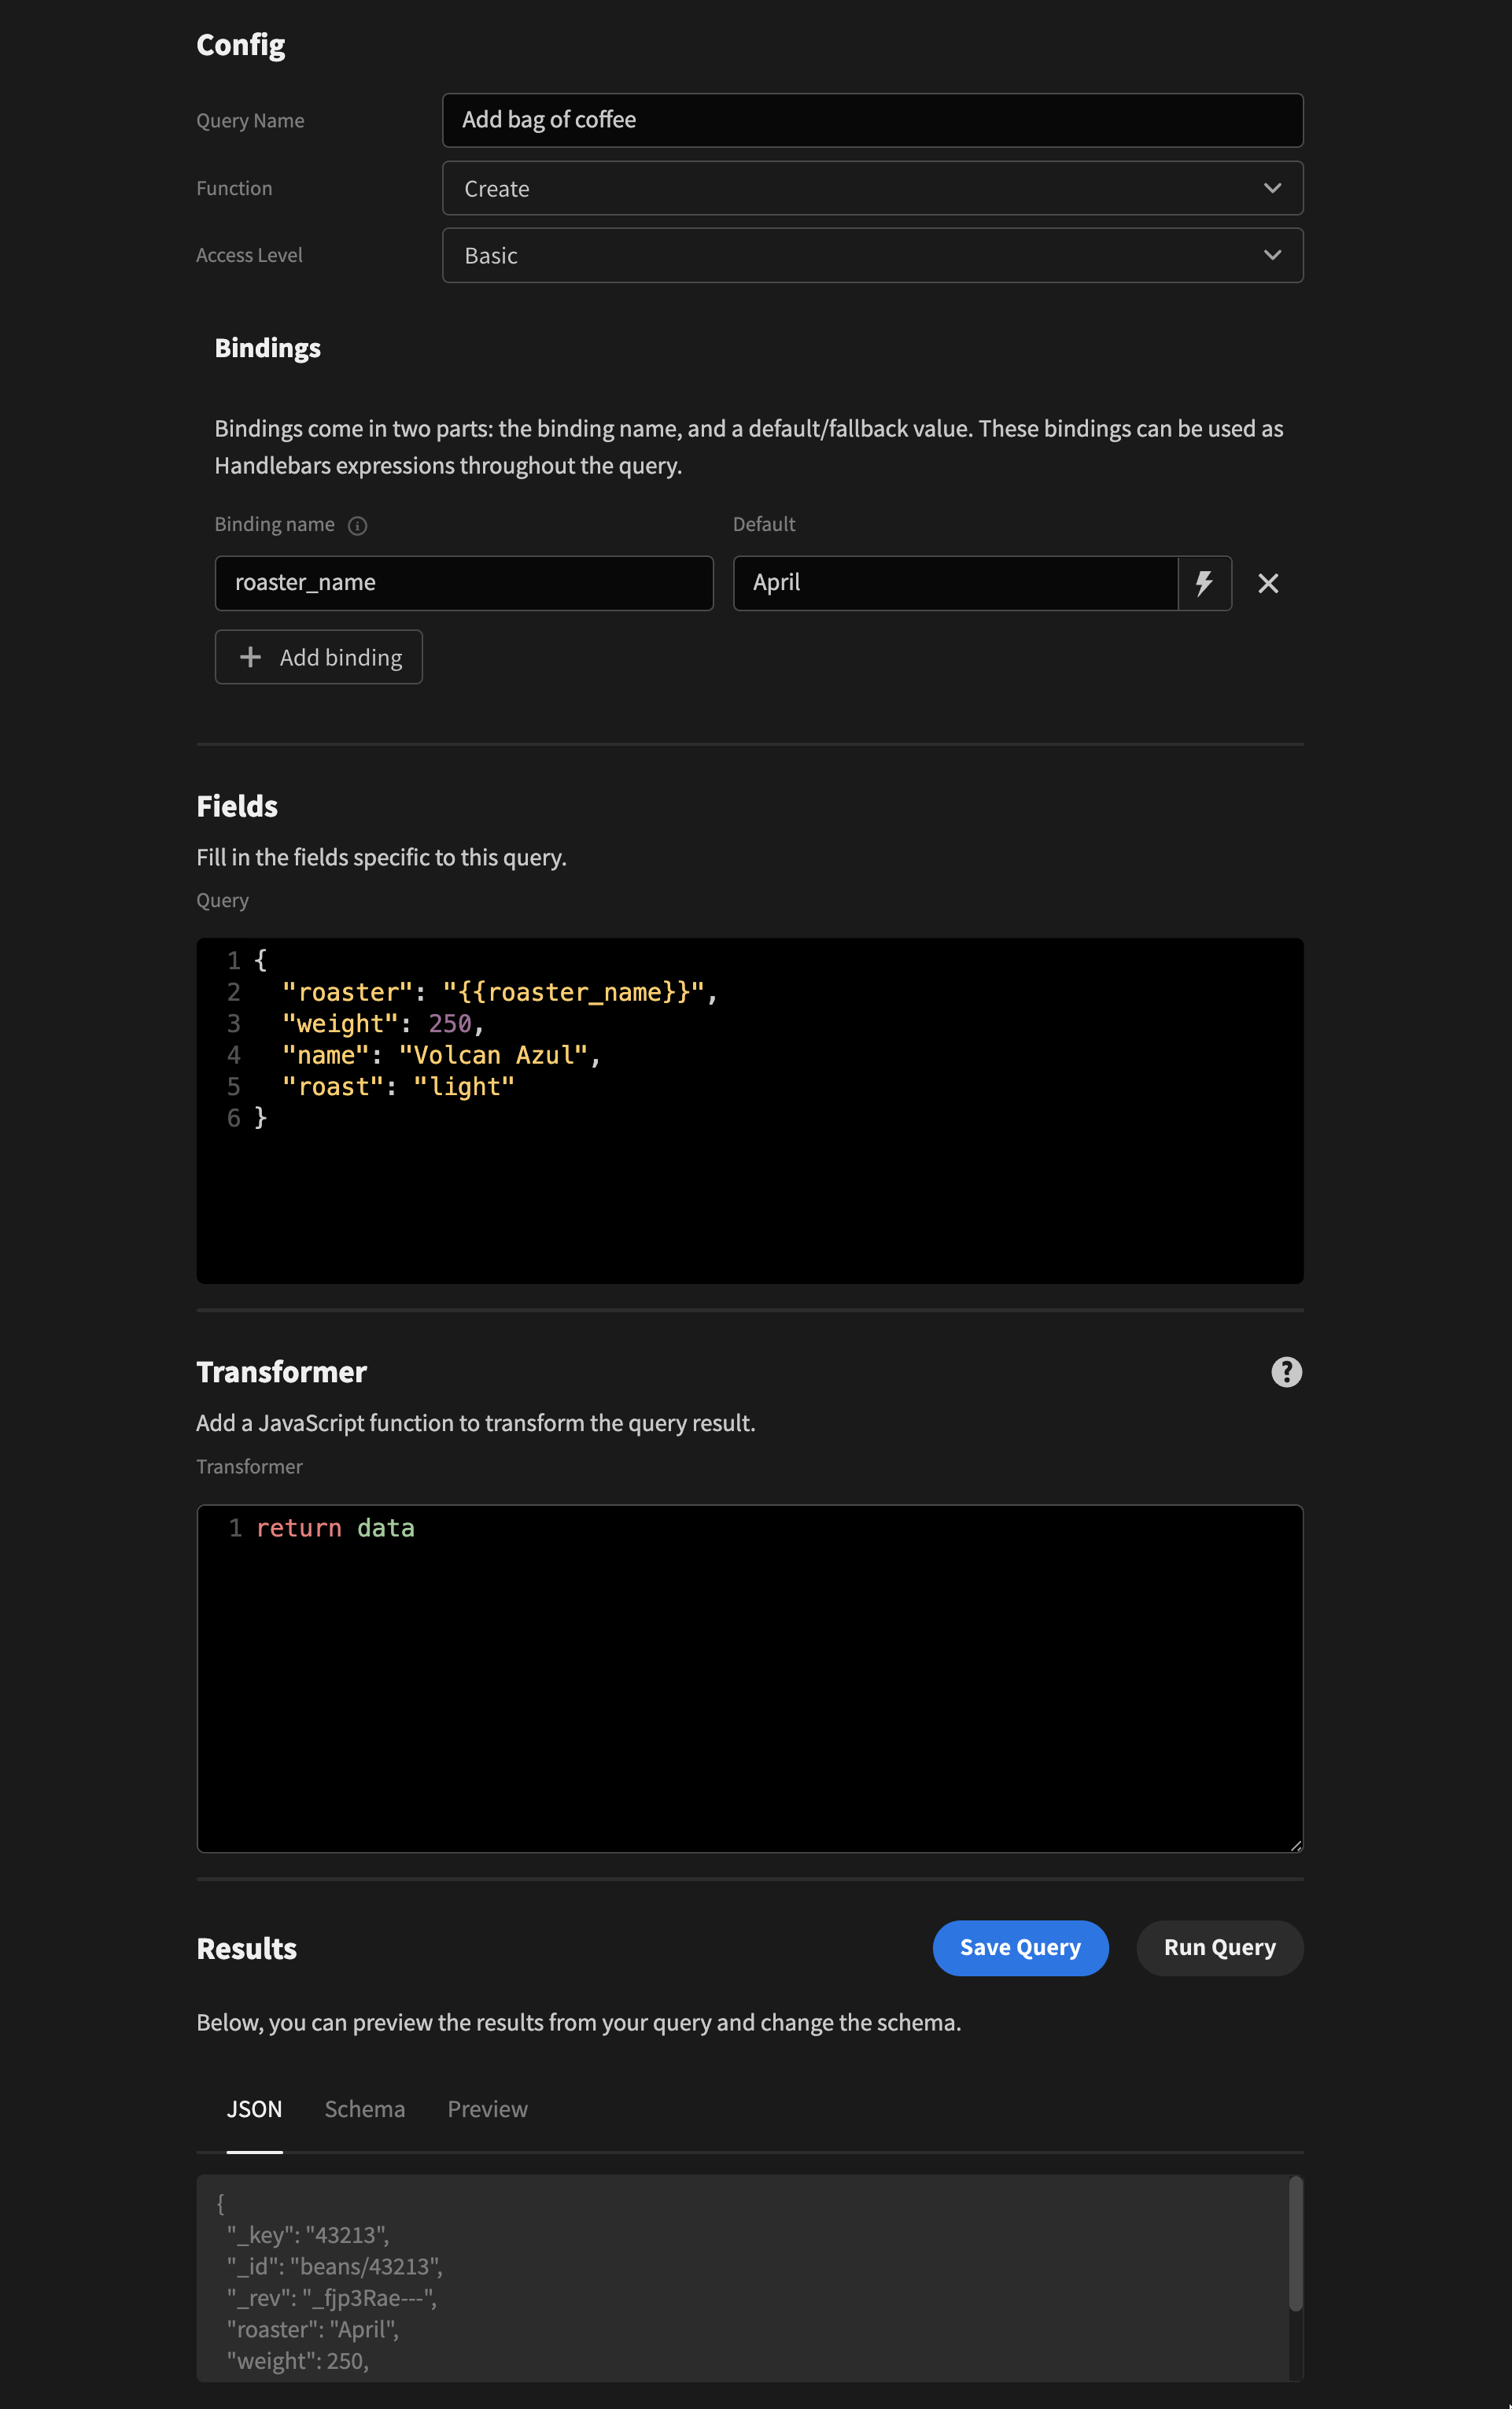
Adding a simple document to an ArangoDB collection
Once you're happy with your query, click Run Query to test it. If you are using Bindings the default value for them will be used. This type of query returns the newly created document as a response. You can use a JavaScript function in the Transformer field to modify this result, but most of the time the default return data will be sufficient. When you're finished working on the query, click Save Query.
Read
ArangoDB read queries use AQLFor a guide to AQL syntax, check out ArangoDB's documentation here.
The Read query is similar to the Create one above but instead of being limited to running inserts for the collection specified you are able to run AQL queries across the database.
The most obvious example would be to get all of our documents from the beans collection we used above.
for bag in beans
	return bag
Using AQL you can add a lot more logic to limit the query or change the structure of the data coming out. In my case here, I'm filtering the results, limiting the count to 10 and sorting them by name.
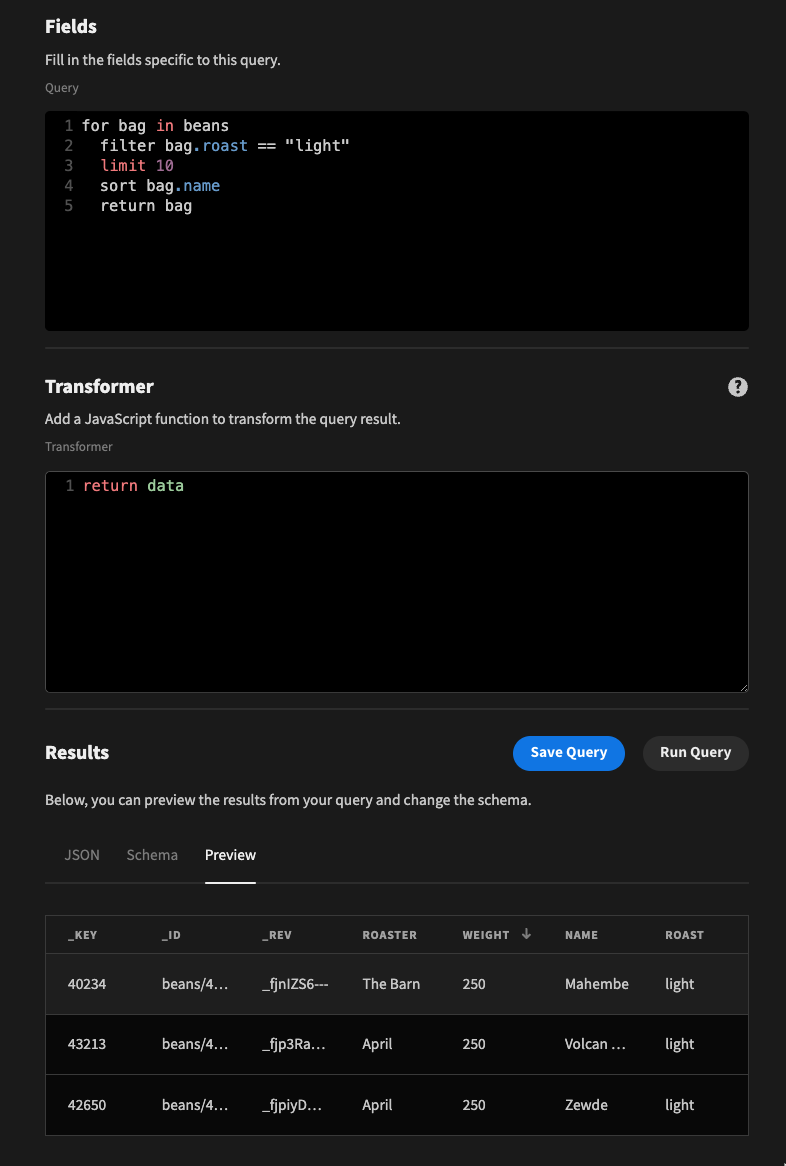
Additional AQL filtering for our query
You can also query the database to get a single object where {{id}} is a binding like this:
return document("{{id}}")These simple queries will be very useful when we go to build an app in the Design view.
You can also use a Transformer here to change the format of the result, although if you are already familiar with AQL you should be able to get your data in the structure you need without it.
Example
To tie this all together, let's build a full CRUD app in Budibase using ArangoDB for the data.
Creating documents
We'll start by updating our Create query we made above. I'm going to replace the rest of the hardcoded values in the JSON object to use bindings.
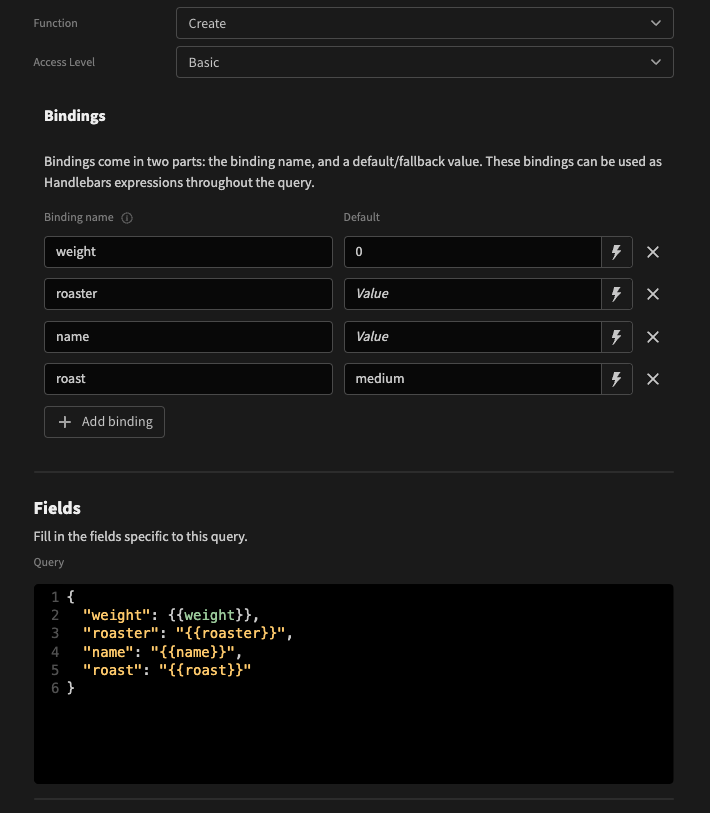
Using bindings to create a new document with form values
Now that we have those bindings in place, we can go to the Design tab to make use of them.
I'm going to start by adding a Blank screen with the URL /bag/new where we will create a form for adding a new document to our collection. In my screen I'll add a Form component with a Field group and a Button. When setting up the form use your Create query as the Schema so that inside the field group we have the relevant fields for each column in the document.
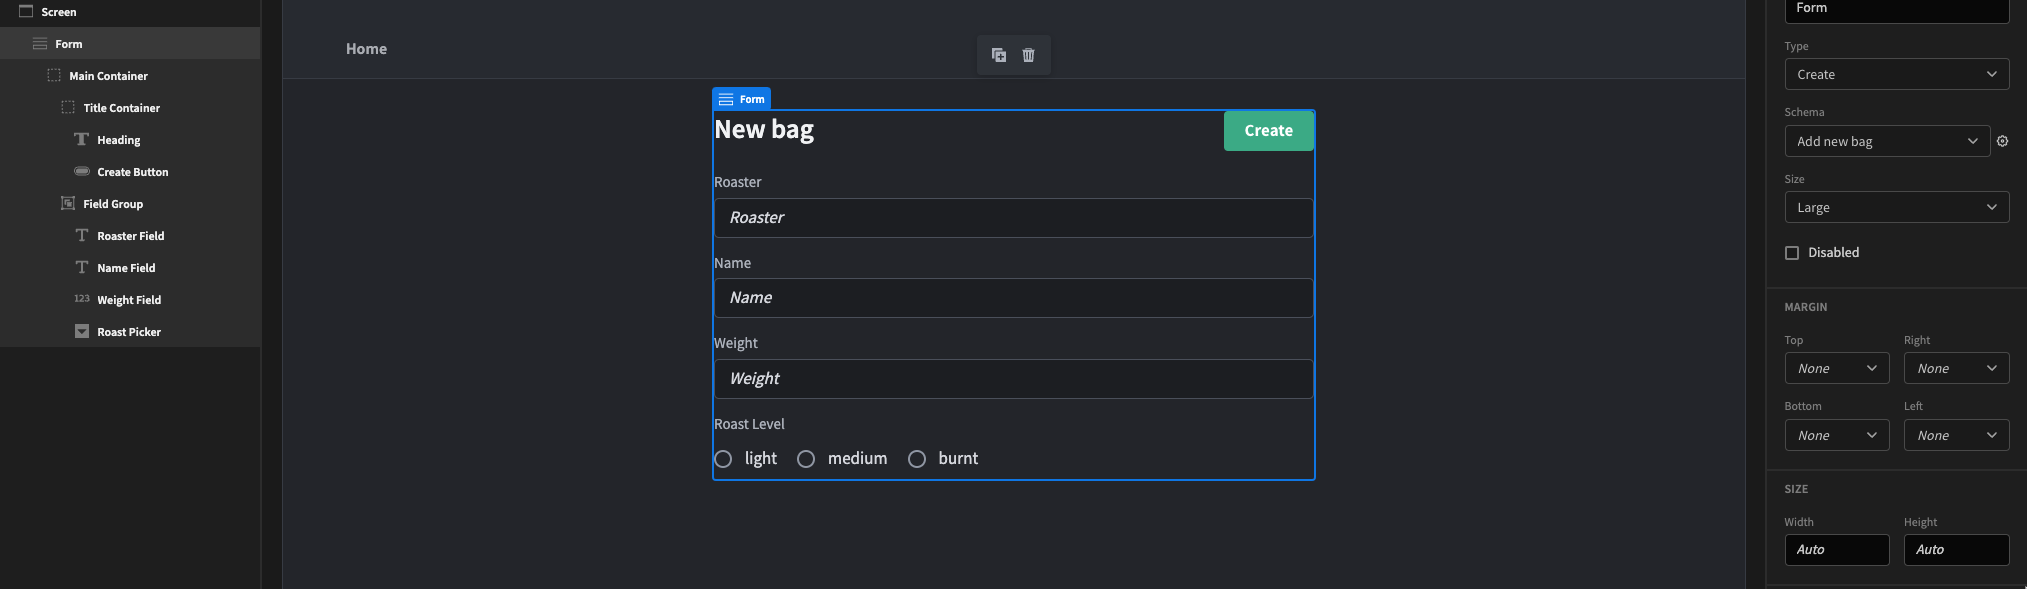
Form component setup
To make the form fully functional, add an On Click Action to your button to execute the query. In the Execute Query action settings, add the field values from the form for each binding.

Execute Query configuration
Now whenever you fill in the fields and click the Create button, our Create query will run with the specified values and add a new document to our collection.
Listing documents
For listing documents we can use the Table block and our simple Read query. All you need to do is create a new screen, add a Table block, and choose the query. The table will immediately be populated with data from your collection.
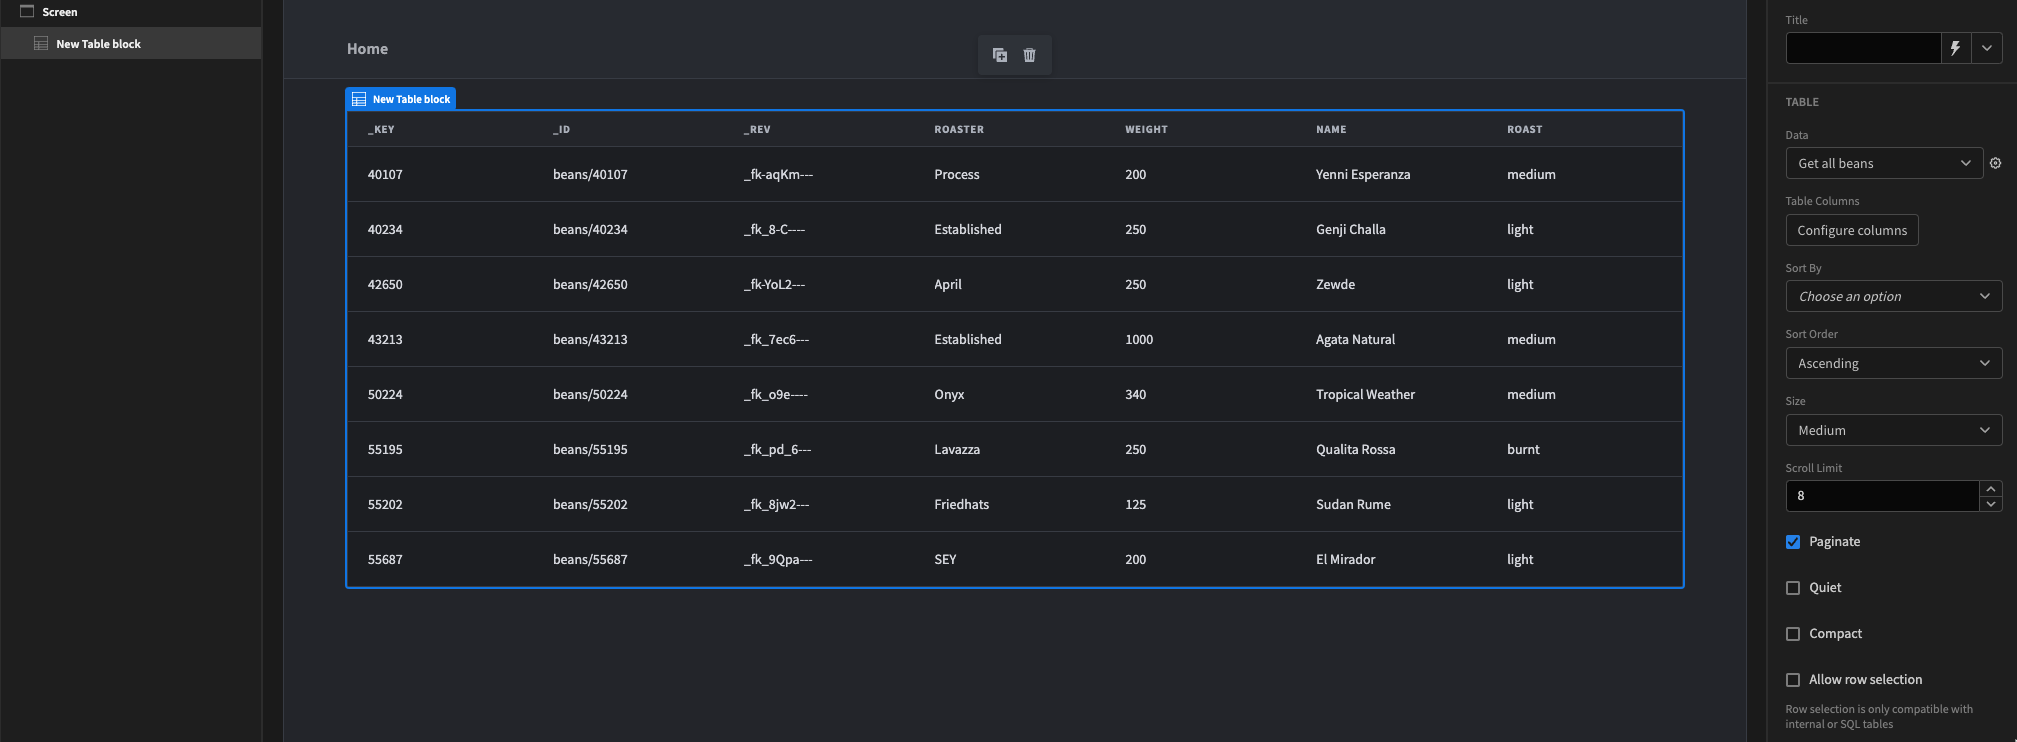
Once you have this table in place, you can configure the columns however you like. You can easily add a button that will link to the New document screen we built above. You can also route to the Edit document screen that we're building below.
Updating documents
Queries
Now to in order to view and edit our documents we will need to create two new queries and a screen to use them. The first query is a simple Read query where we retrieve a document by its _id. The AQL for this is as follows, with id being a binding:
return document("{{id}}")The next query we need to make will be another Read type query where we update a document and return the new version of it. When updating in ArangoDB you always need to provide the _key for the relevant document in the query. In our case, every other column uses a binding which will be populated by the form fields in the screen we're about to make.
update {
	"_key": "{{key}}",
	"roaster": "{{roaster}}",
	"name": "{{name}}",
	"weight": {{weight}},
	"roast": "{{roast}}"
}
in beans
return NEW
The return NEW at the end of our query means that ArangoDB will provide our newly updated document in the response object. Now that we have our queries ready, let's build our screen in our Design view.
The edit screen
When creating our new edit screen, we need to pass in the document's key as a URL variable so the form inside knows which document's data to display. We'll use the URL /bag/:key so we will need to pass in the relevant key when navigating to this page from elsewhere.
Our edit screen will be set up in a very similar way to our create screen shown above. The main difference is we will use a Repeater block to provide the existing form values as defaults for the field components. We will use the first query we made as the data source for this Repeater block, and use beans/{{ URL.key }} as the id binding for that. This query will only provide one document from the collection, but to be extra safe we can also filter the Repeater block by the URL param key and limit it to 1 result.
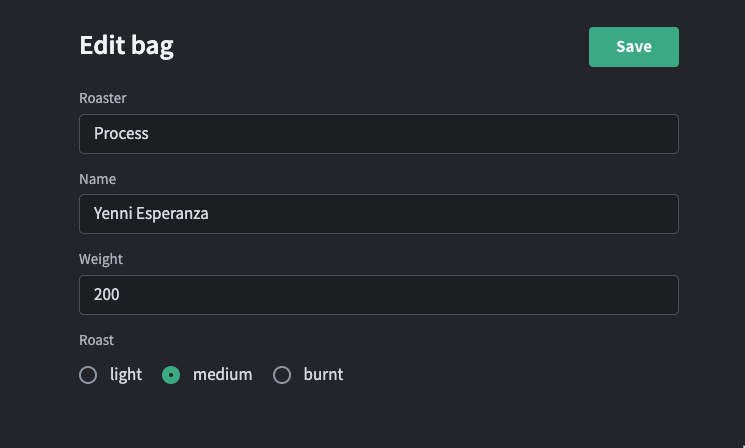
The edit screen, with form fields populated by the Repeater block
You will need to configure the Form and Field Group similarly to the ones on the create page, but add the values from the Repeater block as default values for each field. The Form Type should be Update in this case and because we are using custom queries in ArangoDB, we need to use a Custom schema where we define each field variable manually.
The last thing to do when making an edit screen is to hook up the On Click action for the Save button to execute the Update query we made above. In the Execute Query settings we can pass in the form field values to be used in the query bindings, like so:
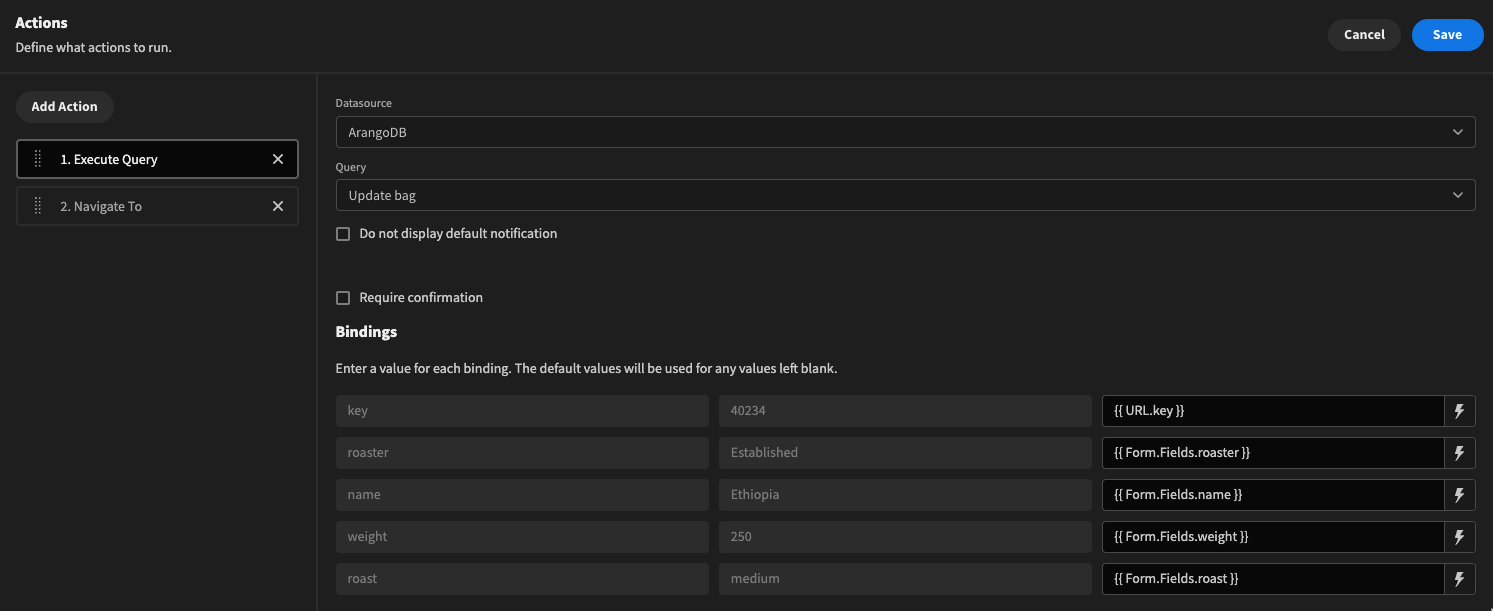
Our save button's On Click configuration
Deleting documents
The last type of query we need to create for a fully functioning CRUD app is one that will delete a document from our collection. This is another query that needs to be set as a Read function so that we can make use of AQL. This time we are using key as our binding and will use that to identify the document we want to delete from our collection.
remove "{{key}}" in beansNow that we have our query, all we need to do is add a button to our edit screen that will execute this query, passing in the key from our URL parameter for the binding.
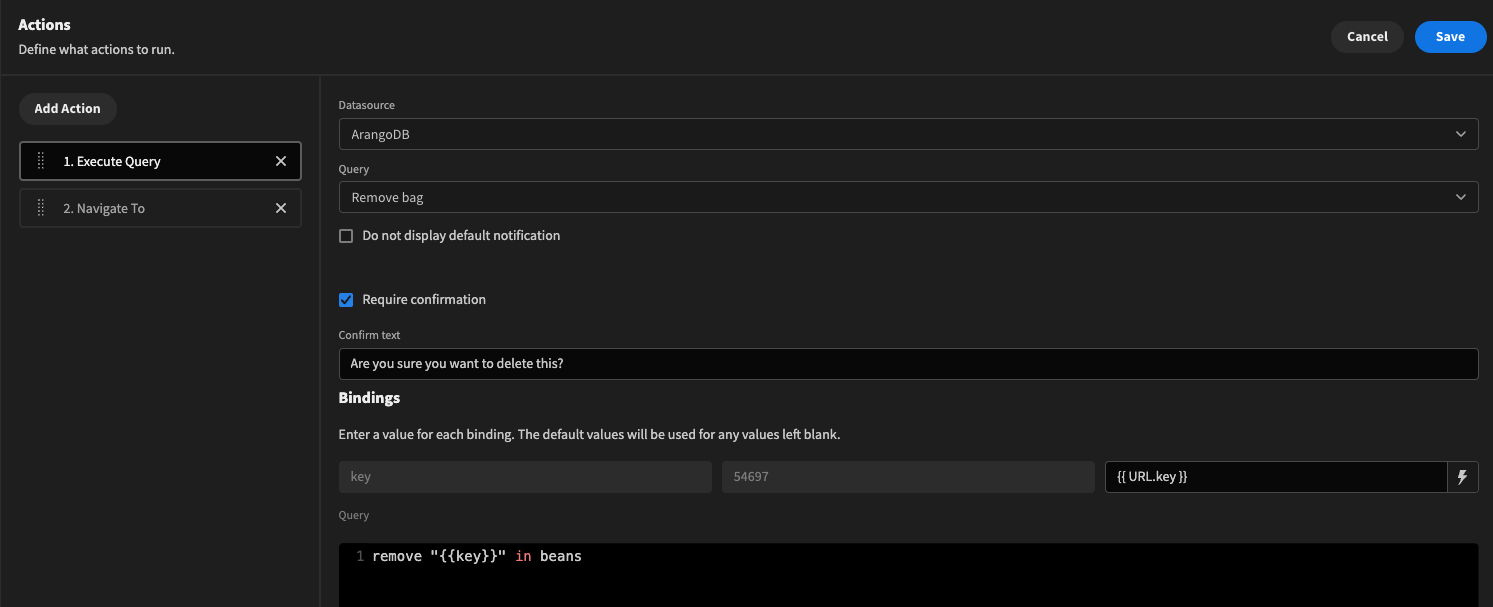
Executing the delete query on a button click
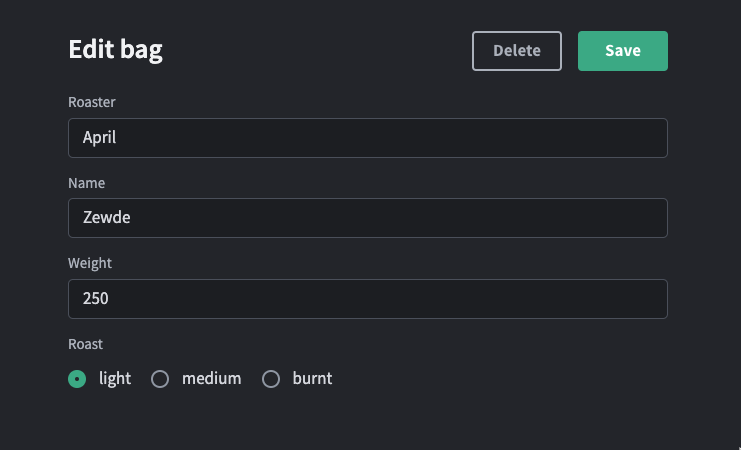
The final edit screen complete with delete button
Nice workWe've successfully built a full CRUD app using Budibase and ArangoDB!