Automation building 101
Budibase Automations are defined workflows that can be triggered by user actions, system events, database operations, or incoming HTTP requests.
When triggered, we can use Automations to apply logic, process data, and take actions within Budibase or across integrated platforms.
Automations can be used within end-user applications or as standalone solutions for systematically carrying out tasks using connected data.
In this guide, we’ll be outlining how to create a simple automation rule for generating and sending a weekly sales report email.
Along the way, we’ll outline the basics of working with triggers and actions, as well as seeing different examples of how we can utilize data within Budibase Automations. You can take a look at our Introduction to Automations docs to start learning about triggers, actions, and data in more depth.
To do this, we’ll:
- Create a CRON trigger to run our automation rule at a specified time each week.
- Send a REST request to retrieve the sales data for the relevant time period.
- Call an LLM to extract and format our required data.
- Send the output of this to the required colleagues using an email action.
Let’s get started.
Creating a new automation rule and defining a trigger
We’re starting in the Automations section of our Budibase Workspace. Here, we’re prompted to create our first Automation.
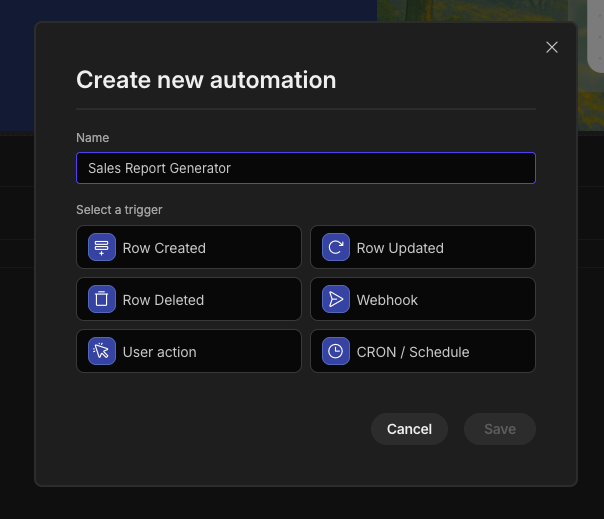
When we choose this option, we’re prompted to give our new rule a name and choose a trigger. We’re calling it Sales Report Generator and selecting CRON/Schedule from the list of available triggers.
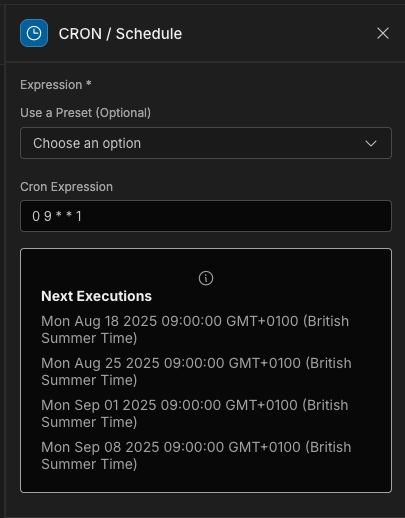
The CRON/Schedule trigger accepts a single argument called CRON expression, as well as giving us the option to use a preset.
We want to configure our Automation to run every Monday at 9 AM, so we’re using 0 9 * * 1.
Populating and sending a REST request
Next, we want to add an automation action to send a predefined REST request. As you can see below, we’ve already set this up in the Data section of our Workspace.
This will send a POST request with two bindings called startDate and endDate.
We’ll use these to dynamically add values to the request body, so that the right time period is selected when we send our request from the Automation section.
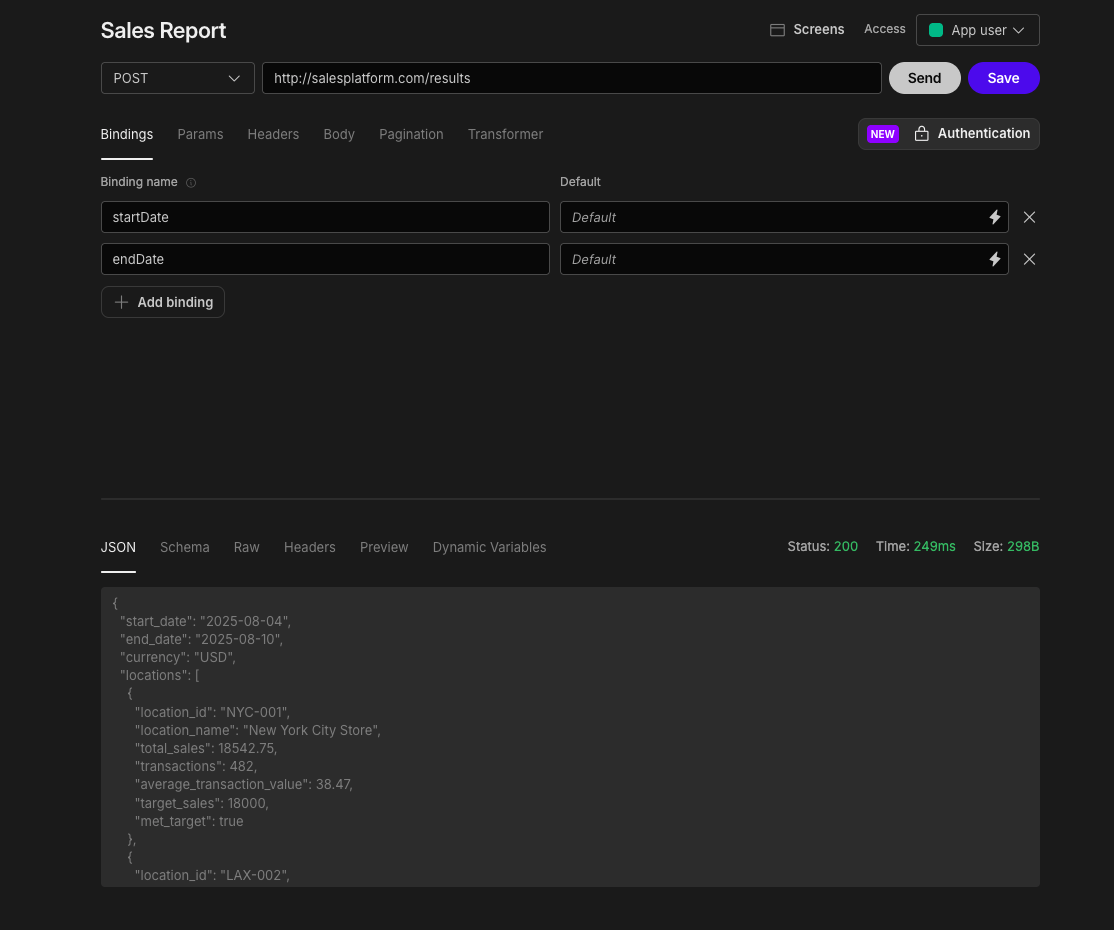
To learn more, check out our documentation page on working with REST data sources.
Back in the Automation section, we’ll add an API Request action and choose our Sales Report endpoint.
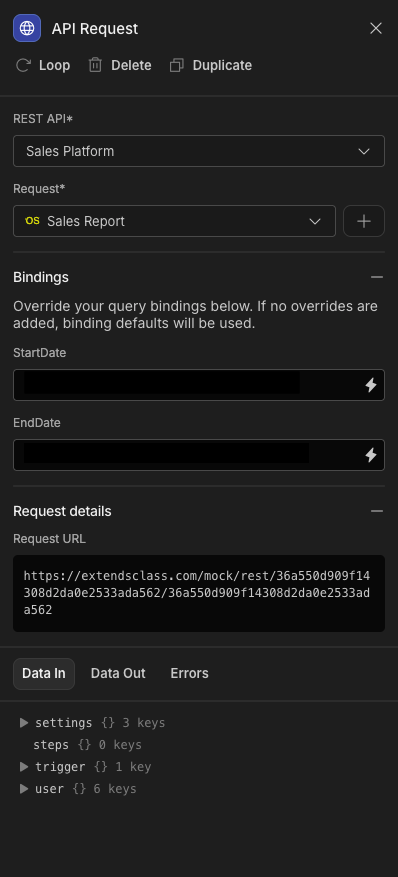
In Budibase, individual automation actions are exposed to all data outputs from previous steps. We can use this data as bindable values, with either Handlebars or JavaScript expressions.
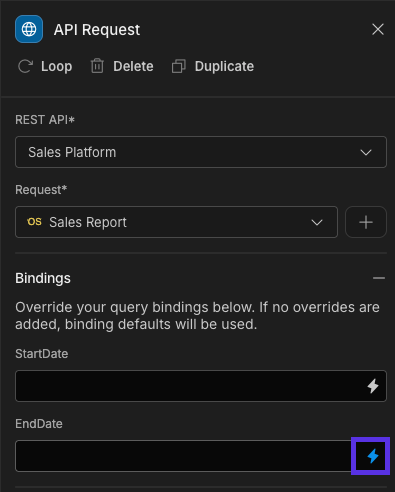
We’ll hit the lightning bolt icon to assign values to our two bindings.
For our endDate, we’ll use the following JavaScript to return the current date and time.
var date = new Date()
return date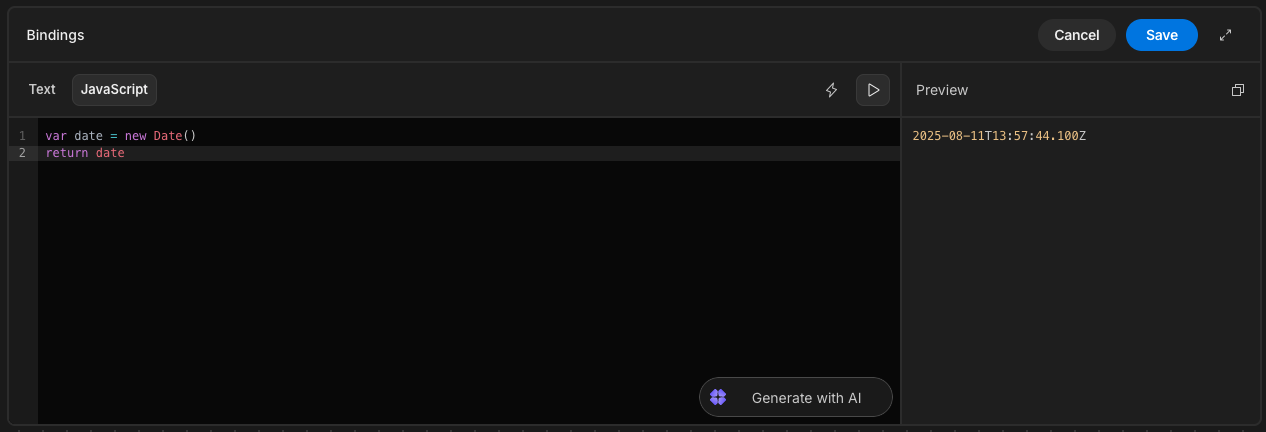
For startDate, we’ll use a similar expression, returning seven days before the current date.
var date = new Date();
date.setDate(date.getDate() - 7);
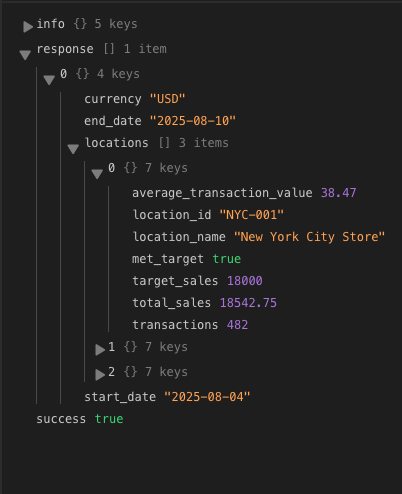
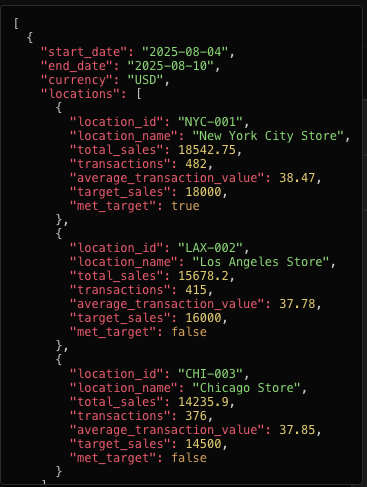
return date;When we run a test, we can see that our API request returns an array of objects containing the sales figures for individual locations, along with their respective targets.
Calling an LLM for data processing
Now that we have our raw data, we’re going to use an LLM prompt to extract and format key details, ready to include in an email automation.
We’re going to use Budibase AI to power this, although we could also connect another provider through Connections > AI models.
Learn more about Budibase AI.
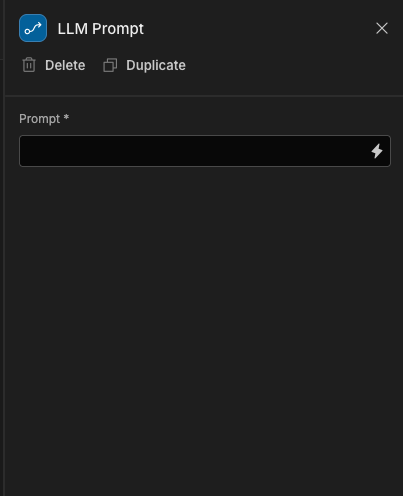
We’ll start by adding an LLM Prompt automation step.
This accepts a single argument, called Prompt.
Within the Bindings menu, we can see the structure of the output from our previous step.
The first part of our prompt will pass the relevant parts of this to our LLM, using the following instruction.
{{ steps.API Request.response.0.locations }} is a JSON object representing our weekly sales.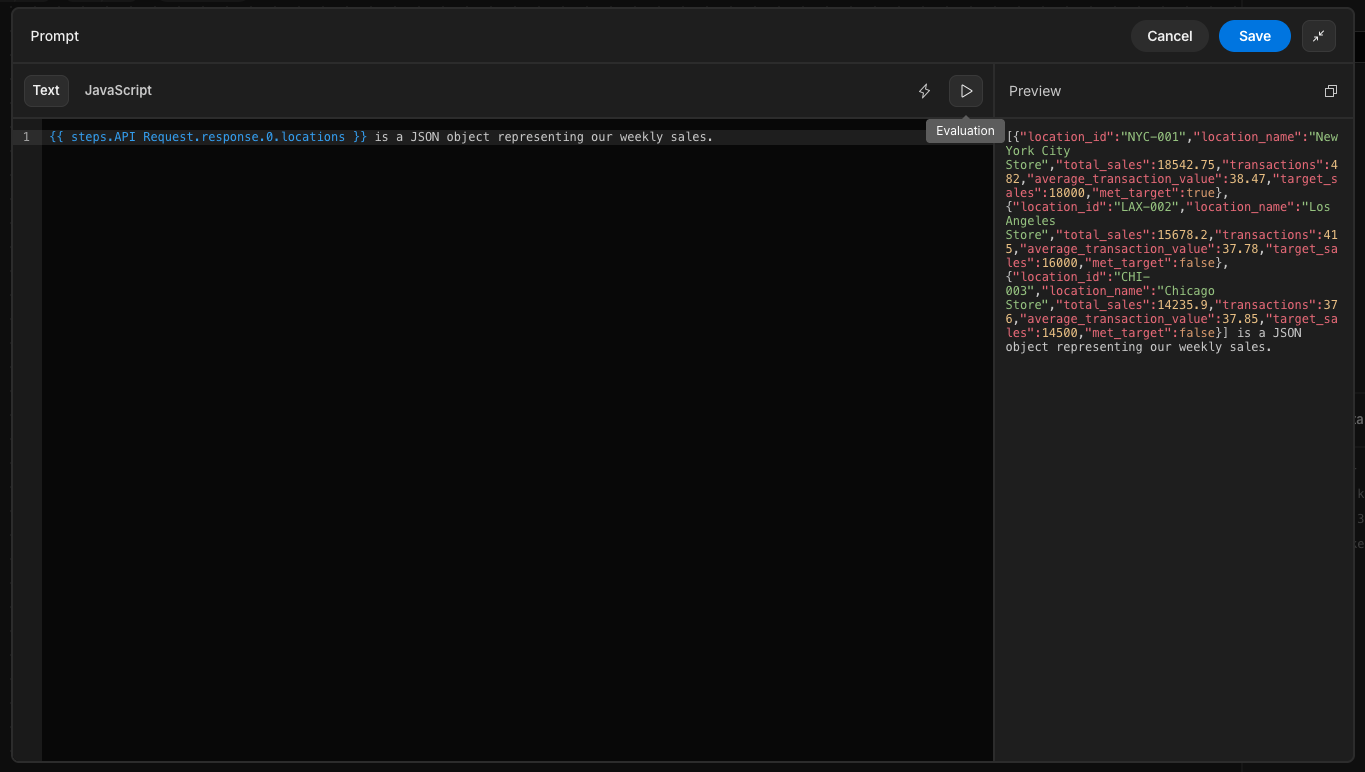
We’ll then outline the specific information that we want to include in our final report, as well as how we need it to be formatted.
So, our final prompt will be:
{{ steps.API Request.response.0.locations }} is a JSON object representing our weekly sales.
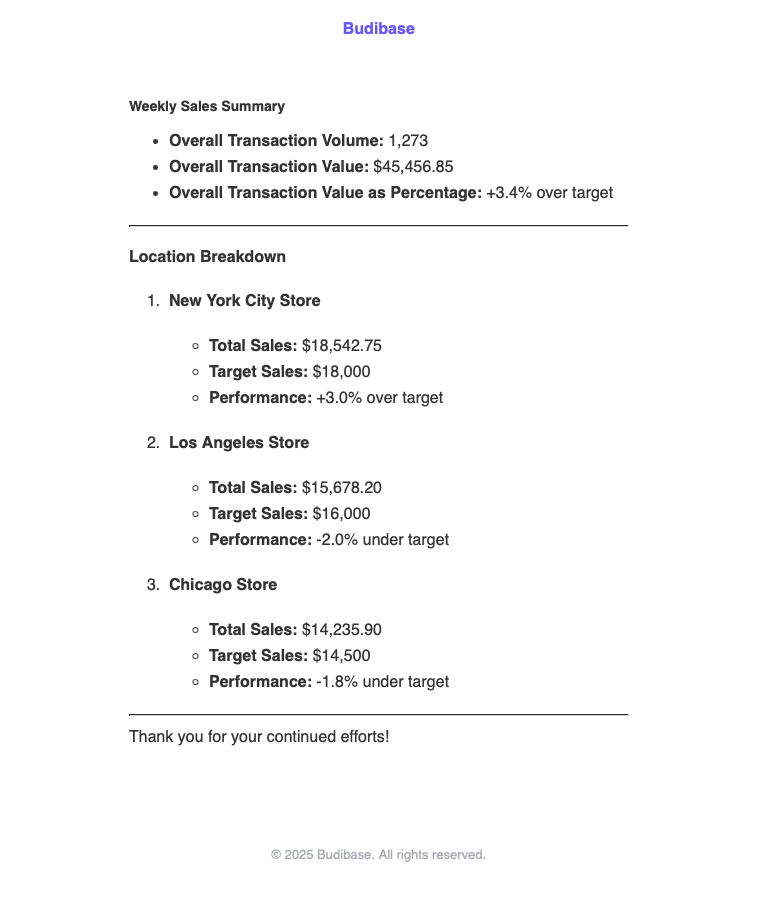
Return a summary of this, including:
- Overall transaction volume,
- Overall transaction value,
- Overall transaction value as percentage under/over overall target,
- Total sales and percentage over/under target for each location.
Format as markdown, ready to include in an email automation in as concise a manner as possible.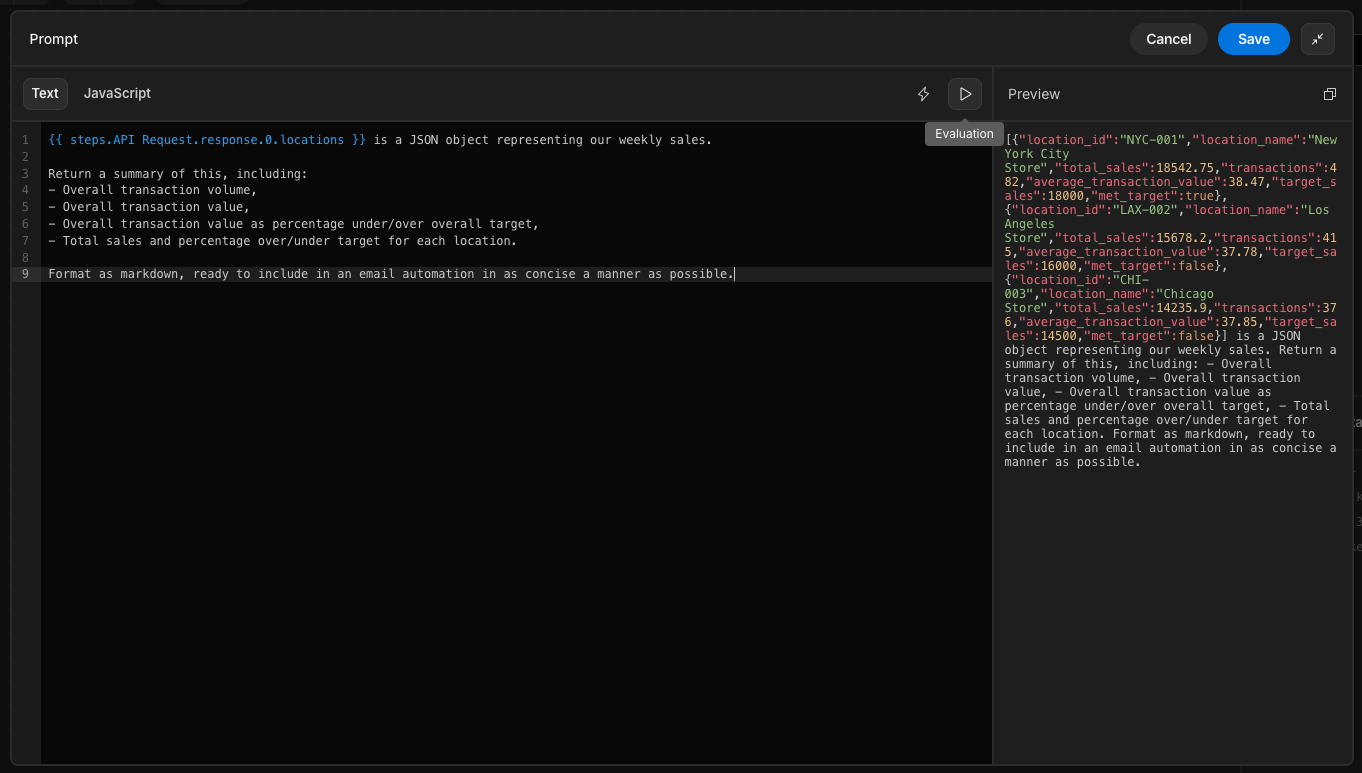
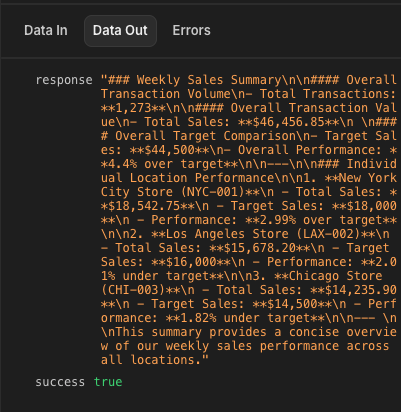
We can then test our Automation again to verify that we’re happy with the information our LLM Prompt step outputs.
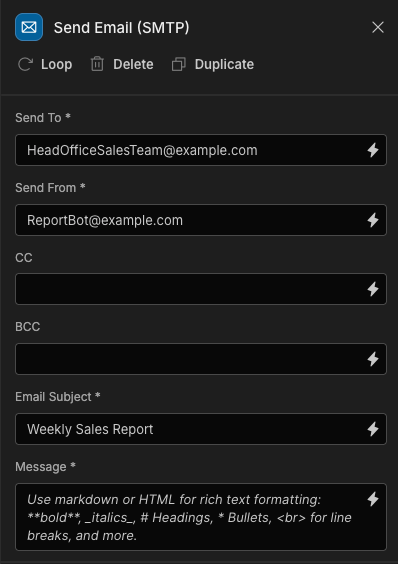
Setting up our email action
Lastly, we want to use this output to populate the body of an email, which we’ll send to our head office team.
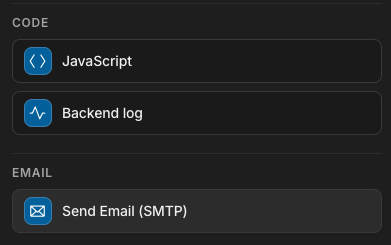
We’ll start by adding a Send Email (SMTP) action. Check out our documentation on SMTP setup to learn more about this.
Within this, we can set key fields including the Send To and Send From addresses, the Email Subject, and the Message. First, we’ll add static values for our Send To, Send From, and Subject fields.
We’ll then bind our Message to `{{ steps.LLM Prompt.response }}
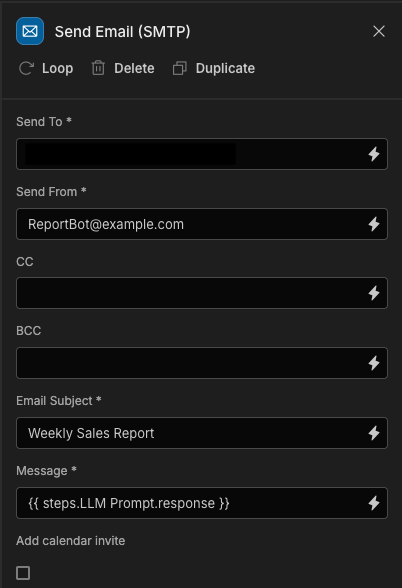
`.
Now, when we check our emails, we can see that the data we need has been extracted and formatted correctly.